
Replacing OEM Fuel Pump with Mr Gasket 42s
Parts Required
·
Mr Gasket 42s·
1ea 1/8 in. x 1/8 in. Lead-Free Brass 90-Degree MPT x FPT Street Elbow (lfa-712Home Depot)
·
1ea 1/8 in. x 1/8 in. Lead-Free Brass 90-Degree FPT x FPT Elbow (lfa-700 HomeDepot)
·
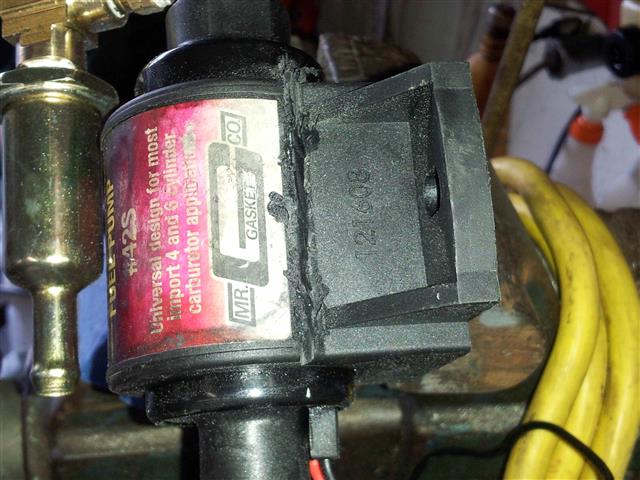
1ea 1/8” Brass hex nipple. (lfa-714 Home Depot)I took the Mr Gasket 42s fuel pump and a dremel tool and cut along the edge of the mounting tabs. Cut
carefully so as to not damage the pump. If you see sparks your to deep.
Once you get a nice line across both halves, take a flat bladed screwdriver and insert into the line you
have cut. Give it a little twist, you should hear a pop or crack sound of the plastic separating. As you
can see in the second picture I used the provided fuel filter also. I needed the length to get back to the
supply side anyways and it was free and just put a second filter in the system. I figured no harm.


The two pumps are fairly close in comparison. The OEM is approx 2” in Diameter and the Mr Gasket
is 1.5” once the plastic case is removed. I looked for a 1.5” adel or “P” clamp but couldn't find one. So
I use good old plumbers strap and some black electrical tape and heat shrink to make a bracket to hang
the pump from. You will probably have to rearrange the line to the carburetors a little to keep from
kinking it. I had to move it to the outside of the plastic thing it runs in behind the fuel tank coming
towards the pump/seat area.


Once its all settled in I tightened up the clamp and double checked to make sure I didn't have anything
rubbing or chaffing. Pump against something or a fuel line against something that could later give
problems. I did install some anti-chaff tape on the fuel line on the opposite side as it was laying against
a bracket slightly by the water tank. I found it easiest to remove both side covers, the forward cover
that they connect to and the overflow tank so I had room and could see what I was doing, On the final
fit with the front cover installed, make sure everything fits inside.

