Search the Community
Showing results for tags 'screws'.
-
We all know how fragile the end of the windshield tabs are so I decided to beef up mine before there was any damage done. What I did was used a small flat head screw and counter sunk drilled the hole already near the ends of the metal bar. That allowed the screw to sit below the rubber strip that the windshield is sandwiched between it and the outer fairing. Next I spot welded a small piece of 16 guage steel and an 1/8" welding rod together. Cut the rod to the right length and welded another tab to the other end. I mounted the lower tab to the bottom speaker mount. You'll need to bend the rod for the proper angles but that's easily enough done. The ends of the windshiled mounts are rock solid now. Another additional support I did was to add some brass flat stock to the mounting screws for the outside fairing. I cut the two outer pieces 1 1/2" long and the two inner ones 2" long , then drilled a 13/16" hole for the screws 1/4" from the top on center. The two inner pieces will need a slight bend to conform to the curve. Adding these pieces will spread the load over a larger area thus saving broken tabs under the washers. I've found that adding the brass pads will also help prevent the windshield from loosening as you can tighten the screws a bit more rather than squishing the plastic tabs at the screw heads.
-
Yesterday, I went out to tweak the pilot screws after replacing the fuel pump. Anyway...three of the four screws turned easily...the fourth...well...didnt turn at all (in or out). As luck would have it, one of the brass "slots" in the screw head appears to have fractured. I sprayed liquid wrench on it to let it soak overnight, and will attempt to turn it this evening after work. Hopefully, I'll be able to use a flat blade to turn the screw. So the question is...."Can I replace the pilot screw WITHOUT removing the carb rack from the bike"? Anyone ever heard of the pilot screw seizing up? Is there a trick to prevent that from occurring? Maybe spray WD-40 on them?
-
Anyone have 2 of those small plastic caps that goes over the allen head screws that holds the right Fairing Cover onto the Faring.
-
What size are the chrome button head socket screws that hold the trunk brackets to the fender? Was leaving for work today and noticed the trunk was loose and one of the screws is missing.
-
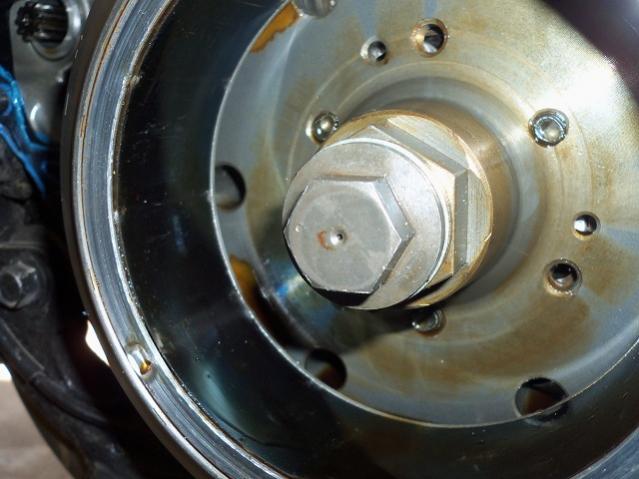
It all started innocently enough. The aluminum crank case covers look bad, so I removed them to polish them up, while I was at sea. I removed the water pump cover, clutch cover, plus the small rear one on the left side (transmission?). I couldn’t get the large front one (stator?) off at the time. While I was waiting for the gaskets to come in, I worked on the large cover. When I finally removed it a small gear fell out. I was able to put it back, hope it isn’t supposed to be in a certain way. I went to remove the screws holding the wires to the cover but no luck. I have the right size screwdriver, but they won’t move. I stopped before I stripped the heads, but I think it won’t take much force before they are striped. What is the easiest way to get these screws out? I can’t get the cover to my workbench, as it is still attached to the bike by the wires. It is free to move around as I try to break the screws free. I tried hammering on the screwdriver while twisting, but was getting nowhere. Help I don't know where to go from here. Bill
-
I had the pleasure of cleaning the carbs on my 83 last weekend and found that someone had already been into them before, removing the blind plugs to expose the idle mixture screws. The mixture screws were all at different settings. I had one a 2 turns out, another at 2 3/4 turns, another at 3 truns, and the last one at 4 turns out. I'm betting someone has been messing with these in the bikes history and at least a couple of these are no longer at the factory setting. Now for my real question. Given that 2 -2.5 turns is suppose to be the magic number on the idle mixture screws, and the fact that these have already been messed with and I cannot return them to their orignal settings. What are your thoughts moving forward? I'm thinking set them all to 2.25 turns and then try to tune each one individually using max vacuum readings like I do on a car. Any other ideas on how to properly tune each carb?
-
I know this subject has been beaten to death, but I would like to add my thoughts (feel free to correct me). My bike idles great and runs great through the entire range, but just off idle--it goes lean and backfires slightly (this seems common). I decided to richen-up the "pilot screws". I agree with several of the other members who err on the rich side (milage will not be affected much). The "pilot screws" adjust the idle mixture. The Main jet size controls the main circuit mixture. What I usually do on a muscle car is adjust the screws until the highest vacuum reading is attained. What I found with my bike is that No amount of adjustment made any difference at all! That tells me that the entire "idle Circuit" is plugged or otherwise non-functional. The reason the bike idles fine is because the throttles are probably opened-up enough to draw from the main circuit. It's time for a chemical dip.
-

Stator info and cooling kit
bkuhr posted a topic in Venture and Venture Royale Tech Talk ('83 - '93)
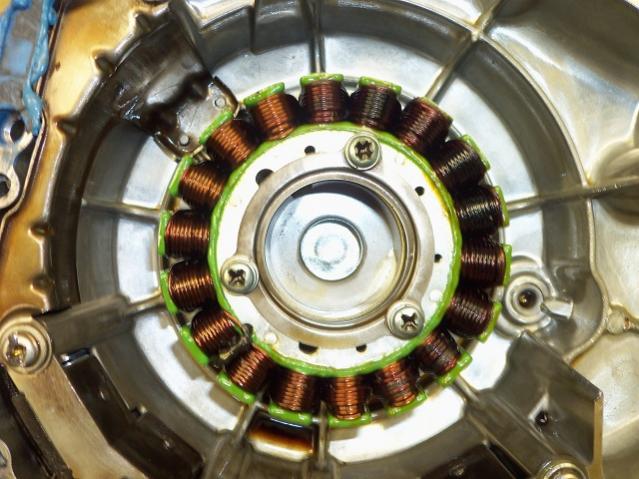
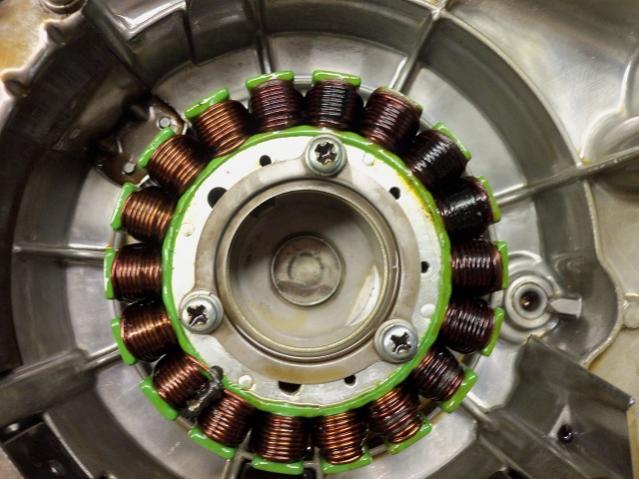
Due to difficulty of reading the technical bulletin in the back of the parts manual in the library, I retyped the two bulletins pertaining to the stator cooling kits. Reddevilmedic with burned coils from 1-7 o'clock, does not appear to be lack of oil cooling mentioned in TA, but please make sure your outside baffel is in place under the inspection cover. The inside baffle on the stator looks correct, but there is no mention of ANY washers. Practice states stator screws are red locktite, and hand impact installed. Also I can't not see the wire (shaft 1) inside the bolt hole, pretty sure I could on mine. Stick a small wire in the hole and feel for shaft 1. 1 final interesting note, is I think I count exactly 6 burned coils, exactly 1/3 of the 3 phase stator. Possible for some reason you have one of the three phases overloaded. As the stator is directly wired ONLY to the regulator/rectifier, this leaves the options for overload limited to the RR ac volt side or the 3 white ac wires. If not already done, I suggest you remove the 3 pin connector between stator and RR. Also do the diode ohm test on your current RR. If even doubtful don't use it on another, 3rd, stator Would strongly suggest to get a clamp amp meter. When you get all back together, test each white wire with clamp meter. They should be about the same amps. Harbor freight has a couple cheap ones should workfor this test: http://www.harborfreight.com/catalogsearch/result?q=clamp+meter 69166.doc 69167.doc -
yea... I uh... heh... just lost one of my screws, the top right one... it fell into this slot between the inner right panel, and the outer fairing. Sitting there... smiling at me, taunting at me , telling me any hopes of getting him was LOST... which was true. I could not find our magnet, no matter where I looked, all I could find was our bleedin' (literally actually, it still, ahem, has some blood on it) Mop Magnet... so I went at it with pliers, and ended up knocking it SOMEWHERE. I don't know where, I took enough of the right side off to know, its gone (probably wedged somewhere else only to knocked free when I go ride to Madera today) -.-' I got three screws tho! and my K&N is NICE and CLEAN, but... yea.............................
-
- 1st gen air box
- lost
-
(and 3 more)
Tagged with:
-
Hi folks, anyone know where to find the chrome truss head screws for the chin, side radiator covers and the two very special windshield garnish screws for my '87 first gen? Previous owner hacked mine into rusty little blobs of steel. I've tried fender washers and the like but nothing seems to be as good as the screws that were made to fit. Maybe someone has a stash in a coffee can they would part with? Thanks in advance!
-
I just found this trunk crack on my 91 VR. It is hard to see. It looks like a stress crack from age and hardening of the plastic, for there is nothing around it that indicates it got hit. And I have not loaded it much at all. I may have purchased it that way, only at that time I may have missed it. The crack does definately stop my fingernail from going over the crack. I dont know what those white spots are for they are not on the turnk. The paint on the trunk looks like the day it came off the show room floor The crack is also felt on the inside. Also the crack starts right dead center on one of the screws that hold the trim on. My options are 1) Just ignore it and hope the crack does not travel father 2) Take it to a body shop for an estimate 3) Buy a used trunk and have it professionally painted to match. 4) Your suggestions
-
a 1500 radio antenna that screws to the base. I don't need the base just the part that screws into it the whip part. If anyone has an extra they want to get rid of let me know and will make a deal. Joe
-
Hey guys, does anybody know a source besides the dealer for the Phillips head screws on the upper fairing under the false tank cover. I have tried several hardware stores and all they could give me was a hex head and longer. Thanks 84 VR 120k brought back from the dead.
-
I took my first test ride today after doing this years round of repairs, up grades and modifications. New Dunlop E-3's front and back thanks to Two brothers Motorcycle tires in Lawrenceville Ga. New Starter clutch Thanks to Dano New programable TCI Thanks to Dingy New HO Stator from Rick at Buckeye Performance Getting it cranked due to the suggestion from 09RSTD to turn the petcock on. The bike runs good but the brakes are a little spongee and un responsive. I forgot how much of a PITA bleeding the brakes are. The front brake fluid resevoir screws stripped, had to drill out, trip to Lowe's for 2 4mm x .7 beveled head screws. Going back out there for some more pump,pump,bleed,pump,pump,bleed,pump,pump,bleed,fill, fill, pump,pump,bleed, pump, pump, ble................................................Arrrrrg again
-
so i have had the carb cleaned and gone over by the shop and they only changed out a few O rings and I changed out the diaphragms. The carb is back on the bike but I can not for the life of me get the bike started. I have screwed fuel air mix screws all the way in and then out 2 1/2 times and it will just turn over with no indication of actually wanting or sounding like she wants to start... at one point i turned the screws back in and counted 7 turns and that was the point that it sounded like it almost wanted to start. I also had fuel leaking from one of the screws at that point. Could amperage be a culprit? It has a new beth but the volt meter on the dash is hanging around 8 1/2 "or low"??? Any suggestions would be greatly appreciated:bighug:. I'm about to do this to the shop. --> Keep the rubber on the road. Mike
-
1988 VR... anyone know how to remove the screws on the clutch reservoir? whoever tighten the screws got them so tight that they are striping the heads....Any ideas on how to remove them? Rabbit:confused24:
- 39 replies
-
- clutch
- rabbitconfused24
-
(and 3 more)
Tagged with:
-
Going through my carbs and was wondering jet sizes. I thought mine were stock. Slows were all #15 but mains were: LF-122.5, LR-122.5, RF-120, RR-117.5. Is this a stock arrangement? OK, did more digging, they're stock. Pilot screws were between 1½ to 2¼. location ?. Do you need to put the covers back on screws? Carbs were filthy on outside (little on inside as someone had put air filters in wrong) I'm guessing all these years with eng case vent line dumping oily laced air in the air filter case. Has anyone dumped the eng case vent to atmosphere like the other vent lines? I've seen it done on other bikes. Why is the sky blue. I'll stop there!
-

Where are the pilot screws?
DANGEROUSDANA posted a topic in Royal Star Venture Tech Talk ('99 - '13)
I recently bought a 2000 RSV Millennium. It had Bub slip ons that sound really good, but too loud. I couldn't hear the stereo. So, I purchased a set of stock mufflers on ebay and slipped them on. Now, I have a backfire (sometimes very LOUD) on deceleration, just as the engine reaches idle. I have greatly reduced the frequency of this backfire by raising the idle. However, it still backfires occasionally, and I really don't like the higher idle. (I'm guessing 1200-1300 as opposed to 950 or 1000, hard to tell without a tach.) I'm thinking I could adjust this backfire out. First by getting someone to follow me and see which side the backfire is on and then by adjusting the pilot screws in the carbs on the offending side. I'm just wondering...Can the Pilot screws be reached without removing the tank? Thanks. dana -
The left side highway foot rest is loose. The allen screws are tight, but cant get enough squeeze on the bar. Any ideas what I can use as a shim to allow the screws to pull the clamp together tighter on the bar? Thanks for the help. Bret
-
Bought my ’08 RSV back in January. Runs great but has a few minor problems I’ve been getting to slowly. This weekend was cleaning and greasing the electrical connectors in the fairing. The audio has been cutting out intermittently – a problem well documented on this forum. I split the fairing OK but when I went to remove the light bar so I could remove the front portion of the fairing, saw that both 5 mm hex screws were completely rounded. Tried drilling one and using an extractor but broke it off (that’s never happened before:depressed:). I might be able to remove the fairing if I disassemble the running lights but that seems to be getting me further down that black hole I’m trying to avoid. The frustrating part – I can see the connectors I want to clean, just can’t get to them – all because of a couple buggered hex screws. Suggestions? It’s too early to drink.
- 11 replies
-
- connectors
- fairing
-
(and 3 more)
Tagged with:
-
Add me to the list of those looking to find that Yami engineer that desperately needs my size 13 planted where the sun don't shine. So I read up all of the info I could find about changing the diodes in the TCI. I acquired a bunch of diodes for the job. Got all of the necessary tools ready. And dive in head first. There were some threads that made it sound like it would be not to bad to get the TCI out. I started with the suggestion that it can be done from the bottom without having to remove the air box, so that is where I went first. It should have been an ommen but the very first screw that I touched to remove the lower air scoop the hex hole stripped out, kind of my own fault, the last time I had that piece off to do an oil change I noted that the holes were very rusted and not much hex was left. Not a big deal, grab the Dremel with a cut off wheel and grind a slot for a flat blade screw driver. I took off the rest of the recommended parts to gain access to the TCI and sure enough, there it was starring at me. I thought Cool this ain't so bad. YEA RIGHT! I grab my Phillips bit and a ratchet to get the screws out, only to find out that someone must have been after the TCI once before, the screws were completely rounded out. By using the trick of putting some grinding compound on the tip of the bit to get extra traction I was able to get out the screw on the right side of the bike. The left screw just was not going to come out no matter what tricks I tried, none of which is helped by the fact that you can not even see the screw head. Enter plan 2; So since I can not get to that screw from the bottom I go ahead and pull out the air box. Cool now I can see more of the TCI but still can not get to that last screw. Enter plan 3; Grab a hack saw blade and go ahead and cut off the tab from the side of the TCI, (ain't NO way I am mounting it back up in that god awful place anyhow) Now that the TCI is out I'm off to the house and back into the A/C to do the diode swap. I took out the screws to reveal the bottom of the PCB. then take out the screws to release the PCB from the other half of the case and once again grab my trusty Dremel and make the cut to get the case open. Low and behold there are the diodes. every thing in the TCI looks like bran new, I was expecting to see the big globs of corrosion around the diodes like others have posted, but no these are clean and shiny looking like bran new. This got me to thinking, I wonder if the PO had the TCI replaced at some point before I got the bike and that is why the screws were stripped out. So I pondered this for a few minutes, should I just put it back together or doe the diode swap while I am in there???????? I finally decided to do the swap and was able to do the whole job without lifting any pads. I cleaned the board of all flux and other residue and reapplied a conformal coating to protect the circuits from moisture. I did notice that once I got the cover to the TCI off that there was a small puddle of water inside of the TCI!!!! I had washed the bike two days earlier. So I put a bead of sealant all around the perimeter of the case and sealed up the new seam that I created and sealed up the 2 small holes that Yami put there for no purpose other than to allow water in. Now time to put it all back together. First thing was to plug in the TCI and make sure that the bike still runs, WooHoo, it started right up and all 4 pipes got hot. So per the ideas posted here I cut a hole thru the inside of the faring and pulled the wire harness for the TCI thru the hole. It is plenty long to reach. then I got out some splices and heat shrink to repair the white with green stripe wire that I managed to cut thru while making the hole in the faring. oopie! I used some Velcro strips to attach the TCI to the inside of the faring. While I was in there I cleaned out all of the mouse droppings and nut and seed shells that the mice had left there for me. WTF the dang mouse was still in there. Well at least it is dead, that explains the "aromas" that I had been noticing when sitting a red lights. Got that mess all cleaned up, the rest of the reassembly went quite quickly and uneventfully. Once more start it up to make sure everything still works and Yippee, it does. So at least I don't have to worry about this issue for another 24 years. Now if it will just cool off enough so that I can take it for a ride. OK Rant over...... Back to you regularly scheduled programing.
-
The light bar on the trunk has a burned out turn signal and only one tail/running light that works. Last night I removed the three screws inside the trunk but the bar did not budge. If I recall correctly this light bar does require heating to release the glue to separate the lens from the base but before I break something, should the light bar come off the trunk easily with the screws removed or is it necessary to pop the lens off first?
-
http://www.yamaha-motor.ca/accessories/images/STR-1D693-50-01_t.jpg This is a picture of the exhaust tips that Yamaha sells for the RSTD. I looked at a set at the dealer today for my RSV. They fit into the end of the exhaust okay but not sure how they attach. Each tip has 4 inside holes (non-threaded) and come with screws but either these were the wrong screws or the RSTD exhaust is different than the RSV because there is nothing in the end of the RSV exhaust for the tip to attach to. The dealer was unable to come up with any solution. Anyone had experience with these on the RSV?
-
I've been hunting around, and I can't figure out exactly how to remove the class computer so I can do the E4 repair. On my 86 venture royale, the class is attached to a pivoting mount, so I can easily get to the plugs, but I can't get it out, I loosened the four screws at the back, but that doesn't seem to be all I need to do to get it out of the fariring. Need some experienced assistance please.
- 4 replies
-
- class
- experienced
-
(and 3 more)
Tagged with:


