


Snaggletooth
-
Posts
4,545 -
Joined
-
Last visited
Content Type
Profiles
Forums
Gallery
Events
Store
Everything posted by Snaggletooth
-
 Those Progressives may seem a little harsh when you first ride it. The stockers in mine were shot and I did the rebuild on the forks and installed the new springs. They raised the front quite a bit and had no more problems with the front end diving and bottoming out. I run mine with no pressure at all on the front solo. Maybe five pounds double up with gear. But they seemed awful stiff for a while. After about a 1,000 miles they felt like they broke in and rode a lot smoother. Add on an upgrade fork brace and the front end will be as good as it can get.
 -
Hey Poppa Bear. It's kind of an engineering problem really. The bolt of course is a shoulder bolt. The front (outer side) of the kick stand is smooth bore and the rear is threaded to receive the threaded bolt. There is a nut on the back side of the stand to secure the bolt. When the bike was new they were probably close to a tolerance fit. But with time and wear with the kick stand rotation and vibrating the inner surface of the kick stand wears as well as the shoulder surface of the bolt itself. Now you have pressure on the insides of the flange itself also. As was discussed a couple of years ago many found the bolt to be a bit loose. That added to the wear on the smooth bore on the outside flange, causing it to take on an oval shape. And then there is some wear on the mounting tab that is welded onto the frame of the bike. With all that working against each other the pressure on the bolt shoulder increases and the threaded section will snap off. What then happens the outer flange can be, as in the pic, the only thing supporting the weight of the bike and will spread apart. I was lucky enough the flange didn't snap off completly. I did find a shoulder bolt at the hardware store a couple of years ago. It was the correct thread and long enough but the shoulder was a bit smaller in diameter. I tried to make a bushing out of stock that would tighten the fit. With the hole in the flange wallowed out of shape it wouldn't fit right. The idea of drilling out the flange didn't seem like a good idea as that would remove a lot of material from the kick stand itself and weaken it. So no matter the condition of the bolt, used or new, the worn outer flange will not support the shoulder properly and there again you have side pressure on the bolt shoulder causing it to break. The only thing I can see is having the hole built up inside and rebored to fit a new bolt. I have no idea if anyone has had any luck with that. I might have a buddy of mine try a couple of things with a welder and see how strong the kick stand can be made and try to rebore the hole to line up with the threads. Another experiment to try. BTW the part number for the bolt is: 90109-104E6-00
-
I know we talked about this a couple of years ago and I checked mine then and put in a new shoulder bolt......and checked it again a year ago. But did I check it this year? Well......er ......no. So today I'm leaving work and I'm out in front of the store. I had to run back in for a second so I pull the bike up by the front walk and threw down the kick stand, leaned the bike over on it and was lifting my leg up over the back rest and I felt her start to drop. Like a rock. I've got the right leg still in the air and the left foot is sliding away. I'm a big fella at 6' 3" and 285 but the bike had me at the disadvantage at that point. I got my right leg back down on the far side and got my left foot to stop skidding and got the bike stopped from going over any farther. So there I am.....holding up the great beast at a rather difficult angle......can't tell if I'm at a stopping point or if I let her back to the left if she will keep going. Hummmm....why am I sweating like this? So there was a fella that saw me wrestling the bike and he came running over. Nice guy, and thank you sir for the offer, but he's all of 5'5" and a 150 lbs if that. He asked what he could do to help. Me: "Look for the pink thing" Him: "What's it look like?" Me: "Pink....maybe a little purple by now" Him: "What's it shaped like?" Me: "Kinda round.......a little fussy looking" Him: "Where would it be?" Me: "Probably by my left boot" Him: "Did it fall off the bike?" Me: "No sir.....it may have fallen off me!" Then it hit him......and at that point he was worthless. Couldn't quit laughing. But he was able to give me a boost back up and got her balanced again and able to get off and get her on the center stand. Yep....broken shoulder bolt and the flange was spread open. I was prepared. I had an extra kick stand at home. A spare part I never thought I would need. Yeah...right. Now I don't know how many of you guys have tried to get off one of these things without using the kick stand and have a back rest to boot.....but it's a bit probmatic. So take a minute to take a look at that bolt and save yourself the conversation I had to have with a complete stranger. I'm betting he will remember the big guy in the leather jacket and dark shapes that sounded like a choir boy. Check all your nuts while you're at it. I've got mine on ice now. If I make it back to tenor by tonigiht I'll be happy.
-
Yamaha Service REALLY is a pain
Snaggletooth replied to rumboogy's topic in Royal Star Venture Tech Talk ('99 - '13)
Try driving in a Torx bit. I've had pretty good luck with that approach on a few of the damaged hex head. Drive a bit in and then use a hand impact to work it out. I like the hand impact as it drives the bit into the bolt as you hit it. Helps hold the bite. -
carburetor help
Snaggletooth replied to dunkins1's topic in Venture and Venture Royale Tech Talk ('83 - '93)
Hey 4gasem... The four lines that run from the 90 degree elbows on the tops of the carbs (overflows) run straight back over the heat shield, if it's still on the bike, to a retainer that runs the width of the frame just behind the motor. If you look from the left side with the cover off you will see it. It is nothing more than a heavy wire frame that holds the four overflow lines and the fuel feed line in place. The lines then drop down in front of the inner fender to just below the frame. If they are install correctly you can see the bottoms of the lines and you should be able to tell which line comes from which carb in case you need to do a quick trouble check when the bike starts belching gas. Mine run from left to right, 1,2,3,4. If you are having overflow problems the lines are your safety net. You don't want gas bleeding onto the hot motor and pipes. Leaving them off would be a safety risk. Even with the lines on an overflowing carb can throw enough fuel onto the ground right in front of the rear wheel to make things interesting. My buddy behind me thought I was showing off as my rear end kept changing directions going away from the light. Pucker factor ........9! But from what has been said, it does sound like a needle is not seating at all. Mike -
Hey Karl. The thing to ask the guy doing the forks for a $100 buck is does that include parts. I got about the same price quote around here but it was labor only. I ended up doing my own and I spent about $125.00 on the parts alone. I bought the Progressives, fork bushings, wave washers, seals and dust boots. And then fork oil was about $10.00 a bottle (needed 2) on top of that. If nothing else make sure you use OEM fork seals. There are a lot of aftermarket seals that are not correct on fit and it just causes more problems. Touch base with Rick at Buckeye Performance. He's where I got my stuff from. http://www.buckeyeperformance.com/ Maybe Skydoc_17 (Earl) can help you out to. Mike
-
When you set up your account you don't even need to keep a balance on PayPal. You can set it up to pay directly from a credit card. Much faster and smoother and nobody but PP sees your info. All the seller knows is he got paid. If you keep a balance a seperate account is a good idea, but like the guys said, using a credit card to pay is adding another layer of protection to what PP offers. Also buy the PP security key. It's $5.00 and adds another layer of protection to anyone trying to get into your account. Had mine for a few years now and don't worry about it anymore. It's like a garage door opener. Everytime you use it it rolls a new set of security numbers into play. Check out the security section on the PP site. Worth the $5.00 anyway.
-
Did ya set the key for "UNLOCK" while trying to put the bags back on? Once they are in the proper position then you set the key to "LOCK". So the steps are: Key to "UNLOCK" Hang rear bag hook on support bracket. Tip bag back and position bag pins in mounting slots. Push bags forward until the catch is in line with the chrome lock arm. Turn key to "LOCK" Be sure the bags are locked in. The PO had one come loose and sent it skidding down the road. Sounds like you're making progress.
-
I'm 285 lbs and I literally made the bike squat when I got on with the stock springs. I changed over to the Progressives and the springs alone changed the stance of the bike parked. Raised the front quite a bit. Didn't squat anymore when I got on either. It's a must do for these bikes. The stock springs are junk. The Progressives can be installed by removing the upper tube caps and pulling the old springs and spacers out and dropping in the new ones. I do recommend a rebuild during the process though. Best to make sure all is well.
-
need to identify
Snaggletooth replied to curtis's topic in Venture and Venture Royale Tech Talk ('83 - '93)
PM sent -
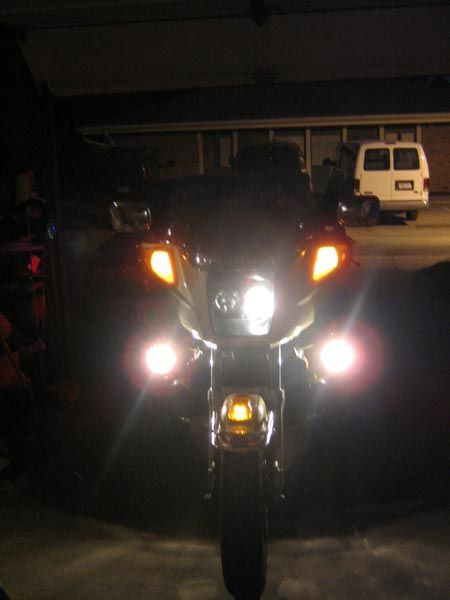
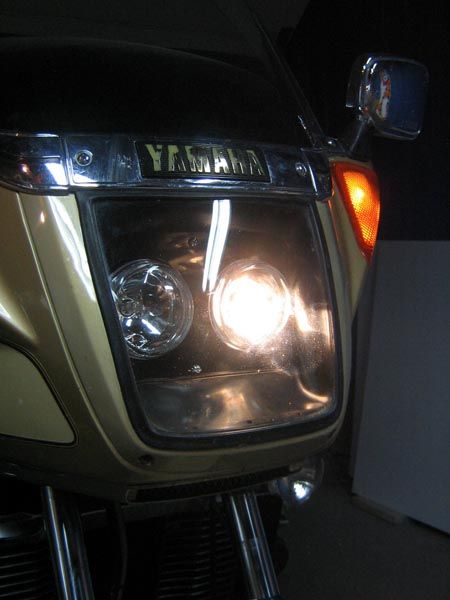
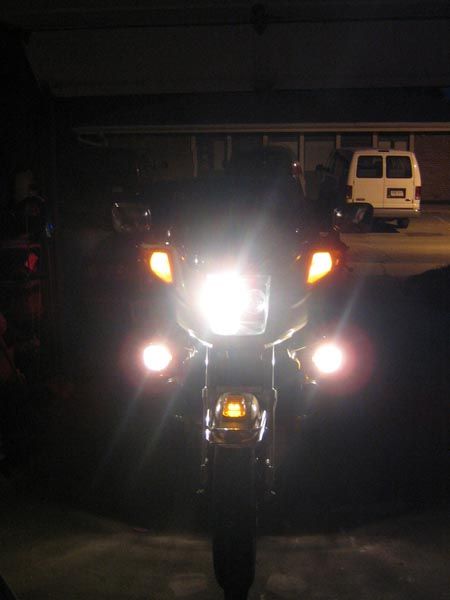
I've got to say.....some weeks are meant to be forgotten. This was one of them. Like they say.....When it rains..... it pours. Lets see...where to begin? I guess the trivial stuff should be first. Rain.....lots of rain. I got rid of my Wally World burners this spring and installed a nice pair of 4 1/2 chrome driving lights with visors and amber lights on my '84. Looked really sharp and did a nice job. I had Squidlys light brackets and he even modified the brackets that the brackets mount onto to beef them up to deal with the bigger light. The problem was after about 500 miles the vibration just beat the elements out of them. Too big of a light with not enough support. Installed new clear bulbs and lost both of them in less than 200 miles. Back to the Wally World burners until I figure out another way to mount them. My full time job informed me that my hours would be restricted to 40 hours a week. Weird. I've been with this company for five years and they keep adding extra duties that have been keeping me around 48 hours a week for the last four years. So I asked the the question, "Who's going to do the rest my job?" Go figure......they did my performance review and I didn't score so well on "Attitude". SURPRISE! LOL! My part time job notified me that they are cutting my hours by 75%. Lets see.....that should almost pay for the gas it takes to drive to and from work. Oh! Hey! I'm on the bike! I can still make a few bucks! About $20.00 a week! Somebody just tell me not to bother coming in anymore. Please? More rain...... River Roads are holding up well. My car has been setting a lot as I've been on the bike every chance I get since I got it back together. I guess it was feeling neglected as the day I really wanted to drive it because of the "heavy rain" it decided not to start. Took a day to figure that out and a rather pricey module to fix it. Seemed the sensor was cracked and did not like the moist conditions. I used to have a Ford wagon that could predict rain 3 days in advance. Got rid of that one. Hummm..... So a week ago I sit down to my trusty 'puter to take care of some bills and do my thing in cyberspace and I get the message, "HARD DRIVE IS UNSTABLE, BACKUP NOW". Wow! Ok. I'm on that........wait.....how much time do I have? Not so much I guess. Second backup disk into the process it just dies. Pull the hard drive and it's gone meltdown. I suppose some of you know how much time goes into replacing a hard drive and reinstalling the system and doing the restore and the backup and well....ya know. But I'm here today. Whew! So today was my special day. Had the afternoon off because on the hours being cut back. Ok that's cool. Nice day out.....mid 60's......blue sky......wind was mild... for a change. So what to do? RIDE!!!! I'm getting the bike out and gearing up to head out and my daughter rolls in. She actually asked if she could go with me. What the hey? She's 18.... she never wants to hang with dad anymore. Something fishy here.....but I'm not going to pass on spending some time with her. Grab your gear kid.....let's roll! And we are off........ Hit the back highways and enjoying the day. Ran across a custom car show......and she actually knew what some of the cars were! That might explain the copy of Hot Rod I found in her room. Found a BBQ place and fed our faces. I'm looking for ice cream next. But we were rolling down the highway about 65 mph and I catch a bit of movement at the bottom of my vision as something flipped up in front of the tank cover and slid down into my lap. No biggie....a piece of a leaf......maybe some sort of road debris.....not worried. YET! A few miles down the the road I catch another movement. On my leg, actually crawling up my leg....well....between my legs. Took me a moment to identify it but when I did I had to muster some control. Now I don't know how many of you guys have ever had a Wolf spider settle in on your "Berries and Twig" at 65 mph but it is a bit unsettling to say the least. It's a nice one to, about 2 inches across on the leg span. And it's holding it front legs up! I guess it was checking for wind speed. Or it's pissed off. I bet on pissed off. So I know that if I even mutter the word "Spider" my daughter will be getting off the bike at any speed. She would! Hates spiders! Me.......I'm trying to figure out how to get off the bike without kicking my daughter in the head. I'm not all that fond of them either and not under those conditions. So mustering my self control I rode it out with a wolf spider waving at traffic in my lap until I got to a get off and pulled into a town and stopped at the traffic light. With a firm but demanding flick of a finger I sent the little fellow off to another location. Now....I didn't mean for it to happen the way it did but the lil fellow found a new ride. The window on the car next to me was open and he just went right on in. Not planned. Just happened. As the light changed and I pulled away I could hear the screaming. I saw my daughters head spin around to look and she tapped me on the helmet and asked me if I heard them screaming. "Yep, Pumpkin....I did.....maybe they found a spider." I didn't tell her what happened and don't plan on it either. I'd never get her back on the bike again....ever! So that was my week. But I'm feeling much better now. Supposed to be in the 70's tomorrow and blue skys again. More therapy......after I check the bike REALLY good for hitch hikers. Ya'll ride safe and be kind to animals. Never leave one stranded away from home. Make sure they have a ride. Mike
-
Cool.....glad that worked for ya. As far as the oil in the airbox......Do check your oil level in the sight glass with the bike on the center stand and level. Make sure it is only half way up the glass. Any higher than that and it will suck oil into the air box. It's a thing with these bikes. They all do it. There are two hoses on the bottom of the airbox. The big one....that runs between the carbs and to the "twinkie" on the crank case. There is another smaller one that attaches to the front bottom of the air box that should run towards the fornt left down tube and then on to below the frame. It has a small valve in it towards the bottom. The hose is the drain from the box. Any oil that builds up will drain through that. And Skydoc_17 does have a mod to eliminate that bigger hose. It's listed in the classifieds. Most guys do it to eliminate the fight to get the dang hose back on. It's a bugger until you figure it out. If you go that route just cap off the two ports on the bottom of the box. As far as the rear master......you're cool. You got the plug out without breaking the body. It happens. I use a ...don't laugh.....a flavor injector for shooting up the old birds to fill the rear master. Grind the end off so you don't have a point and it's a clean fill. Now a word of advice. Fill it up......not all the way! If you think you have too much fluid in it crack open the rear caliper bleeder and bleed some out. These bikes do tend to warm up the rear master. If it gets hot the fluid expands and the brakes (rear first and then the front left) will start to drag, even lock up. That does damage to the pads and can warp the rotor. Not to mention it's no fun to ride like that. As long as your are at it.....just bleed out all the brakes and get some fresh fluid into the system. Clutch to. I bought my bike as a non runner three years ago. Spent the first winter going through it. After two seasons of riding and the winter tear downs to fix, repair, replace, fabricate or rebuild.....this is my summer to ride trouble free. I think I can take next winter off this year. Nuttin left to fix. Did I say that out loud? Ah crap. Jinx! Good luck. Mike
-
Not sure which screw you are talking about but the idle adjustment is behind the bracket that holds the carb bodies together on the left side of the bike between the carb bodies. It points downward and is a round, knobby thumbscrew about the size of a dime. There are two screws at the rear of the carbs that have springs on them that are for adjusting the sync of the carbs. Changing one of them could affect the bike enough to kill the engine. Mike
-
Hey Dan. I bought a set of 2nd gen valve covers gaskets off eBay a while back for my '84. The listing showed all years for them. All the new 2nd gen gaskets have that lip around the edges and that helps a bunch. I did cheat it and gave the covers a shot of sealent before laying the gaskets in and dropped them on a spare set of heads over night to let them cure. Once I figured out the correct way to hold my mouth and which words to use at the appropriate moment they went back in a lot easier than they came out. The gaskets held tight during the install and sealed up nice. No problems with leaks now. You are planning on doing the bolt seals to right? Neither cover was really harder than the other. Had to loosen the radiator up and pull it forward a bit to get the right angle to drop the front one on. Had to trim the lip off a little on the left rear edge of the rear cover as it rubbed on the choke links a bit. Works ok. Mike
-
Most excellent news! Good to hear you're on the mend. Mike
-
I vote for mass air flow sensor to. Had a problem with my Lincoln doing that same thing, took it to a friends shop to leave it and he had it fixed in 10 minutes. A loose connection on the intake and the sensor got dirty. Cleaned.....tightened and no problems since. The connection on the intake got knocked loose during an accident and the got worse over time.......sound familiar? Worth checking.
-
Rebuild Fuel Pump
Snaggletooth replied to puppy's topic in Venture and Venture Royale Tech Talk ('83 - '93)
No kits for them. Pinwall Cycle or eBay. Not too money to buy used ones. Mike -
It amazing how many beer cans die in the name of motorcycle maintanence.
-
Just got an e-mail from Joshua over at Bohannon Battery. They launched a new web site with all the info on the DEKA ETX18L AGM battery. Just about everything that you would want to know about it. http://www.etx18l.com/ Of course our member here Earl, aka Skydoc_17 is now carrying a line of DEKA's also but if you got questions before you buy.....this site should answer them. Mike
-
From the album: '84 Venture Royale
-
From the album: '84 Venture Royale
-
From the album: '84 Venture Royale
-
First things first.........are the pinch bolts at the top of the tubes all loose? I've seen a lot of stripped out holes and round cap nuts because the PO's didn't loosen the pinch bolts first. Ok....this is kind of a reach but I've done it before. Depends on how bad it is torn up and rather or not it is too rounded. I think these are what.....17mm hex's right? You are need a hex drive socket to fit. A hand impact is best and some shim stock. A beer or pop can will do. Cut a small section of shim stock to fit over the cap and use a dead blow or rubber mallet to drive the hex socket into the hole. Remember the threads are fine on the caps so work it do not force feed it with a sledge! That is why the socket drive hex. Getting an allen wrench driven in straight would be a challenge. Once the hex drive is seated firmly then use the hand impact to start working it loose. Shouldn't take much to get it started once you get a grip. Any impact wrench would help but the hand impact helps keep the hex drive seated in the hole when it's struck. Like I said......not the best way but it works. Might be worth a try.
-
Park in 1st all the time. Just for the safety of the bike. Ain't gonna start with the stand down anyway. As far as a stupid question........ain't no such thing here. Everybodys learning curve should have a bend in it sometime.
-
I did away with mine maybe two years ago. I did the Progressive springs and had no more problem with the front diving on me. I also added the SS lines and the Condor Fork Brace. The front has great braking control now and the lever is rock solid with the SS lines on. Just pull the lines and use the short union bolt from the anti-dives to tie the line to the caliper. I made my own bolts to cap off the anti-dive units. Worked for me. Mike