Geobob
Expired Membership-
Posts
219 -
Joined
-
Last visited
-
Days Won
1
Content Type
Profiles
Forums
Gallery
Events
Store
Everything posted by Geobob
-
Ok so I put a ohm meter on the wires and go approximately 109 between each and the black wire with the exception of the Black and Yellow wire. I got nothing on that one. Now to find that wire diagram in the shop manual. And the ignition fuse has been replaced some time ago. God I cannot believe I don't remember replacing that one. Must not have failed while out on a ride like the head light fuse did. Ok that was easy, here is the wire diagram now where are my super duty magnifying reader glasses.
-
This is a big help. If you saw the mess that is my fuse box you would understand why I picked up one the replacement kits. I have traced and replaced ground wires all over one of my old bikes like you would not believe. It eventually turned out to be a fuse that we looked at several times. Good to know about the timing. I am still puzzled by the backfires but at least I know its not timing like having your distributor installed 180 out of line. Yes it will run but the header got so hot my spark plug caps caught on fire. Almost burned up a new motor on the f up. Regarding the coils. When I dug the TCI box and vacuum boost out I barely even looked at the coils. They are stuck up in there in such a manner that getting to them is not something I saw a need to do or even wanted to attempt. So did I do anything with the wires or connections at the coils. No never touched them. I am curious to know what happens when the diode on the TCI go bad. I replaced mine and could have a bad contact. Does anyone know what happens when one goes bad. What happens? I really don't think they are the problem since I checked the continuity multiple times for each connection. It would be nice if that was the problem because they are easier to get to at this point than the dam coils. Correct me if I am wrong but getting the coils out requires removing the fairing which is basically all the front end body work. And even then they are still not that easy to get to. I could be wrong so if anyone thinks just pulling the battery box out will get you at the them I go that route. I am also suspicious that I may a wire or two pinched someplace.
-
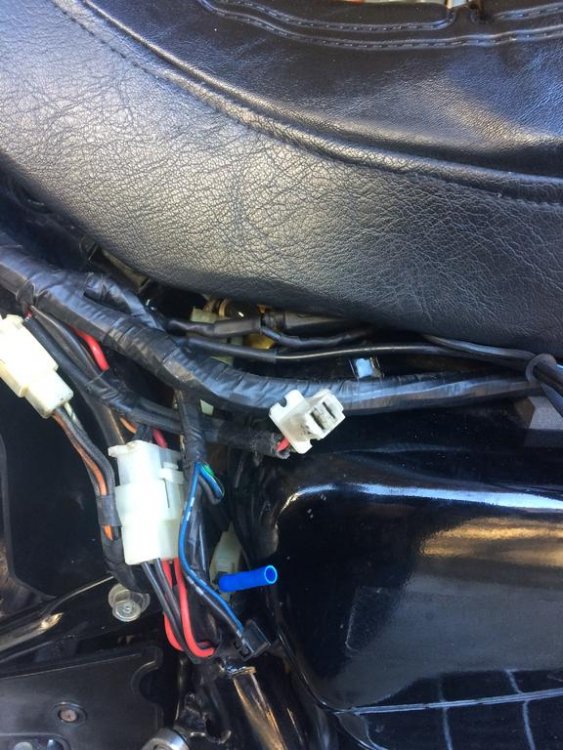
Ok so it appears from the location of this plug it likely has nothing to do with the ignitions system but I a cannot help look at it and think it does not look like a block connector that has been sitting exposed for 30 years. I thought of something else while cranking it over today. It is getting spark enough on one or two cylinders (1 and 3) to back fire. So why is it back firing and not starting (even on two cylinders I think it would turn over and run. For it to be backfiring would suggest timing is way off also. This brings up the question of how and where does this bike pick up crank position in order to signal the coils to fire. The backfiring suggest something more than no spark on 2 and 4 is the problem.
-
I kind of remember plugging in the pressure switch when I installed the new one. This connector has about 3 inches of wire before it joins the loom. I will post some photos when I get out there and start taking parts off again. Would not be a bid deal if I did not have another project that needs to be done to complete the sale of a bike. Which in turn will provide the money to go buy another bike. Addiction is real and it does not just apply to drugs. I clipped 1/4 inch off each plug wire as recommended and screwed them back into the caps. I have now double checked those twice. I also replaced the back two cylinder spark plug caps because the rubber was so melted I thought that was where my wet weather miss was coming from. I have since been advised that it was likely moisture in getting into the TCI box. I have checked for spark at the cap with a tester that enables you to adjust the gap so you can get an idea of how strong the spark is. It appears to clearly show a spark on 1 and 3 and nothing on 2 and 4. At this point I really do have to start checking backwards like you recommend. Resistance to the and through the coil and then signal and voltage at the coil. The coils are difficult enough to get to and while it is possible that I disturbed something while looking for a place to install the plastic shield I have a hard time believing I messed something up in there. But the reality is that the bike will not fire up. I Thanks for the input guys, I dig in some more and up date the thread. I am sure the problem is simple and I am just not seeing it. Tonight I just found something I have been looking for weeks. And of coarse it was right where I would have expected it to be. It was just in a container that I was not expecting to see it in. This tells me that anything is possible. Speaking of that, is there any fuses involved in the ignition system.
-
I hooked up the volt meter to the grey wire (with two black bands) and turned on ignition. Got the 12 volts and hit the starter and watched the volt meter drop and flutter around 2-3 volts. I got the same readings on the Yellow wire (with two black bands). I also hear the fuel pump cycling on. I guess i have to look at the coils. I cannot stop thinking about one block connector that did not seem to have a mate that I noticed on the left side of the bike near the seat. I cannot see how it relates to the coil for the two left hand cylinders. Is anyone familiar with an unused connection. I post a photo of it when I can bring myself to take the body work back off.
-
This helps a lot. I will use it to investigate. If you look back you can see the photos of the solder joints and the testing with the DVM for resistance between the joint and someplace else on the board. I cannot get the bike to start which is concerning since it has run on two cylinders before when the TCI was wet. I did hear the full pump kick on when I first tried to start it and after I drained the carbs. I did not hear it today but I suspect the carbs were still full. Getting at the coil wires at the coils is a project but getting at them at the TCI is easy now. I'll look at testing them at the TCI which is on the air box. I assume I can roll the motor over with the starter and check the voltage to the coil and see if it fluctuates. I can also look at the other coil wire since it is working. I was also thinking about checking voltage inside the TCI after I open it up again while turning the bike over. So if I understand correctly the TCI should be breaking the 12volt charge to the coils while the motor is running or being turned over by the starter. That makes sense. That should be easy to check at the TCI. I might have an old analog meter. I assume you can see the swing on those better than trying see the digital meter change readings as the coils cycles.
-
I checked things over again and definetly have spark on 1 and 3 and no spark on 2 and 4. I check the voltage at the TCI lead for what appears to be the wires leading to the coils. All four had 12 volts. I assume the TCI breaks that voltage to generate the spark. I guess that is the next check. Just have to figure out how to check that. All the other leads at the TCI showed only a little voltage as I could tell with the ignition on. The hot wires leading to the coils all appear to have two black bands on them. I think it was a yellow, orange, red? and white? I need to look more closely at the schematic in the manual but the orange definitively leads to the coil for the left front cylinder. That was one I could get an eye on. At this point I either going to tear that box back open and look again at the solder connections. I did test them all so I am not sure what I will see. When these diodes fail or are not working properly what damage does it do. I am thinking if I installed them improperly then it is the same as if they went bad? If that is the case then have I damaged the TCI beyond repair and just need to find another one. I guess they could fail and by no longer acting as a diode and that could do the damage. I doubt that occurred. So maybe just re-soldering them might fix the problem. Any ideas. And if anyone wants to try my TCI on their bike I will be happy to send it to you.
-
I did not mess with the coil connections but that does not mean they could be loose. I checked those welds with a meter several time but I does seem like the likely problem. It is easy enough to ship but it is all sealed up. I would love to get a second opinion on it from someone on here. Once again I left with the feeling that if it aint broke don't fix it. I should probably have just sealed it up and moved it to top of the air box.
-
So I looked at the plug wires and they are all on the correct plugs. The back to still have the numbers visible and the front looks like you could not get one side to reach the other. I check to see if I was getting a spark and #1 showed what appeared to be a good spark, #3 in front of it looked week and 2 and 4 on the other side showed no spark. Could this be a problem with the TCI that serviced. I have never had a problem with a TCI box so I don't know what it really controls. I suspect it controls ignition which is not happening very well now. On the bright side it is easy to get at now that its sitting on top of the air box. Maybe i should pull the tank cover off an look at those block connectors.
-
My first thought is I mixed up some spark plug wires but is that even possible. The routing of the wires as I recall don't allow for crossing them over the motor. This leave the possibility of the new vacuum advance not working properly (i did not bench test it) or I messed up the TCI sodering the new diodes. I suppose there is any number of other things I could have done during the valve adjustment but I will be dammed if I can think of what it could be. Any ideas would be helpful. And by the way it did run before I work on it LOL. Just did not advance the timing
-
You guys are just the absolute best help. I have been looking and trying to fit it in somewhere in that area but for the life of me could not make a logical decision on where it would go. I may have mentioned this before but I picked up a Honda v4 magna and took it apart to clean the tank and carbs. I had to go video tape a friends to figure out it went back together. Ridiculously complicated and a service manual that is not as detailed as needed. This beast is going to be off the stand today.
-
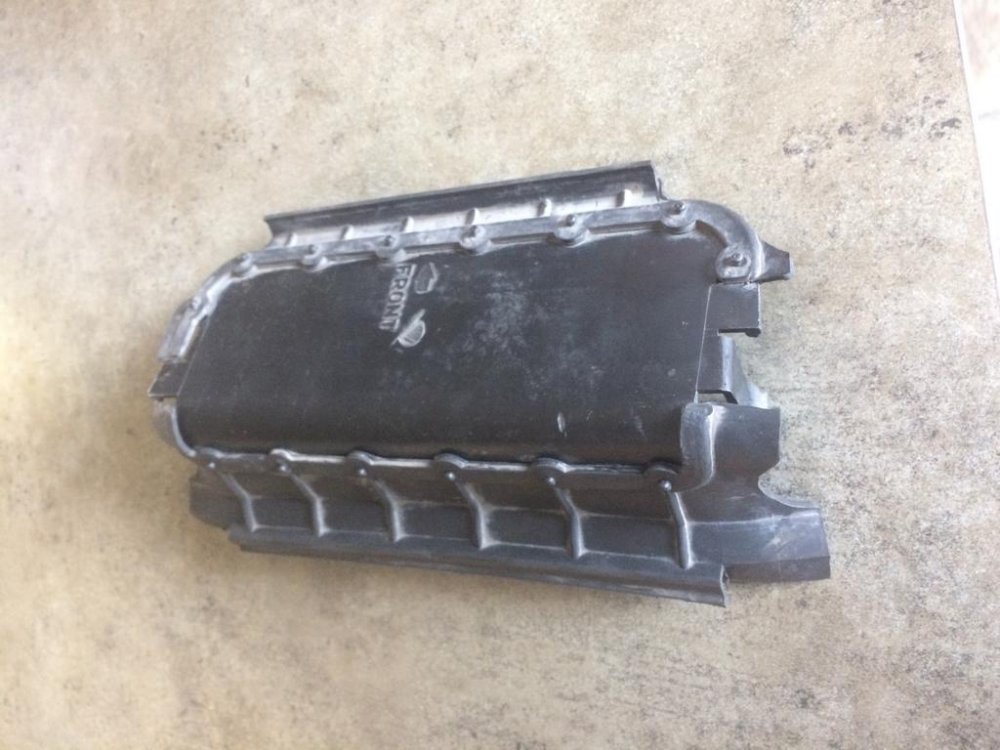
I can tell you that the two larger shields are in place and really can only go in one way since they have the holes for the hoses. I have been trying to fit this thing in some how up in the front in a manner that will shield the TCI and ignition advance but so far I cant see how it will stay in place. I am thinking if I had the TCI box in place maybe it will grab on to it since it has two prongs on the sides that look like they would hold it in place. It also has a rubber lip on both ends that suggest is sits over the plastic shield on the head but I cannot for the life of me see how it is held in place or where it should really go. I can see a whole lot of place that it cannot fit. And that dam arrow and front label really should make this easy. I could not find any diagram in the manual or on the parts schematics that show it. I am laughing at myself and cursing this bike at the same time. The other night I dropped one of the head cover bolts down the back side of the motor. Heard it hit the exhaust collector, found it but it took me 30 min or longer to get it out of there. If I had not had such a hard time years ago taking the rear headers and collector off, I would have started taking it off to get that bolt. At least I could find it. There have been a number of battery nuts that have dropped into the abyss never to be seen again. It really hard to attach a battery cable without that nut or bolt. I also found an electrical connector tab laying on the stand. I have to post a photo of that one just for laughs. I am looking the thing just shaking my head saying where in the hell did that fall out of. It looks like it has to have fallen out of a block connector. I have never seen one fall out of a connector. I am also wondering how I am going to fit the new fuse block and TCI box on top of the air filter as suggested. Anyone have a photo of that little engineering accomplishment. I also have the two accessory blocks to mount. Maybe I will have to put something onto of the battery to mount things on. I have a lithium battery for the bike now and it is really much smaller so there is room to stuff things around it but it has gotton very ugly in there. Thanks for the help guys
-
Congratulations, I hope you got the deal you wanted. These guys can help you fix anything, they are the best. I just spent a few hours working on mine today and several time said to myself "I hate working of V4s." Everything is so tightly built together that just getting plugs and hose off the head is a ridiculous. Invest in some heavy long nose pliers and maybe just plan on replacing spring clamps with screw hose clamps. Use you phone or something to take lots of photos since a month later you may want to look to see where something went like a hose or how a wire ran. Take note when removing things it will help when you get around to reinstalling. The more you take off the easier it will be to do what you need to do. I may take more time but it might be a lot less frustrating. It will also give you a chance to clean some places that have not seen the light of day for many years. I would split the brakes if you can. The system is not good. I was informed that the two front calipers on not the same so if you do away with the stock system looking into picking up a old pair of FXZ 1000 calipers. They bolt right up and should not be that expensive. Progressive front fork spring were a huge improvement over the air assisted stock set up. I have no air on my front forks now. Its a bit of a job but I would pull the rear suspension and inspect clean and fit grease fittings. They get dry and stiff and what little travel they have is lost. I had to replace a differential since it did not get greased often enough (by me for the first 10 years) so I would check that when you pull the rear tire. Anything else you have a problem with is likely covered somewhere here. This group makes owning this bike realistic and manageable. Most of these bike that have been sitting around for years have some many issues that having a shop service the bike would cost way more than the bike would ever be worth. So doing the work yourself is basically mandatory. If you are willing to spend more money you can buy one that needs not work which is what I would recommend. Some of these guy bikes are in great condition and will give you years enjoyable touring. Yes thing will go wrong but nothing that cannot be fixed. Its those bikes that have been neglected for years that are best used for parts. By the time you are done putting a basket case back together you could have bought someones well maintained bike for 3-5k$ I have had mine for 25 years if my math is correct so in my opinion they are great bikes. Unfortunately they will have systems fail just due to age so you will be putting in some maintenance and repair time. Just my 2 cents worth, now if I could only figure out where that dam part goes I could get this thing back together.
-
reassembly has begun and of coarse i cannot remember where this part goes and I cannot find it on any parts diagram. You would not think it would be that hard to figure out but I am at a loss. I figure eventually I might see but I could well past the point of installation so now would be a good time to figure it out. The dam thing even has a label noting "Front" with an arrow. I must getting to old for this.
-
Timing Advance
Geobob replied to snyper316's topic in Venture and Venture Royale Tech Talk ('83 - '93)
ok now that someone else has highjacked the thread I will put my thought out there. First the bike has a fuel pump so can enough gas really drain into the motor while its sitting. I owned a number of CBXs and that is the only bike I ever heard of having this problem. I had a V65 that did this but it just stopped the starter. Has anyone ever heard of this happening on a venture or vmax. I am just happy when the starter motor works let along worry about it having the strength to bend a connecting rod. -
I guess now I understand how you ended up with this project. I assume you have a more difficult time finding bikes up there and I am going to guess the price was right. This is the place for help. God knows I have depended on this site to keep mine running. You really cannot find better help than this group. And these are far from simple bikes.
-
When the rage subsides...
Geobob replied to s.tyler58's topic in Venture and Venture Royale Tech Talk ('83 - '93)
Hi Tyler, I was reading through the thread and kept asking myself what in the world prompted you to restore this bike. The list of things you have had to deal with is significant. I realize finding a good condition 83 might not be easy but finding a well maintained 87 or later is reasonable. -
When the rage subsides...
Geobob replied to s.tyler58's topic in Venture and Venture Royale Tech Talk ('83 - '93)
I should have read this and spoke with you before attacking my circuit board. I had a hell of time soldering the diodes in. -
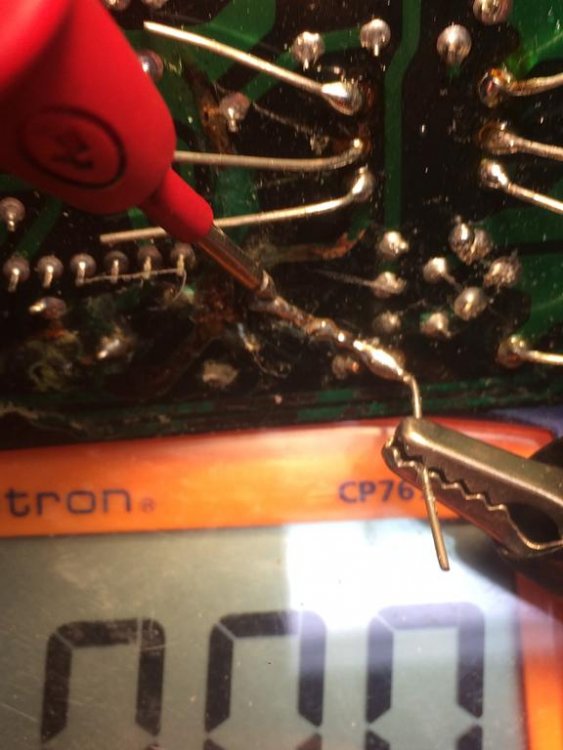
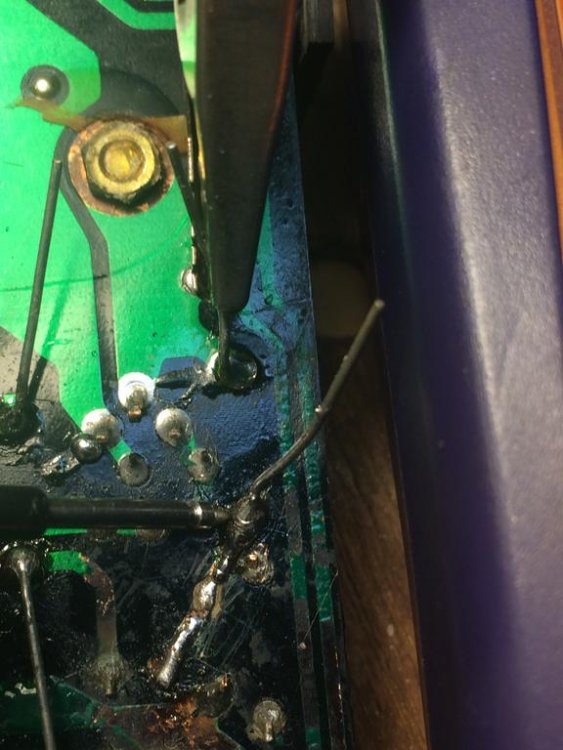
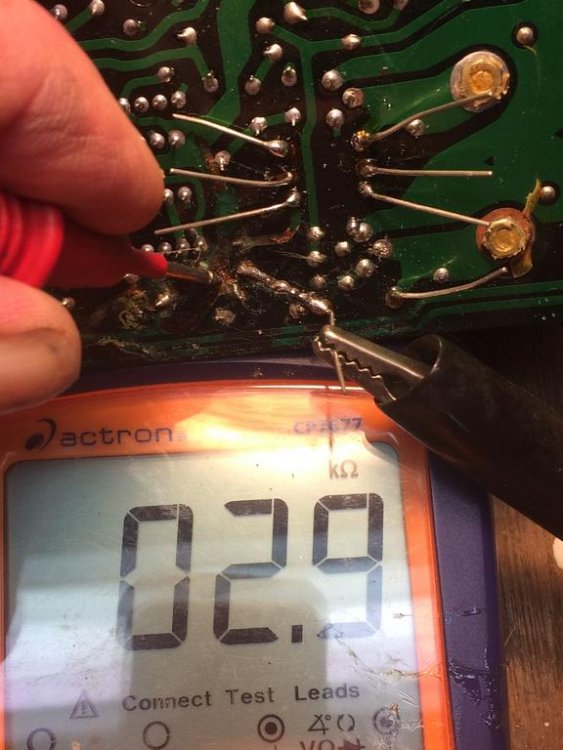
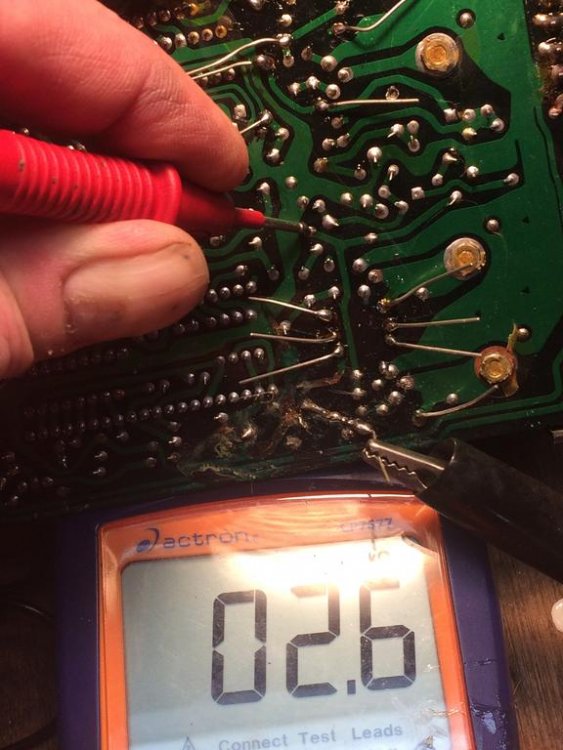
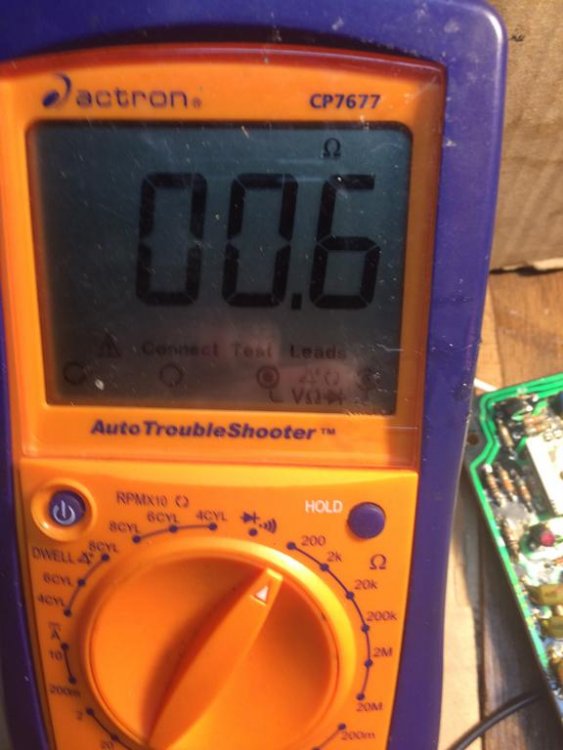
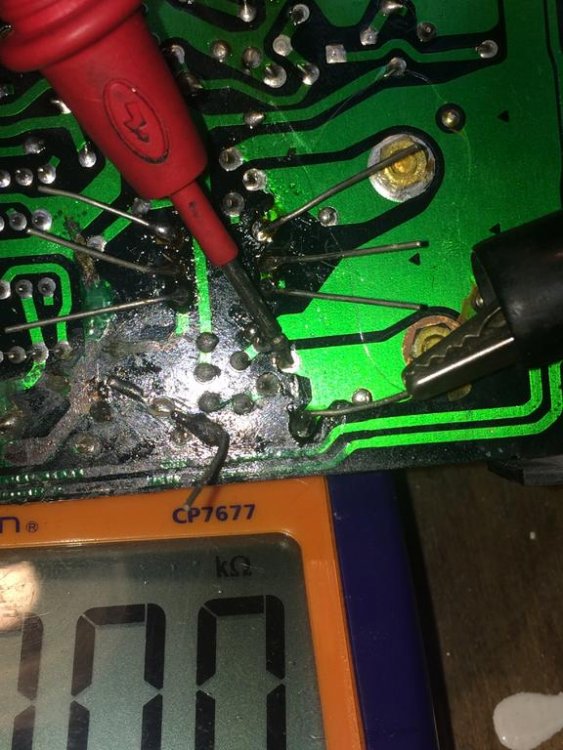
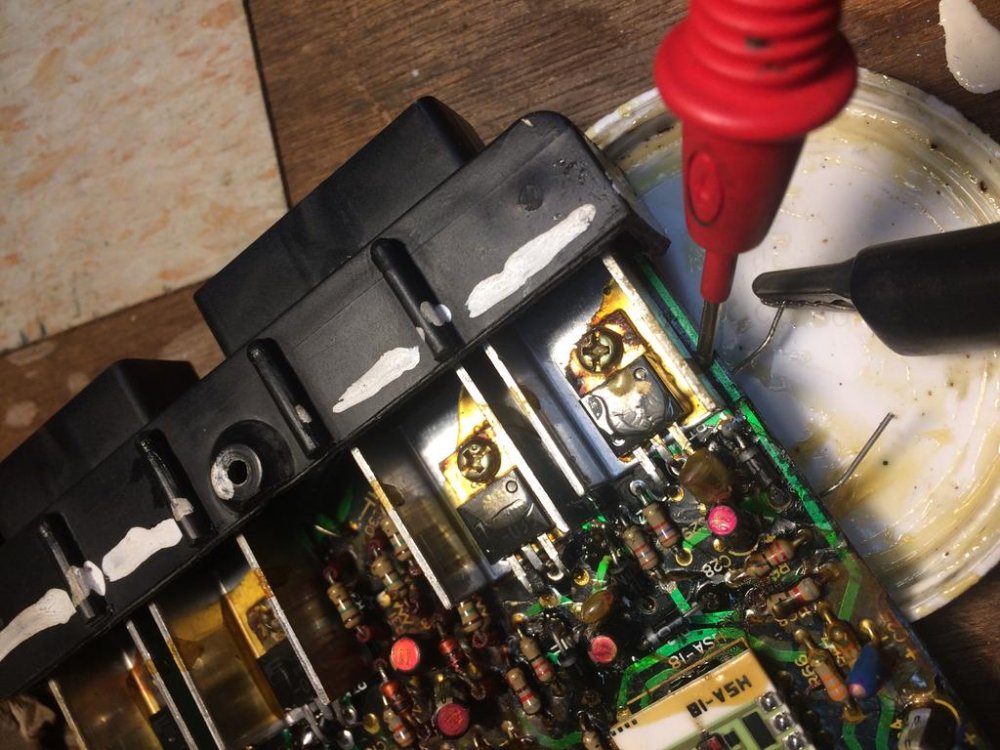
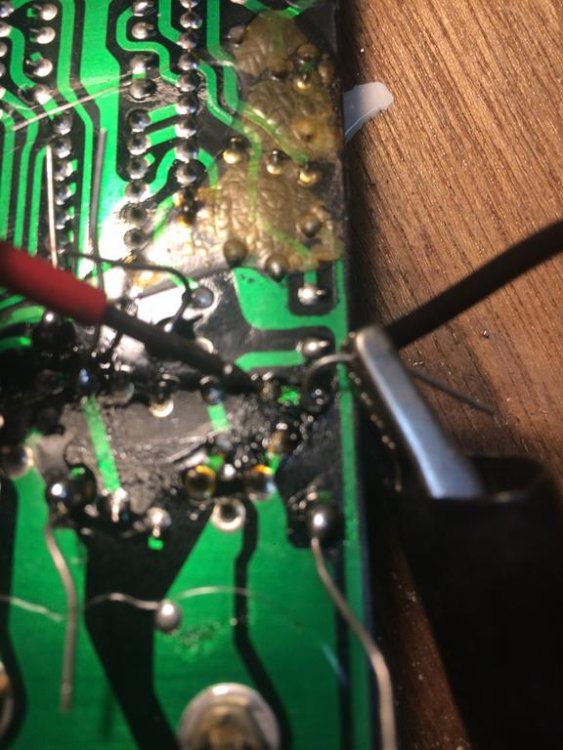
In has been a while since I posted anything about my progress but years from now when someone is reading through this they will never notice. The photos are meant to document the testing of my new diodes. It became clear that testing of continuity was a good idea. Here is what I learned. It is not as easy to get a dot of solder to sit on that hole where the diode lead passes through. Maybe with the right solder, past and iron heat it works better but it is not as simple as joining to wires together. Lower heat setting on the iron seemed to be the way to go since a hot iron on a plastic board with a thin film of copper on it is probably not a good idea. Some of my connection points were apparently damage from the removal (how that happens?) so while it looked like they blob of solder was holding the diode in place it was not making good contact. I found that if you dig and grind hard enough you can drive the probe from the meter through the green paint into the copper below and get a reading. If you leave the leads from the diode sticking out you can attach a meter lead to it with an alligator clip and then go looking for a place to dig the other probe into. I did have to make one repair of the copper plating on the board, or I think I did because I could not see any other contact between the diode and some path on the board. If anyone know differently please let me know before I seal this thing back up and reinstall it. The frist photos shows that mess of a repair I made. I was wondering about what amount of resistant is indicative of a bad connection. Some show as low as 0.06 ohms while others show a couple of ohs. Has me wondering about my repair. Maybe I'll have to take another look at the connections and readings. The rest of the photos show different placed I check for continuity. I did have a second location that needed more solder before a continuity was achieved. From what I understand after reading what has been posted on this forum, if any of these are bad or fail it will cause irreparable damage to the board an the bike will not run. Isn't preventative maintenance great. So why was I replacing these. Oh ya, because I could or more accurately, I could get to the unit. Actually my bike was running on two cylinders when it would get washed or rained on. That was supposedly just a moisture issue. What ever happens will happen at least it won't be reinstalled under the coils. I will be find a home for it on top of the air box cover. That way if it fails it will be easy enough to replace.
-
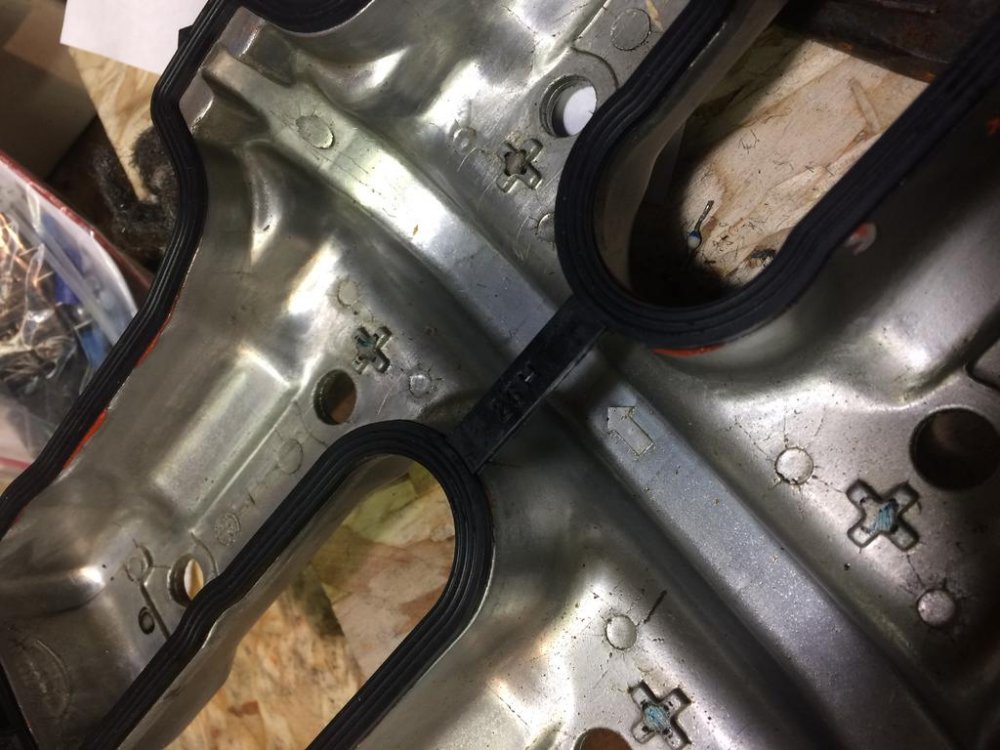
So we learned something new tonight that I think is worth pointing out. I don't think I read about it anywhere. Maybe it is as obvious as taking the part out to the package before trying to install but I spend a couple of minute turning the dam thing around and looking up in there to figure out why it would not settle into place. I am talking about the new valve cover gasket. I am assuming it goes without saying that the rubber bridge in the middle needs to be removed. Feel free to correct me or laugh at me.

