M61A1MECH
-
Posts
2,311 -
Joined
-
Last visited
-
Days Won
11
Content Type
Profiles
Forums
Gallery
Events
Store
Everything posted by M61A1MECH
-

Close Call.......Them pesky giant rats with antlers....
M61A1MECH replied to MonsterBiker's topic in Watering Hole
Had one run out in front of the group I was riding with on Saturday on the North side of Deland, crossed the road, ran along side of the road and then crossed back in front of the lead rider, just enough to get your attention. -
I noticed a huge slow down in packages going north of the border as soon as the Covid mess started, it was almost like they let it set to decomtaminate or something. Try shipping something to Australia, now that was painfully slow.
-
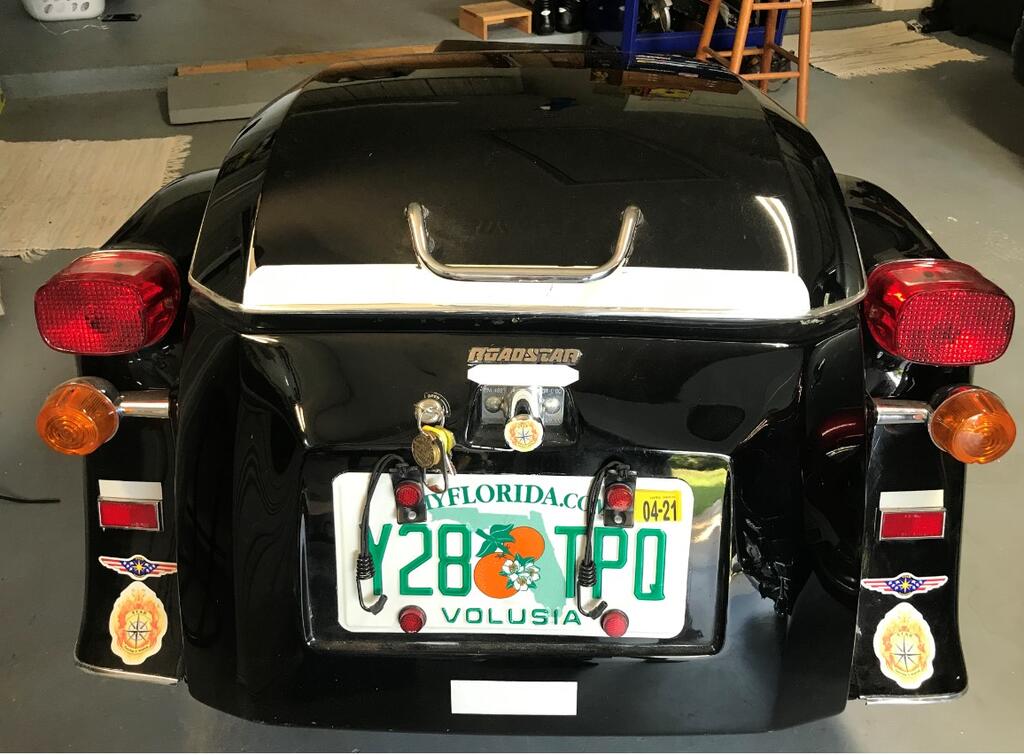
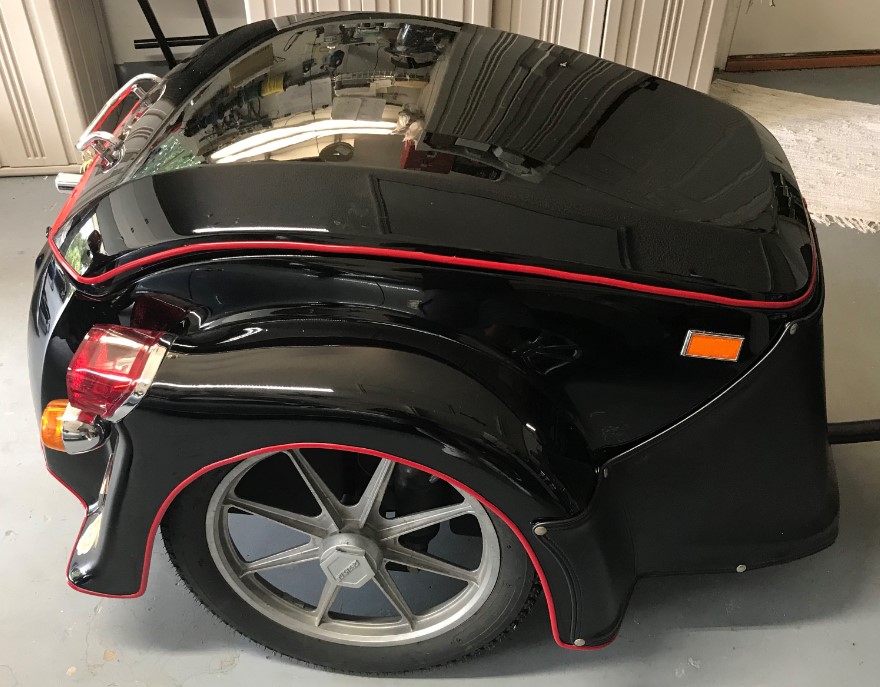
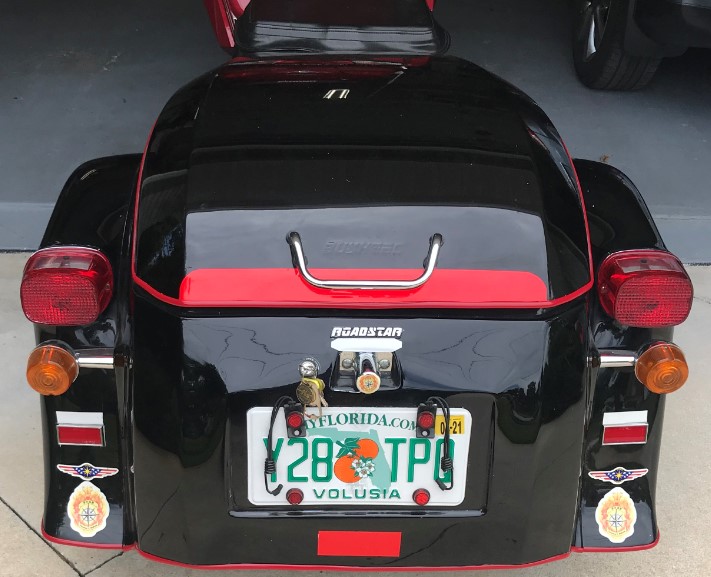
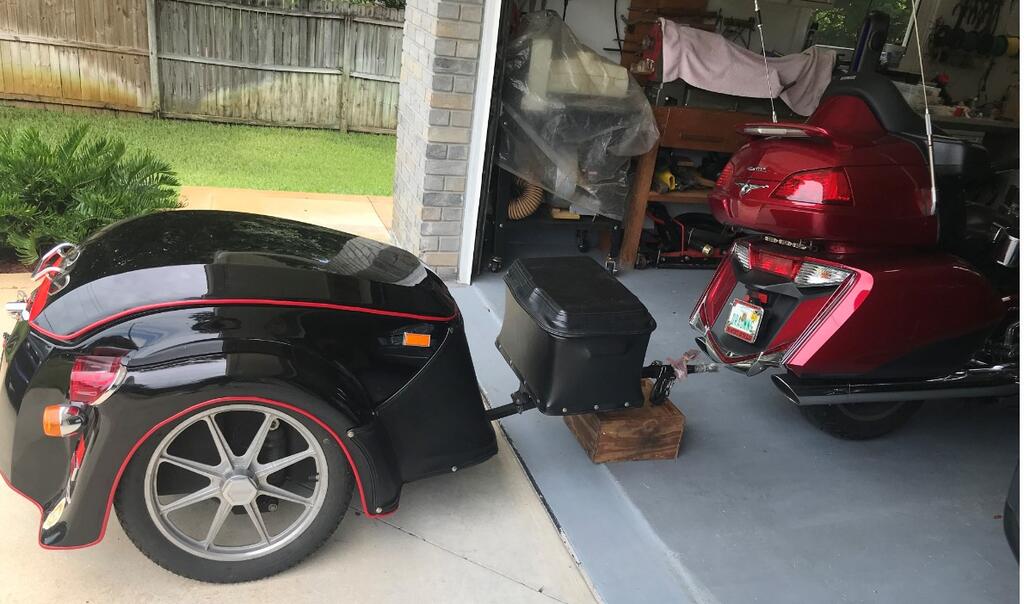
Could not justify painting the trailer, so I did this instead
M61A1MECH replied to M61A1MECH's topic in Trailer Talk
Yeah toyed with that idea, but it was about 1/2 the cost of painting, what I did was 1/10th the cost of painting. -
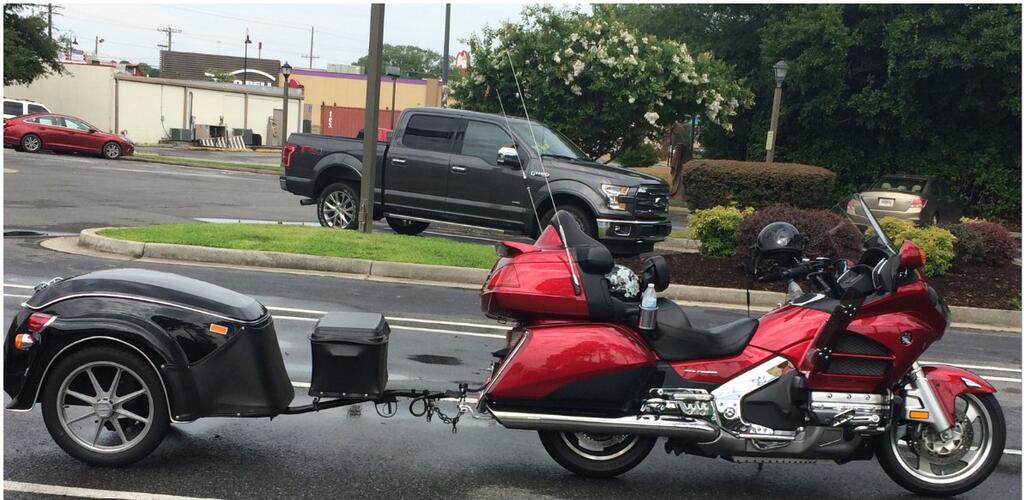
I never was really happy with pulling my black Bushtec Roadstar behind my red Goldwing, but on my retired budget there was no way I could justify spending the money to have it painted, so I removed the chrome edge guard and replaced it with red edge guard. I think it it looks OK.

-
Read this post from VGoose, it is quite good. https://www.venturerider.org/forum/showthread.php?37353-Some-Tips-on-Changing-the-2nd-Gen-Coolant
-
I had very good luck with both of these methods. 1) Using a new allen in a socket set up , do not use a ball end allen. Use a hand impact tool and smack it hard. 2) Using a new allen in a socket up, do not use a ball end allen. Using a good sturdy breaker bar, apply force in loosening direction and smack the joint on the breaker bar so the shock wave goes straight down the axis of the allen.
-
2nd gen relays and fuses
M61A1MECH replied to OutKast's topic in Royal Star Venture Tech Talk ('99 - '13)
One small correction to VideoArizona’s post, I make a lot of different harnesses and will customize to suit the user, but I am not the member making the ignition bypass harness. That would be Dion DJH3 I think is his screen name. I am happy to help once you know what you want to do, I am also OK with giving out my sources for electrical hardware for those who want to do it themselves. -
I shamelessly stole this from the Goldwing forum I frequent, I have not tried tie tip yet, but thought I would pass it along in case it can help anyone in need. "If everyone else in the world knows this, then I apologize, but as a small way of repaying all the help I've gotten here, I offer this tip for stripped plastic threads: The 2018 has a rear side panel held fast by a screw into a plastic block. If you're ham-handed, it is easy to strip. Which I did. An easy, if inelegant, way to repair this is with steel wool. Tear off a chunk of SOS or Brillo pad, twirl one end into a long point, and push as much of it as you can into the stripped hole, leaving a bulb of it outside the hole. Then press the screw firmly into the steel wool and screw it in until it firms up. Be gentle. This is not a heli-coil-quality or EZ-Lok-quality repair, but it will hold firmishly."
-
If you want to wire to the back side of that power port inside the fairing, I can set you up with neat little plug and play 2 pin break out adapter.
-
Oh poop ,now you have to shock the pool to sanitize it
-
I have seen videos of them climbing over various types of fences, just wait until he wants to leave and see how he gets out.
-
Need a little input from my tech guys and gals
M61A1MECH replied to jakemiller93's topic in Watering Hole
Here is link to setting the floats on the Venture 32mm carbs, the process for the 28mm carbs on the original Royal Stars may be similar. https://www.venturerider.org/forum/showthread.php?24246-Set-the-Float-Levels-on-QuickSilver Check the needles and seats for wear or damage. Most leaking from the overflow tubes is caused by debris or varnish on those needles and seats. -
My 98 Tour Classic had a noise like that that turned out to be the water pump, I had an issue where the oil was getting in the coolant, turned out it was bad seal on the driven shaft on the water pump. Once the water pump was rebuilt the noise went away. Take your stethoscope and check on the lower right side at the water pump cover and see if you can hear it there.
-
Just try twisting the throttle when you are in 3rd gear a few times you may be impressed by how well she does, 4th and 5th are both overdrive gears.
-
From 1996 to 2001 Yamaha produced the "Original" line of Royal Stars, there were several model designations such as Tour DeLuxe, Tour Classic, Boulevard, Silverado and standard Royal Star, each had unique packages such as chrome parts, hard bags , soft bags windshields and what not. They all had the same power plant 1200 cc 4 cylinder at 78 horsepower. Good solid bikes many have gone well over 100.000 miles.
-
i am still making all of my products, my trailer harnesses are isolation harnesses. The isolation relay adds a layer of protection by isolating the bike's lighting system from the trailer's lighting system. The trailer lights are powered from the battery through the isolation relay that senses the bike's rear lighting and activates the tail, brake or turn signals on the trailer as the bike calls for them. If your trailer develops a short circuit only the trailer lights are affected, the bike's lights still function. The sub harness that EC sells for $49.95 is only one part of their system, it does not connect to your trailer, it requires that you also purchase an isolator from them and if your trailer needs a 4 pole connector you need to purchase a converter also and then you provide the trailer connector that matches your trailer. My system includes the sub harness and either a 5 wire to 5 wire isolation relay package or a 5 to 4 converter that has an isolation relay built in. No messing about with piecing parts together, just one clean plug and play system that is tailored to your specific needs. If you need a special connector for a Bushtec or a 6 pin square, I will build the harness with that connector at a modest up charge. EC doers not include the trailer connector and shipping is an extra charge with them, my system includes shipping and a standard 4 or 5 pin flat rubber molded connector. A 5 wire system from EC will run you $129.90 plus shipping and the cost of a trailer connector. My complete 5 wire system with shipping and a flat 5 pole rubber trailer connector will cost you $131.00. A 4 wire system from EC will cost you $162.85, plus shipping and a trailer connector, while my 4 wire system including shipping and a standard 4 pole flat connector will cost you $96.00. Shipping is to the lower 48 states, if going to Canada add $7.00 US to cover the added freight costs. Tell me what you need and I will get you a quote, as quick as I can. Hope that answers your questions.
-
Not Loving This Hitchdoc Install
M61A1MECH replied to Freebird's topic in Star Venture and Eluder Tech Talk ( '18 - Present)
I cannot speak to the RVTC being affected by side drafts, but i can tell you that my 2013 Goldwing is the worst bike I have ever had for getting blown around by side drafts. I was pulling my Bushtec and was blown about 2 feet sideways by a very strong gust, no problem with the trailer it was fine, no whipping or excessive side wise movement. Bustec Roadstars are not very heavy and most of the time I forget it is back there. I have pulled it with a 98 Royal Star and a 2007 Venture, never a problem. -
Go here in the tech library, http://www.venturerider.org/manuals/1996-2001%20Royal%20Star%20LIT-11616-VZ-01.pdf, then scroll down to the last manual and find pge 8-7, it gives the fault codes.
-
OK, mystery solved, just need more digging. The harness works and with a few minor changes I will have a production ready design for sale.
-
Thanks. Interesting, those are the instructions he has, I think the connector is hiding under the wire harness and just has not been uncovered yet. John will be looking at it again this evening, he is armed with additional pictures from Facebook and a video from Buckfan, I am sure he can find it.
-
So fellow member here gidz took me up on my offer to install my trailer harness on his Eluder, looks like maybe the Eluder is different than the new Venture. He has found the left and right turn signal wires and they work just fine, but he is having no luck in finding the tail/brake light connector.If anyone has done a similar install using the EC harness or just plain knows where he can find the connector under the seat that feeds the tail/brake light assembly he and I would be very grateful. Thanks
-
That is going to be a tough one. First off you need a small pencil type soldering iron that you can control the heat and some fine gauge electronics type solder, not one of those huge Weller soldering guns that get super hot. If the green wire is long enough to reach the terminal point, strip off about 1/8" to 3/16" of insulation off the conductor. Apply a little flux to the wire, heat it up with the soldering iron and touch the solder to the wire to tin the wire, let the solder flow in and fill around the strands. put a small amout of flux on the terminal carefully heat the terminal up with the soldering iron watch for melting plastic, quickly apply a small amout solder to the terminal to tin it also. Clean the tinned wire and tined terminal with isopropyl alcohol and dry. Move the wire as close to the terminal as possible, if you can find a way to hold it in place on ther terminal that would be good, if not heat the wire up again with the soldering iron and add a drop or so of solder to the wire, while holding the wire in one hand and the soldering iron in the other heat the wire up until the solder flows, keeping the iron in contact with the wire, more the wire to the terminal and let the molten solder on the wire melt the solder on the terminal, quickly remove the soldering iron while holding the now very hot wire in place until the solder solidifies. This is not an easy repair even for those that are experienced with this type of repair. If the green wire is to short you will want to solder a length of wire to the terminal, using the above procedure and then splice it to the original green wire. Good luck
-
What voltage are you getting on the input connector that plugs into the breakout? What voltage are you getting on the backside of the breakout connector that plugs into the incoming bike harness. The contact should be reachable with meter leads or a small jumper wire. I have never had a reported issue of my crimps have high resistance or causing a voltage drop. Check the voltage on the tail light circuit break out as well as the turns, the turns could be troublesome as the dwell time at voltage is not very long and the meter may not have time to trap the peak. If you determine the break out is causing the voltage drop, I will replace it at no charge.
-
Flying fool may have some thing with the flasher grounding internally on the off cycle. In the video of your bike both turns are flashing, is that part of the mystery, I forget if the Venture has a hazard switch on it or not. Can you post a picture of the turnsignal connections brown and green you made?
-
The videos are both set tp private and cannot be viewed. Do you stil have the OEM turns, brake and tail light connected? If yes try unplugging the harness end that goes bak towards the fender keeping the breakout harness connected to the new auxillary lights. That may tell us something. There is no obvious reason I can see why this set up should not work as planned. Also try taking the ground for new auxillary lights directly to a good frame ground or the battery negitive terminal. Let us know how you make out.