M61A1MECH
-
Posts
2,311 -
Joined
-
Last visited
-
Days Won
11
Everything posted by M61A1MECH
-

Bushtec Road Star with broken Torsion bar, Help
M61A1MECH replied to M61A1MECH's topic in Trailer Talk
Yes I know, I looked at that style when selecting hardware, but wanted the extra strength afforded by the heavy SS nuts and added thread engagement for the Loktite, Nylocks are fine, but by they are intended for one time use, lock washers can be used over and over if needed. Yes I have reused nylocks, but I have also seen them not hold on repeat use, and I am expecting that chassis rod to see a good bit of vibration from the road surface, and thought the heavy nuts, Loktite and lock washers afforded be the best opportunity for long term success, time will tell, I will be carrying an extra set of nuts , including some nylocks, with me when pulling the trailer, just incase I need to make a repair on the road. I did try drilling one of the spare nuts I had hoping I could lockwire them for added security, but I do not have anything that will drill 316SS, I may see if I can find some predrilled 5/16-18 nuts, maybe Aircraft Spruce has some. -
I am not sure the electrode is magnetic, you could also try one of those small OD bore scopes you hook up to a smart phone or laptap. Like this one; https://www.amazon.com/Endoscope-Depstech-Borescope-Inspection-Adjustable/dp/B0749BQG1B/ref=sr_1_14?ie=UTF8&qid=1536529717&sr=8-14&keywords=borescope+for+android+phone Just make sure the OD is smaller than the spark plug hole.
-
Bushtec Road Star with broken Torsion bar, Help
M61A1MECH replied to M61A1MECH's topic in Trailer Talk
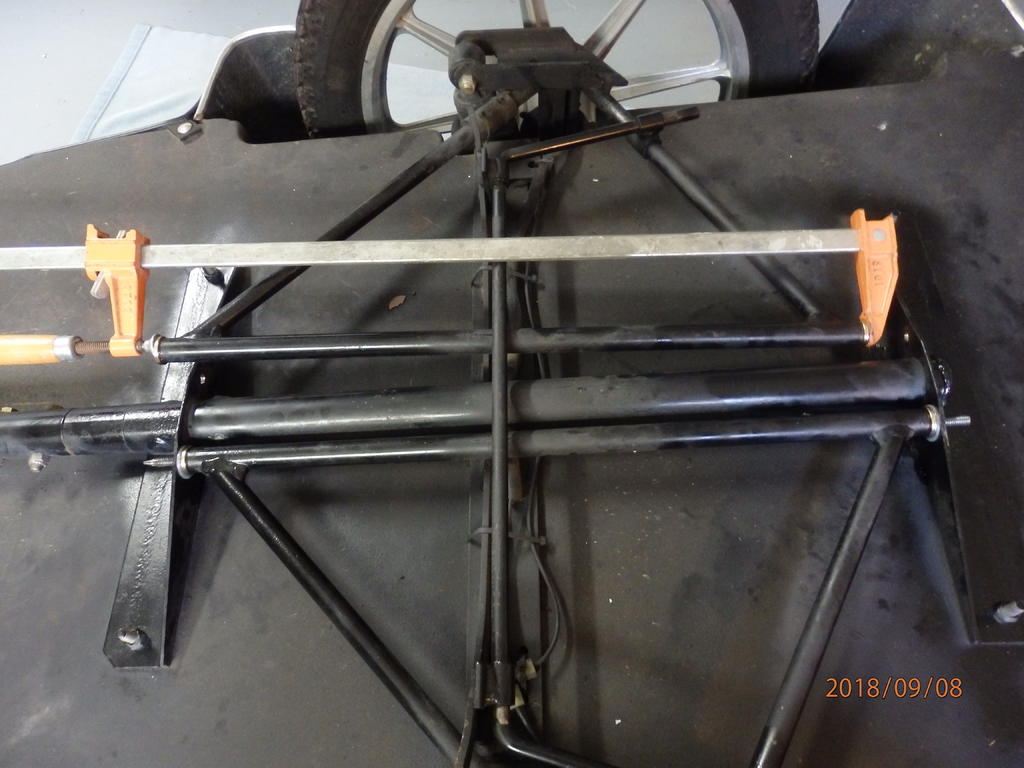
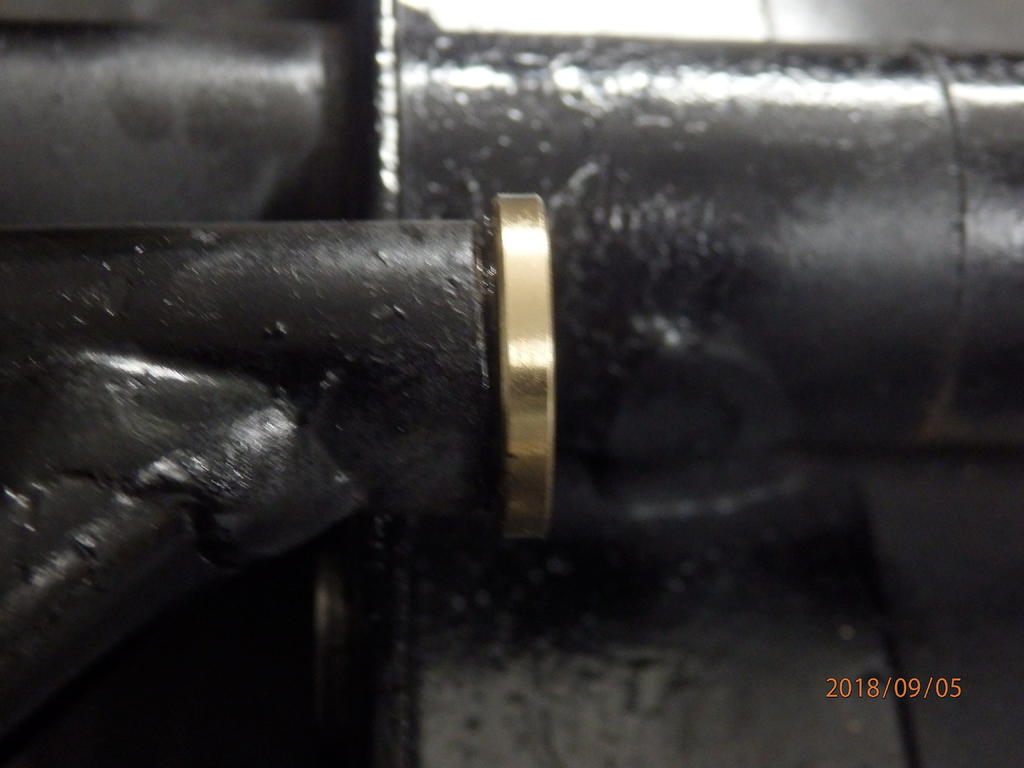
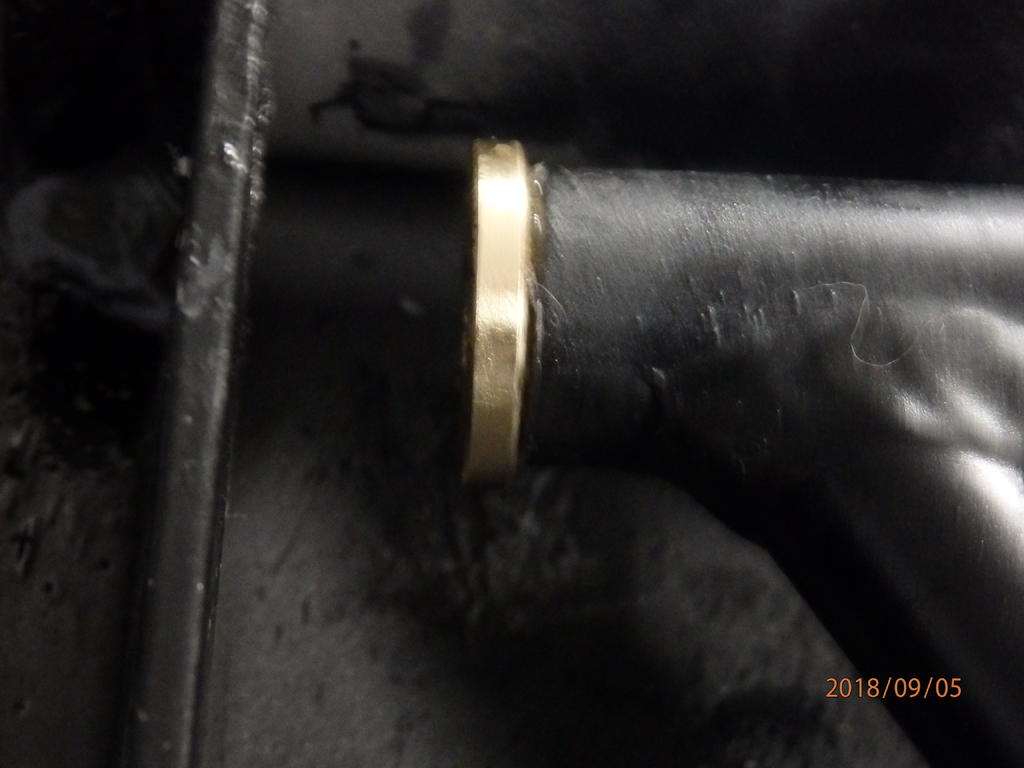
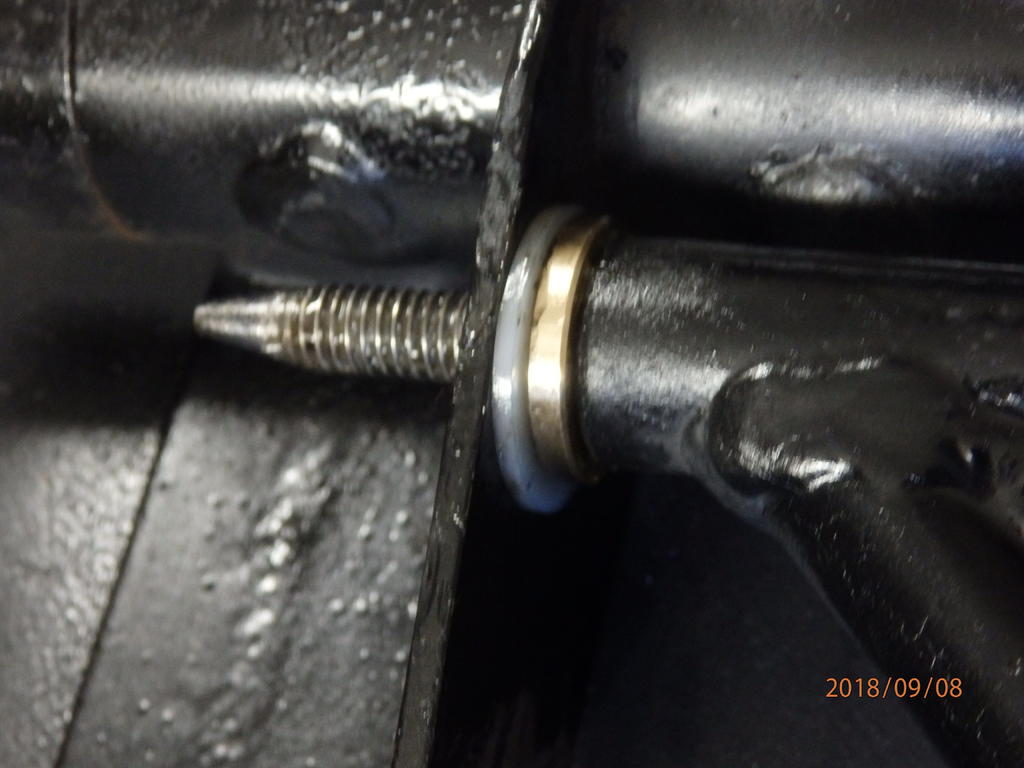
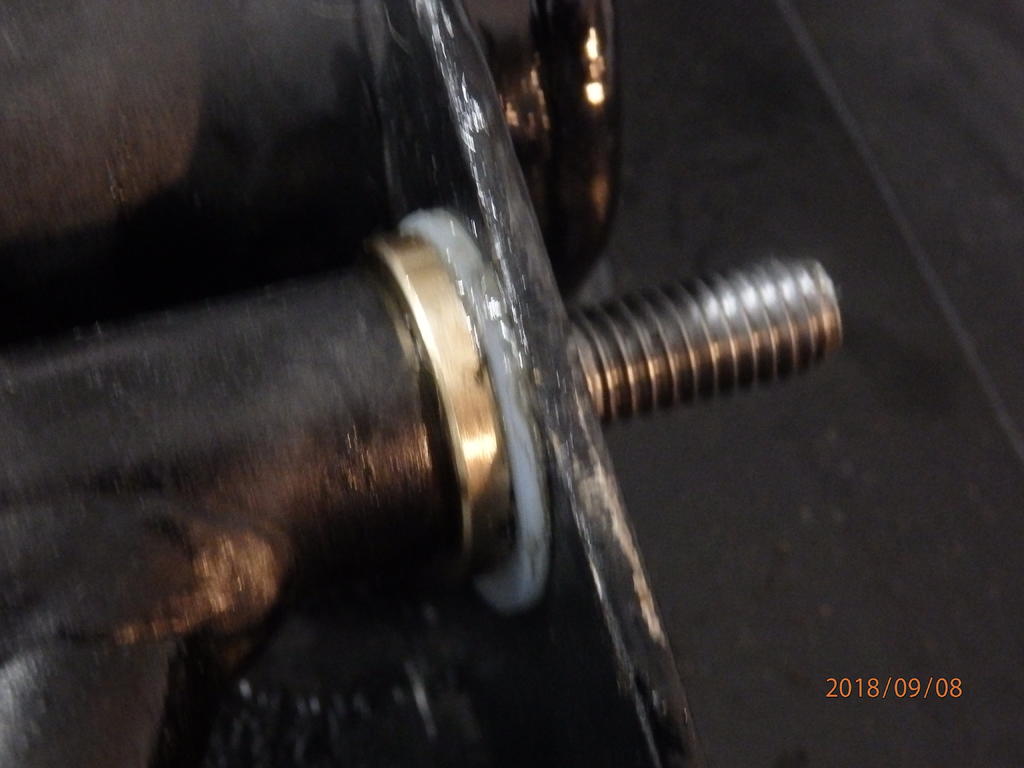
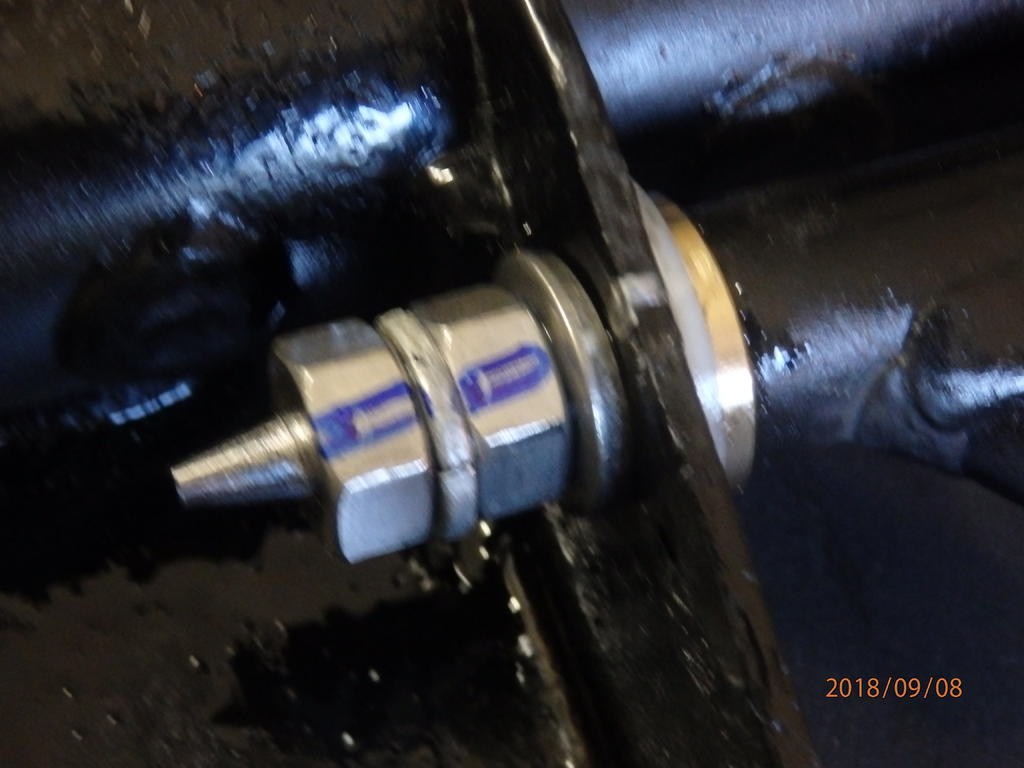
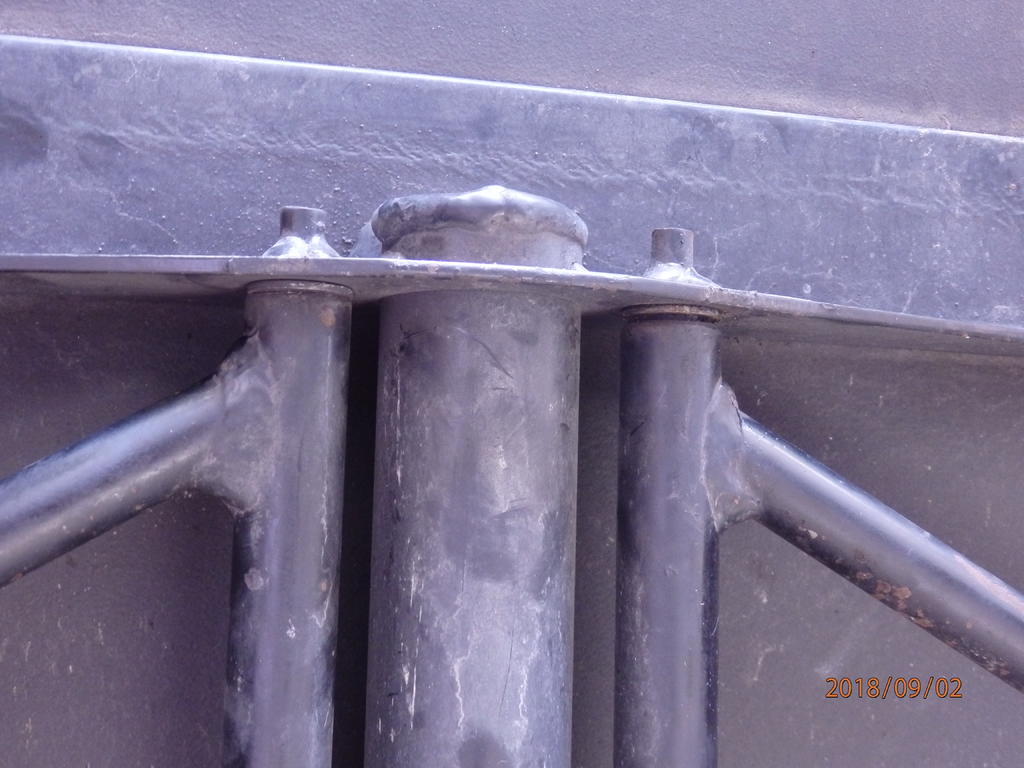
Well the repair/re-build is complete, took it out for about 60 mile ride, over rough roads and high speed interstate, so far no issues and the jam nuts are staying put, will monitor those on upcoming trips and keep a set of spares with me just in case. Pics of completed assembly are below, once I have enough miles on this set up to be confident, I will publish a short on how I did it. If I had to do it again, I would order or make the chassis rods at least 1/2" longer (1.5" over stock length) just to get a few more threads. Nuts are Loktited to the chassis rod and there is a heavy split lock washer between the two nuts, just enough room between the frame member and A-Arm bushings to allow the nylon spacer room to rotate but not move fore and aft ,also not so tight that it is jammed up, still allows allow the A-Arm bushing to rotate on the chassis rod.
-
Bushtec Road Star with broken Torsion bar, Help
M61A1MECH replied to M61A1MECH's topic in Trailer Talk
No, but did not expect it, the trailer is more than 20 years old. -
Bushtec Road Star with broken Torsion bar, Help
M61A1MECH replied to M61A1MECH's topic in Trailer Talk
I heard back from Bushtec today, the bushings they use are urethane impregnated with graphite. According to Andrew Preston the GM they do not normally see those bushings fail like mine at the age and miles of my trailer. He thinks they were contaminated with a chemical or some sort of heat issue. Still think the design leaves a lot to be desired as far as serviceability. -
Bushtec Road Star with broken Torsion bar, Help
M61A1MECH replied to M61A1MECH's topic in Trailer Talk
Yes you have the idea now on how it goes together, I searched McMaster Carr and did not find the rod I wanted, Bushtec has the axle rods ready to purchase so I ordered those, not to expensive and I am sure I have the right material, other than knowing they are some type of steel I have no idea exactly what grade of steel they are or what the hardness is, I am guessing the OD is work hardened to give a robust surface to resist wear and the ones I took out are dead straight to boot, not all rods that diameter are straight. If the Bushtec rods do not work out, I may try tractor supply or other supply houses around town. -
Bushtec Road Star with broken Torsion bar, Help
M61A1MECH replied to M61A1MECH's topic in Trailer Talk
All good methods, but not a lot of real-estate on the ends of the rods for cotter key or R clips, plus do not want to weaken the rod any further, threading them will reduced the effective diameter and reduce the tensile load numbers. Safety wire, maybe, if I can drill the 316 SS nuts I am getting, but still not as secure as a tack weld -
Bushtec Road Star with broken Torsion bar, Help
M61A1MECH replied to M61A1MECH's topic in Trailer Talk
My plan is to replace all 4 bushings, (front and rear , in the left and right A arms). I am going to get new "axle" rods as Bushtec calls them, they go through the fore and aft frame members, the bushings inside the A arm tube ride on the rod. I am going to thread the ends of the rods, shim up between the ends of the bushings and the inside of the frame members with nylon and stainless washers / shims to get a proper fit then secure the rod in place with nuts. With the nuts holding the axle rods in place I can take the trailer to a welder and have the nuts tack welded to the frame to ensure they do not come loose. Should I ever need to service the bushings or shims, I can cut the tack welds off, saving the rods and replace the wear items and reassemble and repeat the tack welding. As far as longevity, much will depend on how quiet the aluminum/bronze bushings are over time, everything that moves will be lubed up as I reassemble, just not sure how long the lubrication will last, the bushings may get to making noise after a while if I can not manage to keep them lubed. The trailer was not designed to easily service those bushings, that is for sure. -
OK All You Rockers And Stoners At The WNY Rally!
M61A1MECH replied to bongobobny's topic in Watering Hole
looking good there Bob. -
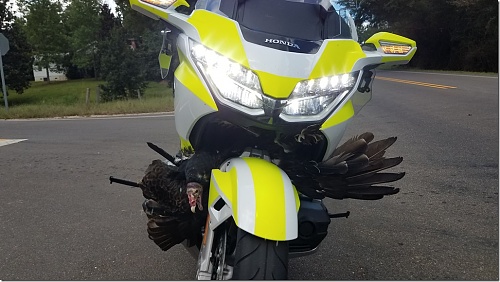
A fellow Goldwing rider in Alabama posted this picture of the aftermath of a bird strike while riding. If you are not familiar with the species, that is a Turkey Vulture one of the most disgusting birds around, nearly had a run in with one on the way to WingDing in Knoxville last week. He said no damage to the bike, could have been real ugly if it hit a few feet higher.
-
Bushtec Road Star with broken Torsion bar, Help
M61A1MECH replied to M61A1MECH's topic in Trailer Talk
Well that got me thinking a bit more, here is a new plan. I will buy the "axle" rods from Bushtec and thread the ends of them and secure the "axle" rods with the nuts and Loctite. I can then make the trailer road worthy enough to pull it to a local welder and have him tack the nuts to the frame member to ensure they will not come off. If I ever have to service the bushings again, it is a simple matter to cut the tack welds and remove the nuts and rods. I just went out and took one of the rods I removed yesterday and threaded one end pretty easily with a hand held die, if I had some real cutting fluid it would have been even easier, WD40 and honing fluid is only so good, but allowed me to prove out a theory. "As for getting the new rod thru everything, did you notice that one end of the original rods was ground to a point to help it find its way thru everything?" Yes I saw that, I figured I could manage the square end, I am sure the point is more to facilitate speed of production than anything. -
Bushtec Road Star with broken Torsion bar, Help
M61A1MECH replied to M61A1MECH's topic in Trailer Talk
Yes , I was having that same thought, the crest of the thread may create fretting and point loading on the ID of the bushing, the other issue will be getting the threads through the bushings and spacers without damaging the bushings and such. The control arm does not have a very large range of motion, but depending on the road conditions, there may be a lot of high frequency oscillation. If I can fill the threads, I can most likely jig the rod up in my wood lathe and get a nice finish. -
Bushtec Road Star with broken Torsion bar, Help
M61A1MECH replied to M61A1MECH's topic in Trailer Talk
Thanks for the input. And I thought about all of that before making my decision. I may investigate a place to put a zerk fitting in, just not sure there is enough wall thickness to get sufficient thread engagement in the tube and no guarantee the grease will go where it needs to go, it is a2 foot long tube to fill up, that is a lot of grease. I plan on sealing the ends of the tubes with compliant spacers to keep moisture out, and will lube the bushings and tube prior to assembly, if needed I can easily remove the tension on the threaded rods and apply lube to the bushings and then re-tighten the whole affair. Just for clarification, the rod that came out is not stainless (based on my very crude magnet test) and it is only .310 in diameter. I looked at the rating of a carbon steel shaft in the McMasterr Carr web site it is 70,000 psi, the rating for 5/16 316 SS threaded rod is also 70,000 psi. The effective areas are different for a solid rod verse threaded rod. I calculated the tensile strength of the .310" steel rod to be approx. 5283 lbs, the 5/16 SS Threaded rod worked out to 4200 lbs, Using a basic rule of thumb that the shear force rating is .70 of the tensile the original steel rod worked out to be 3698 lbs in shear and the threaded rod to be 2940 in shear. So I think I may have lost about 20% of the safety factor. The loaded trailer probably weighs less than 500 pounds and each of the rods support 1/2 of that in a static condition, not sure what implied loading could be when the trailer hits a pot hole, but in my mind there is enough safety factor. But I agree with your hypothesis and would have gone with solid rod if I had a welder handy, but I do not, and cannot move the trailer without the rods being secured. If I find out my plan does not work, I could simply purchase the 5/16 solid rod later and tow the trailer to a local welder and have the all thread swapped out for solid rod and welded in place. -
Bushtec Road Star with broken Torsion bar, Help
M61A1MECH replied to M61A1MECH's topic in Trailer Talk
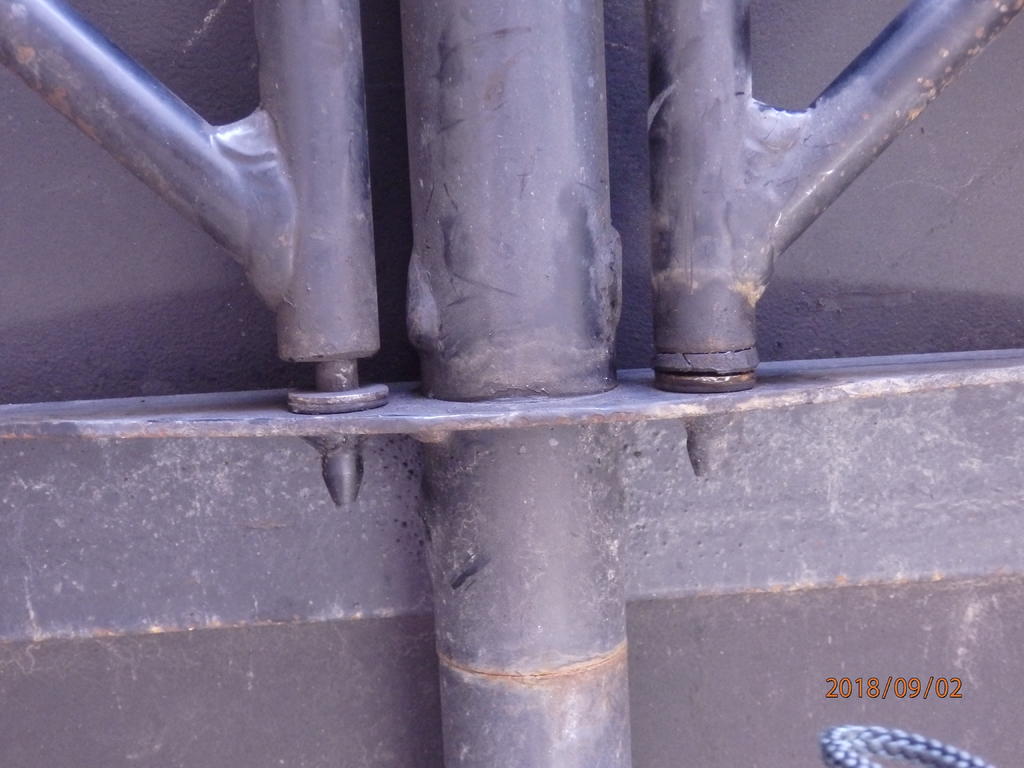
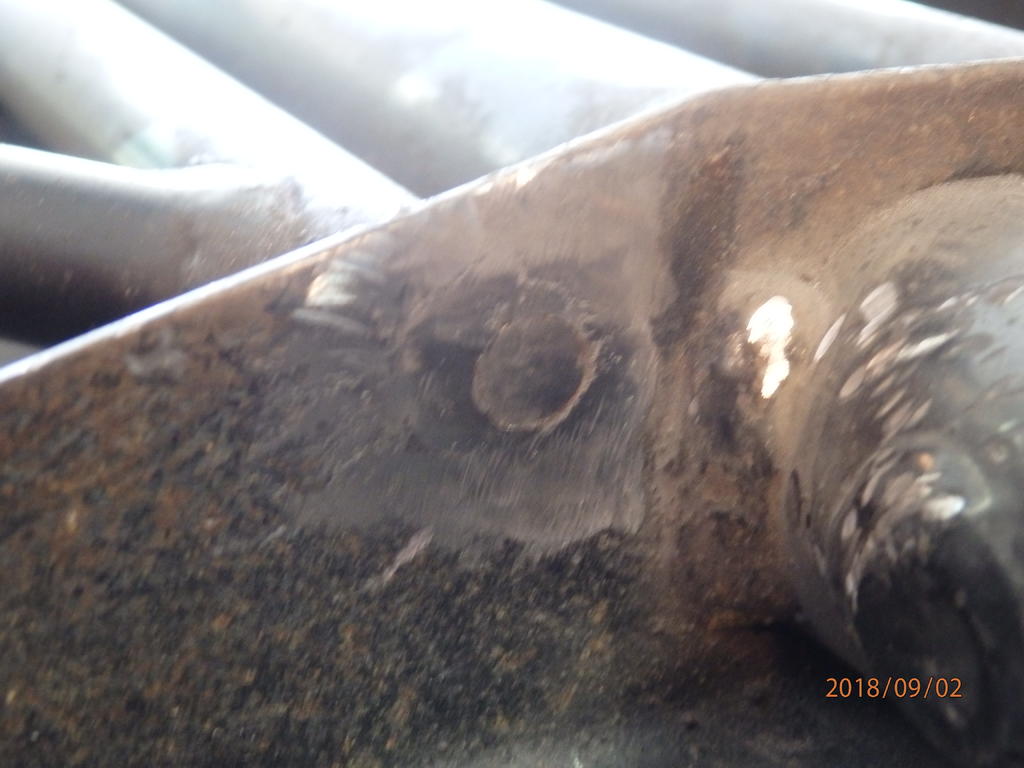
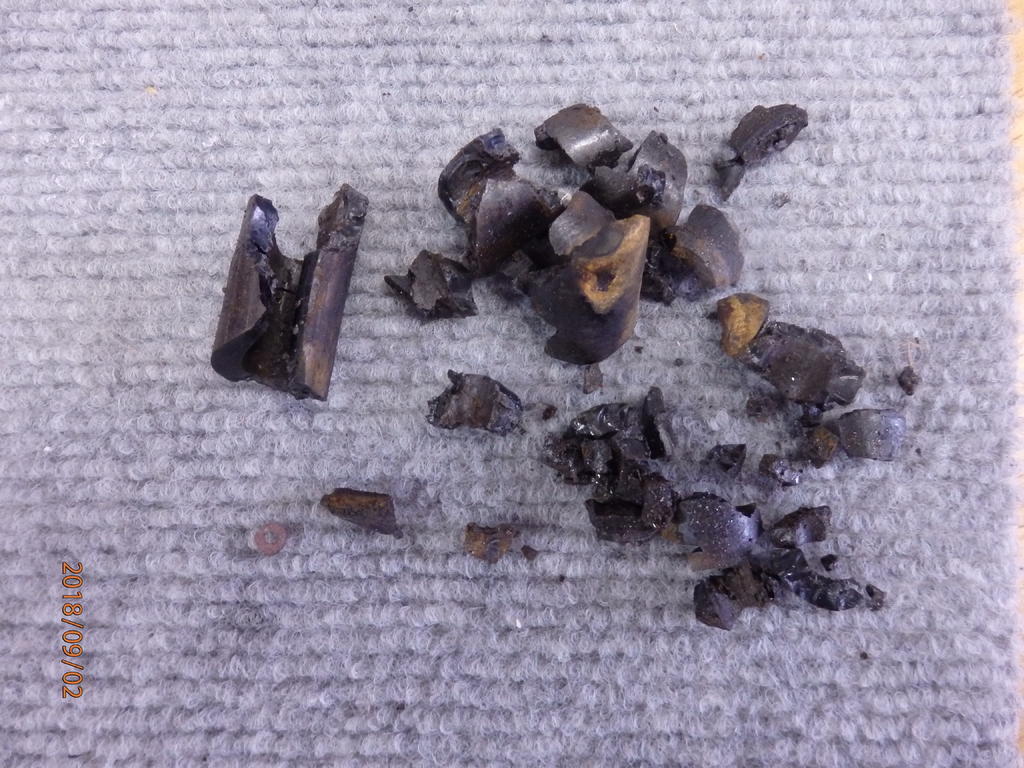
I have the trailer upside down, found out the wiring harness is threaded inside the tongue, so no taking the cargo box off to make this repair. The pins are removed, was not to bad once you figure the best way to do it. I took a dermal with a cut off blade and cut the welded ends off as close to the support plate as possible. I then ground down the residual weld until I could see the outline of the pin. Once both ends were done, I simply took a drift punch and hammer and knocked the pin out as far as possible , then pulled it out the rest of the way with some sturdy channel locks. On the side that was loose and making all the noise , there was nothing left of the bushings, on the other side that was still tight and quiet, the bushings came out in pieces. I have decided to forgo talking with Bushtec and I am going to replace the pins with 5/16" 316 stainless steel all thread, install some marine grade bronze flanged bushings from McMaster Carr and shim up the gaps with PTFE and 316 SS washers as needed to get a proper fit. The all thread will be kept in place with double heavy duty 316 SS nuts and a generous application of blue Locktite. I expect that I will need to re-size the locating holes in the frame to accept the 5/16" (.3125") all thread as the current holes are sized for a .310 rod, but that will come after I receive my threaded rod and check the fit. I am taking photos as I go, so if it all works out swimmingly I will post a DIY Bushtec Bushing repair manual. Attached are some photos of the disassembly.
-
Bushtec Road Star with broken Torsion bar, Help
M61A1MECH replied to M61A1MECH's topic in Trailer Talk
Dion, look at this link this the same issue as I have, http://www.sheriart.net/honda/bushtec I am thinking that if the SS rod is a standard size that can be threaded I can skip the welding of the rod to the frame and make any future replacements easier. -
Bushtec Road Star with broken Torsion bar, Help
M61A1MECH replied to M61A1MECH's topic in Trailer Talk
OK, I did some more research over on the Goldwing site and then reinspected my trailer and here is what I found. What I originally thought were solid cold rolled rods with turned down ends running fore and aft parallel to the main frame tube are actually hollow tubes with a long "pin" running down the center, the pins are what go though the frame supports and are welded in place. There are supposed to be bushings in each end to locate the pin and tube relative to each other. Looks like the bushings on the left side of my trailer disintegrated and that allowed the tube and wheel to flop around. Evidently the fix is to remove the welds and remove the "pin", replace the pin with a new one and install new bushings and weld the pin back in place. I need to talk with Bushtec on Tuesday to see if I can purchase the parts I need to do both sides, also want to know if it is possible to thread the ends of the pins and secure them with nuts instead of welding. That would make future replacements much easier. -
Bushtec Road Star with broken Torsion bar, Help
M61A1MECH replied to M61A1MECH's topic in Trailer Talk
Not at the spindle, but at the aft end of the trailer where there is an L bracket where both left and right torsion (sway) bays are anchored. I pulled it home today from Spartanburg, SC to Edgewater, FL, 490ish miles. Set my mirrors so I could see the trailer and the left wheel for any funny stuff starting, no issues, ran at interstate speeds and checked it at every stop. Tomorrow I will take the cargo box off and photograph the issue. If I have room to get tools in the space I think I have a fix worked out, but still want to talk to Bushtec first, but they are not open again until Tuesday. More to come. -
On my way to WingDing I thought I heard some clunking frommy trailer, I did not see anything obvious and passed it off as the hitchclunking. Today when I stopped at Spartanburg, SC on the way home fromKnoxville, I grabbed the left wheel and it was "floppy", I found thetorsion bar is broken at the weld where it attaches to the frame. The trailerpulled fine all the way up to Knoxville and down here to Spartanburg, so now Ihave a couple of questions. 1) Has anyone else had this issue? If you did what did youdo to repair it? Looks like it could simply be welded back in place. 2) Any thoughts on how safe it is to tow this the 480 or somiles back home. Thanks for any thoughts and inputs.
-
Greasing rear wheel pins and splines
M61A1MECH replied to frankd's topic in Venture and Venture Royale Tech Talk ('83 - '93)
So check out the read only technical section for the Royal Star Venture here on VR, here are two links for rear end maintenance. https://www.venturerider.org/forum/showthread.php?13263-Rear-Hub-Lubrication https://www.venturerider.org/forum/showthread.php?1705-Rear-End-Noise-Yamaha-TSB. Same as TSB M2005-015 If you do not have a copy of TSB M2005-017 PM me and we can work out how I can send you a copy. Update: Sorry I just noticed that this thread is in the GEN 1 forum, not Gen 2, my bad, but TSB M2005-017 applies to all shaft driven models from Yamaha. -
Steven G has very good advice there, many of the Ventures have been known to have Regulator/Rectifier failures, they tend to fail in a manner that over charges the battery and then bad things can happen. That happened on my 2007 Venture, boiled the battery, swelled up to where I almost could not remove it from the bike. Charging voltage should be around 13 to 14 volts as I recall, ay more or less is cause for concern.
-
Brake lights on Star venture
M61A1MECH replied to ZOEYDOG's topic in Star Venture and Eluder Tech Talk ( '18 - Present)
That should work nicely, and they are using POSI-LOC products to make the connections. -
Brake lights on Star venture
M61A1MECH replied to ZOEYDOG's topic in Star Venture and Eluder Tech Talk ( '18 - Present)
So just wondering how you made out with this idea? One problem you may run into is what I ran into when I first started building light bars for the2nd Gen Ventures. I used the same 4 LEDs on either side of the center LED as brake and turn signals, problem was if you held the brake lever back or used the foot pedal the brake the lights stayed on constant, the brake did not allow the LEDs to go out when the turn signal cycled. I tried to compensate for that by adding some dropping resistors in the brake circuit just before the LED light bar, that way you still got the brake signal to the light bar but at slightly less than full brightness, when the brakes and turns were both applied the affected 4 LEDs would cycle from full bright (turn signal power on) to reduced brightness (brake power applied) so there was still a turn indication working. -
Flashing Brake lights for SVTC
M61A1MECH replied to johnnyroid's topic in Star Venture and Eluder Tech Talk ( '18 - Present)
If you do tap in to the wiring please use these types of taps, http://www.cycleterminal.com/posi-lock-connectors.html. Those wretched Scotch-lok blue crimp on pieces of **** should never be used in my opinion. -
Member Down
M61A1MECH replied to Freebird's topic in Inspirational, Motivational, Prayer Requests, Etc.
Prayers up from Florida, heal fast. -
grubsie Here is an issue had on my 98 Tour Classic, one turn signal was flashing fast, when you watched with the lens on it "appeared " to be working but flashing fast. I swapped bulbs left to right and the issue followed the bulb. When I watched them flash with out the lens I saw that the running light filament on the suspect bulb was actually flashing not the turn signal segment. Evidently there was some sort of back feed and the running light filament was seeing the voltage meant for the turn signal, it must have had less resistance than the turn signal filament which caused the high flash rate, once I changed out the bulb all went back to normal and I never had any more problems. Just some food for thought