


PGunn
-
Posts
327 -
Joined
-
Last visited
Content Type
Profiles
Forums
Gallery
Events
Store
Everything posted by PGunn
-
Just went through the fuel pump change (Thanks Freebird for the article) and the symptoms of what mine was doing are the same. Now before you dig too deep one simple test is to shut the gas off unbolt the fuel pump (under left side cover) next figure out which line is the one coming from the gas tank and remove the other one and be careful gas will run out. Now plug a hose onto it and put it in a bucket or something. Now turn on the gas back on then turn on the key the pump should pump like mad. Now if it does not first check the connection and clean then test again. If it is still slow, good test put your finger over the hose end and see how much pressure you have or if you have a pressure gauge it should be around 5 lbs. If after all that and the pump is not pumping or has really low pressure replace the pump.
-
Cheap Tach Accuracy
PGunn replied to Bodaggit23's topic in Royal Star and Royal Star Tour Deluxe Tech Talk
First line the picture will show you what you need. I picked up the parts at Radio Shack. http://www.venturerider.org/forum/showthread.php?t=29859&highlight=tach+install I am still using the orginal parts I installed and no issues. -
Cheap Tach Accuracy
PGunn replied to Bodaggit23's topic in Royal Star and Royal Star Tour Deluxe Tech Talk
You need to connect to 2 coils usually the 2 on the right side under the tank. If not you get 1/2 of your true reading.... Take from experience.... -
These are the ones I bought a few years ago for my 2006 Venture and they are still going strong.... http://www.shadetreepowersports.com/Yamaha-Star-Saddlebag-Lid-Organizer-p/85-95.htm Our Price: $39.95 - saddlebags http://www.shadetreepowersports.com/Yamaha-Star-Trunk-Lid-Organizer-p/85-96.htm Our Price: $34.95 - trunklid
-
There are plenty of H3 led bulbs out there but the big issue is which works and which does not work. What your looking for is an H3 that is not a projection bulb because the the magnifier on the end of the bulb will put the focal point way off. The best ones to use are the ones that look like a turn signal bulb but with an H3 mount.
-
Well with the trailer the big draw will be the convertible top hydraulics to open and close the top of the trailer with or without extra baggage loaded (it will easily lift a few extra pounds on the top of the trailer. The rest will be lighting and possibly a sound system and a power converter so plug it and charge the battery much like in a travel trailer. From what I have laid out so far the room needed for the complete setup is less than one would think. One concern is leaking HYD fluid but I think I have that taken care of also and as always pictures to follow when I start really getting into it.
-
I still may try it but it will be a while before I get to them, worst case I can use them in the wife's car or swipe hers and try them... LOL yea that would go over real well. Here is what I do know and what I am trying to do.... 1) first thing is get the draw from the lights as low as I can. 2) adding the load resistors isn't that big of a deal really. 3) CAN Bus lights have the resistor ALWAYS in play, In other words the load is constant. 4) LED has lower draw as a constant and only goes up when the blinker / flasher is activated. Now the reason for all this is I am putting together a HF Trailer with a few options which will require a battery to carry the load for some "options" I'm including and will need to charge or keep charged (trickle charge) the battery when riding. I have already changed out the driving lights for custom projection LED's and I am working on a custom dual projector LED headlight as a plug and play type of install. So by doing what I have done so far the draw has dropped quiet a bit already.
-
And after hours of looking and reading I still don't or can't figure out why you can't use Can Bus lights in a non CAN Bus system. I'm thinking it is because that resistor is always in use which would defeat the purpose of changing over to the LEDs to start. Thanks for the help guys....
-
I have seen that but can't find a real reason why. I'm thinking if you already have a car say that already has standard OEM LED's and you put in an CANBus LED it could cause a system over load due to the added resistor in the CANBus? Guess I'll have to go back and search some more on that issue as to why not. I'll post it here when I do.
-
Mike first thanks for you reply, I know what your talking about and is one option but I'm looking for a way to keep it as OEM as I can. With replacing the sockets for LED Light Bulb Connector Wedge type I'll be putting the matching ends on the new light socket leads. Now there are I believe 2 ways around this and one is what you explained and the second is put a load resistor in line to each bulb. Now my question in a shorten version is the CANBus bulbs have that load resistor built into the bulb and if anyone has tried using these on their bikes yet to see if it does in fact makeup for the load resistor. I'll have to order one and a socket and test it I guess.
-
I have been looking at these and found a whole bunch of different answers into the use of them. Now from my understanding they contain a resistor to bring the load equal to what the load would be from a standard bulb. This is so the computer will be able to tell and display when the bulb burns out. I know a little more involved than that but I'm sure you see where I am going here. Now has anyone tried using these on their bike without load resistors to make the flasher flash as it should? I'm thinking if the built in resistor brings the load up to where it should be they "should" work on the bike. I will be replacing the sockets in my lights to upgrade them to current "Blade" type bulbs and I'm looking at different light bulbs to use in them. One thing I did find is if you do what I am planning you will need a bulb that will "fill" across the inside as much as it can.
-
Big Bike Parts LED HL
PGunn replied to rutman's topic in Royal Star and Royal Star Tour Deluxe Tech Talk
Squidley is 100% correct on this also I tried the LEDs I bought and quickly found out that in the driving lights the projecting light beam was more a mismatch and didn't give me what I was expecting. I ended up going with projection housings in place of the standard lens which gave me even more than is was expecting. -
Big Bike Parts LED HL
PGunn replied to rutman's topic in Royal Star and Royal Star Tour Deluxe Tech Talk
I have been doing a lot of research into this and found that even though they may say "80 Watts" they are not even close to that wattage see what you need to check are the lumens between the LED and a standard bulb. A lumen is similar to the measurement of candle power when it comes to lighting. Here is a direct easy comparison look at a 55 watt sealed beam headlight, a 55 watt Halogen, and a 55 watt HID. in the order I have them each has a "brighter" beam of light even though they are all rated at 55 watts but if you were to check the lumens between them you will see that in the order in which I have them they get progressively "brighter" because even though they are rated at 55 watts they are totally different when it comes to the amount of light produced. I hope this is starting to make sense here. So back to the original ask are they really 80 watts well they may be when you compare the lumen output of a sealed beam 80 watt bulb to the LED they are the same output. So I really think the only reason they rate the LED and others in the wattage like they do is to remove the confusion between the different types of lights out there. Keeping that in mind an LED that is equal to a standard light bulb is using less wattage than the standard so an 80 watt LED may really only be 20 watts but it's output is equal to an 80 watt bulb. "Luminous efficacy is the measure of the visible light from a light source. The maximum level of efficacy from lumens is 683 lm/W. A light bulb light source is measured at 10 to 15 lumens per watt. A compact fluorescent light can produce 50 to 75 lumens per watt. LED lamps provide 50 to 100 lumens per watt. The amount of watts per lumen depends upon the type of light source that is being measured. " Reference: www.efi.org http://www.ledlightingexplained.com/led-lighting-myths/ http://www.ledrunlights.com/ledlights.html I just added this I swapped out my Halogen 35 watt driving lights for some custom made LED driving lights with a 55 watt bulbs. Now before the swap my bike voltage would drop a good 1 1/2 volts when I turned on the halogen lights. I swapped out the Halogen ones for the "larger" LED lights and now if it drops a 1/2 a volt it is dropping a lot. So I went from halogen 35 watt to 55 watt LED and I am putti9ng less o0f a load on the charging system. -
"I have an Dell optiplex 620 that a church asked me to take and wipe the drive on and I have not yet been able to find a Win7 audio driver for it. Everything else has worked. I suppose I could install an aftermarket sound card." Did you try the Windows Vista drivers doing a manual upgrade to the soundcard through the management console? I have done this quite a few times and it does work often.
-
I have a Dell D630 with 4 gig of ram running windows 7 ultimate 64 bit just fine. It all depends on the hardware your using and if it is compatible with the version of windows your using. And yes even M$ will tell you it won't work (like my Dell) so do some Googling on the hardware because sometimes a memory upgrade is really all it may need.
-
Thanks and I did....
-
I think I got what your saying and something like that might work. A blind threaded hole in the center of the plate on the back side, screw a threaded bar into it (Loctite) pass the bar through where the original lightbulb would have gone a backing plate there (to "fill" the hole) and tighten a nyloc nut to pull it all together. That would work very well thanks for the idea. I should then be able to reattach the chrome ring around the bucket and over the mount plate like it was to start with a little moding.
-
Ok now for the headlight.... With the stock bucket the lens is glued into the bucket and all you need to do is apply some heat and the lens will come out. Next I will be fitting an aluminum plate in place of the lens. The plate will have holes bored through it in lets say just for discussion 2 places side by side. In these holes I'll be pressing the projection lamps into them much like I did my driving lights. Now with the 7" aluminum plate I can place 1, 2, 3, or maybe even 4 projection lamps depending on their size (diameter). Now when I paint the plate to match the bike it "should" look good or at least I hope so. I have a few Ideas on the plate also such as curving (convex or concave) the outside face but the holes will be bored straight through so the shape of the outside plate won't affect the beam of the light but will give it a nice match to the shape of the faring. So the hunt continues..... LOL
-
I bought these off EBay http://www.ebay.com/itm/190811615414?ssPageName=STRK:MEWAX:IT&_trksid=p3984.m1423.l2649 Removed the Halogen bulb and replaced it with a 55 watt LED (not an HID) I then bought a piece of 4 1/2 aluminum tubing with a 3 1/2 bore turned it in a lathe into this (pic #1). Next I had to modify the back of the lights to have the needed depth so they wouldn't hit the back of the driving light case(Pic #2). Next I used a piece of 1/4 neoprene as a fill between the chrome light ring and the aluminum adapter (picture #3). The press fit was easy and one thing to remember is to push it through about an 1/8" too far use a razor blade to trim the outside rubber to the adapter ring then press it back into place and trim the inside flush (pic #4). Finished with the exception of need to be painted to match the bike. (Pic #5) Difference between the original driving light and mine. (Pic #6)
-
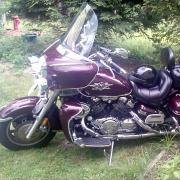
I'm looking for a used headlight, the bucket is what I am after. The lens can be broken or cracked does not matter. My plan is to mount 2 LED projection lamps in place of the single lens so they will match my driving lights I just finished making. Attached are the LED projection lamps I put together.
-
You mean to tell me after ripping out the tape player and installing the gauge package there really was a use for that space without modifying anything??????
-
State officials project $67 million a year from taxes on marijuana sales. These consist of the existing 2.9 percent state sales tax (plus local taxes), an additional 10 percent state tax on retail marijuana sales, and a 15 percent excise tax on the "average market rate" of wholesale marijuana. In Denver, that means a $30 eighth of pot (1/8 oz.) will have about $8.59 in taxes tacked onto it, or about a 29 percent overall tax rate. http://taxfoundation.org/blog/colorado-begins-legal-marijuana-sales-collecting-marijuana-tax At the rate they are taxing it makes me wonder who the real "dealers" are.... I see nothing wrong with it just so the person using it stays put for 5 or 6 hours before hitting the road....
-
Why not go with an Android and run Torque with a Bluetooth connection to the OBDCII. The Torque app is a whole $4.50 and it allows "tuning". I just picked up an Android with a 7" screen Bluetooth, Wi-Fi, FM Radio and GPS along with other options for $108.00 and (it is also a phone if you want to use it as one). Small enough to use on the fly or dash mount for monitoring.
-
Ok here are some photos of the parts used..... the 4th one shows how far the projector light sticks out but it has about another 1/8th of an inch to go.... Oh yea you can still use the lens shades also.
-
I'll pull it apart tonight and post a picture of the parts and what mods have been done to everything. I haven't pressed it together yet because I want to paint the ring I made to match the bike. The best part is once the ring adapter is made it's really up to you what light to put in it. Oh and Bob one guess what the second project is because I am tired of waiting on the person who said "Sure no problem I can do that for you".