-
Posts
327 -
Joined
-
Last visited
Reputation
17 GoodAbout PGunn
- Birthday 03/08/1953
Personal Information
-
Name
Paul Gunn
location
-
Location
Holbrook, MA, United States
Converted
-
City
Holbrook
Converted
-
State/Province
MA
Converted
-
Home Country
United States
Converted
-
Interests
RC Trucks
-
Bike Year and Model
Venture 06
Recent Profile Visitors
The recent visitors block is disabled and is not being shown to other users.
-
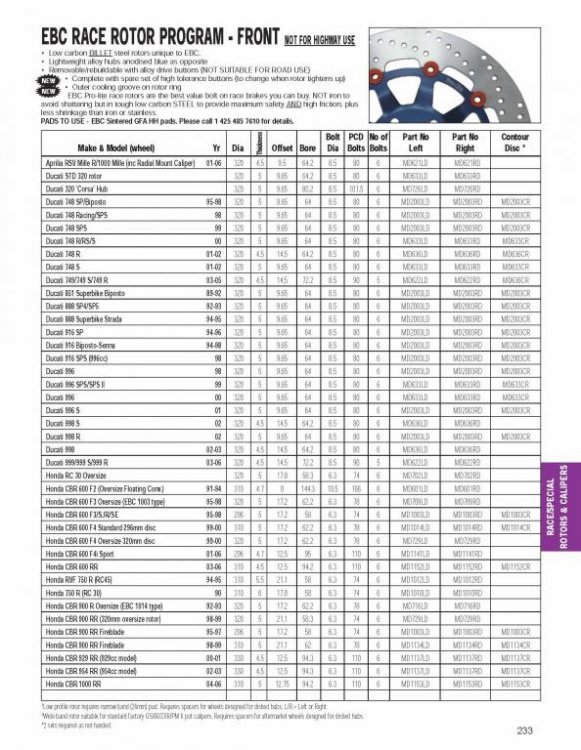
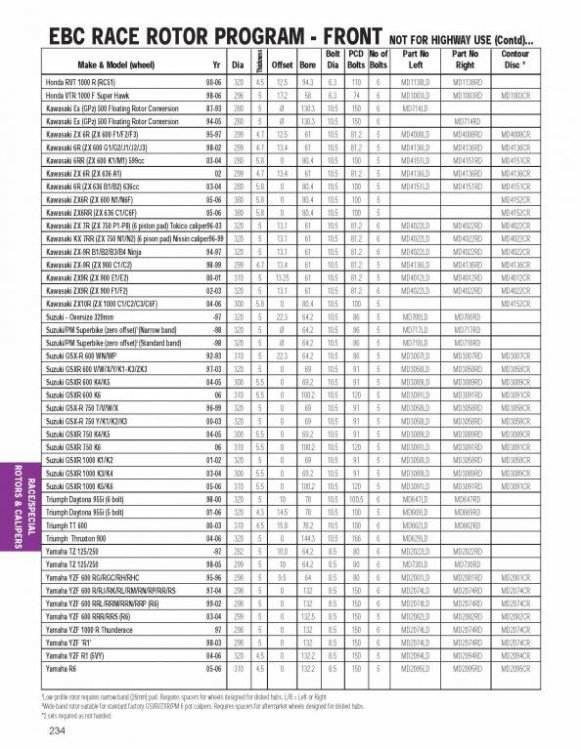
Please ignore the "R4" edit I did that is one of the side effects from the concussion I received from the accident. I have had issues with it but it is getting better, I'm driving my wife nuts sometimes saying one thing than later changing what I said only to realize I am wrong and yes it does suck. Yamaha YZF ‘R1’ 98-03 298 5 0 132 8.5 150 6 MD2074LD MD2074RD MD2074CR Yamaha YZF R1 (5VY) 04-06 320 4.5 0 132.2 8.5 150 5 MD2094LD MD2094RD MD2094CR Yamaha YZF-R1 07-14 6-piston, radial-mount front brake calipers with 310mm rotors http://www.cheapcycleparts.com/page/yamaha-r1-parts-specs) Yamaha R6 05-06 310 4.5 0 132.2 8.5 150 5 MD2095LD MD2095RD MD2095CR So from what I can find searching is from 98-03 (4 pot) rotor size is 298 mm, From 04-06 rotor size is 320 mm and from 07-14 rotor size is 310 mm and the R6 rotor size is 310 also.
-
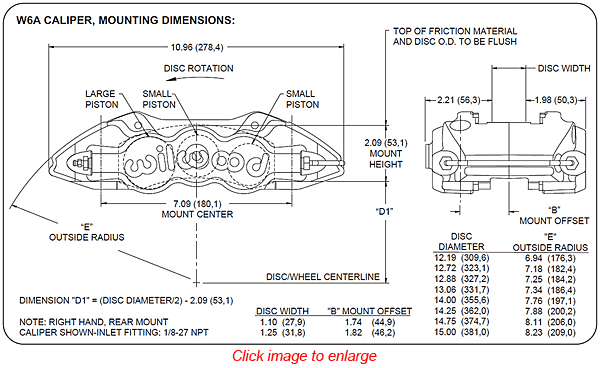
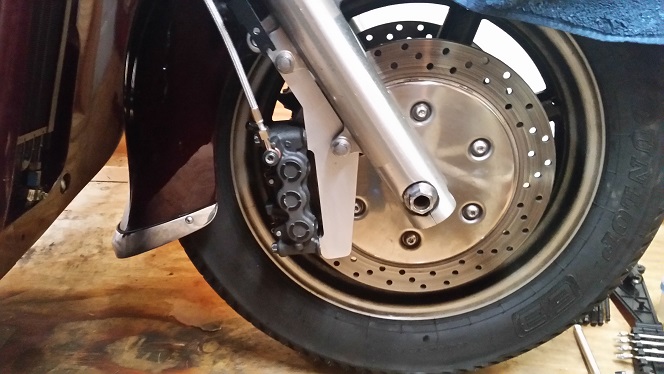
Front rotor diameter on a R1 is 310 mm which is a difference of 12 mm or 6 mm per side or about .23 of an inch. The end slots of the caliper sits about 1/8 th of an inch off the OD of the rotor with the pads sitting below the OD of the rotor. Now on a car your diminitions are correct below is the sizes of a car caliper which is at least twice or real close to twice the size. I do understand your concern but as I said I put at least 1500 miles with no issues and pad ware was just as it should have been no stepping on the outside edge of the pads
-
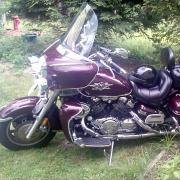
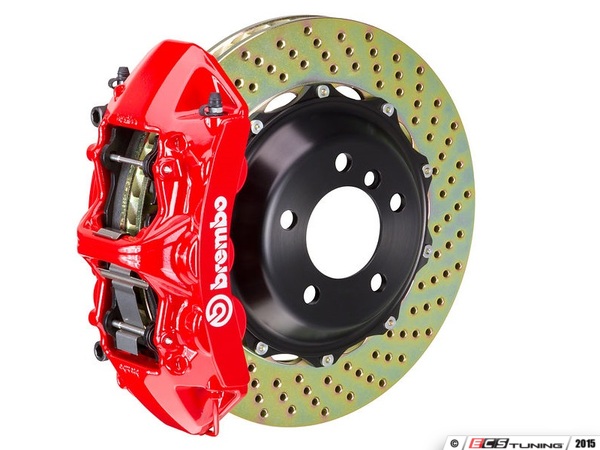
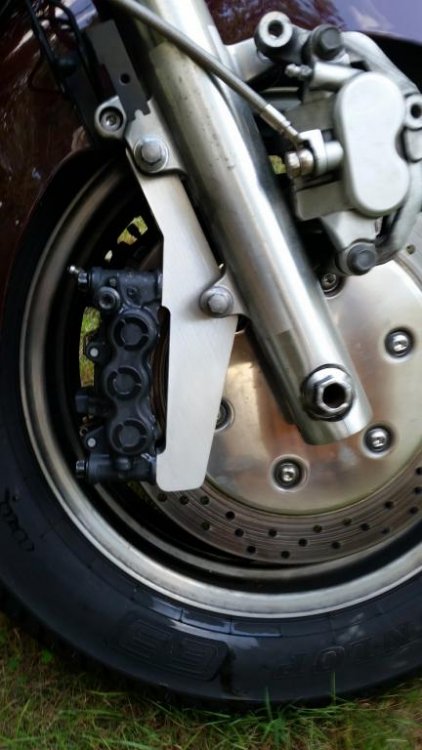
The pads make full contact it was one of the things I was most concerned about, it looks like the angle I took it at is causing the question it isn't a real straight on picture like the one you posted. The accident was completely my fault had nothing to do with the brakes or anything else, driver error only. I had the bike leaned over so far the RK muffler was lifted the back tire up which was when things really went bad.... With the difference between the 2 R1 calipers the 6 pot has 2 pads per side (4 in total) one covers 2 of the pots and the second the 3 pot giving more surface contact on the pads and rotor. and yes these thing make the OEM calipers on the Venture look under size.... This is from when I was testing fit....
-
No kit but let me explain why, Last December I was out for a ride on my Venture and due to my fault, took my eyes off the road for about 5 seconds and got caught in a progressively tightening curve lost control and totaled the bike, got 2,000 for it. Well long story short I broke my right foot, right ankle, right collar bone, right scapula in 7 places, and my neck at the C2 vertebrate. So my riding is done for good because of my neck and according to everyone in the medical field I'm lucky to be walking with no after effects. I did have these done at a CNC shop in Canada and I'll be happy to give you the guys info he also told me with a bigger order he could get the water jet cut saving on a lot of the machining. He charged me 120.00 for one set. I also did a lot of checking the legal aspects of a kit and the liability alone would drive the cost way up so that is why I posted the print. I figured the group here could get together and get a volume discount saving some money. Also if you buy a used set of calipers I highly recommend that you rebuild them before installing them. The R1 lines are too short to reach.
-
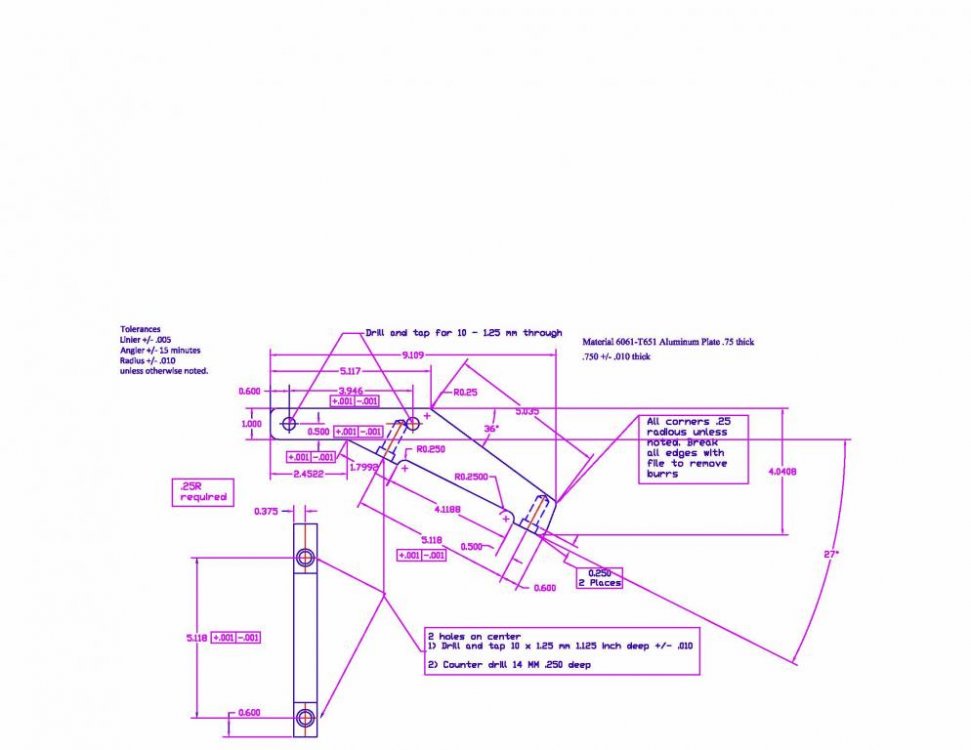
They are made out of 3/4 inch thick Aluminum plate all corners inside and out call for a 1/4 inch radius. I had to buy 18" lines and banjos for both sides. I couldn't find a set with attached banjos with the correct geometry between the ends without putting a twist in them. The stock mounting bolts are retained also for the tube mount and for the caliper mount (bolts are from the R1).
-
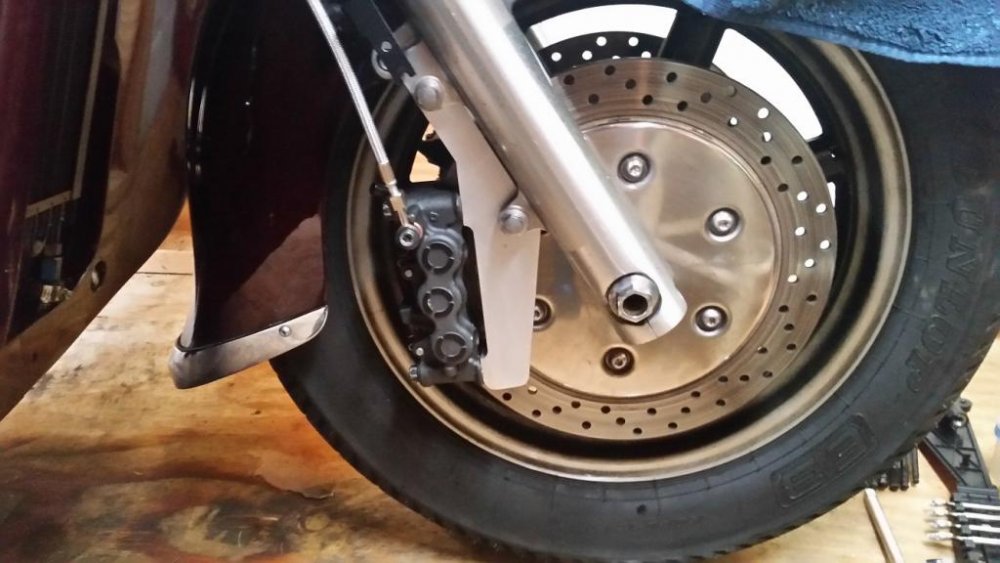
Here is a shot of them mounted on my bike. I put about 1500 miles on them to test and not a single problem. These are plain nothing fancy but I'm sure they can be machined a little more to make them better looking. The mounts are the same for both sides, there is no left or right.
-
Here is the adapter I came up with to mount the R1 6 pot calipers to the Gen 2 Venture and the RSTD. The bolt spacing is 130 mm which will also allow the Brembo caliper to also be mounted as long as they are for the R1 and have a bolt spacing of 130 mm.
-
Those I believe are 5 mm screws as a temp fix try Home Depot they carry metric screws. Once you have the right one look on EBay for stainless ones to replace the Home Depot ones which will rust in time. You can coat the steel ones with light grease to hold off the rust over the short term
-
Ok thanks....
-
A quick question on this do I have to drain the oil before pulling the stator side cover? I just changed it and by just I mean last weekend. The problem at hand is the bike starter drive is jammed or appears so. The bike was running fine no issues after changing the oil, let it run for a good 1/2 before shutting it down. The starter was turning and all of a sudden a grinding noise from the starter turning and a "Ding" like a steel on steel ding and than everything locked up in all time wise it took about 5 to 10 seconds to come to a halt. I have looked around on the web and it looks (hopefully) like the starter clutch or one of it's screws is the issue and I'm hoping the screw has the gears jammed.
-
I bought a backup camera that is wireless to my cell and no the image is correct and not reversed
-
No problem and it should have been pointed out that 1) read all the way through before you respond also if I remember right there are 2 versions of the first gen out there so the title could be misleading also.....
-
My fault for not reading the whole thing and for going by the title of the post.....
-
Having a similar issue in the past I would pull the ignition switch clean the contacts with a pencil eraser and reassemble. Test to see if that fixed the issue if so I would do the relay install to take the load off the ignition switch and apply it to the 30 amp relay. Another quick check is pull the 2 wire connection to the ignition switch and wire a switch across the 2 contacts coming from the bike not the 2 going to the switch turn on the ignition switch than the jumper switch if all works well it is the ignition switch that needs to be cleaned.


