-
Posts
3,621 -
Joined
-
Last visited
Content Type
Profiles
Forums
Gallery
Events
Store
Everything posted by Prairiehammer
-
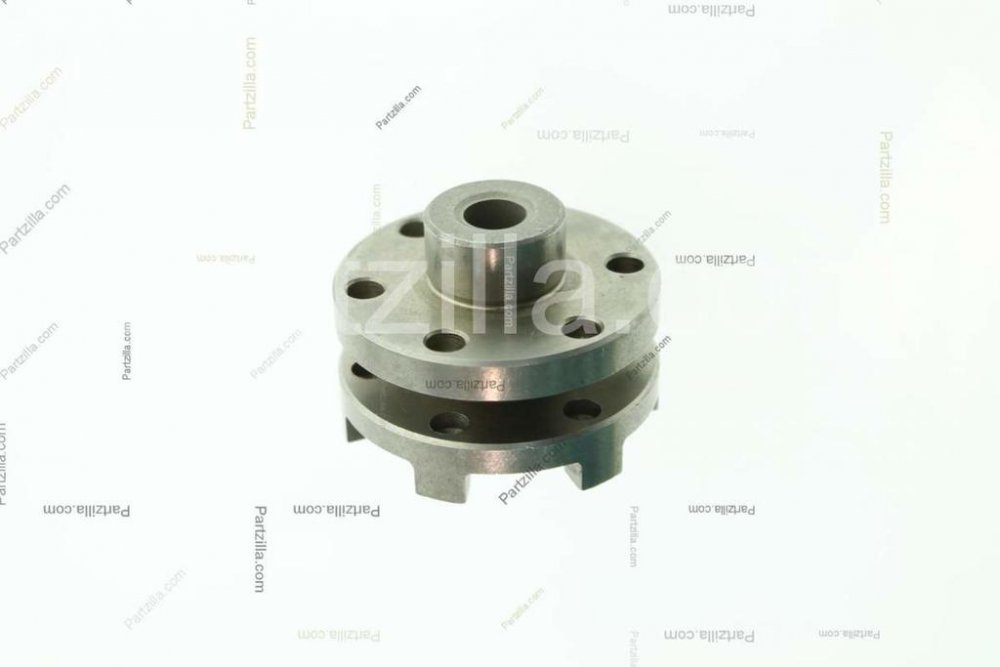
Actually, the newer style shift cam segment appeared for the first time on the 1998 XVZ13 and the 1999 VMX. While your shift cam from Randy may indeed have come from a 1993 XVZ, it had been upgraded after the 1993 Venture was manufactured. The newer style shift cam segment DOES have pins. The pins are captured by the one piece segment versus the sheet metal side plate on the old version. Sometimes the ears on the old side plate became bent outward, allowing the pin to fall out.
-
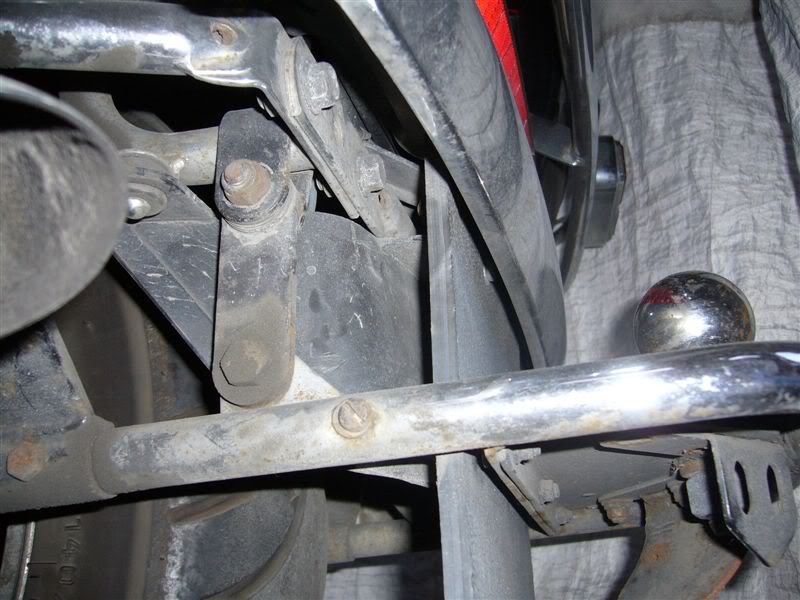
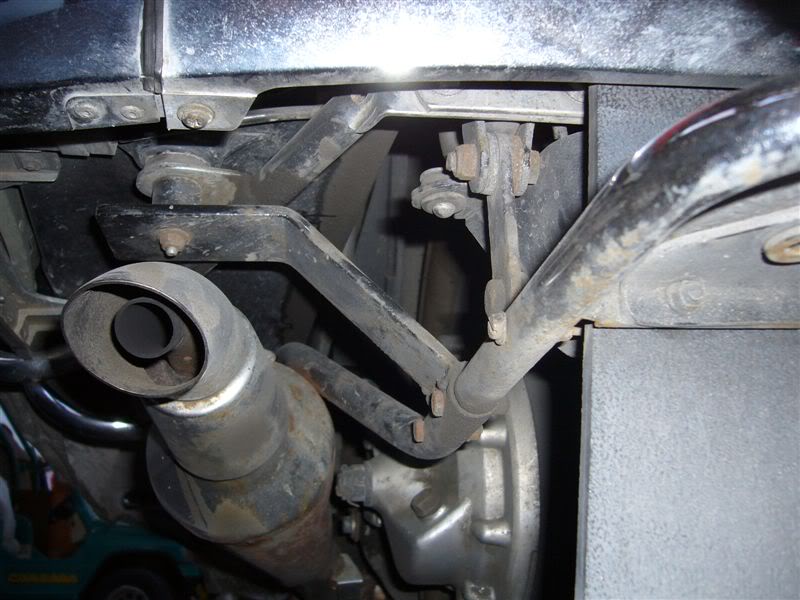
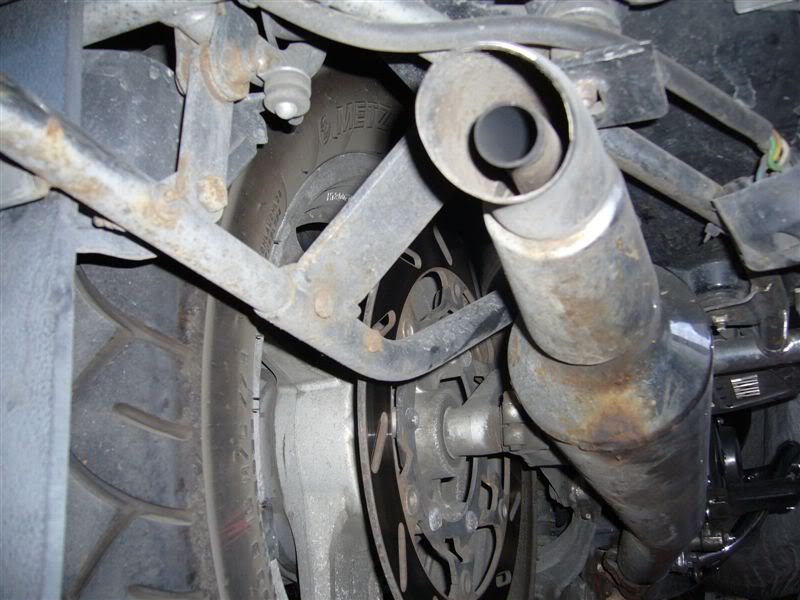
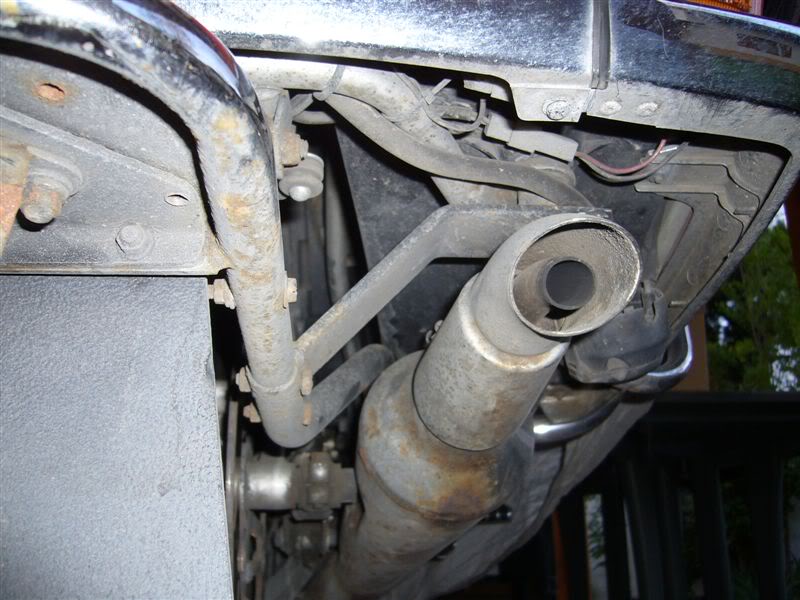
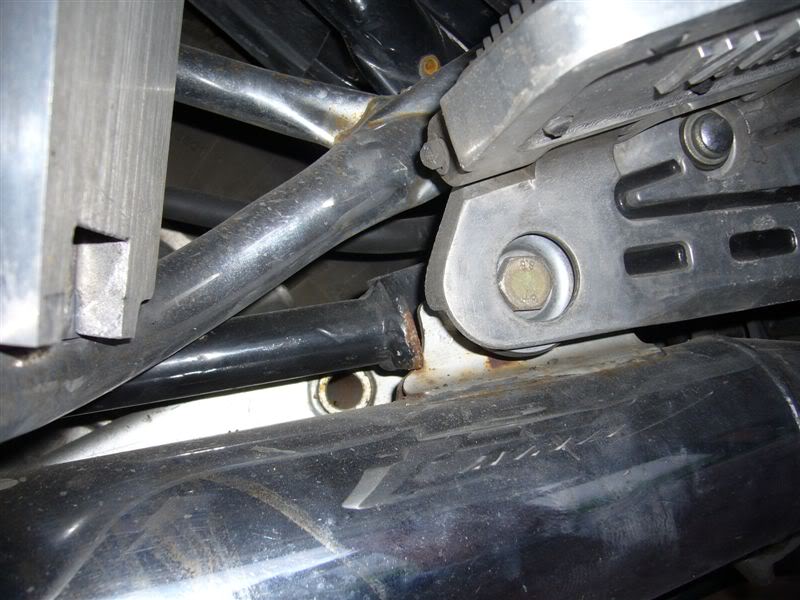
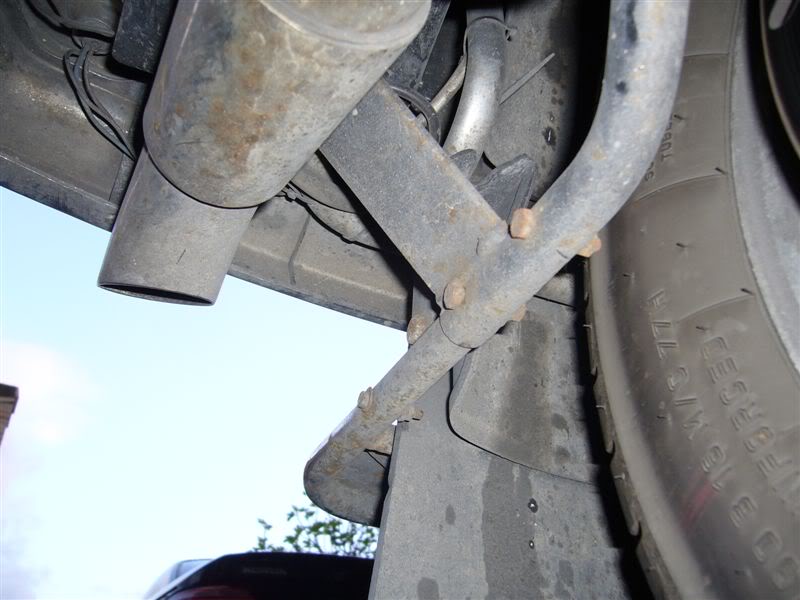
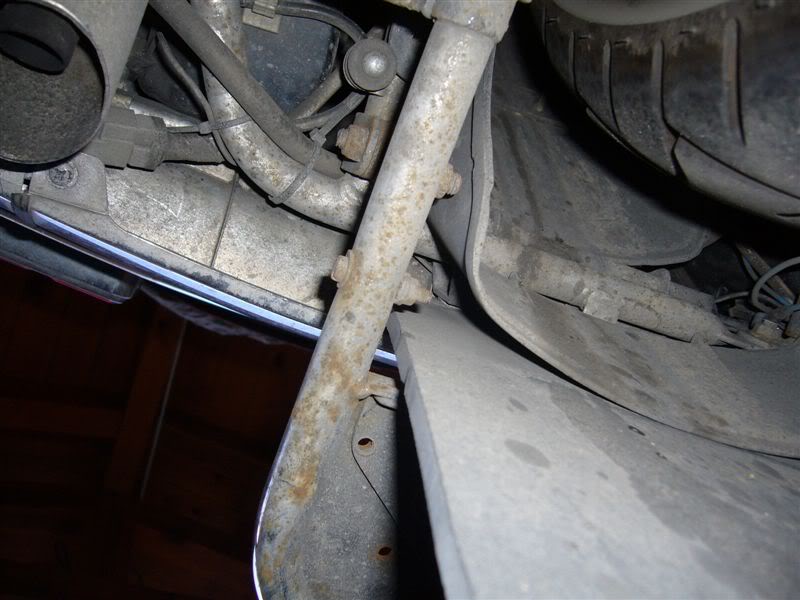
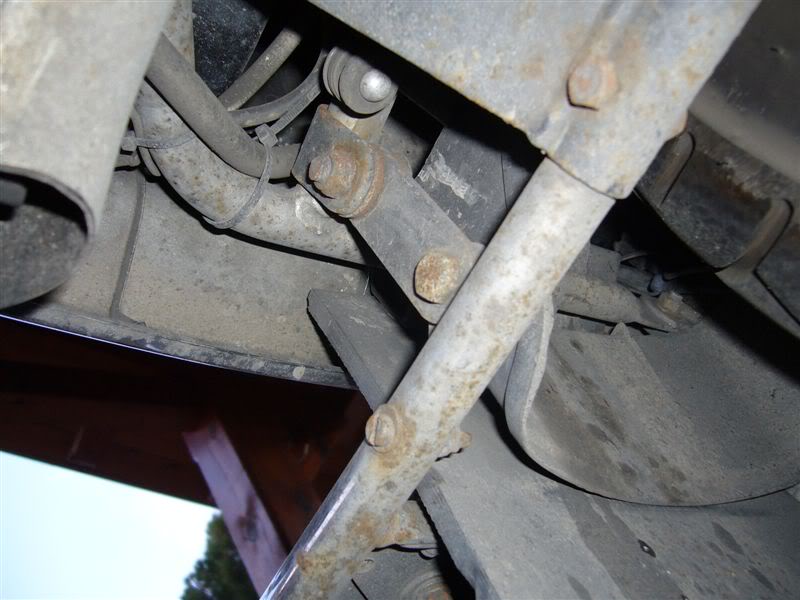
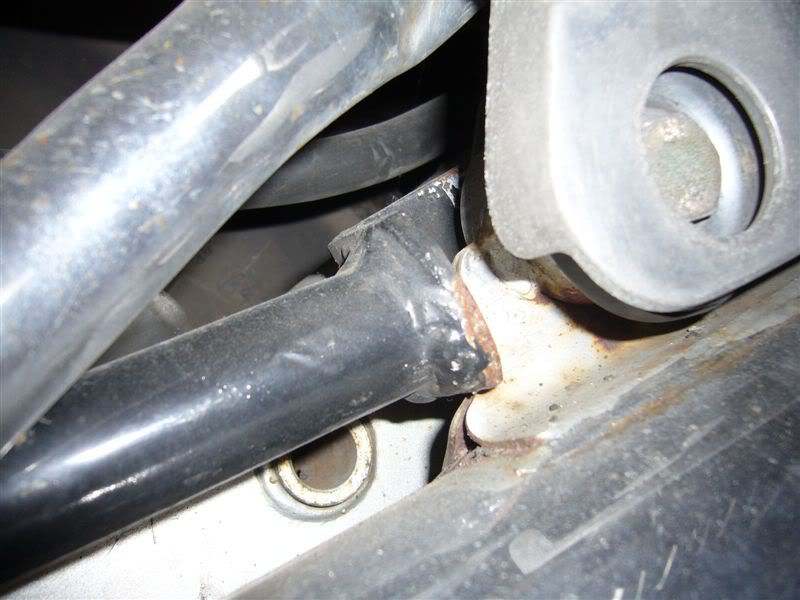
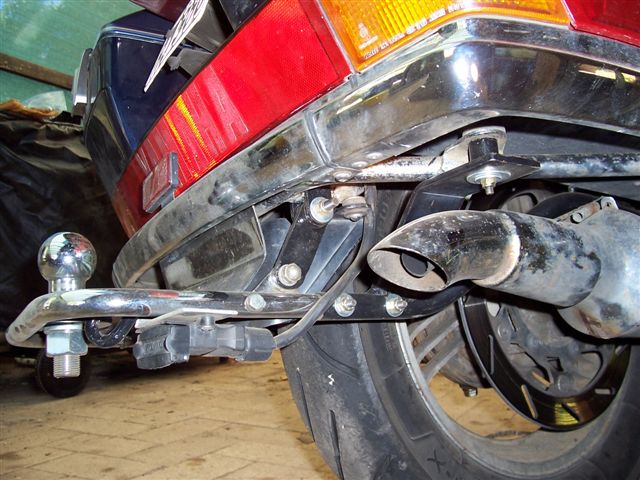
The pictures are from a collection of hitch mounting pictures I have. There are at least two different bikes shown. But on both of the bikes I've had a Markland hitch on (1990 and 1991), the vertical bar running from the ear on the ball hitch plate to the U-strap mounted on the saddle bag/crash bar frame has been angled. Maybe just manufacturing tolerance or minor changes Markland made over the years? I don't think it will matter.
-
-
-
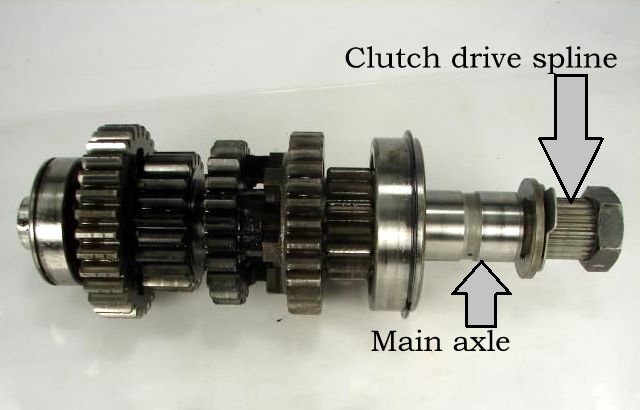
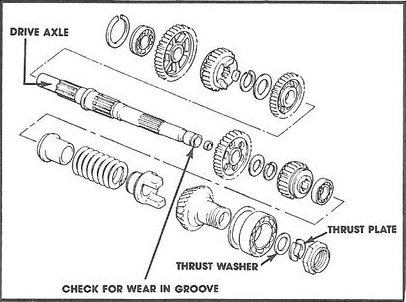
Yes. The clutch assembly is bolted to the main transmission axle. You will have to remove the clutch assembly from the main axle in order to transfer it to the new main axle. Since the clutch basket is secured to the main axle with a big nut, requiring substantial torque to loosen, it is best done prior to splitting the cases.
-
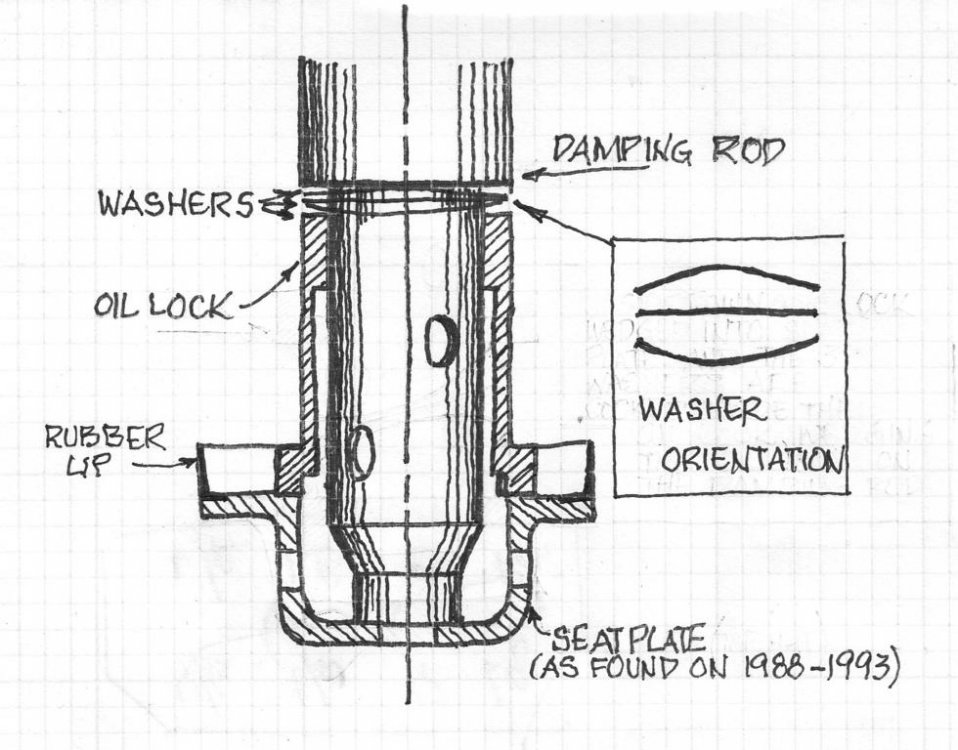
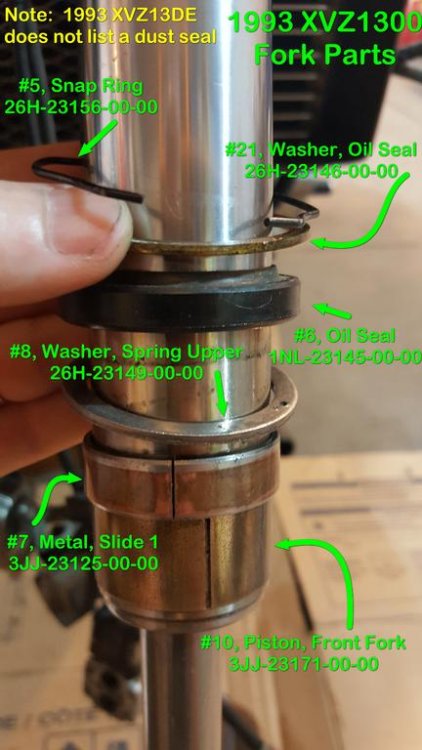
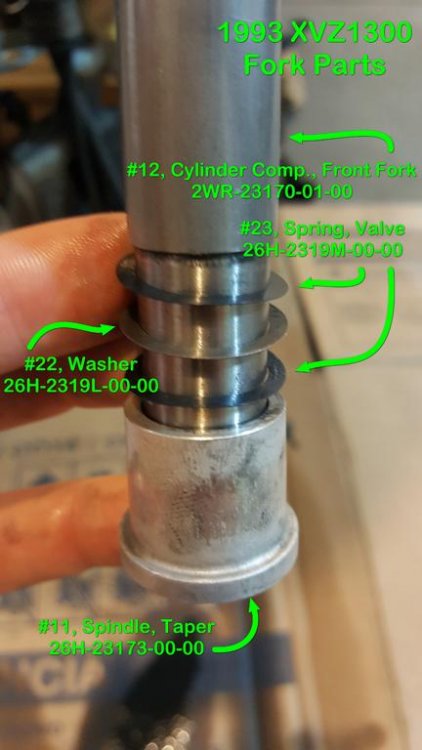
Will, you mention the "plate, seat", but it is not pictured. The "plate, seat" is used on 1988-1993 Ventures. You are working on your 1989, right? The "plate, seat" often remains at the bottom of the lower leg interior upon fork disassembly because of the rubber seal/lip on the "plate, seat" creating a seal. If you don't have it out of the lower leg yet, fish it out and examine it. The rubber lip is sometimes damaged. If the seat plate is good, then lightly grease all those loose components to stick them together and on to the "spindle, taper" and slide the whole assembly down into the lower leg in one smooth motion until the assembly bottoms out in the lower leg. Attached is a diagram I made, showing how the 1988-1989 assembly should be. Also attached is Bob K's photo of the damping rod assembly, but with out the "plate, seat".
-
By Jim Bryant (MoreV4), from Facebook: "I was asked to post a word on here concerning a good friend of many. Please say a prayer and/or keep him in your thoughts for Fred Saari (@Yooper). His colon cancer he beat 15 years or so ago is back. Details of when surgery will happen down in Milwaukee are up in the air as of today. Fred is a rare breed of people that tells you like it is, in total honesty, whether you like it or not. He will do anything, for anyone, anytime he can. He has taught me how to be a better person by telling me like it is whether I liked hearing it or not.....which is most of the time. Venturers and Venture Rider folks please communicate this along, thank you."
-
@Snaggletooth where the heck have you been? HOW have you been?
-
Puc, only supporting members of Venturerider.org are allowed to join the VentureRider Facebook page. And I monitor it as an administrator and remove members from the page who have allowed their VentureRider.org supporting member status to expire. And if you check out the VR Facebook page, you will undoubtedly note the relative inactivity there. OTHER Venture related Facebook pages (there are at least two that I know of) probably do siphon off potential VentureRider members, but not the "official" VentureRider Facebook page.
-

A couple of air box question
Prairiehammer replied to Chaharly's topic in Venture and Venture Royale Tech Talk ('83 - '93)
Actually, the sealant around the air box boots was a genuine authorized Yamaha fix for the 1983. On subsequent models, the factory applied that sealant. It is spelled out in this Tech Bulletin: M84-017 Air Box Oil Leakage .pdf -
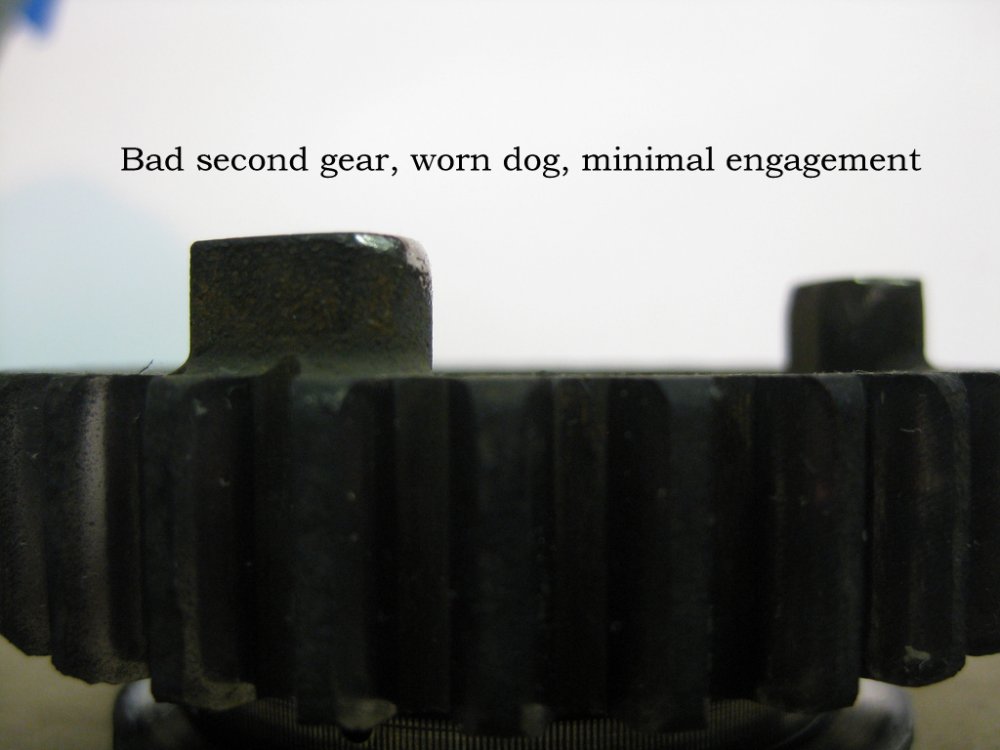
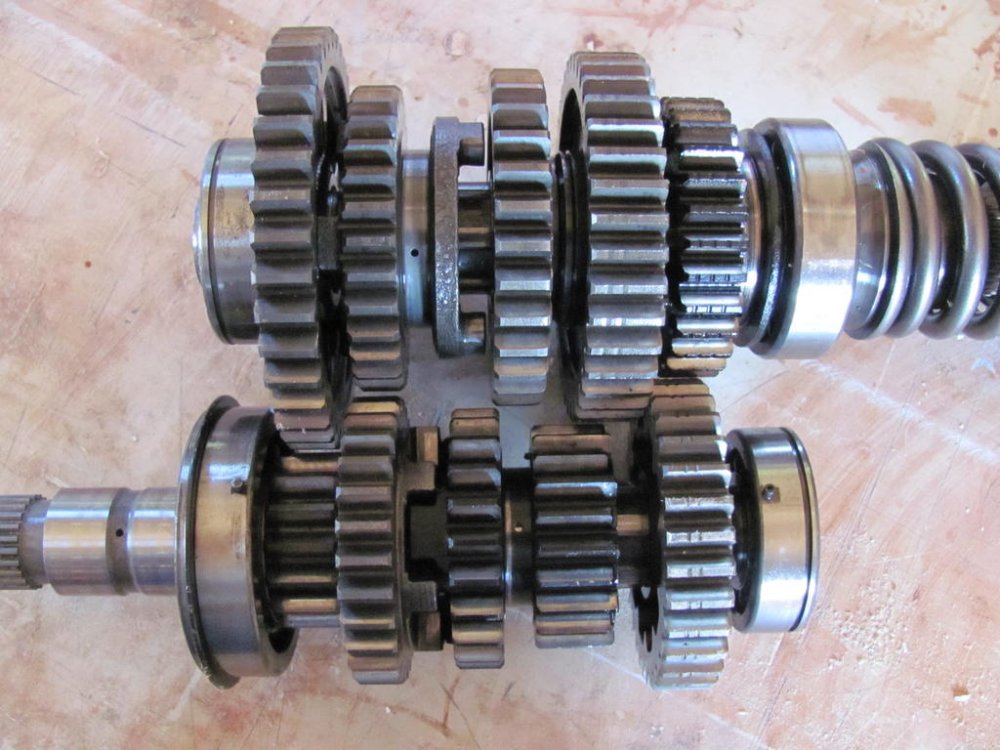
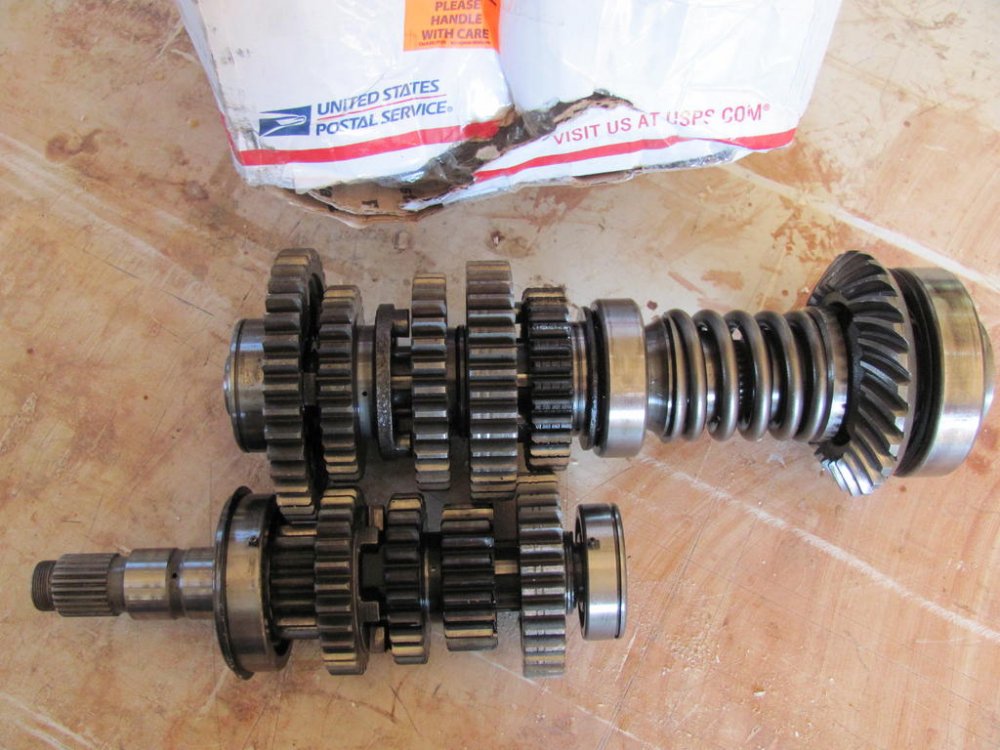
I am very late arriving at this party, so pardon me if I missed something in the five pages of this thread. 1. Check the engine number. Both the clutch cover and the stator cover indicate that this is a 1300. I can identify the year of the engine if you give me the engine number. 2. If it IS a 1300, the second gear "missing" may not be because of the transmission damaged. It may be because of the linkage train; either the shift drum or the shift linkage on the left side. (The foot pegs are not stock MKI pegs, nor are the peg mounts. The left peg mount looks like it may have been part of an aftermarket floorboard retrofit. The linkage may have been cobbled. 3. Final drive is not stock MKI. Either MKII or maybe V-Max. EDIT: Upon closer examination, the final drive appears to be from a Second Generation Venture. I can just see the speedometer pickup port. 4. Trailer hitch is not made for a MKI Venture. Either for a MKII or perhaps a GW. 5. (minor point): The mufflers are from a MKII. Muffler mount is not proper for a MKI and the turn downs are as for a MKII. 6. (another minor point): The fairing bags are added. The 1983 Royale did not come with fairing bags; the brackets that hold the bags are also not stock Venture.
-

1983 Models (not the super model kind)
Prairiehammer replied to Ialreadyknow's topic in Watering Hole
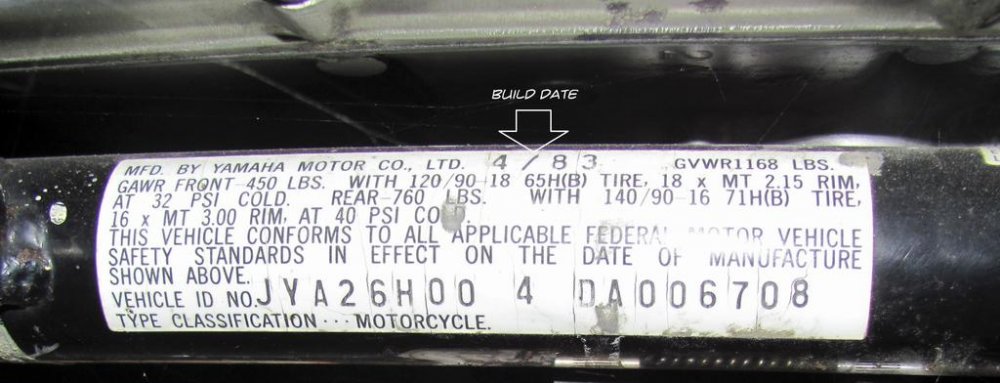
The "JYA" is not descriptive of any specific model. JYA simply means that the bike is made in Japan, by Yamaha, "A" denotes "motorcycle. To decipher your bike, I will need all the numbers and characters of the VIN. For example: JYA26H00xDA000xxx (1983 Standard Venture) or another possibility: JYA31M00xDA000xxx (1983 Venture Royale). The full VIN is located on a black text on white label adhered to the lower frame rail under the brake pedal. It is also stamped into the frame at the steering neck. Note also the manufactured date. -

Header Pipes brick wall.
Prairiehammer replied to Vickersguy's topic in Venture and Venture Royale Tech Talk ('83 - '93)
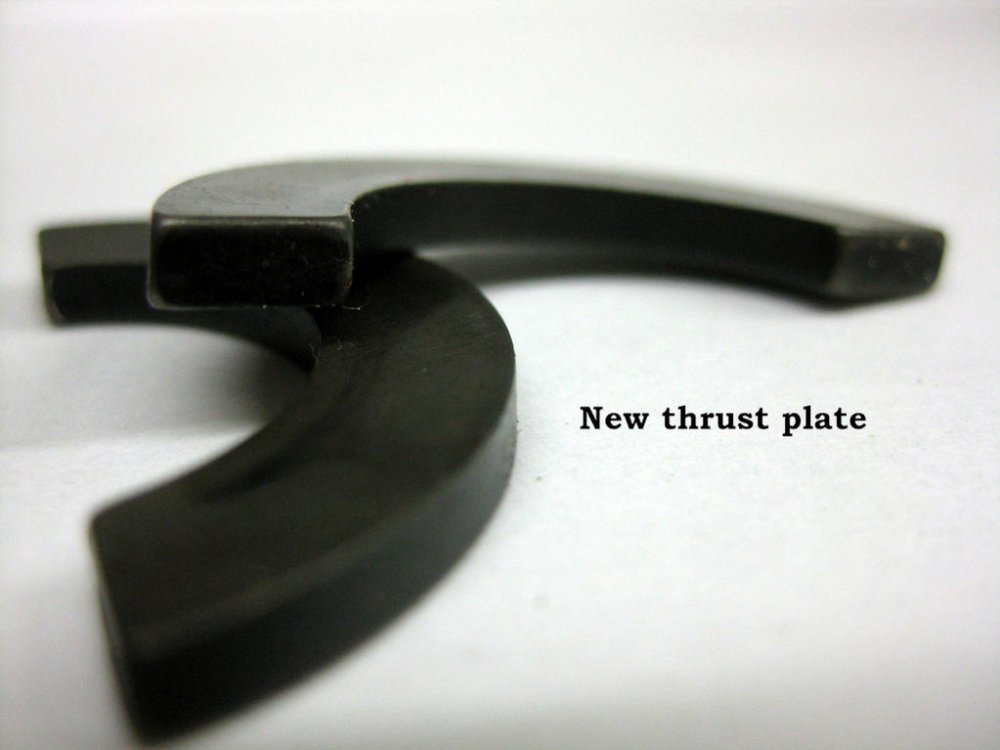
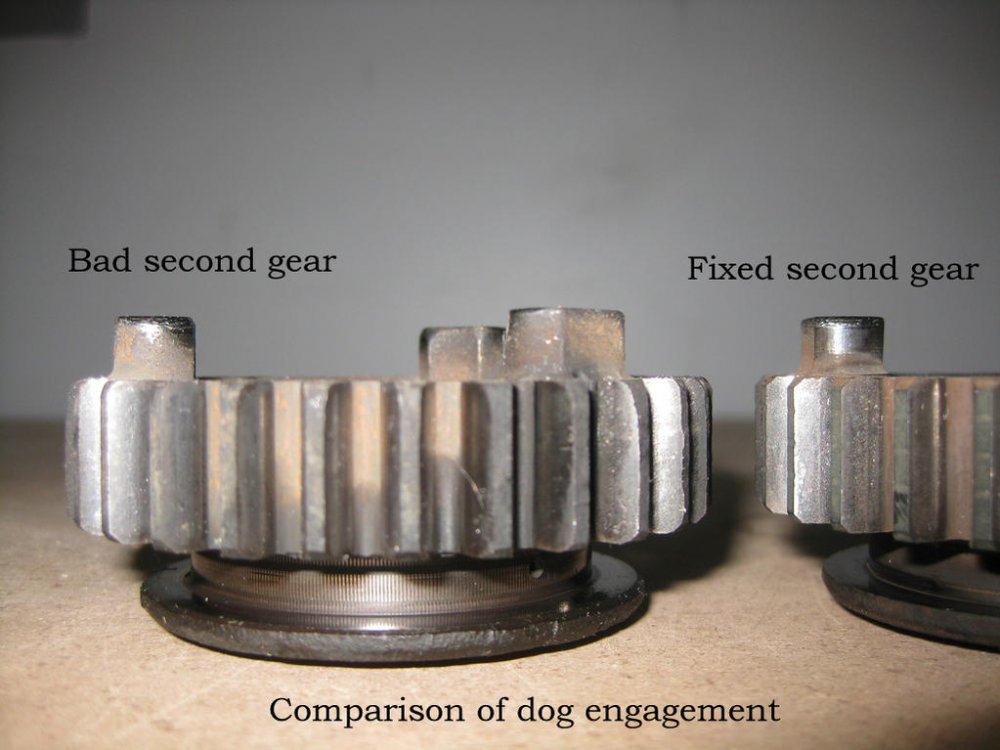
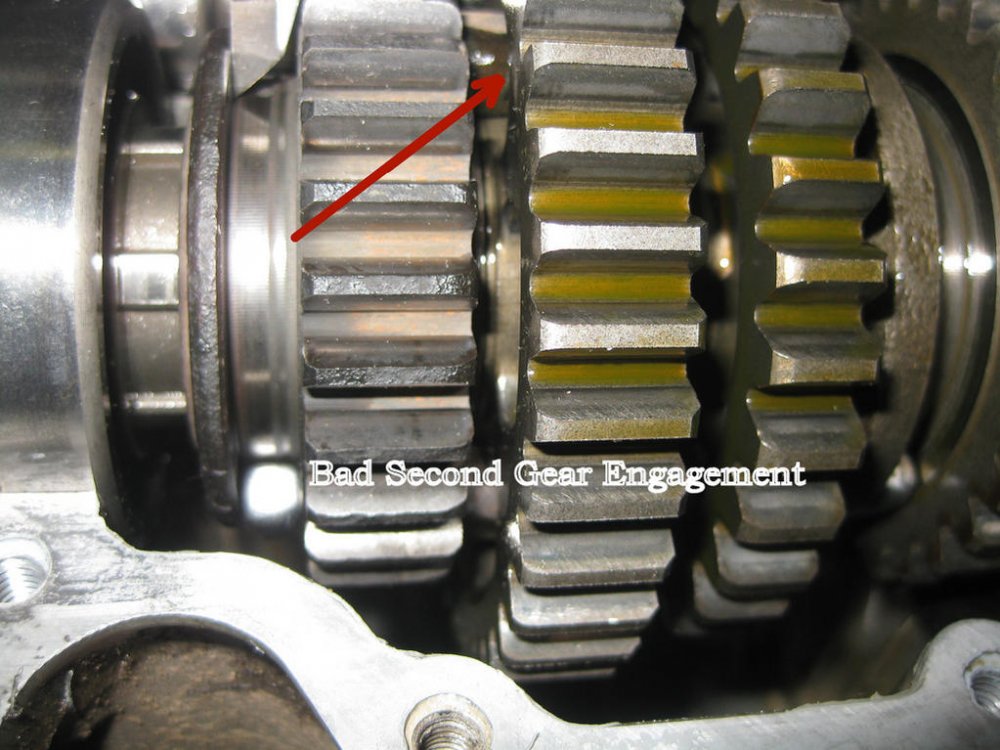
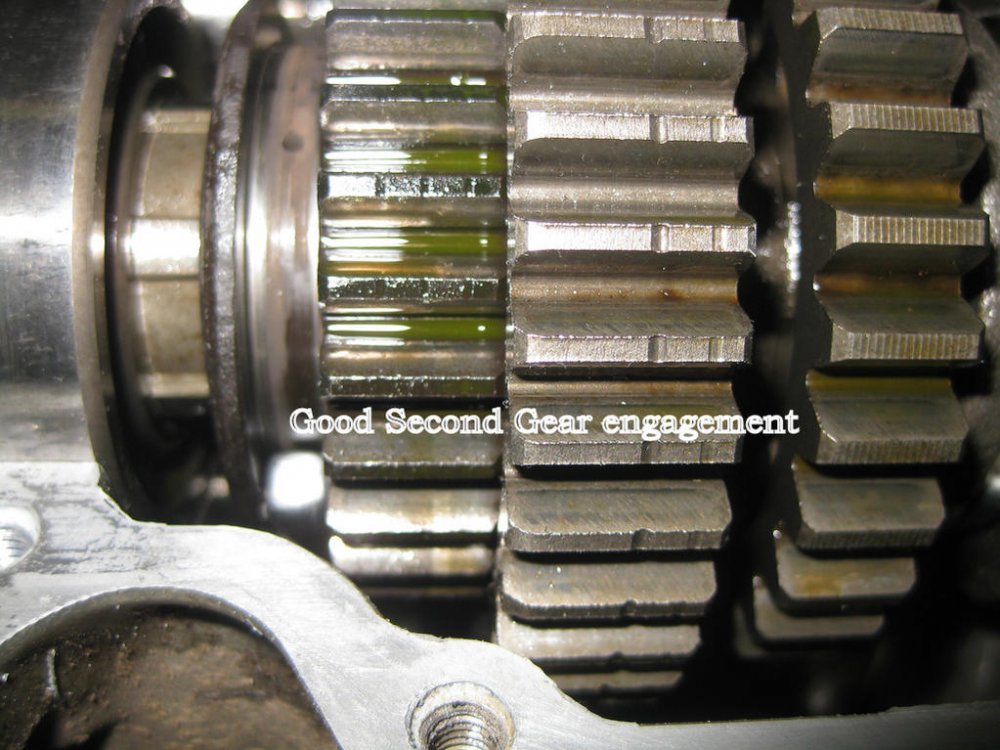
@Dano, I found the thread where you undercut the dogs. The pictures had not migrated with the thread, but Don @Freebird has restored them now. Here: https://www.venturerider.org/forum/showthread.php?21023-2nd-gear-cut-and-measurements&highlight=undercut -
Thanks for restoring the missing photos, Don. Here's another thread that has missing photos: https://www.venturerider.org/forum/showthread.php?21023-2nd-gear-cut-and-measurements&highlight=undercut
-
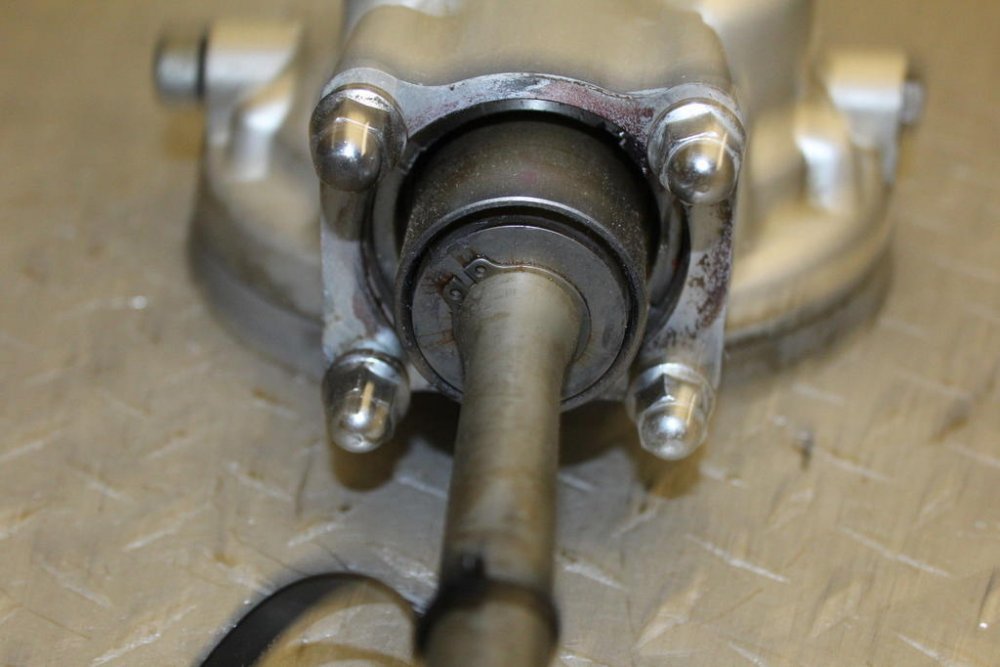
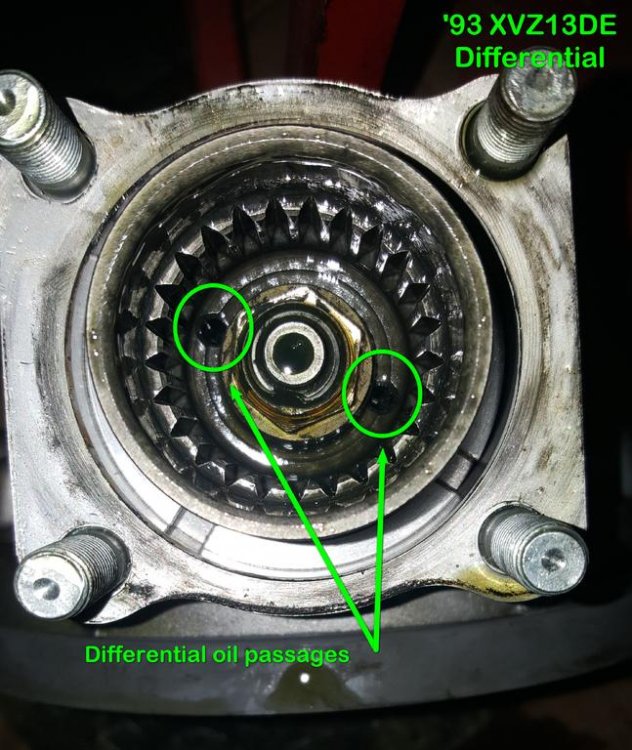
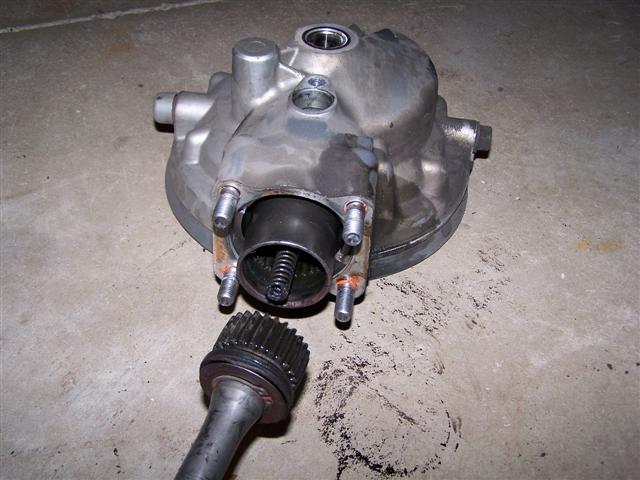
That driveshaft looks near new. As Rick says, you should consider replacing the oil seal. Although some have removed the driveshaft from the final drive and reinserted it without damage to the oil seal, others have damaged the oil seal while reinserting it, so it is a crap shoot whether you will get lucky. Whether you replace the oil seal with new or reuse it, lightly lube the periphery of the seal with gear lube before inserting into the final drive. The driveshaft simply slides into the final drive housing and is held there by the friction of the oil seal. Clean the inner part of the final drive housing where the oil seal will mate of potentially damaging debris. Before reinserting the driveshaft, inspect the inside of the coupling, ensuring that someone has not mistakenly greased the coupling and or the big end of the driveshaft and excess grease has blocked the gear lube ports with grease. Also, before inserting the driveshaft into the final drive, ensure that the compression spring is still attached to the pinion shaft.
-
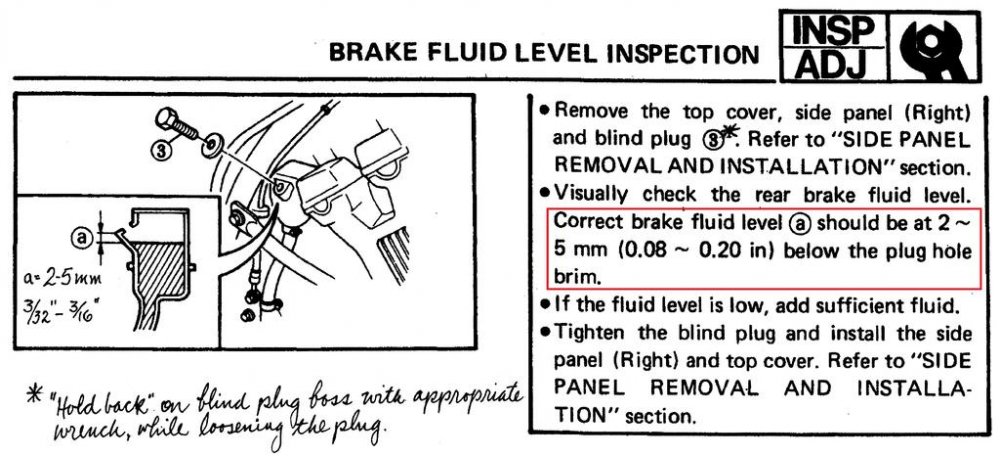
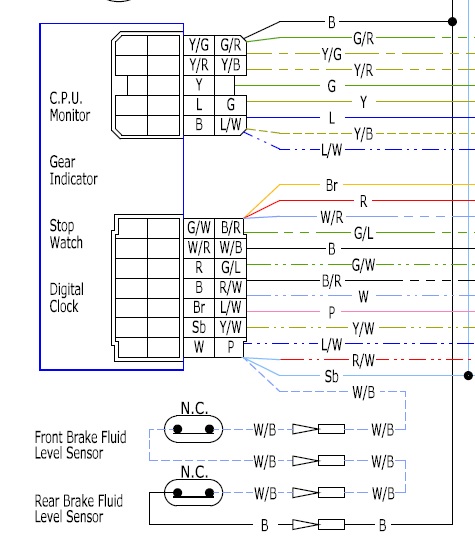
The level line "LOWER" is the minimum level, not the preferred level. Not a bad idea, but you may not find a problem with the float. The switch itself may be bad (stuck open). The switch is a tiny magnetic actuated reed switch. It is not serviceable beyond replacement. And it is no longer available new. You might try applying a strong magnet to the float stem to see if the switch closes. Because the FRONT brake master cylinder reservoir fluid level switch is wired in series with the REAR brake master cylinder reservoir fluid level switch, an open switch in either reservoir will illuminate the brake fluid level warning icon on the monitor. One way to test the switches and circuitry is to jumper the connectors for the reservoir switches on the wiring harness. Since the switches are normally closed (no warning), jumpering the leads will simulate closed switches. If the brake fluid level warning is still illuminated after installing the jumpers, there is either an open circuit in the wiring harness, faulty connections or a faulty CMS.
-
Are there still pics available for this OLD thread (2008)? Thanks. https://www.venturerider.org/forum/showthread.php?27170-VR-to-R1-Brake-Swap-Part-1!


.jpg.821dd17932ba110a381d758142ac9173.jpg)
.jpg.ee3d199621e982430148f739c41d8208.jpg)
.jpg.c1f07277c249dfcfc681caa2ae1febec.jpg)
.jpg.239d4c899be95a821bdfd03ae1e76a7b.jpg)
.jpg.e8f5e8acee4ef2b69a891cd0447f6e30.jpg)
.jpg.ae87e081704cf11a4b936fe2860332eb.jpg)
.jpg.9bbf92e3056fec3bb3a733dc04b1f200.jpg)
.jpg.ad47a5890ca8fda5cc9d6191a81612ec.jpg)
.jpg.d2668e61719dd548c90c7a20b4df17b6.jpg)
.jpg.0b88c68b1896df52cf638ea45f0683da.jpg)
