-
Posts
3,621 -
Joined
-
Last visited
Content Type
Profiles
Forums
Gallery
Events
Store
Everything posted by Prairiehammer
-

Gotta make room in the shop......................
Prairiehammer replied to DragonRider's topic in Watering Hole
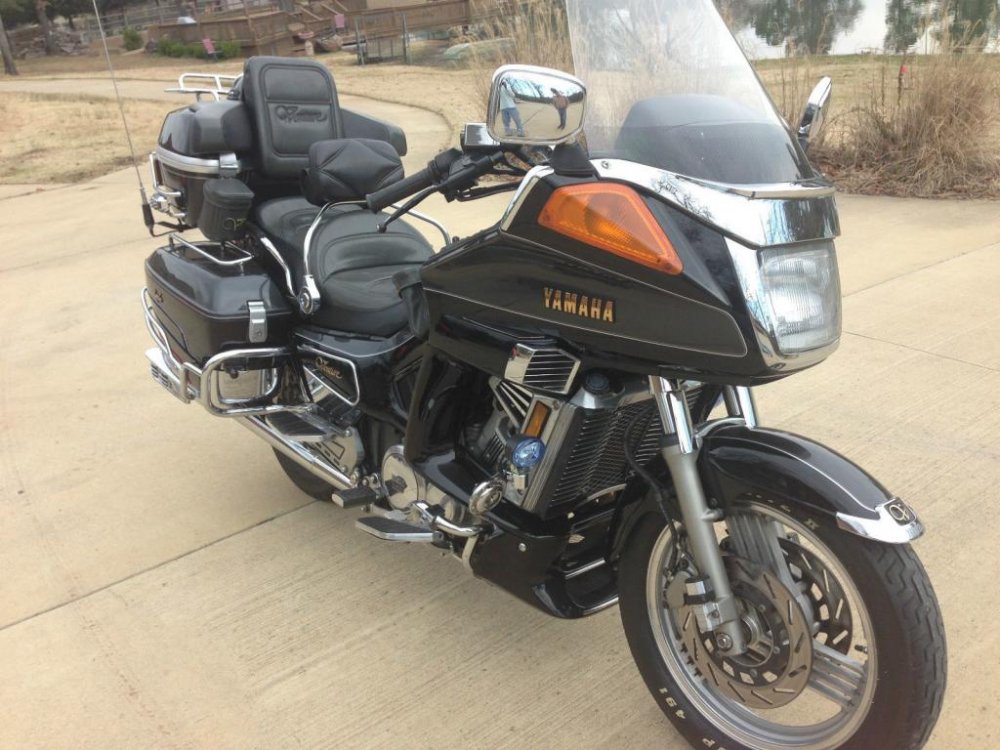
That is a 1988 Venture Royale, not a 1987. The '87s were either " Fifth Anniversary Gold" or Imperial Brown. If your bike is the white and cream then it is a 1988, or a repainted 1987 to match the 1988 colors. What is the VIN and build date? -
I am not too bright, but thanks for the confirmation.
-

Vacuum Advance/Boost sensor
Prairiehammer replied to KIC's topic in Venture and Venture Royale Tech Talk ('83 - '93)
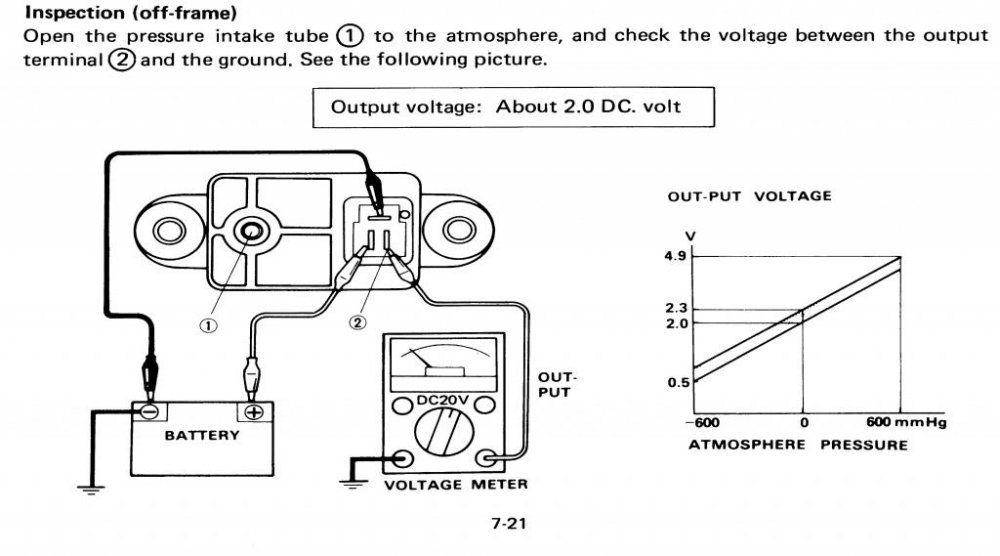
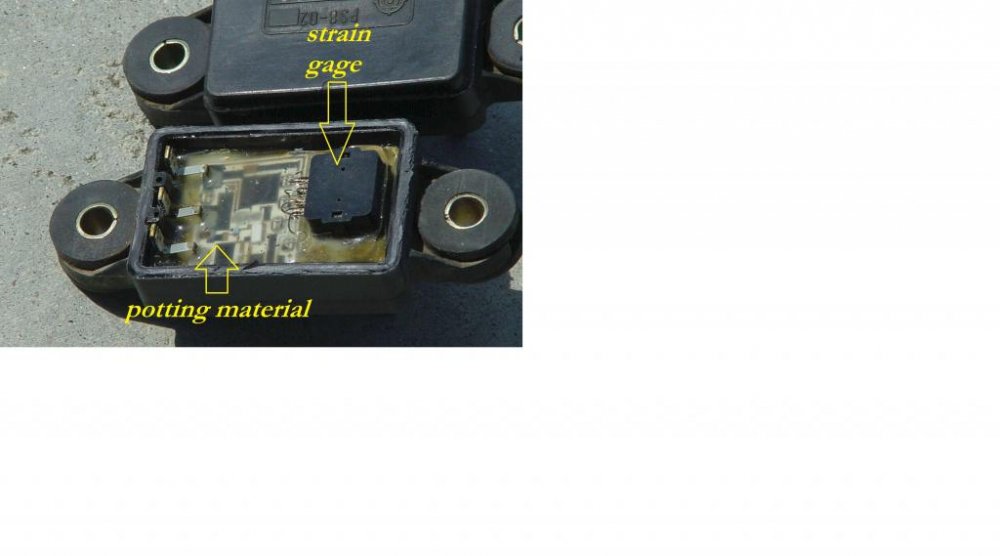
I hope you were not applying "as much as I can create" POSITIVE pressure to the Boost Sensor. The Boost Sensor should show a voltage change when 600mm Hg (mercury) NEGATIVE pressure (vacuum) is applied and 600mm Hg positive pressure. Six hundred mm of mercury translates to about 11 psi. Too much positive pressure will damage the Boost Sensor. Six hundred mm of HG vacuum applied should indicate .5 volts. Six hundred mm Hg positive pressure should measure 4.9 volts on a good sensor. Double check the procedure described in the manual. Confirm that you are checking the voltage properly. And make sure your digital voltmeter is set at the lowest range. The Boost Sensor contains a strain gage/gauge. A strain gage is a device whose electrical resistance varies in proportion to the amount of strain in the device. In this case, the "strain" is the movement of the diaphragm within the Boost Sensor, movement caused by the varying vacuum applied to it. Strain gages are very sensitive to varying pressures and to electrical over currents. It is entirely possible to "burn out" a strain gage. There is also an amplifying circuit within the Boost Sensor. It too can be defective. -

Starter Clutch Mod
Prairiehammer replied to Dano's topic in Venture and Venture Royale Tech Talk ('83 - '93)
It appears that the rotor/flywheel became loose, allowing it to slide toward the stator. One or more of the starter clutch bolt ends caught the stator mounting screw head(s). When the interference happened, the woodruff key may have been sheared then. If you tried to torque the crankshaft bolt after that happened, the specified torque may have been indicated but the sheared woodruff key may have prevented the rotor from seating fully on the taper of the crankshaft. The rotor has to be keyed in the proper position; if it is off, the timing will be off. I'm guessing the rotor came off relatively easily? Usually the rotor is a bear to get loose. In addition to the damage to the stator mounting screws, the stator windings are also scraped and damaged. You will need three new stator mounting screws and a new stator. The Woodruff key should be available at your local Yamaha dealer. That same key (PN. 90280-05029-00) has been used on hundreds of Yamahas, right up to some 2015 models. I don't believe the crankshaft key slot is damaged enough to render the crankshaft ruined. [h=1][/h] -
Yes, a longer muffler mounting bolt is required. The longer bolt will thread through the frame tab and project enough to hang the trailer hitch onto. Install a lock washer and nut. Make sure the bolt is not so long that it interferes with the swing arm. It is a tight area to work on. You may find yourself using some curse words as you attempt to get that washer and nut onto the longer bolt and tighten it all up.
-
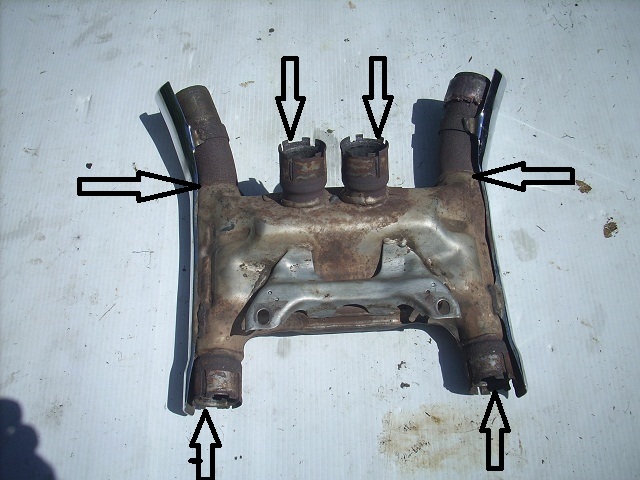
One of the most common exhaust system failures occur at the juncture of the mild steel nipples and the stainless steel collector. Essentially the nipple rusts and cracks at the weld. The impact very likely stressed an already weak point. It is difficult to see the juncture because of the chrome heat shield. The weld joint is behind the welded on heat shield.
-

Starter Clutch Mod
Prairiehammer replied to Dano's topic in Venture and Venture Royale Tech Talk ('83 - '93)
When you turned the engine over by hand did you improperly use the crankshaft rotor bolt to turn the engine? Or did you properly use the big hexagonal boss on the generator rotor/flywheel to turn the engine? If you used the rotor bolt, you may have loosened it. Did you re-torque the crankshaft rotor bolt to the specified 94 ft/lbs? An unrelated note: While you have the chrome cover off, make sure that your Venture received the stator cooling kit. The crankshaft rotor bolt should have a hole drilled through its center and a crooked wire oil slinger should be present in the hole. -

2016 VentureRider International Rally Discussion
Prairiehammer replied to Freebird's topic in Watering Hole
Perhaps the Maintenance Day in June could be expanded and called the International Maintenance Day? Continue to have the Regional events, so that folks around the country could have an opportunity to experience different venues. But the Venture Rider INTERNATIONAL MAINTENANCE DAY will always be at the founder's home. An expansion of the traditional Maintenance Day by a few days will be an easier "draw" for those more distant. Personally, I would not like to travel for two or three days to and fro just for a one day meet. But I think more folks would attend from afar if it was for three, four or more days. Of course, an expanded Maintenance Day would be more work for Don and Eileen, so perhaps some volunteers could be recruited to assist with the "International Maintenance Day". Heck, the Maintenance Day is already "international". Lots of Americans, Canucks and even two Icelanders at this years MD. -

I need a TCI for my '84 XVZ12
Prairiehammer replied to garyS-NJ's topic in Venture and Venture Royale Tech Talk ('83 - '93)
Gary, "XVZ12TDK" and "1984 Venture Royale" are contradictory. Model XVZ12TDK would describe a 1983 Royale. A 1984 Royale would be model XVZ12DL. The one sure method of determining your bike's model year (and model) is via the VIN. I have looked through my database and do not find any Venture attributed to you. Perhaps you would submit your Venture's VIN and build date to me? Thank you. -

TCI from my 1984
Prairiehammer replied to garyS-NJ's topic in Venture and Venture Royale Tech Talk ('83 - '93)
Only on a 1990-1993. See above, my comment. -
Did someone say there was going to be a chili cook-off at P.I.P.? Might be a bit overcooked (is there such a thing as overcooked chili?), but I could possibly cook my chili on the way up...on the front or rear head or both. Perhaps some aluminum foil wrapped around the header pipes and funneled to a makeshift heat shield/pan? Hmmm, wonder how (or good) chili cooked that way would be after 600 plus miles?
-

TCI from my 1984
Prairiehammer replied to garyS-NJ's topic in Venture and Venture Royale Tech Talk ('83 - '93)
No. All First Gen Venture TCIs will be either 26H-**(1983), 41R-**(1984-1989) or 3JJ-**(1990-1993). The 4XY-** (Second Gen Venture?) will not work on any First Gen Venture. -

TCI from my 1984
Prairiehammer replied to garyS-NJ's topic in Venture and Venture Royale Tech Talk ('83 - '93)
Yes, ANY 41R-** will work on your 1984. The eBay seller is incorrect when he/she says the 41R-11 will fit "1986-1993". It will work on 1984-1989, but not 1990-1993 (or 1983). -

Starter Clutch Mod
Prairiehammer replied to Dano's topic in Venture and Venture Royale Tech Talk ('83 - '93)
Dano, Since a new Sprag unit (starter clutch) from Yamaha is so expensive, could not one just purchase a used Second Gen Venture rotor with clutch, remove it from the unusable Second Gen rotor and send you the Second Gen clutch and a First Gen rotor? You would then machine the First Gen rotor to accept the Second Gen starter clutch at a big savings for parts. I presume one would also have to have the Second Gen big gear? -

Condor Fork brace on ebay?
Prairiehammer replied to Great White's topic in Venture and Venture Royale Tech Talk ('83 - '93)
When it comes to Venture frame flex, one thing that many folks don't check is the fasteners on the removable lower frame section on the right side. Yamaha was pretty adamant about making sure those Allen head bolts were properly torqued. Apparently, (according to a Tech Bulletin) those fasteners were prone to loosening. -

Top Box amber lens?
Prairiehammer replied to Great White's topic in Venture and Venture Royale Tech Talk ('83 - '93)
BJ, if you are patient, the full Big Bike Parts trunk light can be found occasionally on eBay. I had the BBP trunk light on my 1990 but the 1991 did not have it, so I kept an eye on eBay, and just a couple months ago, I discovered a complete unbroken BBP trunk light for $22US with free shipping! (GLOAT!). I have yet to install the Big Bike Parts trunk light on the 1991, partly because the thicker BBP light may not fit on mine, as I have the accessory VentureLine Tour Box Trim Rail, ABA-26HCD-19-00 and the clearance between that rail and the BBP light lens may be too small. But I did add this LED light as a high mounted brake light and mounted it to the trunk luggage rack. It really makes a difference. http://www.ebay.com/itm/171492691883?ssPageName=STRK:MEWAX:IT $15US with free shipping. -
Thank you guys for your contributions. Blaine, I always appreciate the Canadian VINs. Helps to answer questions about the timing of Canadian vs. US builds. Pete, your 1987 Royale, XVZ13DT was not offered in Black/Silver by the factory. The 1987 Royale was available in Alluvial Gold/Silky Gold or in Elegant Brown/Imperial Brown. It seems it may have been repainted twice. Wade, your Venture is a California bike. It is also the latest California 1993 I have in the database. Thanks all for your contributions.
-
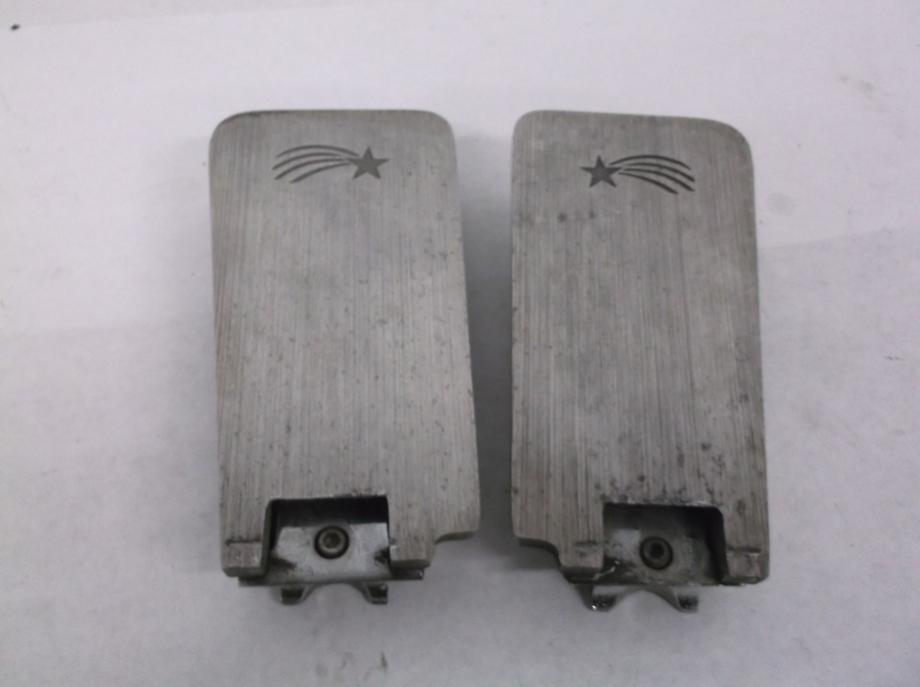
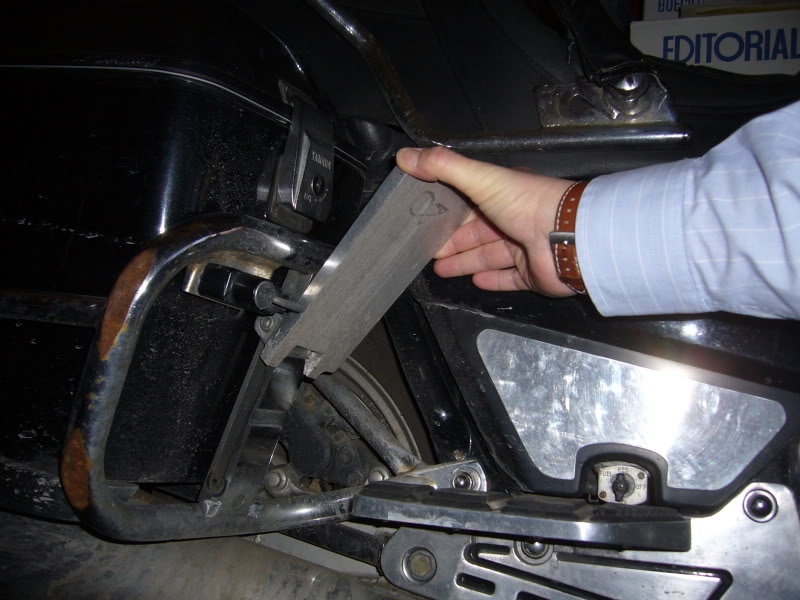
Regarding the original inquiry about the tabs on the front of the saddlebag guards: Yes those tabs are where the helmet locks were mounted on SOME 1991-1993. My 1991 has helmet locks under the trunk, but a friend's 1991 (below) has the helmet locks on the saddlebag guards. As for the aftermarket passenger foot risers that are mounted to the front of the saddlebag guards; those were manufactured by Kriss and were called "Starsteps". Kriss made them for Ventures and for Gold Wings. Yamaha offered them as an official Yamaha VentureLine accessory (ABA-1NLCD-20-00). The VentureLine version of the Kriss Starsteps has the Venture Vivaldi "V" engraved into the bottom of the foot riser. The non-VentureLine Kriss Starsteps have a "shooting star" logo cast into the step bottom. I have a set of VentureLine Starsteps, shown here on my 1990. I have since transferred them to the 1991. Debbie finds those Starsteps quite useful, allowing for different foot positions.


.thumb.jpg.7ee2e632f8916682c40282194dae48de.jpg)
.thumb.jpg.511c75bb863b9ae4fe7092ede1b0d14d.jpg)
.thumb.jpg.9d7bd2c155ee77f3cf1aff8ead00dc4f.jpg)
.thumb.jpg.c353931516385030d13dcfac8ccbf60c.jpg)
.thumb.jpg.80f3fb1ad93902fd492ed03c36ff1c9a.jpg)
.thumb.jpg.aecc75b3b254a0ebfe5e87001d930e31.jpg)
