-
Posts
3,621 -
Joined
-
Last visited
Content Type
Profiles
Forums
Gallery
Events
Store
Everything posted by Prairiehammer
-
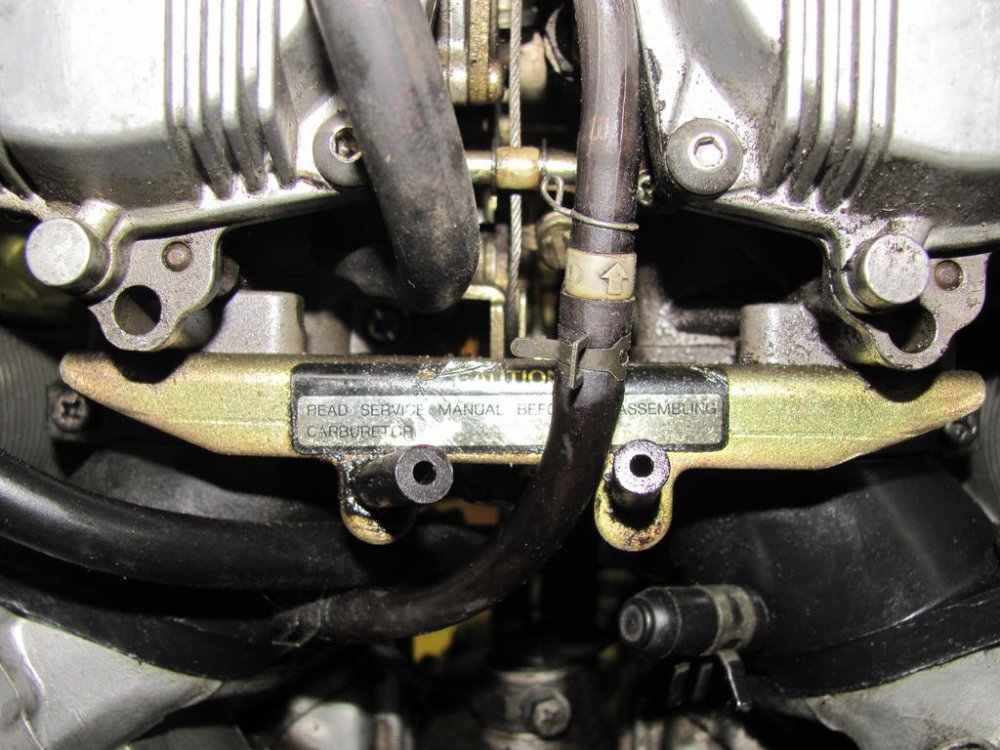
Steven may have hit on the reason for the roller, kinda. Perhaps during cruise control operation, the servo introduces slack in the throttle cable and the roller is to make sure that there is no interference with the enrichener/starter/"choke" actuating shaft? Note that on the nearly identical V-Max carbs, the same actuating shaft has the grooves for the circlips (that locate the roller), but the circlips and roller are not used or needed. Why? Because the V-Max does not have cruise control? (Ignore the red arrow in the photo, it is not relevant to this discussion.)
-
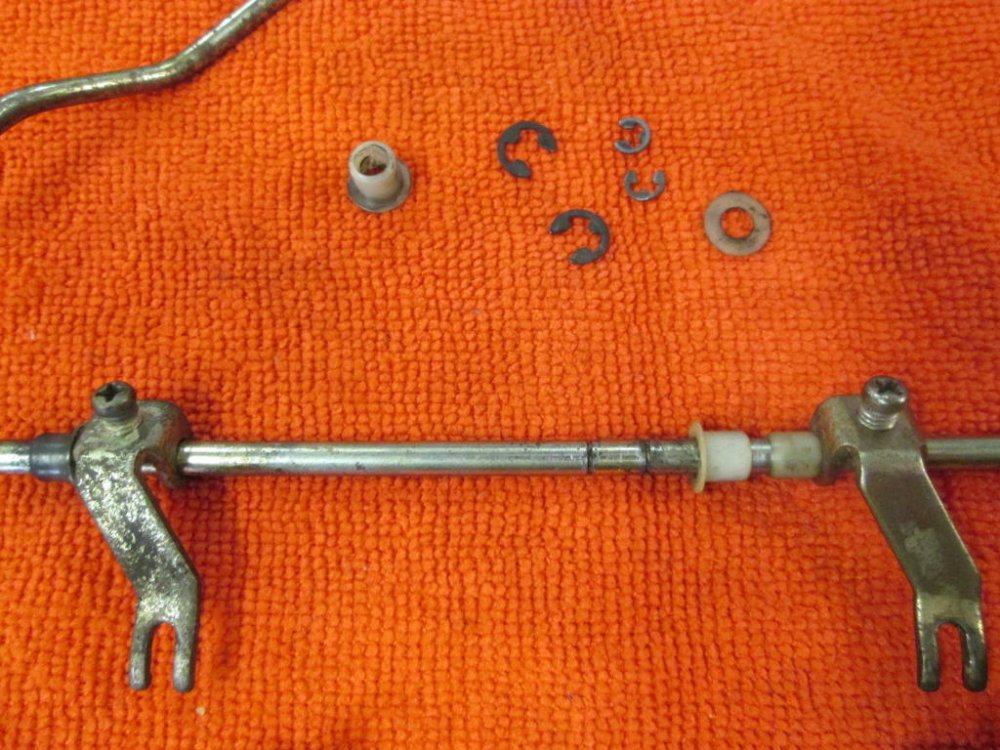
I confess that I don't know the "why", but I do know the "where" is behind the plastic roller. I think that Marcarl's explanation of that plastic roller being a spacer is valid. Perhaps, in some situations the throttle cable MAY touch the enricheners actuation shaft and so Yamaha did a "CYA" to prevent unexpected throttle sticking?
-
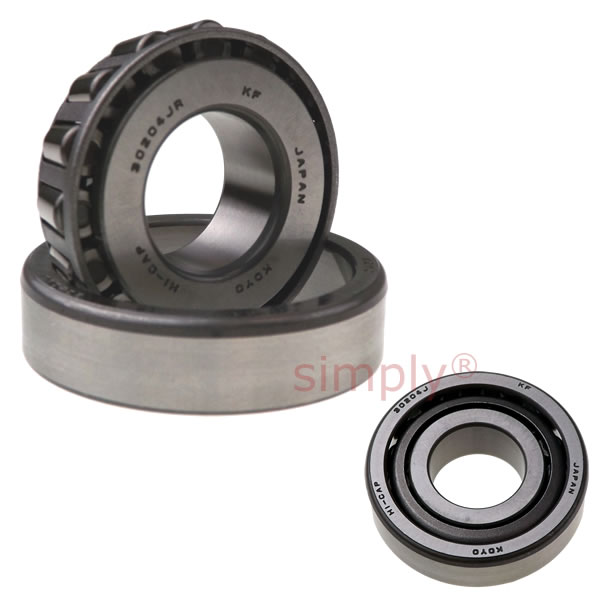
Which model are you working on? The 1988 XVZ13DU? At any rate, the grease Zerks were not installed on the relay arms by the factory until 1990. Yes, it will be easier to remove those shafts after the relay arm assembly is on the bench. Some have resorted to heat and a lot of CAREFUL pounding to remove the shaft(s). Actually, EIGHT of the 90381-18068-00 bushings are required if you replace all of them. (There are two bushings at each of the four pivot points on the "Big U" relay arm. You may have to check other suppliers in addition to Partzilla, to obtain enough bushings. Run the part number through an eBay search and you will find more suppliers and bushings. And yes, they do wear out, especially the relay arms without the grease zerks (1988-1989). I know of no substitutes for either of the bushings. I have never heard of the swing arm bearings going bad, but if you need to replace them, 93332-00051-00 is commonly available (at a more reasonable price) as 30204JR from Koyo and others. BTW, the previous incarnation of the swing arm bearings was Yamaha PN 93332-00050-00 (93332-00051-00 superceded it). The non Yamaha equivalent for 93332-00050-00 is HR30204J originally supplied by NSK. It too is commonly available, mostly used as an automotive wheel bearing. The difference between the two bearings is that the 93332-00051-00/30204JR is called "HiCap" (High Capacity?).
-

Clutch Slave Cylinder
Prairiehammer replied to uhfradarwill's topic in Venture and Venture Royale Tech Talk ('83 - '93)
Good tip. However, getting the slave OUT is rarely a big problem. Getting the slave back IN gives folks a fit, many times. -
I sent the seller a copy of my earlier post: His response: New message from: tammytleming (4) You are correct about some of the parts being 1993. The ad states it is a 1987 in 1993 clothes. It has only 2369 miles. Original base bike is a 1987. Mentioned it should be in a museum because of the pristine condition it is in. I am going to add some additional pictures of the foot pegs. They only have 2369 miles. He did add two pics of the footpegs to the eBay listing. I still maintain that the left peg shows too much wear for 2369 miles.He has not changed the listing to reflect that it is a "1987 in 1993 clothes." He did remove the "museum" comment.
-
I saw that Venture for sale on eBay a couple days ago. Some red flags were immediately flying: 1. It is not the proper color for a 1987. There was no blue 1987 ROYALE. 2. It has 1990 forks (gaiters and the electric anti-dive on the side instead of in front of the forks as a 1987 should be). 3. The wheels are silver (like the 1990 and newer) not black like the original 1987. 4. The left foot peg rubber is worn more than a bike with 2369 miles should be worn. 5. The "chevron" pinstriping on the trunk. 6. The black and gray seat is not consistent with a 1987; it is what was found on 1990 and newer. Bottom line, despite the stated VIN (which IS for a 1987 Royale), the bike is not a "museum quality" 1987. Perhaps a 1989 or 1990 and not precisely correct even for a 1989.
-

rear wheel bearing/seal order
Prairiehammer replied to dna9656's topic in Venture and Venture Royale Tech Talk ('83 - '93)
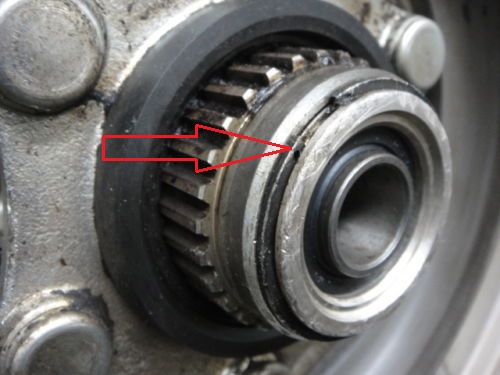
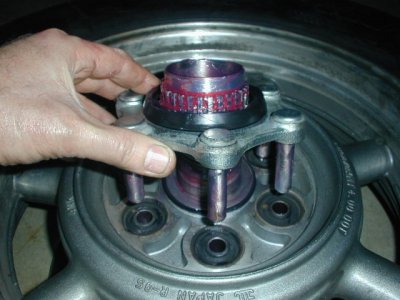
Remove the circlip that holds the "clutch" (drive fingers). Pull the "clutch" from the wheel. The procedure is explained in a multitude of posts here and in the service manual. M2005-015, REAR WHEEL CREAKING.pdf -

rear wheel bearing/seal order
Prairiehammer replied to dna9656's topic in Venture and Venture Royale Tech Talk ('83 - '93)
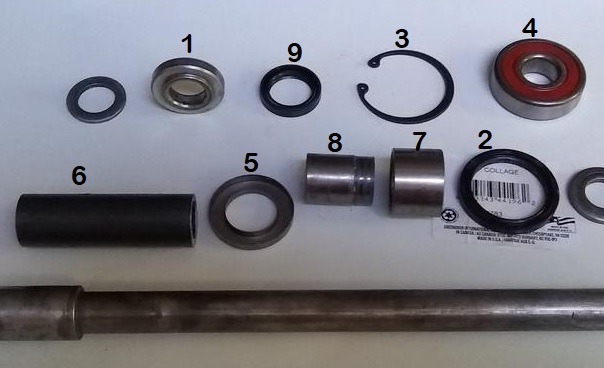
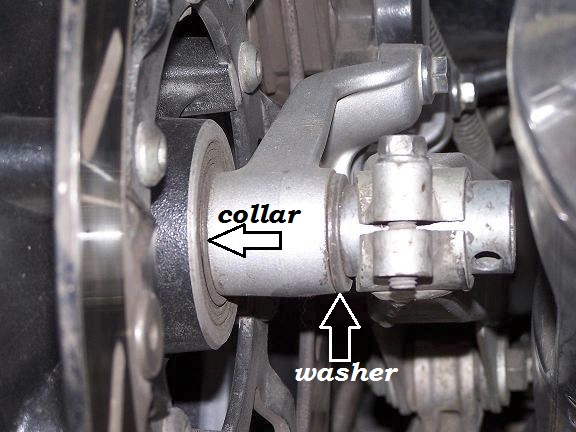
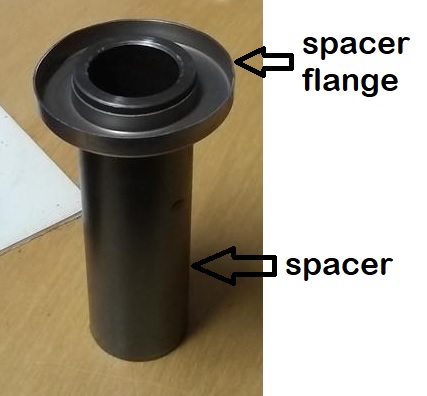
6. Installing the new bearings: we laid out the parts and slid them onto the axle to verify we understood how it needed to go back together. Started with the large sealed bearing, then the Spacer Flange (open side against the bearing, followed by the long Spacer, then the Collar (Inner Race of the needle bearing) and then the needle bearing itself (which we had not yet greased up and so we did not actually slide the collar into it). This is the point where we first really understood how it all was meant to work. When we initially slid the Spacer Flange up against the large bearing, it was contacting the bearing’s rubber seal and wanted to turn with the outer race. We knew that couldn’t be right, and it finally dawned on us that the long Spacer was meant to fit through the Spacer Flange and thus keep the flange from contacting the rubber seal. a. So the next step was to insert the long Spacer into the Spacer Flange. This is accomplished simply by laying the Spacer Flange on a flat surface (open side down) and tapping the long spacer through the center until it comes into contact with the flat surface. The end result is the long Spacer protrudes thru the flange to allow it to contact the bearing while preventing the outer edge of the Flange Spacer from touching the bearing seal or outer race. We verified that by sliding everything back onto the axle and now the only parts touching were those that lined up with the inner race of both bearings. b. Lay the wheel with the large bearing side up c. Insert the Spacer/Flange Spacer assembly into the hub (long spacer first – it will protrude out the other side of the hub). d. Insert the new large bearing into the hub and gently hammer into place. We used the tip from the XS11 instructions and had already cut a notch out of the old bearing, so we laid the old bearing on top of the new one and hammered on that until the new one was completely seated. The old bearing pops right out of the wheel housing when squeezed with a pair of plyers. e. Install the circlip f. Install the new seal g. Flip the wheel over – the Spacer/Flange Spacer assembly should slip back down and sit on the newly installed bearing h. Grease the new needle bearing i. Install new needle bearing – again we used the old needle bearing (which we also had notched) as a hammering tool. j. Apply a little grease to the new Collar (inner race) and insert into the needle bearing. It should butt against the Spacer inside the hub. k. Install the oil seal l. Reinstall the hub per the instructions in the Rear Wheel Service document i. Apply grease to the inside of the hub and to the six posts that fit into the wheel. ii. Check the o-ring on the wheel to be sure it is in place before you replace the hub and circlip. 7. The wheel is now ready for installation. -

rear wheel bearing/seal order
Prairiehammer replied to dna9656's topic in Venture and Venture Royale Tech Talk ('83 - '93)
Doug? Did you read the Word doc I previously posted? It describes the reassembly. -

rear wheel bearing/seal order
Prairiehammer replied to dna9656's topic in Venture and Venture Royale Tech Talk ('83 - '93)
Is this diagram easier to read? Also read over this Word doc: 83 Venture-Rear-Wheel-Bearings-Replacement.docx -
Unfortunately, I don't believe you can remove the petcock from the tank while the tank is installed on the bike. While the gunk LOOKS like big pieces of rust, I think it is, as you suspect, dried flakes of dislodged varnish. Fish some of the crud from the tank and experiment with different solvents. Place some of the gunk in a small container and add different solvents to determine which solvent dissolves the stuff and puts it back into a liquid solution.
-

Front wheel seals
Prairiehammer replied to dna9656's topic in Venture and Venture Royale Tech Talk ('83 - '93)
-

Cylinder side covers
Prairiehammer replied to dna9656's topic in Venture and Venture Royale Tech Talk ('83 - '93)
NO! Don't do that! That would run the risk of loose RTV migrating through the cooling system, possibly clogging the radiator or getting entangled in the water pump impeller. The solution is to shim between the striped cover and the rubber plug. A dime (ten cent piece) has been effective as a shim (at least on the Second Gen, where the leak seems to be more common). You state that there is an OIL leak emanating from behind the striped covers. There should NOT be any OIL. The rubber plug is holding back coolant from within the the cylinder water jacket. The "damper" is just that, a cushion or damper for the striped cover, to preload the cover screw and to prevent rattling and loosening of the striped cover. -

Need a part....
Prairiehammer replied to uhfradarwill's topic in Venture and Venture Royale Tech Talk ('83 - '93)
Keep an eye out for this brake switch for the 1986-1987, 41V-83980-01-00. It is a four wire switch, too. It differs from your 1988-1993 brake switch by the addition of a noise filter on the wiring harness of the 1988-1993. Gives you another option when you are seeking a replacement. -

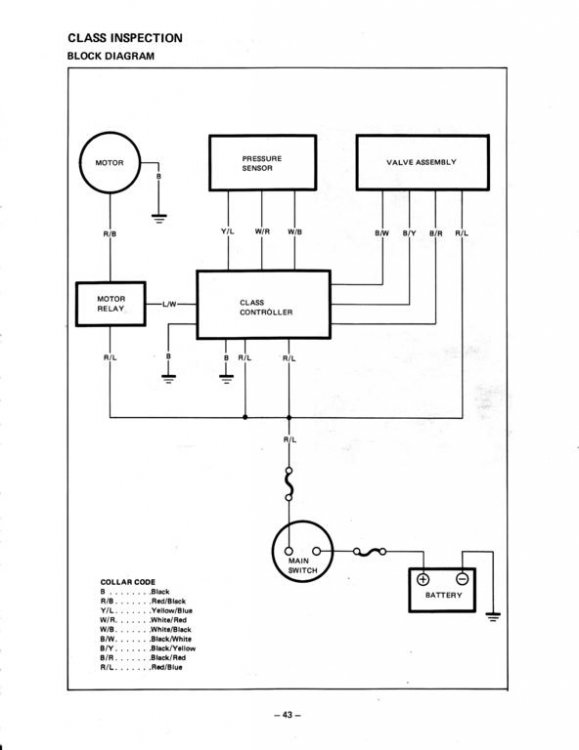
Class wiring
Prairiehammer replied to ken5124's topic in Venture and Venture Royale Tech Talk ('83 - '93)



.thumb.jpg.0d49f7cd39eabf2cb4aba13113e45461.jpg)



.jpg.9c66b79573f73098c74569c03b58ed72.jpg)
.jpg.1de489f5add32f1d1ba84790c50556ca.jpg)
.thumb.jpg.a88c677eb84693cff0b012f825ae521a.jpg)
