-
Posts
384 -
Joined
-
Last visited
Content Type
Profiles
Forums
Gallery
Events
Store
Everything posted by ToyOdie
-
dug050 sent me a PDF for the early RSTD's. It does show the adjustment screws located differenty from the newer RSTD's and Ventures. I have included a link for anyone who might need it. http://www.venturerider.org/forum/attachment.php?attachmentid=49436&d=1282743896 I went out this morning and hooked up my sync tool. It woked perfectly. It was out of balance on 3&4 and right to left. I did find that you have to have a lite touch on the screwdriver to get an accurate setting. Too much push pressure will change the reading without chqanging the setting. With a little practice I found the right touch. By the way, the screw that was bottomed out was not an adjustment screw. It was right above the adjustment and I kept putting the screwdriver in the wrong one. It helps to use a flashlight and glasses. (old guys rule)
-
This is one of many. When I was a senior in high school (1974) a buddy and I were coming home from a party in my first car, a 67 VW. We had had a few beers and decided to take a short cut through the county park. This was in the early spring and the lake that the park road went next to was used for Miami Vally flood control for the Ohio river. In the spring they close the dam to prevent run off of the melting snow from flooding the river. This particular night the barriers were not closed on the road, but the dam had been. Needless to say we found out that VW's do float. The snow tires churned like a paddle wheeler and took us about 100 yards to the other side of the flooded road. If we had not gone straight we would have ended up somewhere in the middle of the lake. We didn't realize how lucky we had been until the next day when we sobered up.
-
96 RSTC Carb sync help
ToyOdie replied to ToyOdie's topic in Royal Star and Royal Star Tour Deluxe Tech Talk
The 1&2 adjustment is not seized, I can turn it counter clockwise. If I look at it from the left side (by the choke) I can see that the outer spring is completely compressed. My sync tool is showing me that number 2 has more vaccuum than number 1. No matter how much I back off the adjustment, nothing changes. I think it's time to clean carbs and sort this out. -
96 RSTC Carb sync help
ToyOdie replied to ToyOdie's topic in Royal Star and Royal Star Tour Deluxe Tech Talk
Thanks, that's exactly what I'm looking for. I figured that the other two screws were the ones I needed to adjust. I was going to go through trial and error to figure it out. Now I need to figure out why the 1&2 adjustment is bottomed out. May need to clean the carbs to get them to sync. Thanks again. -
I've read all the threads that I could find for help. None seem to solve my problem. Rather than repeat it here, I've provided a link to the Poor Man's Tips and Fixes thread where I've detailed the problem. Thanks for any help you can give. http://www.venturerider.org/forum/showthread.php?t=34376
-
Sorry, I had some problems uploading the pictures.
-
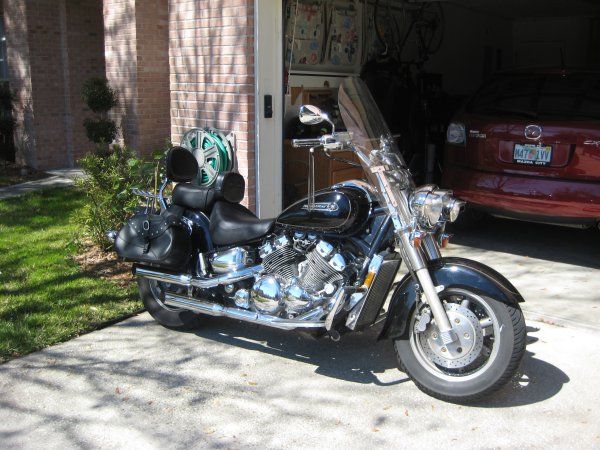
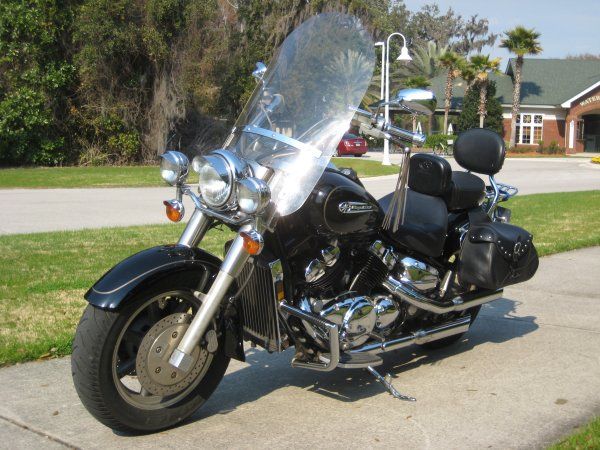
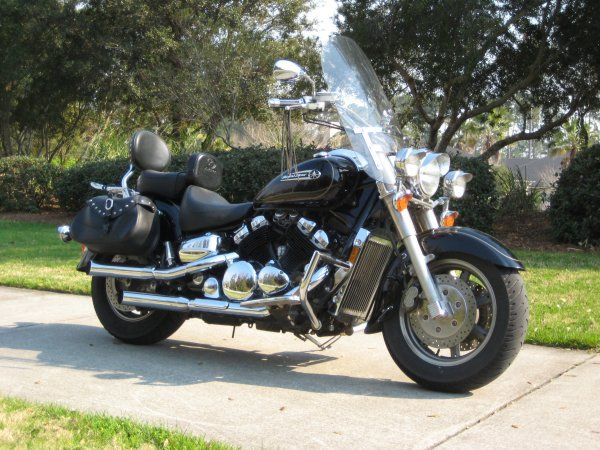
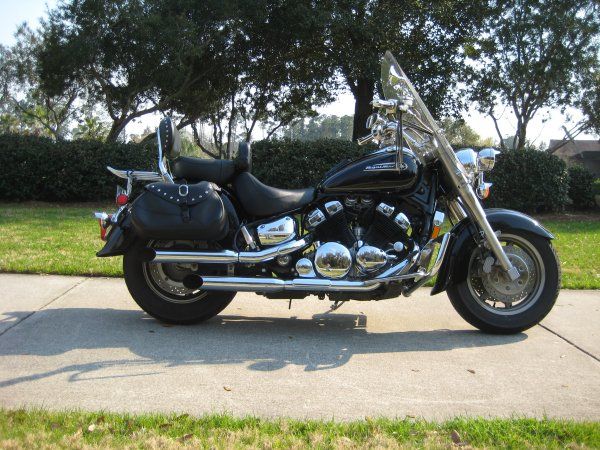
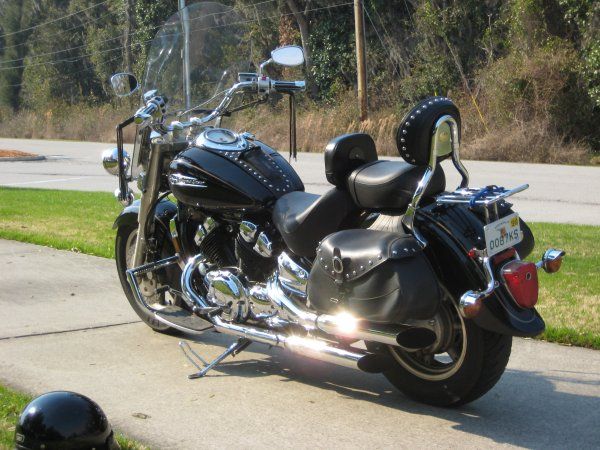
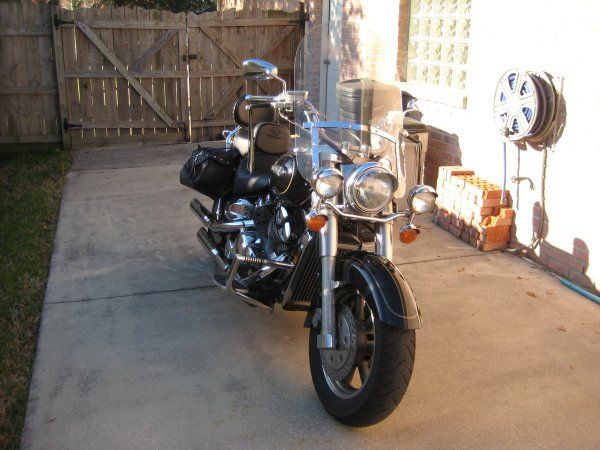
I've been reading this thread and others about syncing my carbs. I like the idea of building my own tool to do the job. I went with the Snapple bottle method and built one based on the discription and pictures. I did use ATF instead of colored water because I thought it would be more stable. For anyone else wanting to build this tool I have a little trick I found on another forum. When filling the bottles, only fill one. Fill it twice as full as you need. Then put everything together and suck the line on the empty bottle that hooks up to the bike. You will transfer half of the fluid to the empty bottle without any bubbles. I also found that a blue butt connector inline would work nicely as a restrictor. Now that I have my sync tool (and it does work!) I have come to my problem. The instructions in the link posted in this thread don't match my bike! I know that the factory manual is wrong but, the screws that I'm to adjust for carbs 3&4 and for syncing left to right aren't where the pictures show them. The screw for syncing 1&2 is right where the pictures show looking from the right side of the bike, but it seems to be bottomed out. I can only turn it counter clock wise. If I look from the left side of the bike I can see 2 screws on the 3&4 linkage that look like they might be the other adjustment screws. I have a 1996 RSTC and as far as I know it is stock. I have atached pictures of my bike to show what I'm talking about. If anyone can help I would greatly appreciate it.
-
http://www.gatorzone.com/include/templates/200908/images/header/header.gif And anyone playing Georgia!!!!!
-
I just looked up Yamaha in Lancaster SC. Here is the info on the one in Lancaster. Bullet Powersports 1200 Hwy 9 Byp W - Lancaster, SC 29720-1780 803-285-5893, Fax 803-285-4993 You might get luck and they have one in stock:fingers-crossed-emo
-
I'm not sure if it is the same on the Rsv as the RSTD, but I was able to remove both cables without removing the carbs. You'll need a long screwdriver or scribe to get the swedge out of the bellcrank. Not too bad of a job. I'm not sure if the cables are the same length. You might need to swap them at the grip end too.
-
Uncomfortable with heal toe shifter
ToyOdie replied to ToyOdie's topic in Royal Star and Royal Star Tour Deluxe Tech Talk
Thanks guy's It sounds like most of you have the same issue with the HT. I adjusted it back to make the toe comfortable. Unless I decide to have it cut and rewelded I'll more than likey leave it that way. I do like the heal when it's lower but I can't live with the toe so high. -
This is the first bike that I've owned that has a heal toe shifter. I have been riding it using just the toe but trying the heal every once in a while. It's very uncomfortable because the heal is so high when the toe is where is like it. I removed the inside belcrank and lowered the heal and it was better for up shifting. The toe was then to high to be comfortable. I started looking at other bikes (mainly HD) and most of their shifters are 2 piece with a spline that allows both the heal and toe to be adjusted separately. Does anyone make a shifter that is more adjustable or flatter than the stock heal toe? I’ve read other posts about cutting off the heal and that is not an option I want to take.
-
I have a couple of questions. First I've never removed my exhaust pipes. I want to take them off to clean things behind them. Will I need to replace the gaskets if I do? Second, I have been considering putting hardbags on my bike. I saw a 99 RSTD with Road King bags that looked great. My problem is that I don't have 4 into 2 pipes and the bags won't fit with 4 pipes. Do any of the newer RSTD 4 into 2 pipes fit my 96?
-
Well I guess there ate at least 4 of us!! My wife keeps reminding me I'm not from Ohio any more when I'm asked. I was borne in Cincinnati but I haven't even been there to visit since 1978. I spent 20 years in the Navy and retired in Jacksonville Fl. in 1995. I have now spent more time in Fl than any place in my life (I guess she's right:doh:)
-
Low Fuel Light??
ToyOdie replied to ToyOdie's topic in Royal Star and Royal Star Tour Deluxe Tech Talk
OK Guys......I've been out of town for a few days so when I got back I took my bike out for a ride. I filled the tank up and reset my trip meter. After 117 miles I stopped and filled up again. I could only get 2.26 gallons in the tank! That's 51mpg! I took mostly back roads with an average of @ 50mph. There were some streaches of 65 to 70 but mostly around 55mph. I'm not sure why my mileage is so much different, but I'm not complaining I was going to do a major tune-up, however, I've always lived by the moto.....If it ain't broke, don't fix it! (I still haven't figured out when or if my low fuel light comes on. If this keeps up I may not need to know.) -
Low Fuel Light??
ToyOdie replied to ToyOdie's topic in Royal Star and Royal Star Tour Deluxe Tech Talk
I have know idea when the plugs or air cleaner were changed last. I do know that the air cleaner needs to be replaced (with a K&N) soon. I did notice that my intake boots are also cracked on the outside. As a temporary fix I brushed them with liquid electrical tape. I didn't notice any differnce in the way the engine ran but they do look better. -
Low Fuel Light??
ToyOdie replied to ToyOdie's topic in Royal Star and Royal Star Tour Deluxe Tech Talk
Just lucky I guess:thumbsup2: I haven't done much long distance riding yet, but around town I fill up at around 150 miles and it take @ 3.6 gal to fill up. That comes out to 41.6666 mpg. My low fuel light doesn't come on before I get to reserve. So my sending unit might have gone bad when the wires were pinched. -
Low Fuel Light??
ToyOdie replied to ToyOdie's topic in Royal Star and Royal Star Tour Deluxe Tech Talk
Since I'm getting around 42 miles to the gallon and have almost a gallon left when I get to reserve your numbers and mine don't add up:starz: I'm thinking about running down to reserve near home and then draining the rest of the tank until the light comes on (if it does). I can then fill it up and know how much was left when the light came on. -
I have a question about the low fuel light on my 96 RSTD. When I bought the bike the Low Fuel light was on all the time. After removing the tank I found that the wires to the sending unit were not routed right and had been pinched. I cut back the covering and spliced new wires in and rerouted them under the rear tank mount (where they were suposed to be) and the light went out. Now my question is, "When should the low fuel warning light come on?" I have run the bike down into reserve a couple of times and never saw the light come on. When I hit reserve I have around 1 gal of gas left based on the pump and gas milage. I would like to know when I should see the light without tempting fate while in reserve.
-
What Model RSTD do I have?
ToyOdie replied to ToyOdie's topic in Royal Star and Royal Star Tour Deluxe Tech Talk
I'm not sure how you measure the windshield, but my line of sight is about 3 inches below the top. It's like the one you see on the state trooper HD's. I have considered cuting it down but I can't afford to replace it if I don't like it shorter.


