-
Posts
2,232 -
Joined
-
Last visited
Content Type
Profiles
Forums
Gallery
Events
Store
Everything posted by camos
-

Top Box amber lens?
camos replied to Great White's topic in Venture and Venture Royale Tech Talk ('83 - '93)
Here you go GW: These parts are cheap enough that is is unlikely you can make them for less. Centre Lens: http://www.bigbikeparts.com/templates/product.aspx?ProductGuid=900100L&GroupGuid=16 Left Lens: http://www.bigbikeparts.com/templates/product.aspx?ProductGuid=900100LL&GroupGuid=137 Right Lens: http://www.bigbikeparts.com/templates/product.aspx?ProductGuid=900100RL&GroupGuid=16 -

The trouble with motorcycle tires...
camos replied to camos's topic in Venture and Venture Royale Tech Talk ('83 - '93)
Perhaps not quite top notch. about 3 weeks ago when I first found their site they were out of stock on the front tire so I clicked on the site's "notify me" button. So fast forward to the other day, I'm looking on their site and they have stock. No notification for me.... No one is perfect but I did feel rather annoyed. Oh well, it's not like that kind of thing hasn't happened before. -

The trouble with motorcycle tires...
camos replied to camos's topic in Venture and Venture Royale Tech Talk ('83 - '93)
Good to know Doug, this is the first time I have dealt with them. When shopping for something in the future I will be sure to include their site in my search. -
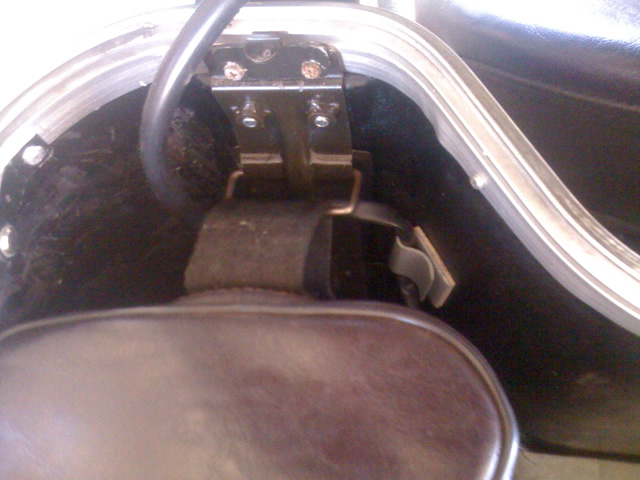
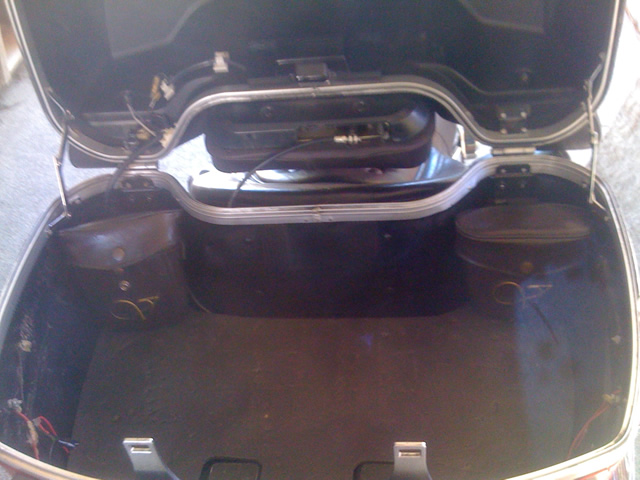
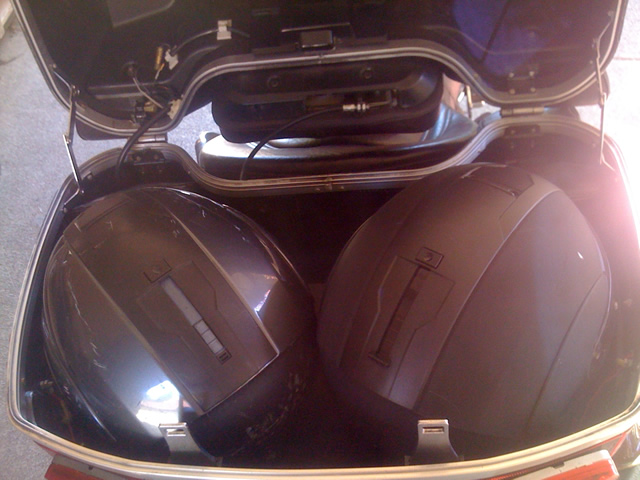
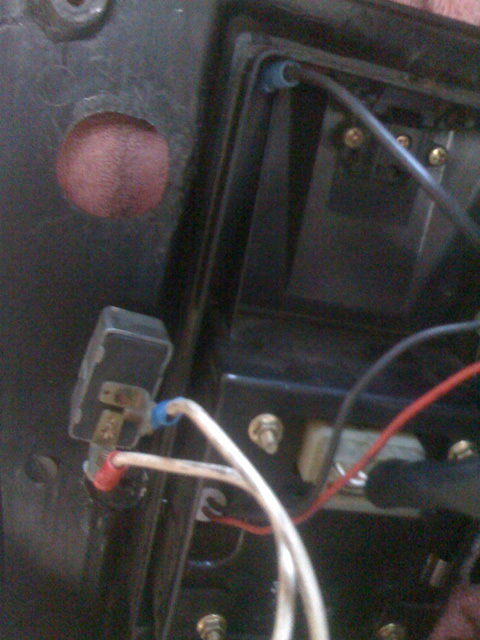
Been meaning to do this little project for a couple of months and this thread kicked my lazy ass into gear. The front pouches when mounted where they were designed to go are 90% in the way of my knees. Before making the first trip on my 89 from Everett WA to home the pouches ended up in the trunk where they have been floating around for 10 months. One pouch was used to hold the headset cables and the other one held the screwdriver, LED flashlight and wrench mentioned in my previous post. It was a bit messy but did keep those items organized together and handy. Today, using a length of wire cut from a clothes hanger, I bent a keeper hoop and slipped it over the vertical bracket in each corner of the trunk. It was only necessary to remove the two hinge bolts and the 2 tiny screws at the top of the vertical bracket. The original hanger strap goes through the hoop which holds the pouch in position. The hoop is free to slide about half way down the bracket which may cause a small issue. On the left side the hoop is held up by the trunk light wiring but there is nothing similar on the right side so it may require putting something behind the bracket to stop the hoop from sliding down. Time will tell. Here is a pic of the completed installation. Here is a pic with the pouches installed and two HJC IS-Max II modular helmets sitting in the trunk. Just in case anyone is wondering, the pouches have the items mentioned plus a pair of sunglasses and the lid does close properly.
-

The trouble with motorcycle tires...
camos replied to camos's topic in Venture and Venture Royale Tech Talk ('83 - '93)
Good idea, never thought of trying that. There will be next time so thanks for the hint. -
The darned things wear out way too soon. I'm a fan of the Dunlop Elite 3 tires so spent some time looking at the various online sellers in the US and found the cost was similar across the board. Some places had free shipping to the lower 48 and others didn't. Some would ship to Canada while others would not. The ones that would ship across the border wanted a mortgage on your first born. The prices from the US retailers did not look too bad until considering payment with a $.75 Loonie. After regaining consciousness, I decided to see what Canadian online retailers had to offer. Most of the ones I found wanted a rather large amount for shipping and some of them also had ridiculously high purchase prices as well. This was not looking good. So long story - short, I tripped over Canada's Motorcycle which had the tires for less then the US retailers after the conversion to Looniedom and free shipping to boot. There was also a $5 environmental fee per tire and a $10 discount for buying two tires. Seemed kind of odd to me that the front tire was more expensive than the rear one. Here is the damage: Dunlop Elite 3 Rear Tire - Tire Size MU90B16 $157.59 Total:$162.59 Dunlop Elite 3 Front Tire - Tire Size MR90-18 $159.37Total: $164.37 For what it is worth, this is the best deal I could find to get these tires in or into Canada.
-
Even in Canada...eh? I used to keep a tire gauge, LED flashlight, Yamaha screwdriver and a crescent wrench in the rear bag. That is until someone decided they deserved those things more than I did. It wasn't much of a score for the scumbag involved but I still had to replace those items so now the rear pouch only gets used while on a trip and only when necessary.
-
The thing about bread is that all loaves are not created equal. Breads stretch from a nutritionally beneficial meal to nothing better than junk food. Most of the breads available in stores these days are at or near the junk food category because they are mostly made with flour that has had all the nutritious bits removed. Fortunately for those who cannot or will not bake there are growing numbers of artisan bakeries that do produce a healthy and tasty product. The down side is that most of the "healthy bread" products are expensive to buy, $3-$6 per loaf. Really? It's just bread, not Kobe Beef. Sheesh!!! No matter what kind of bread a person prefers, bread machines make it awesomely easy to produce a loaf of bread with only about 1/2 hour of prep time. Of course, there is the bake time which takes about 3 3/4 hours but other things can be done while that is happening. The biggest negative to bread machines is all of them are made by manufacturers who don't use them. That's my theory anyway. Otherwise why do they all automatically go into a keep warm mode after the baking cycle? If the bread is not removed, or at least the machine unplugged after the baking cycle then it will get over done. That is just lame...so lame!!! The solution is to get one of those timer plugs that will turn off the power at a preset time. Sadly I keep forgetting to do that. The reason I decided to develop this whole wheat, whole grain recipe was to create a bread that was more than just an extra calorie vehicle to carry whatever food I wanted to wrap it around. Whole grains and seeds are high in necessary nutrients, proteins and fiber that the body needs. My recipe is most likely also high in calories but proteins and fiber are both necessary to keep your body satisfied for longer with the net result that you don't feel hungry for much longer than the usual bread types. The other part of what is good about whole wheat flour versus refined white flour is that since it takes longer to digest it will not spike the blood sugar which causes the body to produce high levels of insulin which makes it go into fat storage mode. When that happens much of what you have eaten gets stored rather than digested with the result not very long after eating blood sugar levels crash and your are hungry again. It's a vicious cycle. The more refined foods you eat, the hungrier you get. Ouch!!!
-
I like pizza but don't eat it very often. About 6 months ago I bought a package of 4 or 6 frozen pizza crusts from Costco, still got 2 left. They are convenient and taste pretty good. Been looking into making my own Whole wheat pizza crusts from scratch. Recently found this "How To" and recipe that caught my interest. http://www.weedemandreap.com/pizza-dough-recipe-fluffy/ Most of the pizza recipes I've found online are pretty much the same. Tomorrow I'm making whole wheat tortillas from a recipe on this site. See how it goes. Looks to me the bread maker is your wife. How could you forget?
-
So, it's been about a year since I first posted this thread and I though I would update it with the current evolution of my satisfying and nutritious multi-grain bread. It has not changed very much, just the addition of red lentils and a better way of measuring the flour. Hearty Multigrain Bread - Updated Servings: 12-16 This high fiber bread is a medium textured loaf appropriate for sandwiches, spreads or eating with a meal. The texture is solid and hearty; yet light and sweet. A little clarification, when I say sweet, that is a relative description since this is not a dessert bread. Ingredients: A : Combine in bread pan: 1/4 c Red River Cereal 1/4 c quinoa Heat 7 fl.oz. water to boiling (microwave 2min) and add to cereal grains. Let stand 20 minutes or longer, it's not critical 1/4 cup red lentils Rinse well in a bowl, 5 or more times, until water runs clear. Cover with water and microwave on high for 2 minutes. Set aside 2 Tbs olive oil Combine 7 fl.oz. cold water, 1/4 c packed demerara sugar or brown sugar as you prefer, 1 egg and 1 tsp salt After 20 minutes, add the red lentils to the bread pan then pour in the above mix. B : Combine in bowl prior to adding to bread pan: 9 oz Multigrain or whole wheat bread flour (164g) (If using lentils 165g) 1/4 c gluten topped up to 9 oz mark with regular whole wheat flour (164g) (If using lentils 165g) 1/4 c flax seeds milled 1/4 c oats or nine grain cereal or porridge oats 1/4 c bran - wheat or oat 1/4 c dry milk powder, buttermilk powder is even better C: Add on top of A and B ingredients in bread pan: 1 tsp bread machine yeast 1/2 c raw sunflower seeds 1/2 c raw pumpkin seeds Optional - add at ingredient beep 1/4 c sesame seeds or 1/4 c poppy seeds Directions: Place ingredients in the pan of the bread machine. Do "part A" first to give extra time for soaking grains. Do "part B" and add to bread pan Do "part C". Select whole wheat cycle and 3 lb loaf. Start Note: When measuring flour - scooping with a measuring cup will pack more flour into the same volume. The technique I use is to use a small scoop and "spoon" the flour into the measuring cup then shake a few times to level. This is new: I no longer scoop the flour but weigh it on a scale which is much more accurate and is an aid for repeatability. Also, have been adding the red lentils for a while. They did not noticeably change the texture and do add a bit more protein and other healthy nutrients.
-
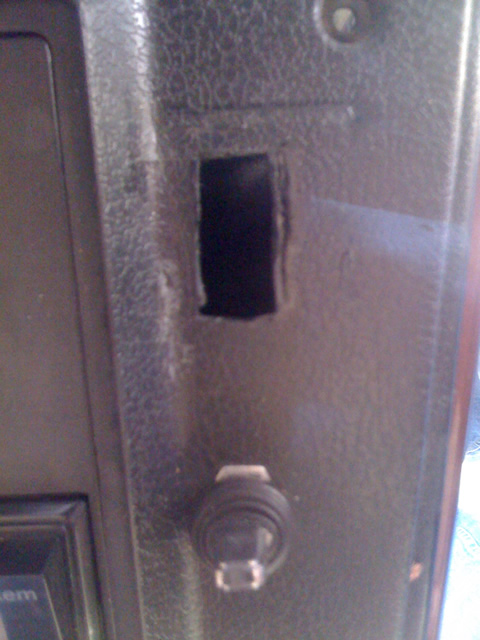
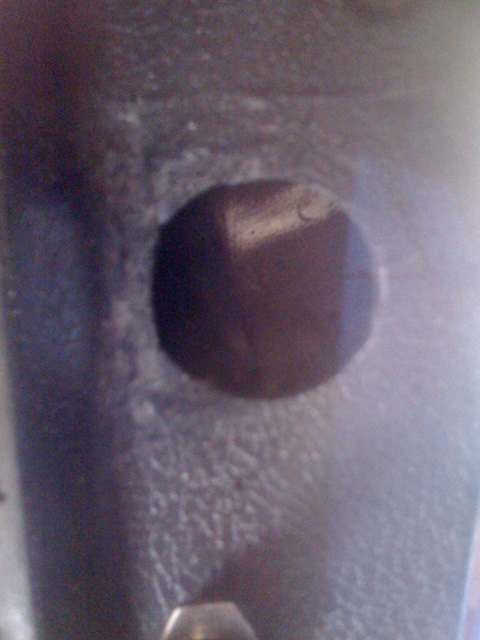
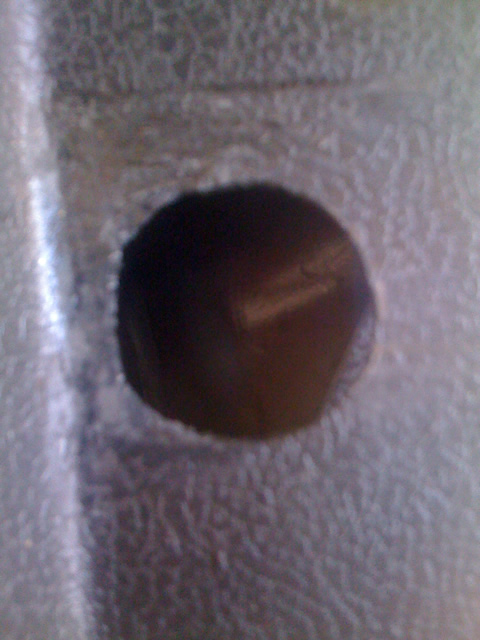
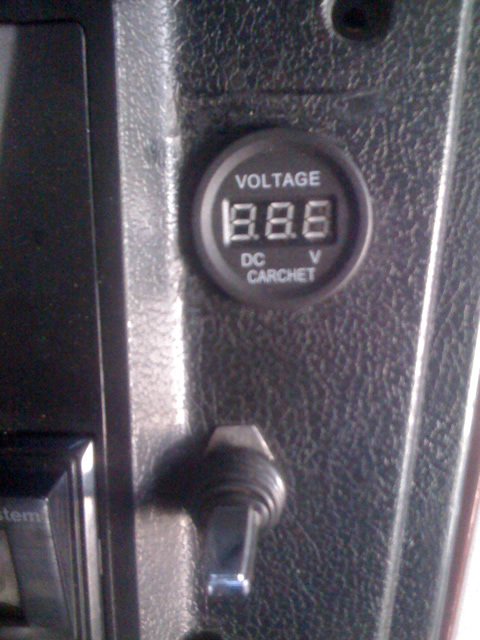
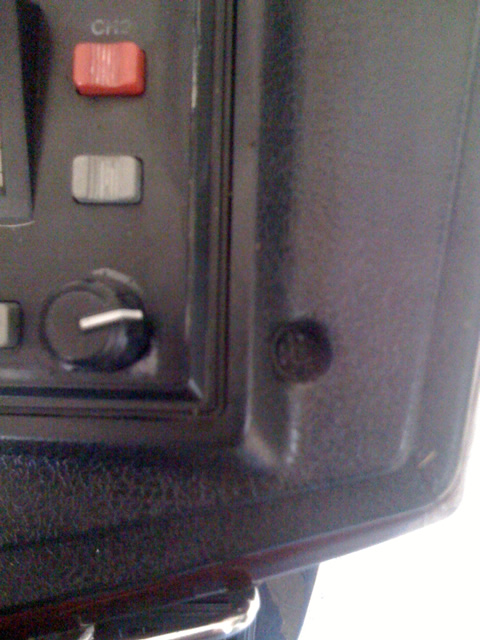
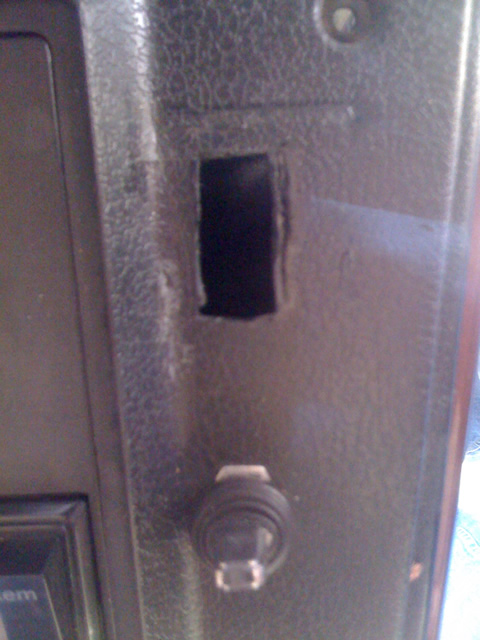
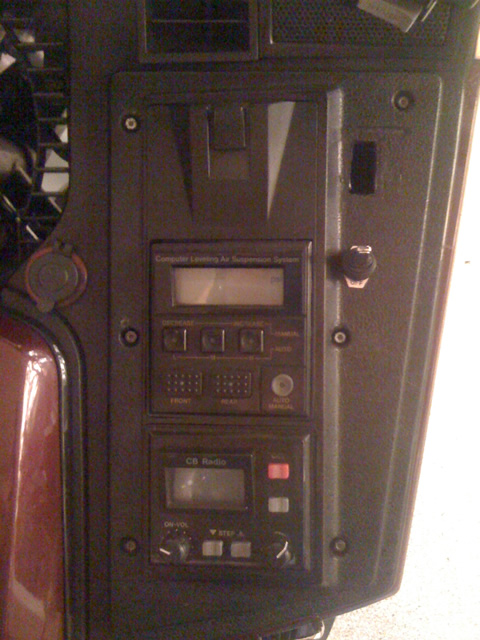
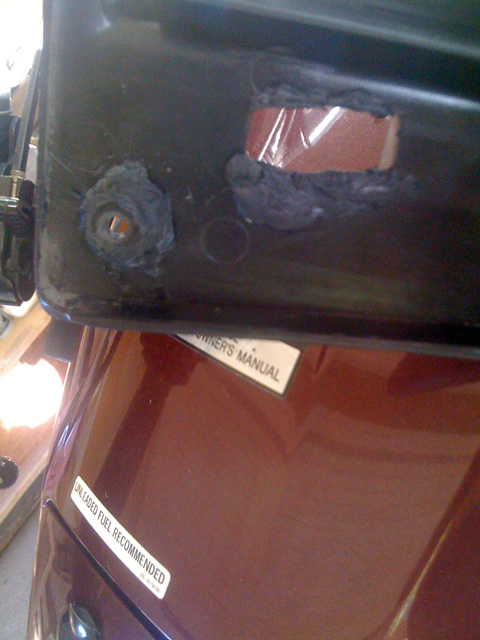
I decided the switch that had it's hole modified in the previous post was not suitable so I chose to replace it with a volt meter. That, of course, required re-patching the switch hole because the VM did not cover the complete hole. Following is a pic of the finished switch hole that is the starting point for modifying to fit the volt meter. Using the same method as previously described, the first step was to cover the edges of the hole with cello tape to create a base line to work to. No pic was taken of that step because there was some rain and the tape got a bunch of white patches in it and looked weird. Fortunately before the rain happened the first layer of ABS-MEK putty had been applied and had set up. At that point I waited a few days while it cured. Then a 1/2" wood chisle was used to carve the excess cured putty on both the top and bottom of the panel. To flatten the cured putty the chisel is used like a knife, from side to side which makes it easy to attain a relatively flat surface that matches the original part of the panel. The patched hole was roughly flattened before cutting the hole to fit the volt meter. The patched corners of the original rectangular switch hole can be seen on the top and bottom left of the round volt meter hole before a final smoothing with the chisel. Hopefully the photo of the finished bottom side shows there are no apparent voids in the patched areas. Here is the completed installation. It is not perfect but does pass a casual inspection. The Horizontal line above the hole is a glue line from the original switch installation. I'm not sure if anything can be done to remove that. Matching the textured surface is problematic but leaving the filler putty a little on the rough side helps to camouflage the filled area. So, this is the first time I have attempted such a sophisticated patch using ABS-MEK putty. While working on this, the patched part of the panel seemed to bend or flex equally with the original and is about the same thickness. It is early days but the bond of the patch material appears to be as strong as the original. It seems, to me at least, ABS-MEK putty should be able to be used to patch fill any smooth part of the fairing prior to sanding and painting although it is definitley limited when patching a textured surface. In any case, this exercise was not about installing a volt meter but rather testing the possibilities of using ABS-MEK putty as a repair method. I did not do the accounting but suspect the repairs to the right side panel cost only a couple of dollars or less. I'm quite pleased with the results. Just in case anyone is tempted to copy this volt meter installation, there is one very important point I want to make before finishing this off. The position of the volt meter in the panel really sucks. It is right behind the brake master cylinder and the handlebar so cannot be seen while riding without attempting some possibly unsafe contortions. Unfortunately, there is no silver lining....
-
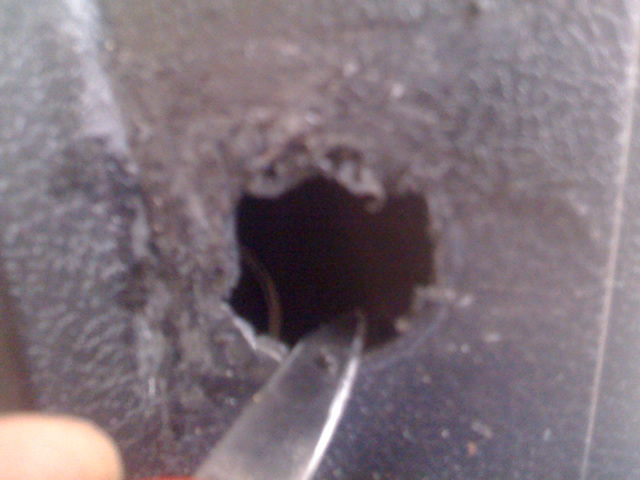
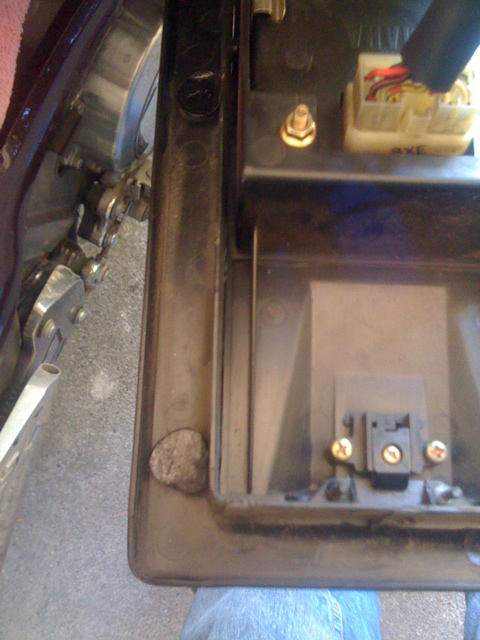
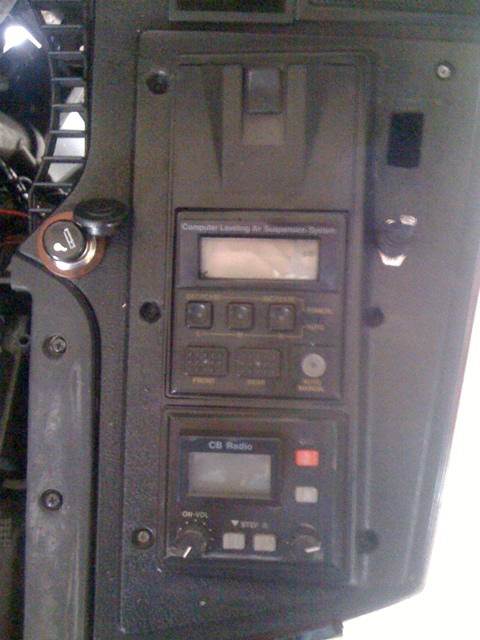
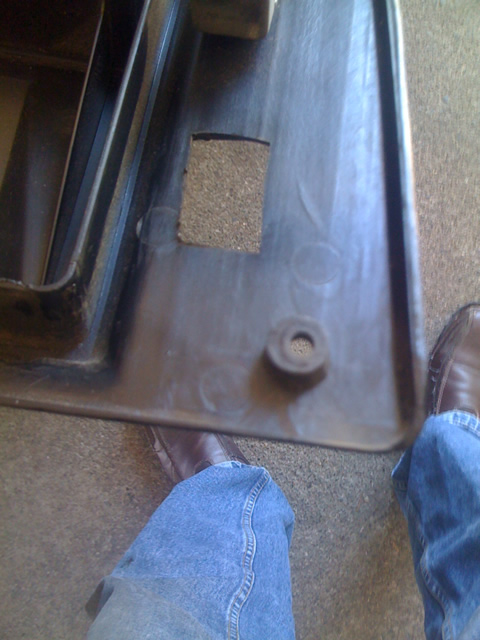
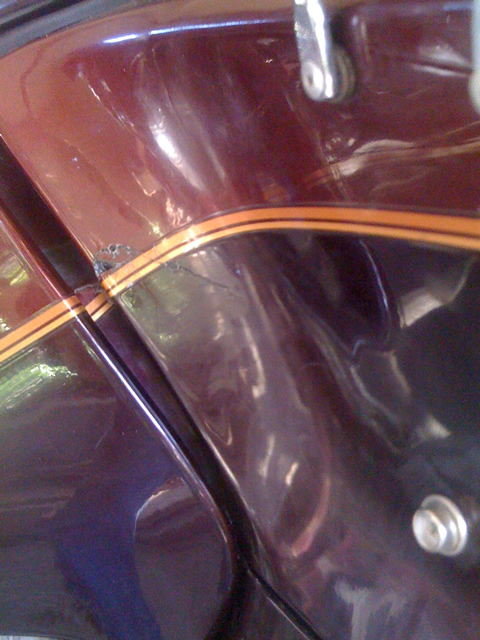
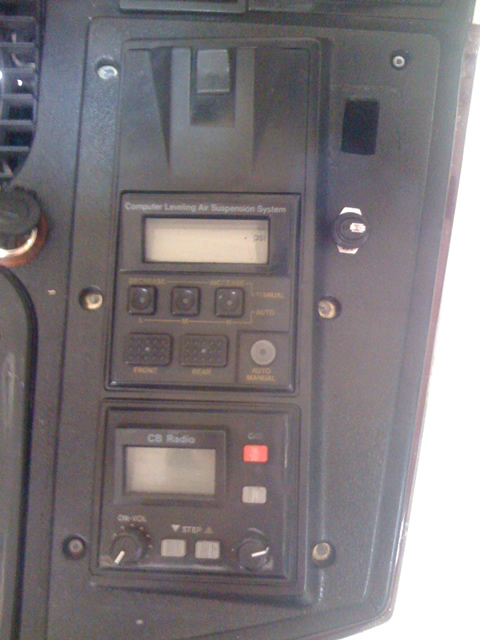
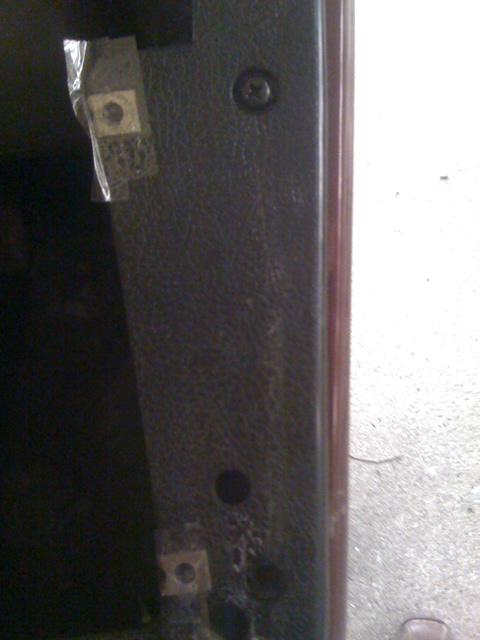
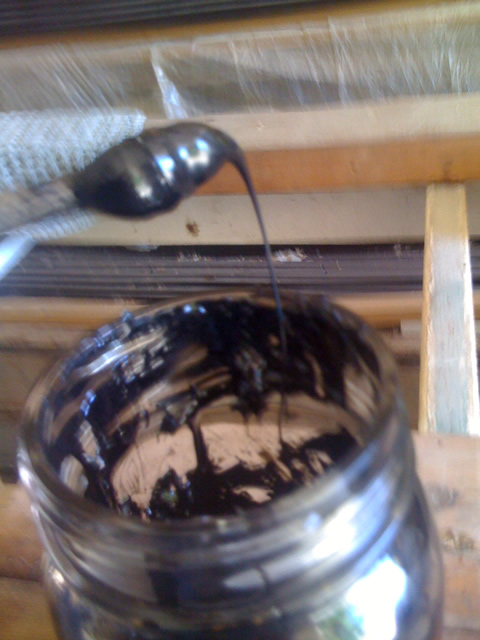
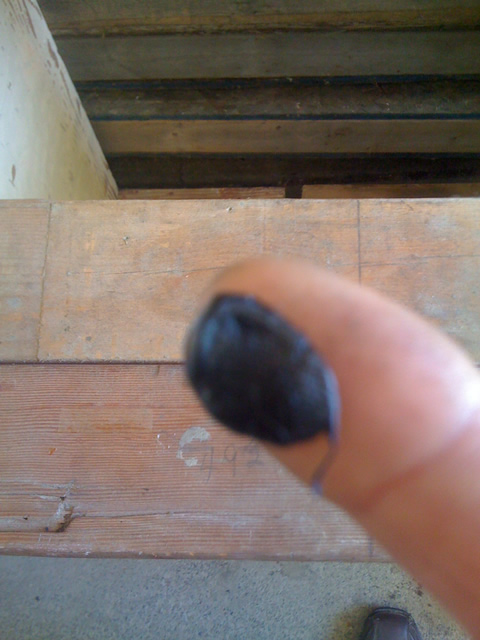
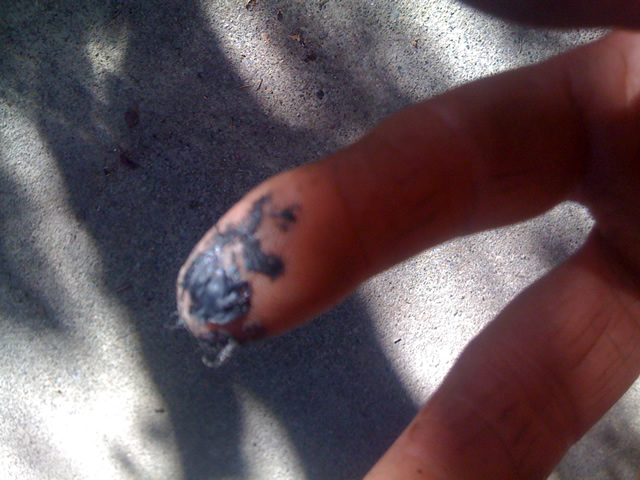
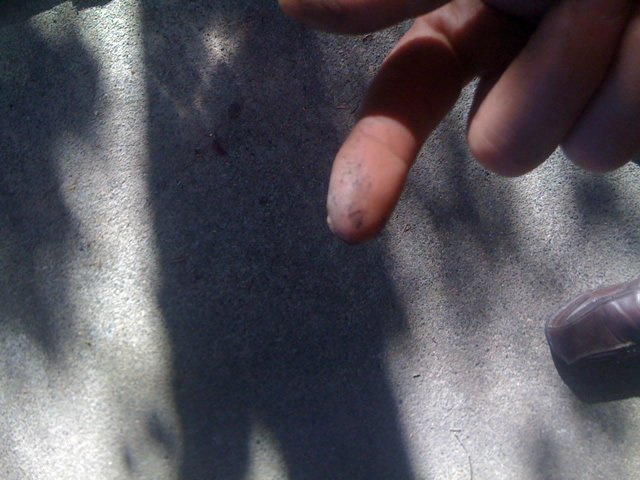
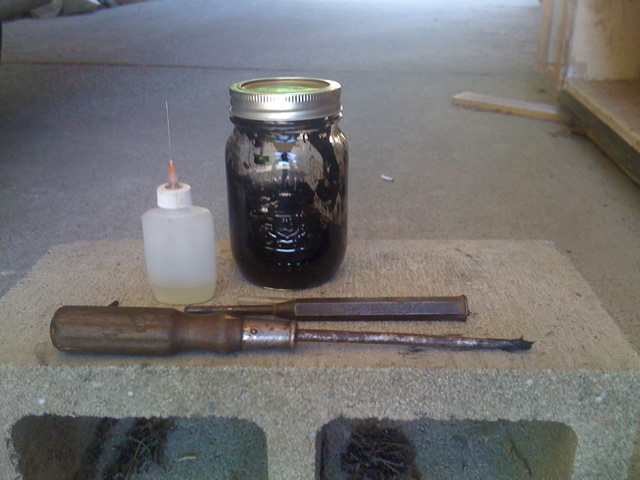
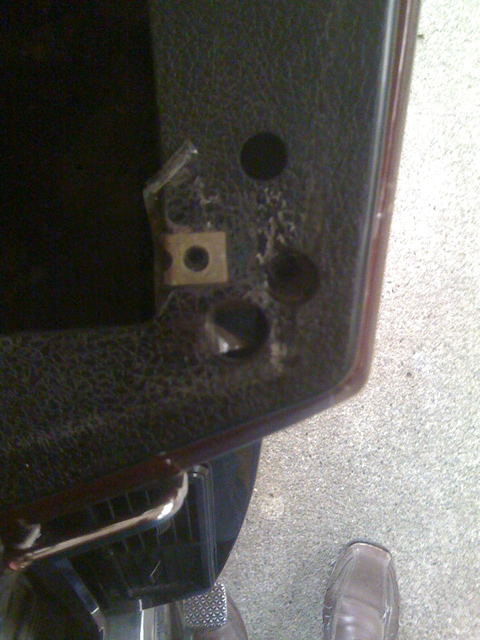
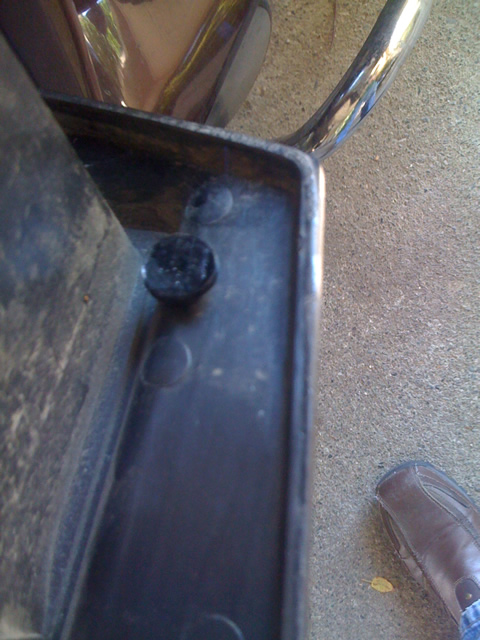
First a bit about working with MEK and ABS plastic. MEK can be absorbed through the skin and in high enough doses can cause health issues. I would not recommend working in a confined area or handling it for extended periods and I've never tried squirting it directly on my skin. These repairs don't take very long to do and don't require contact with a high concentration of MEK. I have found that handling the putty with my fingers causes me no discomfort. Here is a link to the MSDS: http://www.sciencelab.com/msds.php?msdsId=9927358 The materials required to make this repair are some MEK (Methyl Ethyl Keytone) solvent in a syringe bottle, a previously prepared mix of ABS and MEK, a stir stick/applicator (old screwdriver), a 5/16" drift or some other flat bottomed poker thing that will fit the diameter of the bolt holes, 5/16 and 1/8 drill bits and some cello tape (Scotch Tape). MEK does not dissolve cellophane so it works well to cover areas that must not get bonded. Use a container that seals like the small mason jar I used. Cut up some ABS scraps such as plumbing pipe cuttings or even buy it if necessary. Making smaller pieces will allow the ABS to dissolve quicker. Pour in some MEK, about 1/2" in the bottom of the jar. Put the lid on and swish it around then leave to percolate for a few days. Have a look then stir or swish around again and leave for a few more days. If there is no liquid left and there are still chunks of ABS, add a little more MEK. The object here is to reduce the ABS chunks and get a movable filler paste. If the mix gets too runny just leave the lid off until it thickens up enough. This is gooey stuff but as it drys out it gets workable...for a short period...but reasonable enough to give a not too stressful working time. Before applying the putty squirt some straight MEK on the surface to be bonded to. This filler paste will be moldable for several minutes and moveable for an hour or so and will take several days to fully cure. That said, messing with it while it is setting up hard will most likely weaken the bond. Any ABS that gets on your skin can be easily peeled off. The right side dash instrument panel on my 89 VR had four of the six holes missing. Well, the holes were still there but their bases had broken away so they were too big for the bolts to hold the panel. The bottom right hole on the primary panel was half broken out with a crack that went to the edge. There was also a crack running half the length of the right side. These were repaired a weeks prior to beginning with the instrument panel. The fairing below the primary panel in the area of the crack had cello tape applied (see below) to prevent any unwanted bonding of the panel to the fairing. The crack repair was done in place by applying MEK from the syringe bottle straight to the crack and holding pressure for a few minutes until the solvent had set. Spillage or runs of MEK on the good part of the panel will evaporate fast enough to not cause any damage to the surface. Getting down to business. The first step is to remove the panel to be repaired and put several strips of cello tape to cover the bolt attachment clips. This can be seen in the above pix. With the instrument panel in place, held by the two good bolts, get a gob of putty from the jar, let it set up until it can be rolled into a ball, give the sides of the hole a squirt of MEK, put the ball in the hole and use the flat bottomed drift to press it into the hole to the approximate depth needed. Use enough putty so it can mushroom out under the panel and up the sides, depending on how much of the hole has to be built up it might be necessary to completely fill the hole. Once all the holes are filled, it's time to take a break for a few days or a week to let the putty cure and complete the bond which could be fragile in some places. About that, this job took three Sundays for me to complete, working about an hour at a time. The next step is to remove the panel and check to see how well the putty attached to the underside. As can be seen, each hole is different due to the amount of damage that had to be repaired and the amount of putty initially used. There is now a base to work from. The first application of putty set the correct depth of the hole structure but all of them did not get sufficiently attached to the bottom of the panel to provide long term structural integrity. A second application of putty was required. Get a gob of putty, squirt some MEK around the base of the first patch and press the putty in to fill any voids and build up enough enough mass to properly support the bolt. Some putty was also added to beef up the two unbroken holes. As can be seen, concurrent to rebuilding the panel holes there is also a switch hole that needed to be made about 1/8" narrower. To fill something that, first lay cello tape around the hole at the approximate size required which will create a base line to fill to. This was an afterthought and was done from the top so it turned out a bit messy. A knife was used to carve the sides of the filled hole straight and will probably use a dremel to smooth the underside. The following Sunday the patched holes were reamed out using a drill bit just a bit smaller than the diameter of the panel holes. A sharp bit turned by hand was able to carve the over filled holes to a proper depth. It also provided a centreing point to drill out the hole for the bolt. Here we have the repaired panel. When I first started this project, about 3 weeks ago, I noticed a serious crack in the fairing from just below the side-panel grommet through the corners and passing beneath the pinstripe. Fortunately the pinstripe was not broken. At that time I separated the crack a bit drizzled some MEK into it, waited a couple of minutes then drizzled a bit more into the crack and held it closed until it set up.... perhaps 4 or 5 min.... which felt like an eternity. At some point the fairing should be removed and the backside reinforced an that area but for now, at least, it seems to be a reasonable repair.
-

mounting a driver cup holder
camos replied to mike042's topic in Venture and Venture Royale Tech Talk ('83 - '93)
Hey, no apology necessary. I now know what to aim for so all is good. -

Brake light adjustment issue
camos replied to camos's topic in Venture and Venture Royale Tech Talk ('83 - '93)
Ahh... Looks like mine might be normal then. Will file that little knowledge nugget under "May Need To Know At Some Point". Still a fountain of information GW. -

mounting a driver cup holder
camos replied to mike042's topic in Venture and Venture Royale Tech Talk ('83 - '93)
Hah! I'm speechless. Never thought that could happen. -

mounting a driver cup holder
camos replied to mike042's topic in Venture and Venture Royale Tech Talk ('83 - '93)
So... my 32 oz Nalgene is 3.6 inches diameter... close but no cigar... Bummer!!!! Well, not a huge problem, it is too hard to drink from it on the fly anyway. Will just have to look for a slightly smaller bottle that has a built in straw. Pretty sure I've seen some around locally. Thanks, knowing what to aim for will make my quest much easier. -

Brake light adjustment issue
camos replied to camos's topic in Venture and Venture Royale Tech Talk ('83 - '93)
Today I removed the right muffler and was able to remove the rear brake light spring from the switch. The spring was stretched. Cut off 1/4 inch, bent the end into a circle, hooked it back up and it worked...just like magic. Could not get the switch and adjuster out. Something is not right there. The threaded bracket that is welded to the frame is canted outboard a bit. Is that the way it is supposed to be? Looks to me as though the bracket should be horizontal which would make a little more room between the switch and fuel tank. Anyone familiar with this situation? -

mounting a driver cup holder
camos replied to mike042's topic in Venture and Venture Royale Tech Talk ('83 - '93)
Right on!!! Anything that holds more coffee is a good thing. -
My day was not nearly as exciting as yours was GW but way more exciting than Yammer's. Before going on, just want you to know how very much you and your guys are appreciated. When my boat went down 20 miles offshore I had a buddy standing by so it was not necessary to have the CG come and get me. Never had to get rescued again but there were 5 or 6 serious incidents during the 30 years I spent on the water when having the CG monitoring the situation was a significant relief. I usually get up at 0545 to go to work but Sunday being my day off I did plan to sleep in a bit. So much for plans, woke at 0400 and was so bored by 0430 that I got up. Drank coffees and read the VR forums for a while then decided to make pita bread from scratch for the first time. While the dough was rising dismantled the right side dash panel on the 89. The cigarette lighter socket had shorted out and melted its way out of the hole. Put in a new one and then cooked the pitas. After that. patched the mounting holes for the panel that holds the CLASS and CB. Four of the six holes were broken/missing. Put in some MEK and ABS putty as a first step and tomorrow the panel comes off and gets the second filling. Took some pix and will do a little write up when it's finished. While that was setting up, put a loaf of bread on to bake. Love my bread machine. So while the panel is curing and the bread is getting made, pulled the right passenger board off. Remember my issue with the brake light? Found out that did not help to get at the switch. Oh well... Tried for a while to get to the switch from under the bike but couldn't, fat hands I guess. The spring is stretched. So tomorrow will be pulling the muffler off which will hopefully allow me to get in to remove the spring. Fresh pita and sausage for a late lunch. Mowed the lawn then put the dash panels back together. By then it was time to start cooking dinner. Rockin Moroccan vegetable stew...awesome. Spent the rest of the evening looking into Bluetooth headphones and decided that SMH10 kit you mentioned would be the most practical and safest choice. Oh ya, somewhere in there I found a couple of old keyboard dongles that will do fine to adapt to a 3.5 mm stereo jack. Tonight I ordered a cheap Bluetooth transmitter off Amazon. If that will pair with my SMH10 then I'll pull the trigger on the kit. It's a good thing that days off only happen once a week.
-

mounting a driver cup holder
camos replied to mike042's topic in Venture and Venture Royale Tech Talk ('83 - '93)
I have a 32 oz Nalgene bottle that I carry at work but it fits into a belt bag that requires two hands to get it in or out which is not conducive to use while traveling. The only way to know for sure is to get the dimensions so what is the inside diameter of the drink holder without the foam cozy and how deep is the holder? I'm hoping to find a 16 oz...or so.... bottle that will fit into a well constructed holder. Thanks for your help with this. -

mounting a driver cup holder
camos replied to mike042's topic in Venture and Venture Royale Tech Talk ('83 - '93)
I have a gimballed cup holder on the 90 VR that was purchased at Walmart. It works well enough and does clamp to the handlebar. The problem when using a holder with a standard paper/foam coffee cup is it spurts out of the drink hole every time you hit a bump. Been thinking about getting a sports bottle with a straw hole. Problem is all the drink holders are rather puny but then sport bottles are on the puny side too. Anyway, do you think a Barefoot Willies is big enough to hold a sports bottle? Wonder if an IV might not be the best coffee solution. -

mounting a driver cup holder
camos replied to mike042's topic in Venture and Venture Royale Tech Talk ('83 - '93)
GW is probably too busy hanging off the side of his bike to ever consider taking a sip of coffee. -
Had a look in the junk box in the house and didn't find a keyboard cable but could be one in the junk box in the shed. Those things are really old. Did find a conversion adapter to a PS2 port though. Tested it and seems to fit into the holes but is too fat to go all the way in but a bit of a trim should make it work. I'll see if I can open it up without damaging the wires. Might only have to buy a 3.5 mm stereo plug. If I don't have to buy an adapter I just might be able to afford that Sena mic base. Whoo-Hoo!!! Things are looking up.
-
From the pic it looks like there are two mic's that are interchangeable or that could also be removed when they are not wanted. I didn't actually look into that kit but now that you made me, it might just be the best solution. Thanks GW, you are a fountain of information.
-

Brake light adjustment issue
camos replied to camos's topic in Venture and Venture Royale Tech Talk ('83 - '93)
Can't say I noticed any issue with the pedal travel at the time. Good point though so tomorrow when I get into it again I'll check that out and give it a bit of a lube. Thanks GW.


