-
Posts
2,232 -
Joined
-
Last visited
Content Type
Profiles
Forums
Gallery
Events
Store
Everything posted by camos
-

weeping oil above kickstand
camos replied to GaryZ's topic in Venture and Venture Royale Tech Talk ('83 - '93)
When I have done mine, I used brake clean which leaves no residue. Can't say if that is the only cleaner to use but done it three times so far and it worked every time. -
Thanks for the suggestions on how to vary the output of the LED's but for me KISS rules and it cannot get any simpler than On/Off. The configuration used in the rear light bar is a natural KISS scenario with two rows on all the time and three rows that come on when the brakes are applied. No one will miss seeing the extra blaze of light when the brakes light it up. Yesterday I found the turn signal and brake connectors under the seat. Never used them before and never really liked the idea but I'm going to use tap connectors to join the the wires from the light bar. It appears to be the easiest solution and I'm hoping that I won't regret it. Time will tell.....
-
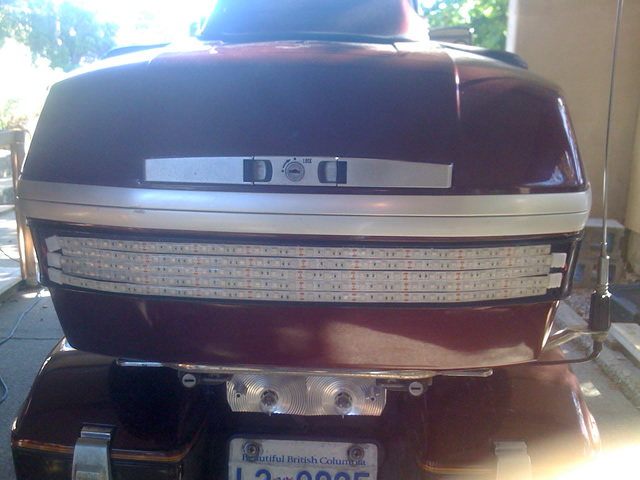
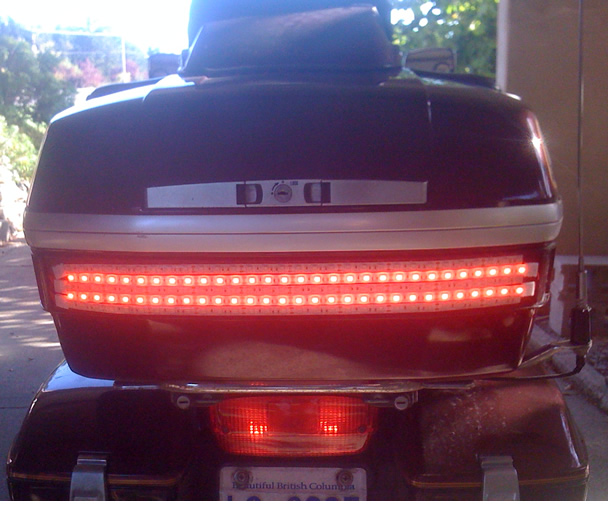
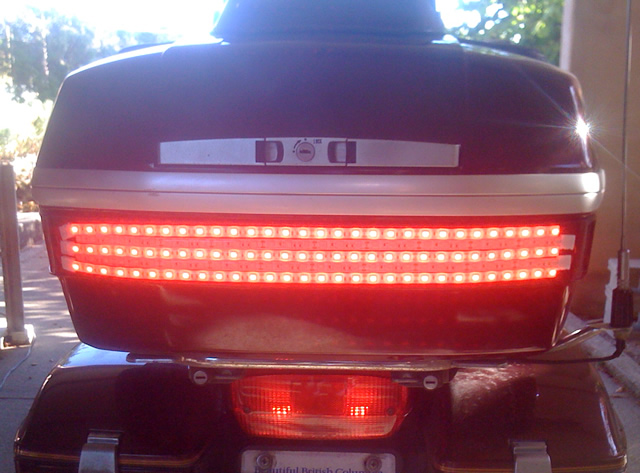
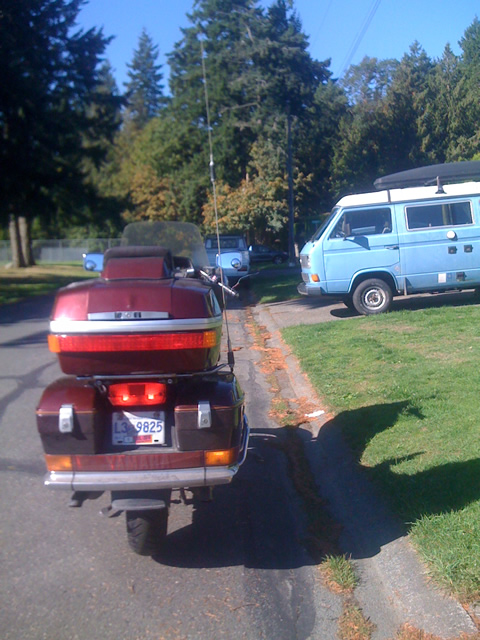
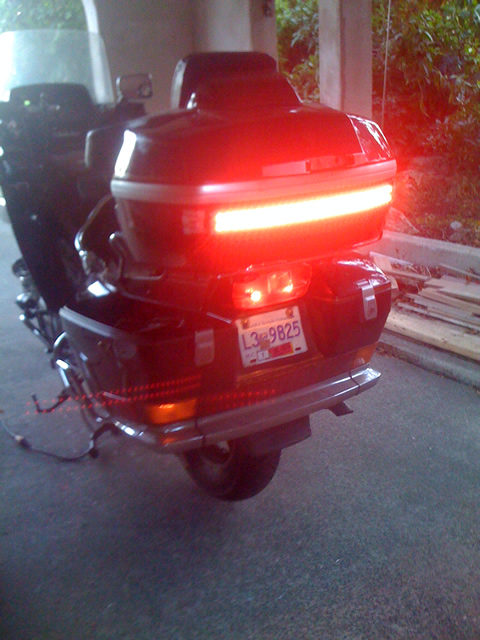
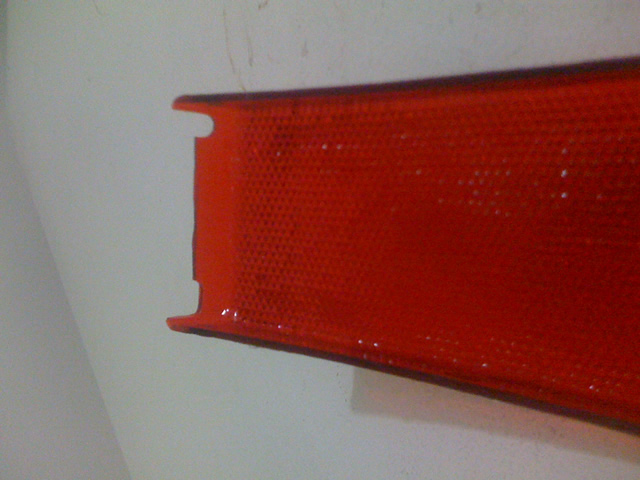
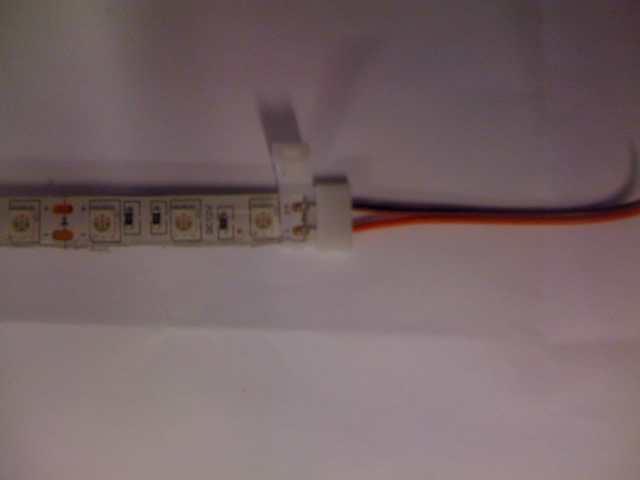
I decided to move this topic to its own thread. The quotes below are the pertinent parts of what was discussed before the original thread went sideways. So to re-cap, getting the reflective lens off the base was a struggle but not as bad as it could have been if lens were to to re-installed. The BigBikeParts replacement lenses fit the OEM reflector base perfectly... almost. The divider on the base between the rear lens and the turn signal lenses don't line up with the BB parts joint. This is not a practical issue though. Today I installed the LED strips in the rear reflector area but only managed to wire the running light circuit but the brake circuit was tested. 5 strips fit in the space available. LED running lights lit up. LED brake lights lit up. Under normal running conditions the two light strips will always be on and when the brakes are applied the other 3 strips will light up as well. With the lens in place the individual LED's are not separately noticeable. The lens cover needs to be trimmed on each end to make room for the LED's and connectors. The plastic is quite brittle but carving it off with a knife works well. Probably better than using a saw or file. This is an example of the connector used to attach the wiring to the LED strip. The LED strip fits into a slot on either side of the connector and the contacts slide under two spring clips then the cover clips closed. I mention this because I did not initially notice the side slots and messed up the contact points. The copper strip is very thin so it does not take much to tear it. Since I'm talking about gotchas, rather than using the connectors it is possible to solder wires to the LED strips but there seems to be some possible issues when doing it that way. I did not do any soldering but did read about other folks having trouble with that method. Heads up no matter which method is used. This is a pic with the rear brakes taken in my carport so it's shady and the lights blast out. The next pic is taken in bright sunlight and the lens lights are on although they may not appear to be. It's a function of the pic since they are quite noticeable when seen in real life. The LED's are available on eBay: Red LED's and Yellow LED's. (note, the ad says amber but they are yellow) I was not happy about that. A better choice for the turn signals might be an amber LED bulb or even an incandescent one. The yellow works but does not match the saddlebag signal lights. The connectors can be purchased on amazon.ca and also on amazon.com The lenses were attached using clear silicon.
-

Reflective lens on trunk
camos replied to MrOflam's topic in Venture and Venture Royale Tech Talk ('83 - '93)
... -

Reflective lens on trunk
camos replied to MrOflam's topic in Venture and Venture Royale Tech Talk ('83 - '93)
Well, I guess MROflam might be interested in mounting mirrors to the reflective lens VentureVet has offered but I rather doubt he is that lame. Sometimes reading more than the last post is most helpful, possibly even necessary. -

Reflective lens on trunk
camos replied to MrOflam's topic in Venture and Venture Royale Tech Talk ('83 - '93)
Really??? -

Reflective lens on trunk
camos replied to MrOflam's topic in Venture and Venture Royale Tech Talk ('83 - '93)
Oh, OK, sorry I misunderstood. Carry on as you like. -

Reflective lens on trunk
camos replied to MrOflam's topic in Venture and Venture Royale Tech Talk ('83 - '93)
Welcome to VR.org. Looks like you might be after a naked Venture. There are a few threads on the site where guys talk about what they did. If you are interested in selling the reflector post it in the classified section. Your questions will get a much better response if you post them in a new thread. -

Reflective lens on trunk
camos replied to MrOflam's topic in Venture and Venture Royale Tech Talk ('83 - '93)
Yay is right. There is no indication that the logo was ever off and reinstalled. I've never taken one off so would not know how it should look, other than what I have been told on here. When one considers the four trailer lights that were bolted through the trunk and the reflector it is difficult to believe the PO could possibly have reinstalled the logo in exactly the right spot. Since this site is PG I will refrain from further comment regarding the abilities of the PO. Minor update: Yesterday after spending a few hours on getting the reflector off I only managed to cut 4 of the center LED strips and 3 of the turn signal ones. Not sure yet if I can get 4 or 5 into each signal, 5 will be tight. Looks like 5 strips might fit into the center area though. Hopefully can get them all prepped for wiring on the weekend. -

Reflective lens on trunk
camos replied to MrOflam's topic in Venture and Venture Royale Tech Talk ('83 - '93)
I know I've got a roll of 30# perlon somewhere but couldn't find it. That is the lightest I have ever used but it would probably work well enough if I knew where it was. Not having heard anything by this morning I waved my heat gun at the logo and it just about fell off by itself. Interestingly, it did not look like it was held on with double sided tape. There was some kind of black goop mystery adhesive in the crevices on the backside. Did not look like RTV either, as it was not rubbery. Thanks for the input, there are so many good solutions, from the guys on this site, that are rattling around in my head that is is often difficult to remember which one solves what problem. -

Reflective lens on trunk
camos replied to MrOflam's topic in Venture and Venture Royale Tech Talk ('83 - '93)
Thanks for your offer of advice. Plastex is too costly for me. I have been using an MEK-ABS paste I concocted to do repairs. It works great and is quite inexpensive. The big challenge with the trunk bottom is that the two broken areas have significant bends at the edge of the holes. No idea how that happened. Anyway, I expect a heat gun will probably do well there but have not yet tried it. It's hard to determine how much plastic is actually missing but will know better once it gets straightened out. -

Reflective lens on trunk
camos replied to MrOflam's topic in Venture and Venture Royale Tech Talk ('83 - '93)
Removed the reflector lens today with debatable success. That lens was not coming off in just one piece...no way...no how. Used an Exacto knife to cut and pry in the slot. For the most part it worked well but there were 3 or 4 places that would not separate. After an hour and a half of fussing with it I ended up breaking it out of the base, which didn't matter in the least because the lens was not worth save to begin with. Getting the few bits left behind still took a serious effort with a chisel which is my reason for saying "no way...no how". For those who have successfully removed the reflector lens without serious damage, I say you were lucky. Conversely, of course, I may have just been unlucky. So, cleared out the reflector bits and test fit the BB lenses. They fit OK enough for me to be happy and somewhat relieved. There were still a few bumps of glue so cleaned them out and it fit quite a bit better. Decided to take off the little ledge at the bottom of the base and now it fits... PERFECT .... Love it when my guesses turn out to be correct. Now need to decide the best method of attaching the BB lenses. They need to be removable for servicing the LEDs that are to be mounted to the base. I'm thinking black RTV in the top and bottom joints. There is no way to make these lenses watertight because the joints between the rear lens and the turn signal lenses are essentially open. One other thing, I'd like to remove the Venture Royale logo from the reflector and, as per someone's suggestion, mount it on the trunk. What is the best way to get it off without damage? -

New Product for plastic repairs.................
camos replied to DragonRider's topic in Watering Hole
Don't have a wood burning tool but do have a pencil soldering iron with a few flat or spade tips. I'll give it a try. Gotta fix a few holes in the bottom of my spare trunk. Not only holes with a bit of material missing, but some of the plastic around them is bent and needs to be coerced back into position before welding or filling can be done. Can always use another weapon in my plastic attack arsenal. -

Finally bit the bullet and had a new rear tire installed.
camos replied to camos's topic in Watering Hole
Wow!!! So does that mean you charge only $10 extra to remove the rear wheel? I can see charging that for the front wheel but not so much for the rear one. That's a real deal. -

New Product for plastic repairs.................
camos replied to DragonRider's topic in Watering Hole
Any tips or just go for it? -
That's a good reason in itself but there is also the much bigger question of why bother with CD's at all? Just because you have one does not necessarily mean it is worth the effort and cost of installing it. Rip the music to MP3 files and play on your phone or even separate MP3 players if you and your passenger like different music. It takes no room, doesn't skip, is less prone to damage and has no wires if streamed to a Bluetooth headset.
-

With over 12,000 members Get your Butts in gear !!!!
camos replied to Brake Pad's topic in Watering Hole
You forgot about attending at The Dalles meet. Anyway, what you said pretty much goes for me too. I really wanted to go to Yreka this year but accidentally found out I was poverty struck so sadly could not make it. Topping that off, with the current state of the Loony it's unlikely I will be crossing the border any time soon. There is not much point voting for an area when there is no hope of attending. That should be left up to those who might be able to do so. -

2nd gear 70mph, 5th gear 75mph?
camos replied to Ga Dawg's topic in Venture and Venture Royale Tech Talk ('83 - '93)
Did you not notice, this is the First Gen forum? Couldn't resist. -

Finally bit the bullet and had a new rear tire installed.
camos replied to camos's topic in Watering Hole
That's about what I was thinking might be the cost. Good to know, Adrenalin did really well then. There was no disposal fee charged when the job was done. I know the disposal fee for batteries is charged at purchase and similarly, I think we pay that fee up front when a tire is purchased. So that's a good price for the job as well. -

Reflective lens on trunk
camos replied to MrOflam's topic in Venture and Venture Royale Tech Talk ('83 - '93)
So the lens could be attached either or both on the bottom and on the lower side where the ledge is. My plan "A" is to try removing the lens with the base still mounted on the trunk. Plan "B" will be developed if that doesn't work. Thanks for the schematic, that should give me enough to go on. -
About 3 weeks ago I accidentally noticed the rear tire on the 89, the one I am currently riding, was almost as bald as I am. Had a spare wheel and tire on the 90 and a spare unmounted tire. Try as I might, with one thing after another happening, still had no new tire mounted until today. With the wet weather actually here I decided to take the highly expensive road and deliver the 89 with the unmounted tire to Adrenalin Motorcycle in Victoria. I've never gone that route before and was somewhat concerned about the cost of doing so versus the cost of a damaged and broken me due to slippage or blow-out. Anyway, the financial damage was $25 for mounting and balancing the tire and $47.50 for uninstalling and reinstalling the rear wheel. Quite a bit less than my overactive imagination was coming up with. I don't know if that is actually a reasonable price but do feel that it was indeed very reasonable so thought I would put it out for any members in this area who may for one reason or another need to also get someone else to do the work for a change. That's it....
-

exhaust collector options
camos replied to jimmyenglish's topic in Venture and Venture Royale Tech Talk ('83 - '93)
Hmmm.... unfinished exhaust installation.... Yup, I'd say a few explosions might be considered normal. Wonderful!!! When you do perhaps I will be able to figure out what a double linked shifter is and what it might accomplish. -

Reflective lens on trunk
camos replied to MrOflam's topic in Venture and Venture Royale Tech Talk ('83 - '93)
I'm pretty sure what I am remembering was the posts you made after doing this mod. Is the weld in the slot between the reflector lens and the sides of the base or at the bottom of the lens? As you might have guessed from the above I'm not so much concerned with getting the base off the trunk but rather with getting the lens out of the base. I have a perfect reflector on a less than perfect spare trunk bottom that I think is probably repairable. Then there is the reflector that is currently on the 89 that a PO drilled 8 holes to mount 4 trailer lights. This is the one I want to use to replace the reflector lens with the BB lenses. So the destroyed reflector lens needs to come off without damaging the base. With that in mind it would be really helpful to know just how the reflector lens is attached to the base so I don't total it. Have I mention lately that I'm pretty good at breaking things? Thanks for bearing with me so far. Also to the OP, hopefully this is relevant to your original question. -

Reflective lens on trunk
camos replied to MrOflam's topic in Venture and Venture Royale Tech Talk ('83 - '93)
By spatula tool would you mean one that fits into a soldering iron? From what I remember finding in posts on VR.org heat will work on the BB lenses but perhaps not so much on the OEM reflector. Certainly, I could be mis-remembering but I'm sure I've seen pix with little bits of reflector still stuck to the base. So it might just be a sharp thin knife could be the best method to remove it. Anyway, before I dive in I will re-read all the threads on this project. That is a very daunting thought so I was hoping someone who had actually removed the reflector would chime in and save me hours and hours of frustrating searching and reading. -

Reflective lens on trunk
camos replied to MrOflam's topic in Venture and Venture Royale Tech Talk ('83 - '93)
While it's true they are different versions, I'm counting on you being wrong about the interchangeability of the parts. Just sayin.... Without having removed the OEM reflector, I held the Big Bike lenses up to the reflector as close as possible and it sure looked like they would fit into the base. I do have the complete BB trunk light on my 90 so no matter how it works out they will be used. Figured it was worth the gamble.


