-
Posts
5,403 -
Joined
-
Last visited
Content Type
Profiles
Forums
Gallery
Events
Store
Everything posted by dingy
-
I think you need to send donation 1st, sort of like praying to God to let you win lottery when you don't buy lottery tickets. Seriously, somehow someone will get it to you. Gary
-
See 1st post in thread linked below for trailer opportunity. http://www.venturerider.org/forum/showthread.php?t=76356 Only put your VentureRider Screen name in PayPal payment. NOTHING ELSE. I will know what it is for and send you a confirmation email back. Do not mention Raffle, Chance, or anything similar. PayPal will lock up the account. Gary
-
I checked parts fiche, they are the same in 1984 & 1991. Gary
-
Brian, Why not take one off your extra carbs for now. How did it get bent, not likely in the carb rack under normal conditions. Gary
-

rear mastercylinder
dingy replied to sandman's topic in Venture and Venture Royale Tech Talk ('83 - '93)
Pretty much same answer as Venture 83_98 gave you. I have both rear masters and the RSV is similar in appearance to a 1st gen, but would be a stretch to get it to fit up and working. Picture of RSV rear master attached. Is your rear brake line running to the proportioning valve on rear master? If it is, you really should disassemble proportioning valve & take all the valve components out of it, so you get good flow to rear caliper. Remove spring and brass plunger shown in 2nd picture. Gary -
Picture is sort of what is going to look like when you remove cooling fin cover. This is a 1st gen block, so it is somewhat different. There are 2 rectangular, unpainted areas directly below the heads on each cylinder. The lower outboard hole is where the plug would go. It will be a round rubber object, with a small threaded hole in it. The tip of a spark plug will screw into hole and it can be pulled out. Coolant will run out of hole, you can collect it with a plastic pop bottle. Many have put a dime size shim over plug, taped it I guess, and replaced fins. Plugs cost about $5 each. For the record, these are not freeze plugs. They are Yamaha's way of draining the cylinder coolant jacket. Gary
-

Problem with bike I sold
dingy replied to Trader's topic in Venture and Venture Royale Tech Talk ('83 - '93)
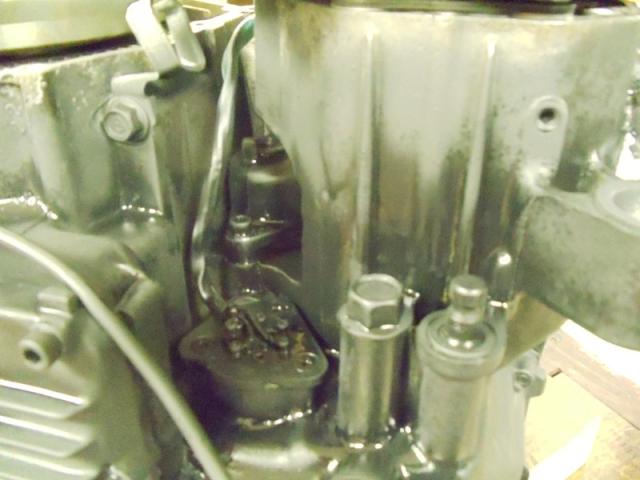
Picture attached is of the bottom of motor, front of motor to the left. Not much back there to leak. 3 good possibilities. 1st is oil pan has come loose, there are 12 cap screws holding pan in place. 2nd is that oil level switch seen in upper left corner of pan is leaking and running back along pan. 3rd chance that pan has been struck and cracked. Also it could be a leaking shift shaft or gear position switch in 2nd picture. right in center of picture also shown is a drain bolt that will drain about a pint of oil, not much but looks like a lot on the floor. Each time rode, the pocket that this bolt drains would be refilled, a few times and all oil would be depleted. Pocket will only be refilled when motor is running. Or also the lower cap screw on middle drive cover will drain similar 2nd pocket, it could be loose or missing crush washer. Gary -

counter balance shaft PLEASE HELP
dingy replied to Big Lou's topic in Venture and Venture Royale Tech Talk ('83 - '93)
Screen shot below is from Dameon Furello's video on rebuilding VMax motor, almost same as a Venture. I took a screen capture at point where crank & balance shaft are correctly lined up. If you look at the far side of the balance shaft in the video you can get a good idea of the position of the balance shaft in relation to the crank shaft. 2nd picture has the red mark on the balance shaft at about 10:00. 1st large throw is where he is pointing to. This will help you find correct rivet that mark is near shown in 3rd picture. The balance shaft mark is VERY small, it is right opposite one of the 6 rivets as shown in 3 picture. Gary -

Performance upgrades
dingy replied to Ventureless's topic in Royal Star Venture Tech Talk ('99 - '13)
One way would be to remove speed sensor on rear diff, you will see pinion gear just inside of sensor tip. Mark one of the teeth on the pinion gear with sharpie, then rotate rear wheel and count teeth on pinion gear. Stock has 10, VMax has 9. Gary -
You are a lucky man, it's been a while since a woman said that to me !! Gary
-
Two days left on these auctions and one day left on Dingy's auctions. Gary
-

Starter, Blackberry & Jewlery auctions for Snaggletooth & Daughter
dingy replied to dingy's topic in Watering Hole
One day left on these auctions and two days left on Squidley's auctions. Gary -
Look at this thread for easier to read schematics. The simplified version is the same wiring layout, but without all the connectors shown. It allows the complexity of the schematic to be reduced and easier to follow. http://www.venturerider.org/forum/showthread.php?t=42358 The icon will light up when you lose the ground path on the Green/Blue wire, from the side stand switch to the CMU. If it is intermittent, it could be a dirty wire connection at one of two connectors, or it could be a failing side stand switch. There are two contacts in side stand switch, both are grounded with side stand retracted. For a temporary test, you can unhook the connector coming from the side stand switch to the main harness, and tie together all three wires with a jumper on the harness side. This will bypass several safety circuits and should only be done as a test. If this eliminates your intermittent icon issue, you have then narrowed issue down to side stand or connector. Gary
-

83 Venture Windshield
dingy replied to Tip650's topic in Venture and Venture Royale Tech Talk ('83 - '93)
No windshield difference between the standards & the Royales. Gary -
They are both on when high beam is on. Low beam is only one of pair on when low is selected. I run high beams all the time in daylight, with a modulator, high beam only pulses on high, low beam pulses on low. Don't get very much at all crossing traffic pulling out on me. Picture is at Canal boat ride @ 2012 International. Gary
-
Weather Channel is reporting some bad tornado's near Cleveland Texas around 10:30 pm EST. This is near Squidley's neck of woods or prairie. Hope him and others are not off to OZ !! Gary
-
Putting a few pictures of horn - driving lights on Tweety. I had an question about the wolo's so I will put some pictures here in case anyone else interested. Identical wolo's on either side. Right horn sets out a little farther than left due to offset mount point on horns. These will bring someone out of a coma when I use them. Driving lights are LED's, 4 lights in each unit. Not extremely bright, but headlights on this bike are hard to overpower. Use them all the time just for the triangle light pattern the main lights & driving lights give to oncoming traffic. Both came from AutoZone. The mounts are a Venture Line product that once and a while pops up on Ebay. They attach at the point the stock horns mounted to. Both are wired through relays. Gary
-
VERY unlikely you will break the setup I sent you. The bolt is way better than what was on it from the factory. Really !! Gary
-

Oil icon came on?
dingy replied to alvald83's topic in Venture and Venture Royale Tech Talk ('83 - '93)
Vmax guys say you ain't Ridin what yamamama gave you right if the oil light doesn't come on !! Gary -
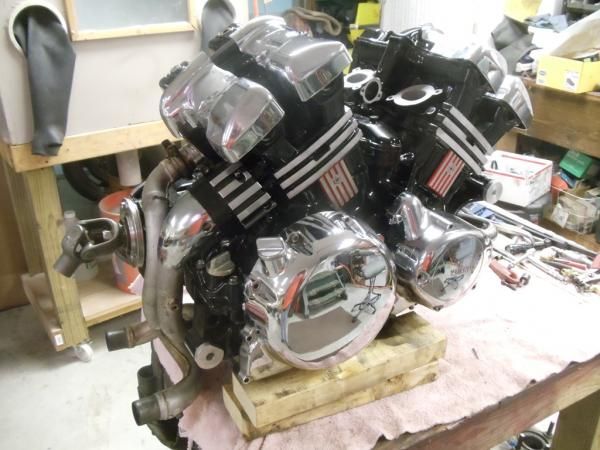
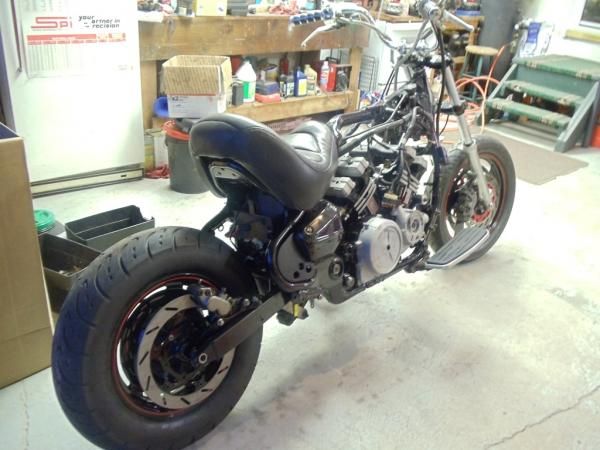
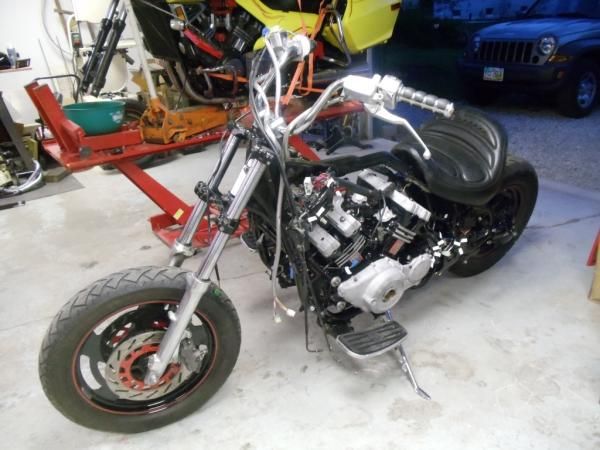
From the album: Hybrid 1st Gen/RSV/VMax project
-
From the album: Hybrid 1st Gen/RSV/VMax project
-

Front View - spare set of side covers on motor at this point
dingy posted a gallery image in Member Albums
From the album: Hybrid 1st Gen/RSV/VMax project
-

Which exhaust header?
dingy replied to a1bummer's topic in Venture and Venture Royale Tech Talk ('83 - '93)
Posting a follow up to my previous post about the header I received from Mark's. Mark did give me a good discount on the header that I received from him. I had complained about the right & left sides not being properly welded. I was concerned that the misalignment of the right & left side would cause fitment issues. Mark has shipped the two collectors I have gotten from him before even billing me. Mark sent me a bill today and did credit me a fair amount for the issue I raised. Gary -

Running issues with 84
dingy replied to Pressure's topic in Venture and Venture Royale Tech Talk ('83 - '93)
It ain't the stator I'll bet. Look at air box also & see if filter is in place and have any holes been drilled in air box or lid. Gary


