-
Posts
2,283 -
Joined
-
Last visited
-
Days Won
41
Content Type
Profiles
Forums
Gallery
Events
Store
Everything posted by skydoc_17
-

I seem to be the bearer of not so good news lately!
skydoc_17 replied to sarges46's topic in Watering Hole
Both Jean and I were verry sorry to hear about Pete. Our prayers are with him and his family and we hope he has a full and speedy recovery. Both our best wishes, Earl and Jean -
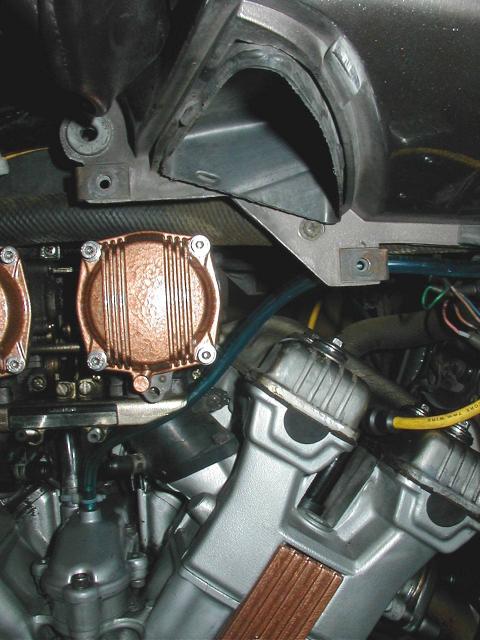
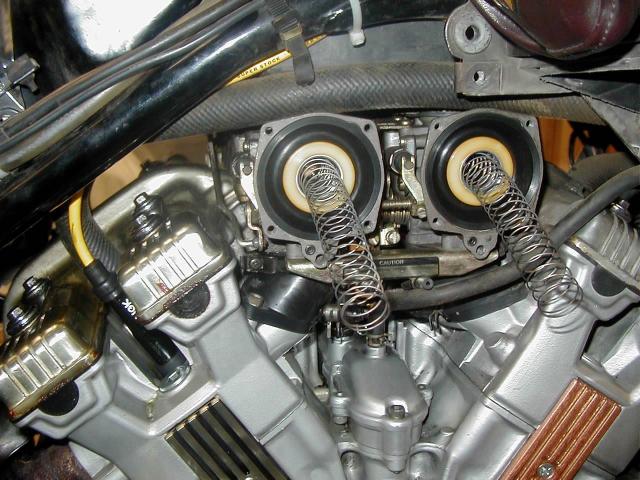
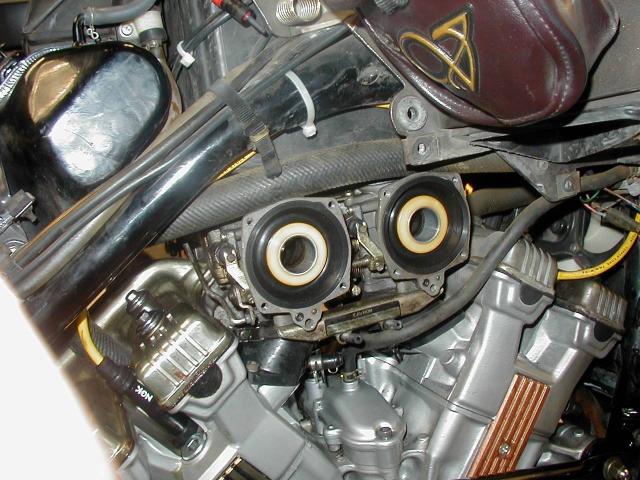
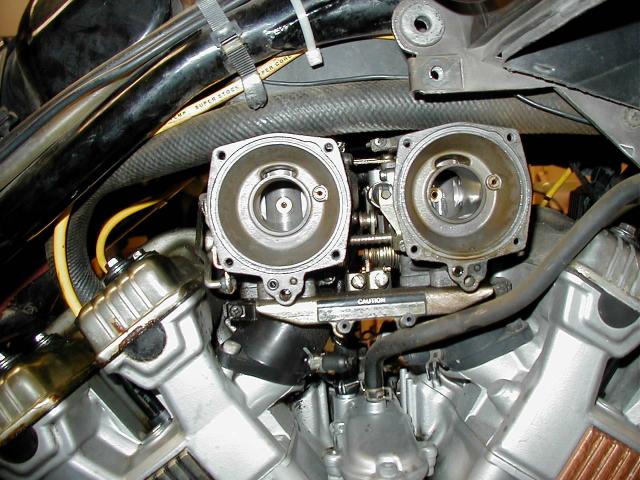
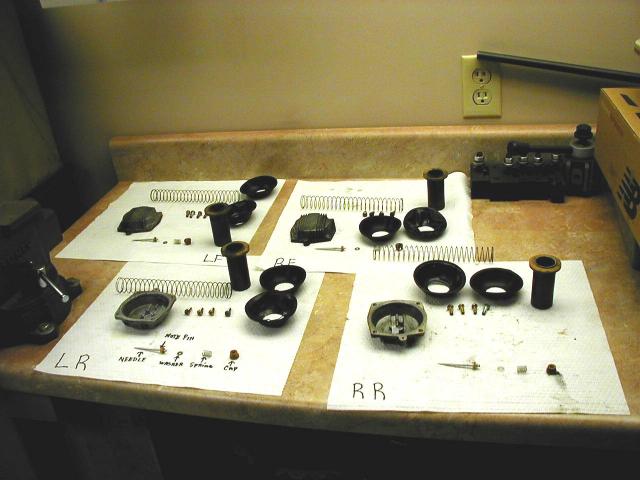
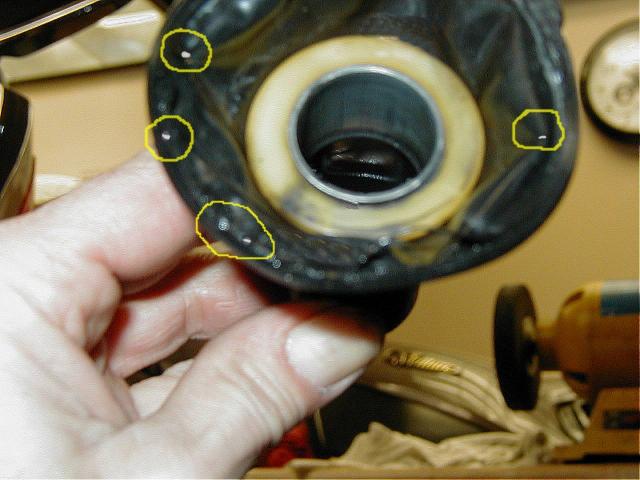
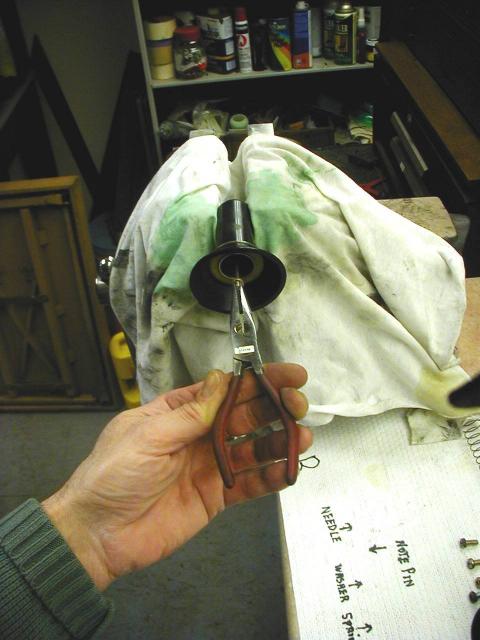
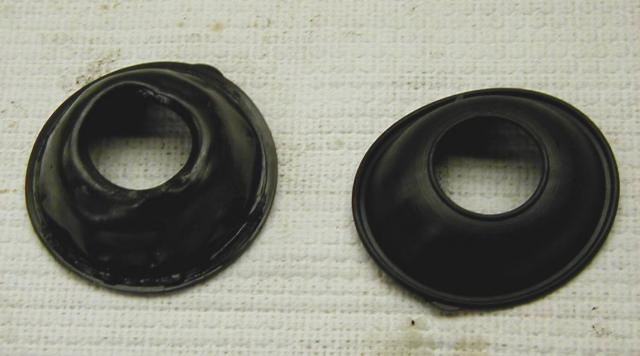
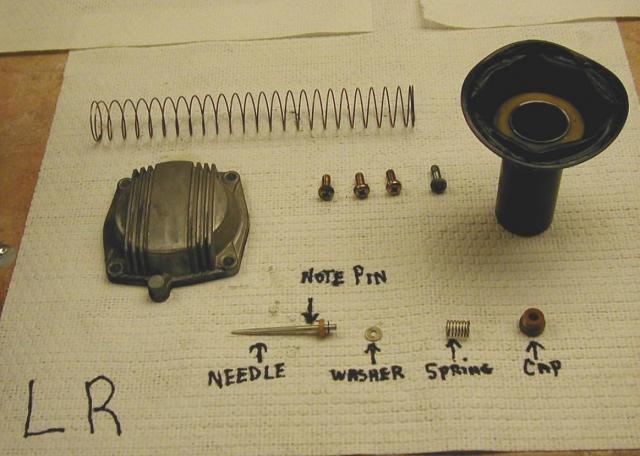
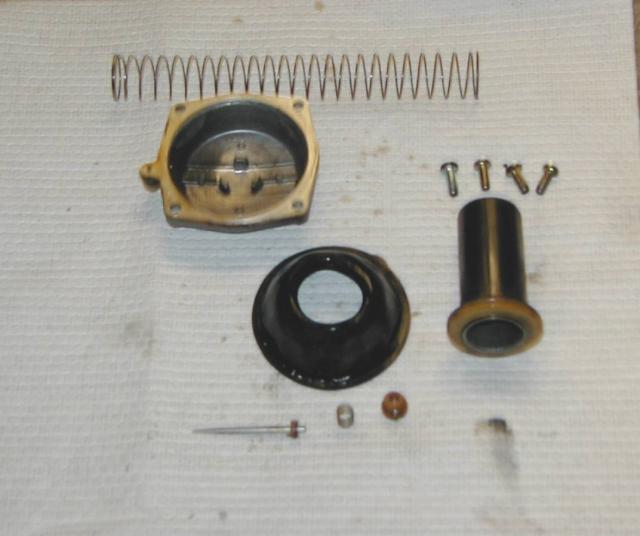
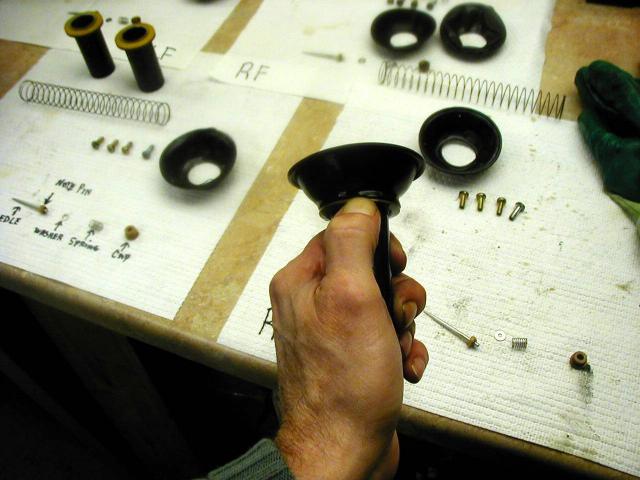
Not being the kinda' guy that likes to do things the easy way,But always looking to save a few bucks I purchased a set of Carb. Diaphragms off of Ebay a while back. ($86.00 with shipping) I thought I would give you a run down on how that went. After removing the False Tank cover and both side covers as well as the lower fairing legs on both sides I was able to get to all 4 Carbs. easily. To remove the Carb. covers I used 3 tools, a 1/4 inch drive ratchet with a special Torx bit on it for the 4 odd screws, an impact driver with a Phillips bit in it and finally a pair of Vise Grips for 2 of those Phillips head screws that just wouldn't come out. I took out the Torx head screws first on all 4 carbs. because when you remove the last Phillips head screw, you better have your catcher's mit on, that Carb. cover is coming off...FAST! I had set up 4 shop towels on my bench and kept all of the Carb. parts separated. I held each slider assembly up to a good light to inspect them and sure enough all 4 diaphragms had holes in them. I removed the old Carb. diaphragms by gripping the slider and "rolling" the old diaphragm out from between the two flanges on the slider. Two of the old diaphragms came off in pretty bad shape. I then cleaned all of the reusable parts with Carb. cleaner , but I must say that overall everything looked pretty clean. All 4 of the sliders were nice and smooth as were the Carb. bodies on the engine. I used a clean cloth and Carb. cleaner to clean out the Carb. body bores. (I don't use paper towels for this as I would not want a shard of paper ending up in the intake or the Carb. body) With everything clean I moved on to the reassembly. The Ebay diaphragms were not made of the same material as the stock Yamaha ones, but were very pliable, and had the tab for alignment in the Carb. body. After lubing the diaphragm with aerosol spray silicone I inserted the slider into the bore of the diaphragm. When I got to the flange, I stretched the diaphragm bore over the bottom flange. Now the spacing on the two flanges of the slider seemed a bit "slim" and I panicked for a moment but realized that by using my thumb nail I could wedge the diaphragm bore between the two flanges with no problem. When all was said and done you couldn't tell that the diaphragms and the sliders were not mated at the factory. I had the slider needles out for another project I will discuss later and at this point I reinstalled them. I put the slider assemblies back in the Carb. bodies aligning the tabs, put the caps on with the Stainless Steel Allen Head Cap Screw set I have listed in the classifieds and reinstalled all of the body parts and that as they say was that! Oh yea, I accidentally spilled some paint on the Carb. caps...Oops! I have attached some pics below and am willing to chat with anyone that is interested in this rebuild. Feel free to PM me. Sorry this got a bit "windy" Earl
-

Short Leggs
skydoc_17 replied to Green Machine's topic in Venture and Venture Royale Tech Talk ('83 - '93)
Hey mike, Not being Vertically Challanged myself, (34 inch inseam) I sometimes forget how "Tall" the First Gen's are. That being said, I was looking for parts to fix my 86'VR and was looking at an Ebay seller called Pinwall Cycle Salvage in Ohio that has a used Corbin First Gen. seat for sale. It was in his store listings not the general Ebay sales. If I remember correctly, it was under $100.00. It sure did look thinner and it might be just the trick to get you closer to the ground. If you have trouble finding it, PM me and I will try to look it up again for you. Hope this helps, Earl -
Hey Dan, I can't believe that you have a lift table!! I spent the morning laying on the floor of the garage, messing with that darn drain. If I could get my VR up to my waist I wouldn't ever leave the garage! Got any houses for sale in your neighborhood?:rotfl: I told Jean that you had a lift table and she just shook her head and muttered......"SISSY" I guess I sent that Cap Screw set a week to soon! Let me know if you need a SS cap screw to replace that Phillips Screw, or a hand getting your LIFT TABLE (I still can't believe it!) set up. Earl and Jean
-
Hey Gang, I am SLOWLY trying to get the old 86'VR back on the road after the trailer accident and was wondering if anyone has a front fender skirt or "Mud Flap" for a First Gen. MK2 that they would like to part with. If you had the fasteners as well that would be more than I could hope for but if not that's OK. I've been trying to buy a fender with one off of Ebay and the prices have been unbelievable! I would be very grateful for any help in locating this item. I can PayPal you or send a check. Thanks in advance, Earl
-

Rehab 1st gen Brake rotors.
skydoc_17 replied to timgray's topic in Venture and Venture Royale Tech Talk ('83 - '93)
Hey Tim, Boy, This is a very good question, and I have put some time into finding what can be done in this area. According to Yamaha Specs. you can decrease the thickness of the MK2 VR Rotors (1986-1993) by .5 MM (about .020 thousands) before they become unserviceable. The preferred method to resurface a rotor is called "Blanchard" grinding where the "side" of the wheel does the metal removing as opposed to the outer most OD (outside diameter) of the wheel. I received a quote from a local grinding shop of $40.00 to grind a pair of rotors on both sides. As you can see in the pic at negative .5 MM I didn't get 100% cleanup but it did remove the "Lip" on the outer most area of the OD (outside diameter) where the brake pads NEVER touch. It did make putting the calipers back on much easier and the seating time on the new pads was a lot shorter but I can honestly say that I didn't notice a lot of extra braking power for the amount of time and money I put into this project. On my 86'VR I put the bike up on the center stand and with Jean holding the handle bars, I rotated the front wheel and with a small right angle air grinder I decreased the thickness of the "Lip" area (outer most OD) and got similar results without removing both front rotors and spending $40.00. I have heard from members on this forum that if you take a file and bevel the sharp edges of the new brake pads you can avoid the contact area of the lip and the break-in for the new pads is quicker because the edge of the pads do not contact the "lip" of the rotor. Either way, by removing the lip or beveling the pads decreases the break-in time for a new set of pads considerably. One other thing I want to mention is that the rear rotor is a 2 piece "semi-floating" rotor and Blanchard grinding is NOT an option because of the Rivets holding the 2 pieces together. Unless of course you have the ability the drill out the original rivets, grind the outer disk, and rivet the 2 pieces back together again. I guess what I am trying to say here is either live with your old rotors, or replace them. There doesn't seem to be a good way to refurbish the First Gen. rotors that I have found other than what I have described above. Earl -
Thanks Jack and Randy, I was so excited that the darn thing wasn't leaking and the weather was so good I almost ran Jean down hitting the road! Thanks again for watching my back! Earl
-

Rear Brake Issue
skydoc_17 replied to jfarr53's topic in Venture and Venture Royale Tech Talk ('83 - '93)
Hey Jim, Boy, I know just how you feel! Inside the master cylinder is a light spring that should retract the plunger but when the seals get old it gets stuck. I did mine and all was well. I think the rebuild kit is around $35.00 give or take a few bucks. You will also need a GOOD pair of snap ring pliers, I got a set at Sears. It's not to bad with the pliers, to take the master cylinder apart. Pay attention to the order things come out and you will be fine. Earl -
I have been one of those VR owners that from time to time had a small puddle of coolant under the front of my 87'VR. Today, after draining the coolant, I pulled that @#$% Phillips head screw, removed the Drain plug and chased the ball and spring all across the shop floor. Who knew this was going to be this much fun! I cleaned up the Drain Plug and removed the old O'ring. I then cleaned the bore the Drain Plug goes into with Steel Wool. I installed the new O'ring, returned the spring and ball to it's rightful place, put the plug back into the bore and at this point I decided I didn't want to deal with that @#$% Phillips head screw so I replaced it with a Stainless Steel Allen Head cap screw and lock washer. Boy was it easier to tighten up that cap screw then that Phillips head screw! After filling the coolant and a test drive, guess what, No more leak! I attached some pics below. Earl
-
After all the work on my carbs. Lately, what with the diaphragm replacement and the adjustment of the diaphragm needles, I finally bit the bullet and ordered the Morgan Carbtune Pro from the manufacturer's site: http://www.carbtune.com/ Right now, the dollar is strong against the pound and I was able to purchase the Carbtune Pro for $87.00 US with shipping! It arrived about 4 days later in excellent shape and I am looking forward to breaking this unit in this weekend. I didn't buy the pouch, mostly because of comments from this site that said if you want to put the Carbtune back in the pouch you had to disassemble the unit. I opted for a medium size plastic fishing tackle box from "Wally-World" for $9.00 and now I can leave all of the hoses connected and have storage "cubbies" for the adapters and what not.All in All I found the service from Morgan very good although you have to search around a bit to find the Carbtune Pro without the pouch, as they make it really easy to buy the "Combo Deal". When I was shopping for this unit in mid 2008, with the shipping it would have run $115.00 US, so I am glad I waited. With owning an 86'VR and an 87'VR I looking forward to Syncing the carbs on them both. Earl
-
Hey Thom, I am so sorry to hear about "Silver". In December I was trailering my 86' "Black Beauty" and due to a faulty rental trailer, the bike pretty much came off the trailer. Ins. paid but not without a fight and as I have been working on the 87', the 86' has just been sitting, waiting for me to start on her. I hope you have good luck with the Ins. Company and I also hope that you can bring "Ole' Silver" back to her former beauty. Earl
-

'84 Front Wheel Bearings
skydoc_17 replied to Schlepporello's topic in Venture and Venture Royale Tech Talk ('83 - '93)
Hey Wayne, Great to see ya' back! The front wheel bearings are a standard Shielded bearing #6303 Alot of guys "pop" one side shield off and grease the bearing again. Here is a thread that explains the process. http://www.venturerider.org/forum/showthread.php?t=31516 I have run them both with both shields on and with one off with no ill effects. If you go to a Bearing House the #6303's are a lot cheaper, but I have used the Yamaha bearings with good luck as well, just more money. It's basically what makes you feel "warm and fuzzy" as far as the bearings go. I have never had one of the non Yamaha front wheel bearings fail, if thats any comfort. I have 72,500 miles on my 87'VR and 95,500 miles on the 86'VR and both have the non Yamaha wheel bearings in the front wheels. Hope this helps, Earl -
Hey Mike, Needless to say...It looks like you Slighed um'! Good Job, Earl and Jean
-
I feel your pain brother, It makes you feel like a dough nut! With that big hole right in the middle of your gut. I have been divorced for about 11 years and it still rubs me the wrong way from time to time. I have three sons, my oldest (15 at divorce) became the "daddy" after the divorce. We barely talk, he has never come for a visit and I don't think things will get better any time soon. My middle son and my youngest son and I talk all the time, they visit and I will be heading to the west coast in June for graduation because my youngest wants me there. If there is one thing I can tell you after more than 11 years of living hell on earth because of a divorce it's that YOU need to take care of yourself. I have found that I have had very little luck in my life convincing ANYONE that I am a good person or a bad one. On the other hand I have tried to live my post divorce life being as honest and caring as I possibly can. I try to NEVER make a promise I can't keep, If I say I'm going to be there I am.(baring accidents) If I tell someone something, I try to tell the truth, weather it be god or bad, always. As in the case of my oldest son, It's not about me, it's about the choice HE is making. I always hope that a time will come when my oldest and I can just hang out and be friends, but I ALWAYS remind myself that if it never happens it is not because I was not a good person or I didn't want it to happen or didn't make an effort to let it happen, It's on MY SON and the choice HE made. It doesn't help with the big hole, but it allows me to sleep at night. If you need to talk Bro, PM me. Oh yea, This is where Jean wants me to tell you that there is life after divorce and Meeting Jean was the best thing that ever happened to me, and I'm a much better man today and HER kids think I'm the best, etc, etc, etc, You get thr picture! (actually, things are much better now! Jean is WAY cooler than the X wife) Earl
-

Upgrade brakes?
skydoc_17 replied to Iowa Guy's topic in Venture and Venture Royale Tech Talk ('83 - '93)
Hey Tim, First off, I'm not sure you realize this but when you are squeezing the brake lever, you are activating the right front brake caliper only! The only way the left front caliper gets activated is when you step on the foot pedal. The Left front and the rear brake caliper are "linked" together. The fact that your right rotor is warped tells me that you are stopping your 800+ pound bike with a lot of right front brake and very little foot brake. Putting a more aggressive set of brake pads on the front of your VR is just going to warp the next rotor faster unless you change the way you stop your scoot. I'm not trying to slap you around...we are learning here. All this being said, yes EBC makes a great set of sintered pads for your VR, grade HH. I also have a set of front rotors from an 87'VR (86 thru 93 are the same) in VERY GOOD condition. I also have two sets of Yamaha Organic Pads brand new in the boxes. If you are interested, PM me. There are also other avenues to take as far as brakes on your VR, If you are interested, PM me. I am sorry if I sound a little "Kurt" but we have been snowbound here for over a week and I have misplaced my "Cabin Fever" pills. Honestly, I have everything you need to fix your scoot, and I promise not to bite! Earl -

How do you take apart a diaphram
skydoc_17 replied to BnkrBill's topic in Venture and Venture Royale Tech Talk ('83 - '93)
Marcarl has a really good rite-up about the replacement of the Carb. Diaphragms in the First Gen. Tech. Library. This is for the complete Diaphragm/Slider assemblies not the Ebay Diaphragms only. Here's the link: http://www.venturerider.org/forum/showthread.php?t=19271 Hope this helps, Earl -
I have been trying to get in touch with Paul, (TupperJ) about a set of his nifty battery cables and have not had any luck. When I checked his profile it looks as if he hasn't posted to this site since October of last year. Has anyone heard from him? Is he OK? My concern is not so much the cables but his well being. Is Paul the only person currently making up the cable sets? So many questions, Earl
-
I found that the fuel line that goes from the fuel pump to the carbs. was crushed by the clip that holds the line back by the fuel pump when I was changing out the fuel filter. I tried to trace where this line goes, and followed it up the frame and then it disappeared under the battery box (which I have removed) and could not find the end of it. I would like to replace this line but can't figure where the other end is. Has anyone replaced this line? What's the trick to getting to it short of removing the engine? Why do they make this so hard?!?! I would be greatful for Any help or thoughts on this subject! Earl
-
I agree with Kent on this one, Yamaha is looking at a new motor here and they are hoping the you will just "go away". I would be making a few phone calls, over and over and over again. If you tie up a Factory Rep long enough, he will get tired of dealing with you and basically fix the problem just to get you out of his hair. Mind you, I am not saying be a d**k but becoming really "phone friendly" with the Yamaha factory boys has worked really well for me in the past. Leaning on the Dealer has also helped in the past. Let him know that if he is not going to honor the warrenty on the products he sells then you will find a Dealer that will. My dad always said, "the squeeky wheel gets the grease!" It has been true for me in the past! As a last resort a consult with a lawyer might not be a bad Idea. I think for around $50.00 or so a lawyer will send a "Letter of Intent" to Yamaha and this might shake the tree a bit. Just my thoughts, for what they are worth. I personally HATE BEING RIPPED OFF!!! Don't give up!!! Earl
-
I have been trying to get in touch with Paul, (TupperJ) about a set of his nifty battery cables and have not had any luck. When I checked his profile it looks as if he hasn't posted to this site since October of last year. Has anyone heard from him? Is he OK? My concern is not so much the cables but his well being. Is Paul the only person currently making up the cable sets? So many questions, Earl
-
Keeping with the fine tradition of having a BBQ on SuperBowl Sunday, Dave has thoughtfully donated his computer as a BBQ pit for his festivities this afternoon! What a GUY! You Da' MAN, Dave! Earl and Jean
-
Hey Dan and Shari, Dan, I'm glad to see you have your priorities strait! By the way, where do you usually get these Food Stamp Checks cashed at?!?! Have a GREAT Game Day! (Unless YOU ARE NOT ROOTING FOR THE STEELERS!):rotf::rotf: Earl and Jean
-
I woke up this morning, had my steaming cup of "Irish Coffee" by my side, turned on my puter, went to favorites, clicked on VR.ORG. site and got the dreaded "site not available" error message! My left eye started to twitch, my heart raced, my hands started to shake! The next thing I remember, I was laying on the floor, staring up at Jean! All I could say was VR.ORG site "not available"! Jean rushed to the fridge, grabbed the Adrenalin Syringe, rushed back into the puter room and I thought she was going to "Pulp Fiction" me! Right before she whacked my chest with that needle, she looked over at the monitor and squealed "the site's back up!" and I said "get off me Jean, you're crushing my smokes!" WOW, that was a close one! Thanks a bunch Don for taking such good care of us members, you saved my life! Earl and (Nurse) Jean


