-
Posts
2,282 -
Joined
-
Last visited
-
Days Won
41
Content Type
Profiles
Forums
Gallery
Events
Store
Everything posted by skydoc_17
-

Life Expectancy of Carb Diaphragms?
skydoc_17 replied to kbert777's topic in Venture and Venture Royale Tech Talk ('83 - '93)
Hey Klaus, Take a look at this older thread: http://www.venturerider.org/forum/showthread.php?t=32052 This thread shows how to replace just the rubber Diaphragm and not the sliders. You can do this for under $100.00 for all four carbs! I found this to be an economical alternative to the Yamaha replacement parts which cost in the $600.00 range. As I stated above I am at 6000 miles+ and a year into these new parts with excellent performance. This thread shows where to get the Diaphragms, be sure to mention VentureRider.Org for your discount! http://www.venturerider.org/forum/showthread.php?t=32943 Hope this helps, Earl- 7 replies
-
- carb
- diaphragms
-
(and 3 more)
Tagged with:
-

Life Expectancy of Carb Diaphragms?
skydoc_17 replied to kbert777's topic in Venture and Venture Royale Tech Talk ('83 - '93)
Hey Mike, When I replaced my Carb. Diaphragms I only did the rubber portion, not the sliders. The big difference I noted was the stock Yamaha Diaphragms appeared to be a woven material that was coated. I will say that they lasted 21 years and 70,000 miles! The aftermarket Diaphragms appear to be solid rubber and don't "bunch up" as much as the stock ones, very much like the "cone" of a speaker. I find the throttle response better with the aftermarket Diaphragms and so far I have about 6,000 miles and 1 year on them with them functioning perfectly. Plus, with them being under $100.00 with shipping it is probably the best "bang for the buck" I did to my VR. Hope this answers your question, Earl- 7 replies
-
- carb
- diaphragms
-
(and 3 more)
Tagged with:
-

Please Say "It Ain't So"!?!?
skydoc_17 replied to skydoc_17's topic in Venture and Venture Royale Tech Talk ('83 - '93)
Hey Randy, Thanks for the speedy repy! Lets assume for a moment that they do mount the same way, how do YOU take your grills off? You Just made my day, Bro. Earl -
I recently purchased a First Gen. Parts Bike and was told by the owner he "thought" the final drive on this bike was from a VMAX. Does anyone know of a way I can tell if this is indeed a VMAX final drive? I have attached two pics below and the red arrow is pointing to what looks to be a mounting point for a rear shock. Could someone please help me?!?! Earl
-
I recently picked up another parts bike that has Chrome Air Intake Grills.(please see attached pic) Does anyone know of a way to install these grills on a Venture Royale WITHOUT taking the Fairing off the bike? I would love to have these grills on my 87'VR but am not looking forward to taking both halves of the fairing off to install them! Please Help!! Earl
-
I recently picked up another parts bike, a First Gen. MKII. It has a Cavalcade Seat on it and if anyone is interested in it I will send it to you for the cost of the shipping only. The riders area is a bit thread bare but the backrest and the passenger area is still good. The vinal (brown) part of the seat has no rips or tares and the foam is in very good condition. I hate to throw it away, so if anyone wants it for the shipping cost, let me know. Earl
-

1996 RSTC vibration question
skydoc_17 replied to dukhunter322's topic in Royal Star and Royal Star Tour Deluxe Tech Talk
Hey Duckhunter, Check tire inflation, especially two up. Jerry nailed it with the Carb. Sync., that would be the first thing I would check. The "sweet spot" RPM wise on these motors is 3500 and above, if you are hauling two people around and are trying to pull away at 2200 RPMS, your gonna' "giggle" your brains out until you hit 3500 and up. My dad yousta' tell me, "ride it like you just robbed a bank"! I do, and these machines love it! Keep us posted what you find out, Earl- 5 replies
-
- acceleration
- cruising
-
(and 3 more)
Tagged with:
-

straight pipes
skydoc_17 replied to BigBMattie's topic in Venture and Venture Royale Tech Talk ('83 - '93)
Hey Big B, I have the Jardine exhausts on my 87'VR and they are really cool. Mac is another company that makes exhausts for the first gens. Check out this old thread about the "Sound Trifecta". It's about 6 posts down. http://www.venturerider.org/forum/showthread.php?p=309608#post309608 It compares stock to Mac to Jardine. I have attached a pic of my 87'VR with the Jardine Exhausts installed. Hope this helps, Earl -

trunk reflector
skydoc_17 replied to Wizard765's topic in Venture and Venture Royale Tech Talk ('83 - '93)
Hey Stewart, This part number: 54K-85140-00-00 is for the reflector. I was not able to find a part number for the Light Bar reflector. I have the standard reflector on my 86'VR and the light bar reflector on my 87' VR. I am not sure how Yamaha decided which bike got which reflector. Perhaps the light bar reflector was a "VentureLine" option. Sorry I couldn't help more, Earl -
Hey Guth, There are a few First Gen. MKI's on Ebay right now in the $1000.00 range. If you are looking for a "stop light racer" as apposed to a touring bike I wouldn't spend $2500.00 on a First Gen. MKI. Besides the luggage change and larger motor on the MKII from 1986 to 1993 the braking system was upgraded to 4 piston calipers in the front. You might have to drive a little but I would think you would be able to find a First Gen. MKI that would suit your needs in the $1000.00 range. Then when 2nd gear goes out, you won't feel so bad about the money. My thoughts, Earl
-

trunk reflector
skydoc_17 replied to Wizard765's topic in Venture and Venture Royale Tech Talk ('83 - '93)
Hey Wayne, The part number for the 1986-1993 as well as the 1985 VR is: 54K-85140-00-00. So the answer is "Yes". Earl -

master brake
skydoc_17 replied to barend's topic in Venture and Venture Royale Tech Talk ('83 - '93)
Hey Barend, The linked brakes on these VRs can be pesky at times. Send Chris an email at Flatout Motorsports, Tell him you are an VR.Org member and he will fix you right up. Here's the link: http://www.flatoutmotorcycles.com/ This site lists the rear master cylinder rebuild kit for your 1983 VR SKU: 26H-W0041-50-00 CYLINDER KIT, MASTER $52.85 SKU: 3DP-2583V-00-00 MASTER CYLINDER ASSY (26H-25850-50-00) $422.18 I got a Stainless Steel rear brake line from Line Pros. out of Canada $24.00 for any line, and if you buy more than one, they give you a discount. Plus shipping. I would be looking at the Proportioning valve as well on that rear master cylinder, it could need a good cleaning. There is a very small hole in the bottom of the rear master that if clogged, will not let fluid return to the reservoir, check that as well. Hope this helps, Earl -
I thought it was WAYYYYYY to quiet around here! :whistling:WOOOO...WEEEEE...WOOOOO:whistling: "Chief of the boat on board! Earl, who thinks BOOMER has been feeding his "Hard Drive" Viagra again!!!:crackup:
-

xvz12 paint & compounds ?
skydoc_17 replied to 6m459's topic in Venture and Venture Royale Tech Talk ('83 - '93)
Hey Brian, Go to Wally Mart, in the auto section, you will be looking for a yellow bottle, the name of the product is called "KIT" $1.89 here in Pa. Rub it on the area you want to clean up, use circular motions and keep rubbing until the paste dries up. Then with a soft cotton cloth, (I use old T-shirts) buff the area to a shine. For a buck 89 it's worth a try. Let us know how it comes out, Earl -

I Want Two Front Calipers
skydoc_17 replied to Sheradan's topic in Venture and Venture Royale Tech Talk ('83 - '93)
Hey Dan, I am going to take a guess here and assume that you would like to have BOTH front calipers work off of the right brake lever and the rear brake work off of the brake pedal. If this is correct, then here's what you need to do this. You will need a front brake line set from a Yamaha VMAX including the "splitter" and the two front lines that go to the front calipers. You will also need a rear brake line to go from the rear caliper to the upper most brake fitting on the rear master cylinder (this is the fitting that the left front used to connect to) Your stock rear brake line is too short. Both the front and rear master cylinders can still be used but that need to be functioning properly. (Might need rebuild kits) At this point, you will remove the "hard line" that runs from the rear master cylinder to the left front caliper. I also removed the proportioning valve. You will plug the fitting in the rear master where the old rear brake line connected. You will connect your new rear brake line to the fitting that went to the left front caliper. Bleed the rear brake caliper. The rear is now done. Now for the front, Remove the stock lines from the front master. Install the VMAX line set to the front master cylinder. Under the front of the fairing right below the headlight is the mounting bracket for the stock banjo bolt. You will remove this and install the VMAX splitter here. I have attached a pic of the adapter bracket I made to hold the new VMAX splitter and double banjo bolts. Run the VMAX lines down the front fork tubes using the stock clips and attach the line ends to both front calipers. Bleed the front calipers and you are good to go. NOTE: I removed all of the old hard lines and other items to give my bike a cleaner look. If you have any questions, or need a bracket made, or need more detail about where I got my brake parts at PM me. Earl P.S. If this is not what you were asking about, then I'm sorry I hijacked this thread! E. -
Boy Jack, That gives a whole new meaning to the saying "Easy come, Easy go"! Earl
- 1 reply
-
- bankruptcy
- brown
-
(and 3 more)
Tagged with:
-

service manual
skydoc_17 replied to rhncue's topic in Venture and Venture Royale Tech Talk ('83 - '93)
Hey Dick, I was having the same trouble until I downloaded Adobe Reader 8 and the entire Service Manual comes up for me now. Give that a shot, Earl -

1st gen MK1 carb detailed info.
skydoc_17 replied to timgray's topic in Venture and Venture Royale Tech Talk ('83 - '93)
Hey Tim, Check out this link, it shows the tear down for the replacement of the Carb. Diaphragms on an First Gen. MKII but it's pretty darn close to yours. Mbrood is right on about ganging up on the mods, Do the Diaphragms first and then after the Carb. Sync and a new set of plugs, if it is still running rich, try adjusting the slider needles. I had to play with mine (a few different shim thicknesses) before I got it right. The biggest improvement I gained was from the replacement of the Diaphragms. With a good Carb. Sync. you will be surprised how much better your bike will run. Here is the link for the Diaphragm replacement: http://www.venturerider.org/forum/showthread.php?t=32052 Here is the link for the "Split the Difference" Carb. Sync.: http://www.venturerider.org/forum/showthread.php?t=35274 This should get you well on your way, Any questions, just ask! Earl- 13 replies
-

Problem after carb cleaning
skydoc_17 replied to rvcullen's topic in Venture and Venture Royale Tech Talk ('83 - '93)
Hey Robert, Sorry to hear about your bad luck with that mouse! Did you Sync. the Carbs. after the reinstall of the Carbs? Did you check the line that goes to the boost sensor, (Cylinder #1, front left) to make sure it didn't come disconnected from the sensor? To be honest, if you have synced. the Carbs. and the sensor is connected, sounds like bad Diaphragms to me. I would not compound you problems right now by reshimming the slider needle, I would also try 21/2 turns on the mixture screws. Keep us posted on what you find out and have done. Earl -

transmission problem
skydoc_17 replied to louich's topic in Venture and Venture Royale Tech Talk ('83 - '93)
Hey Louich, It's STILL faster that a Second Gen......up to about 50MPH! (they're just jealous!) Hope you get'er fixed, Earl -
Holy Cow Brian! You are one lucky guy! I'm glad you and your scoot are OK! I would still go buy a LOTTO TICKET! You can't loose! Boy, that says tons for a Dunlop! Earl
- 13 replies
-
- bike
- flat dunlop tire
-
(and 3 more)
Tagged with:
-

Left hand thread
skydoc_17 replied to 6pak's topic in Venture and Venture Royale Tech Talk ('83 - '93)
Hey 6pac, My fix wasn't nearly as fancy as Lonestar's, I took JB Weld, filled in the hole, drilled and tapped it for a right hand threaded cap screw and call it a day! Sure did work go though. If you find a really nice set of cap screws or "button head" screws you could use the JB Weld on both sides, and tap them to an American Standard size like 3/8-16. Earl -
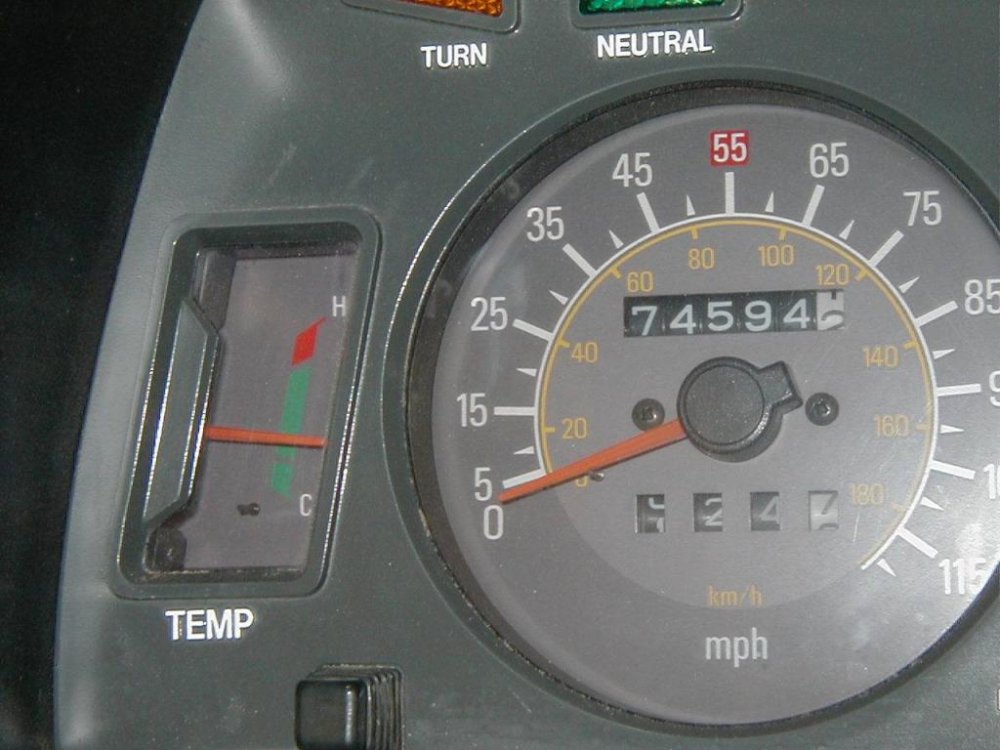
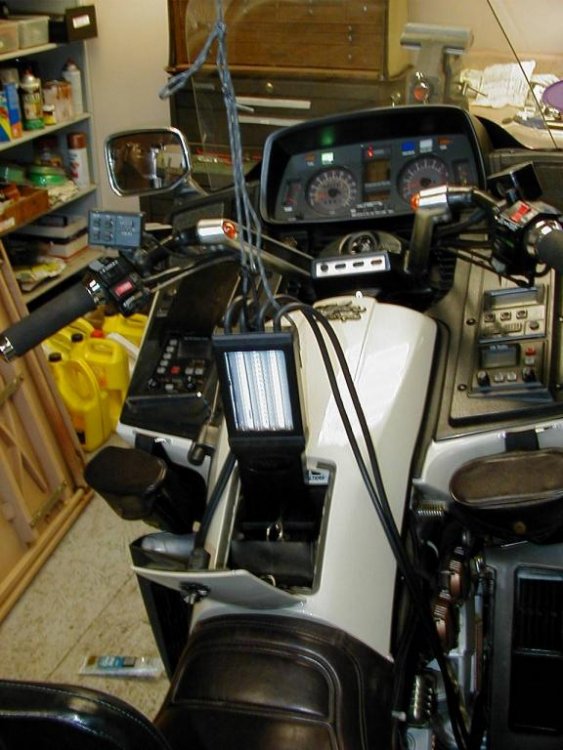
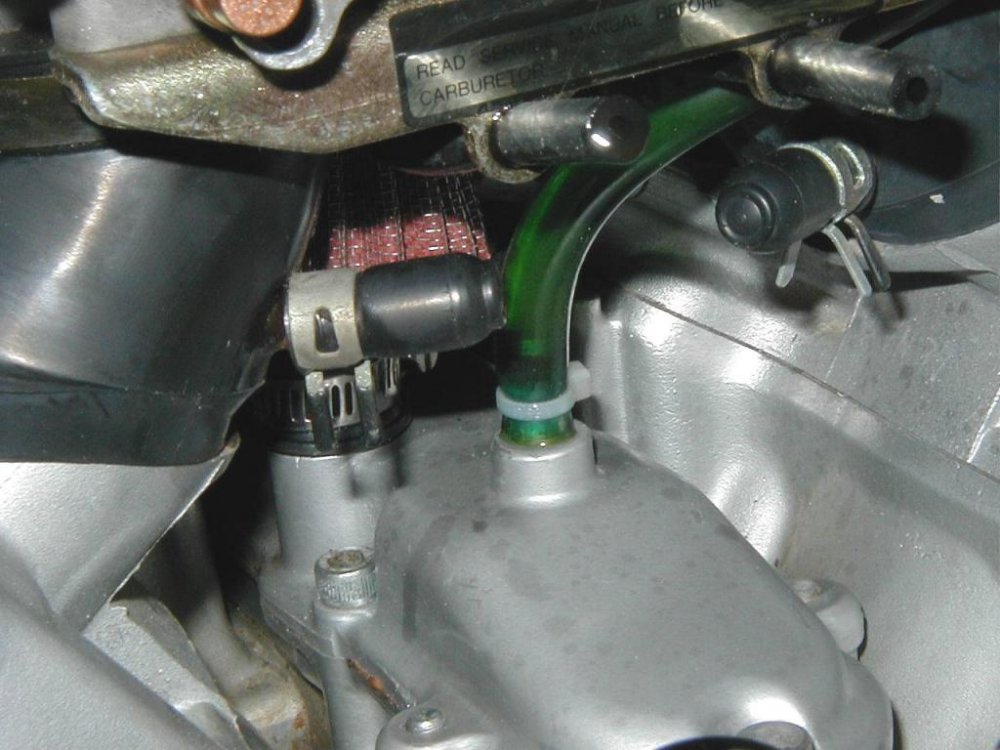
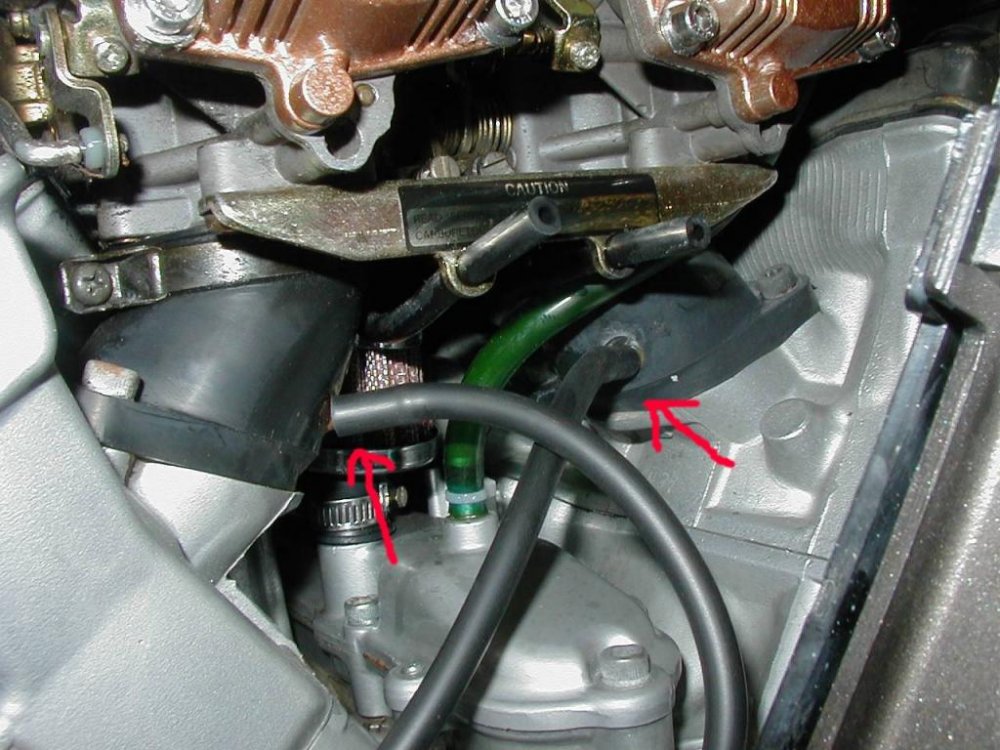
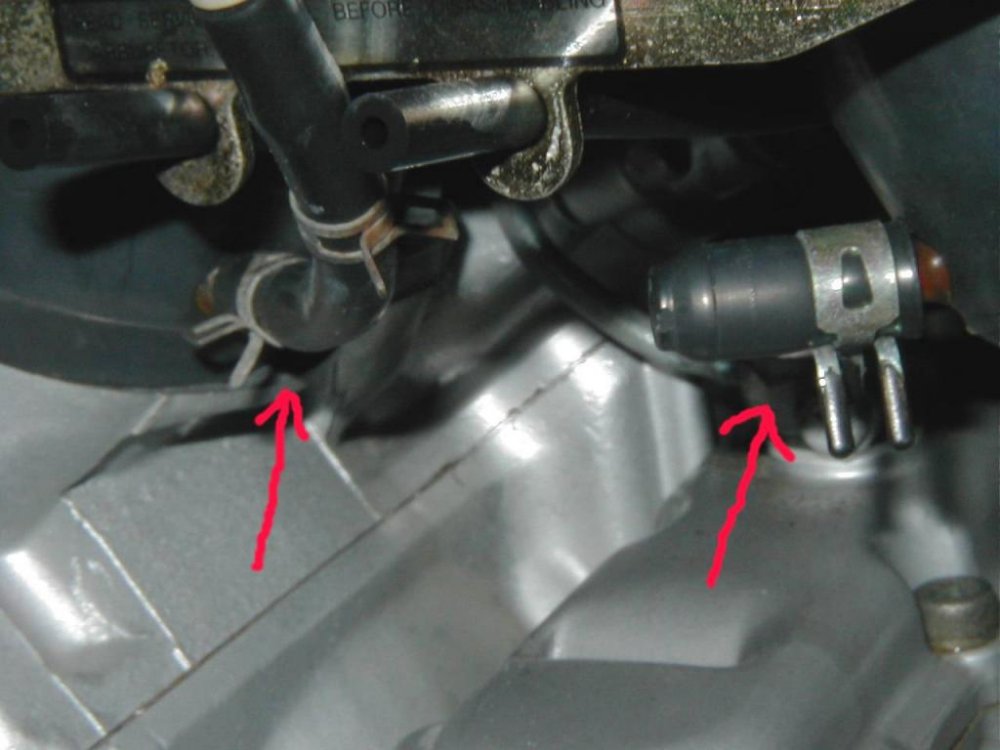
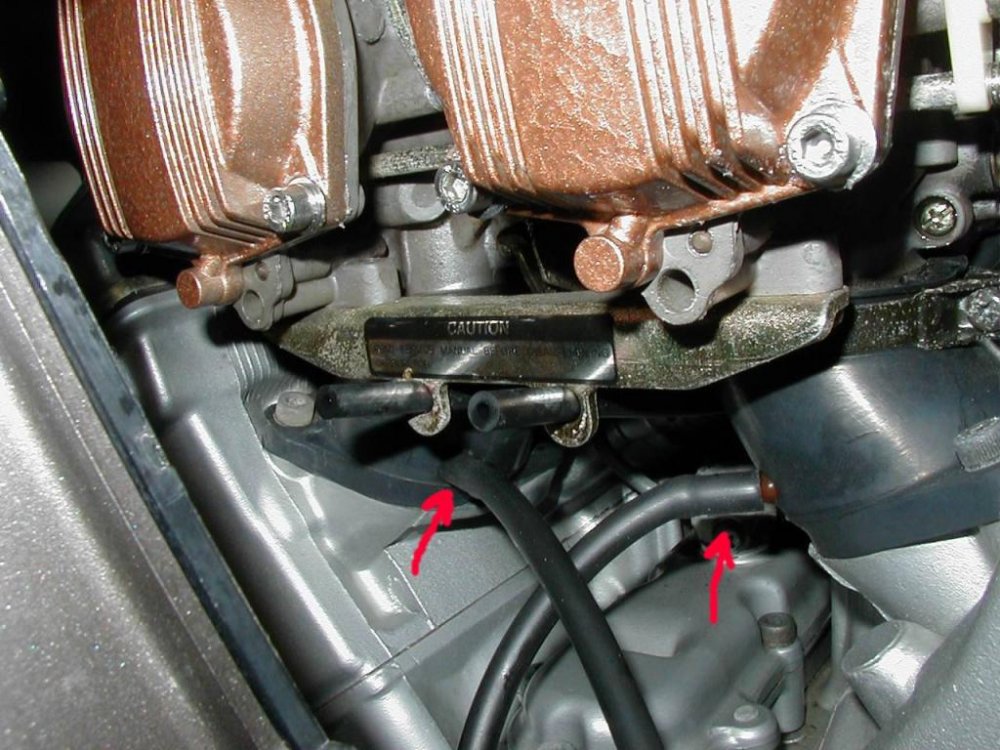
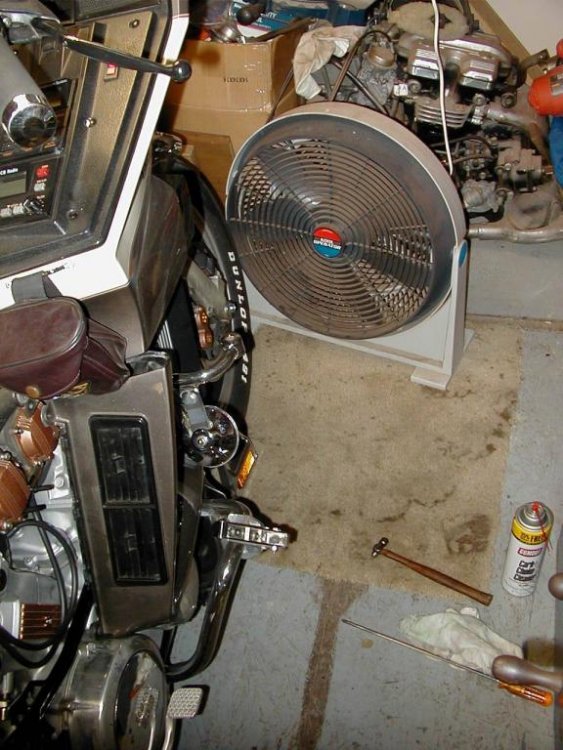
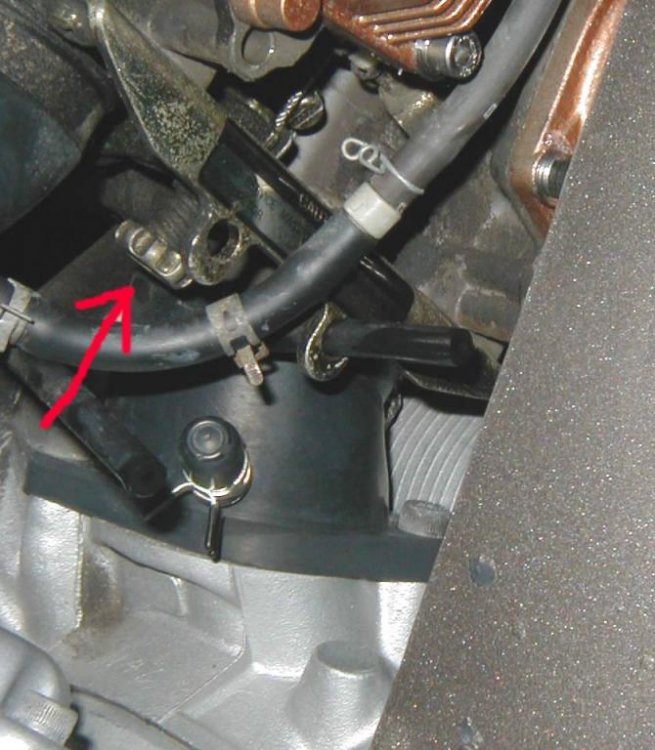
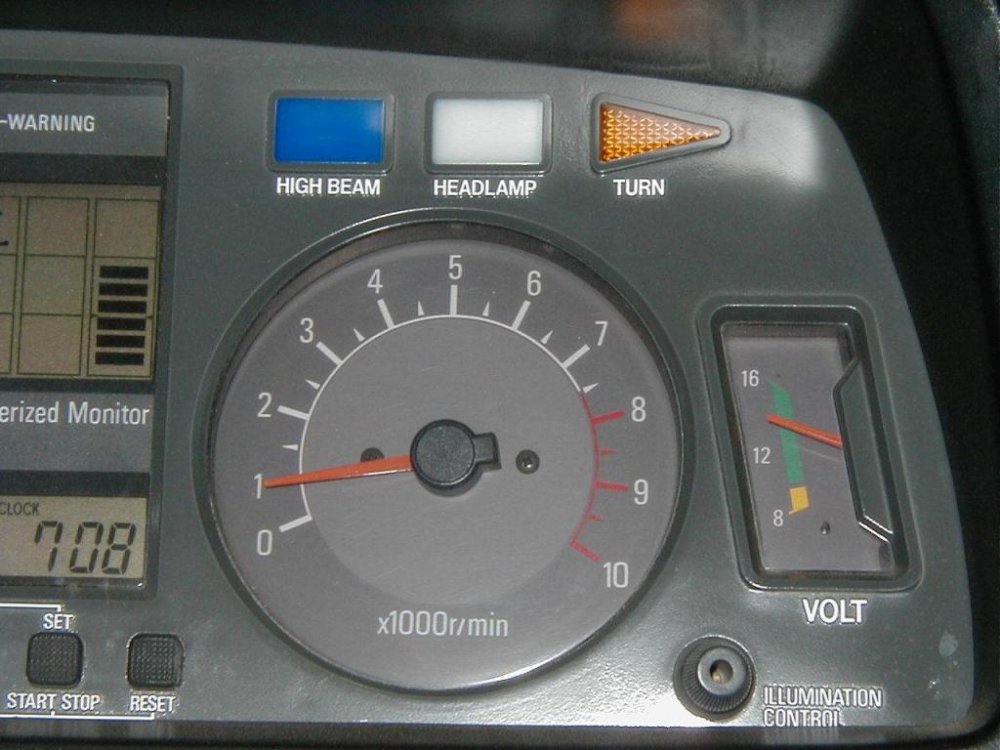
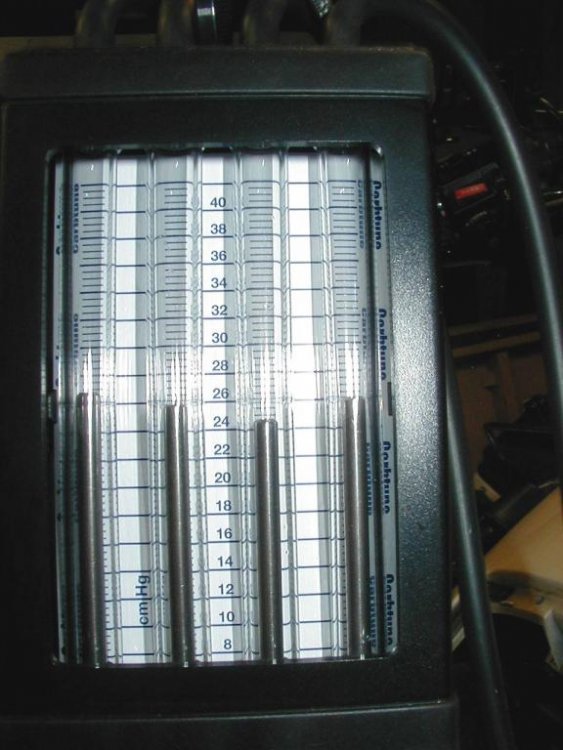
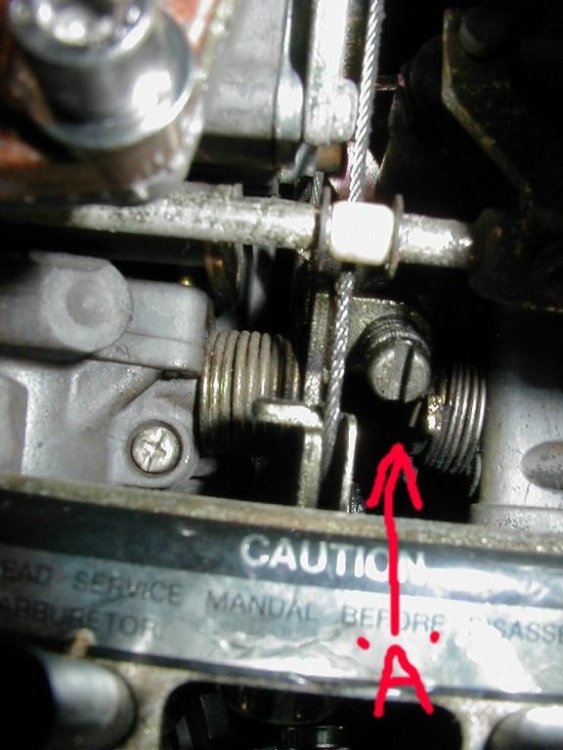
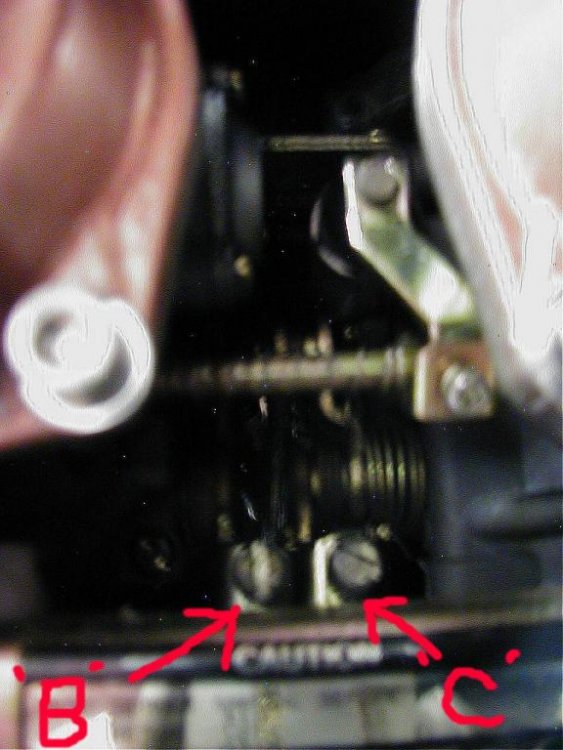
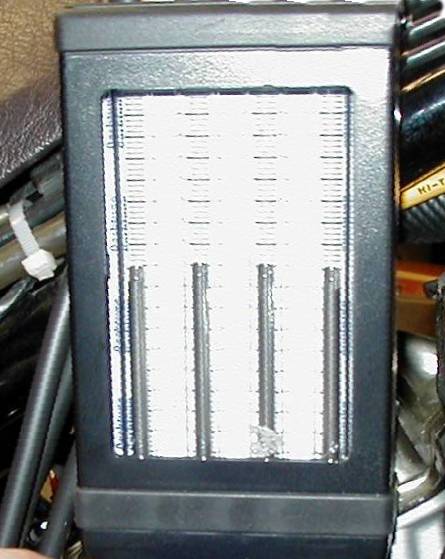
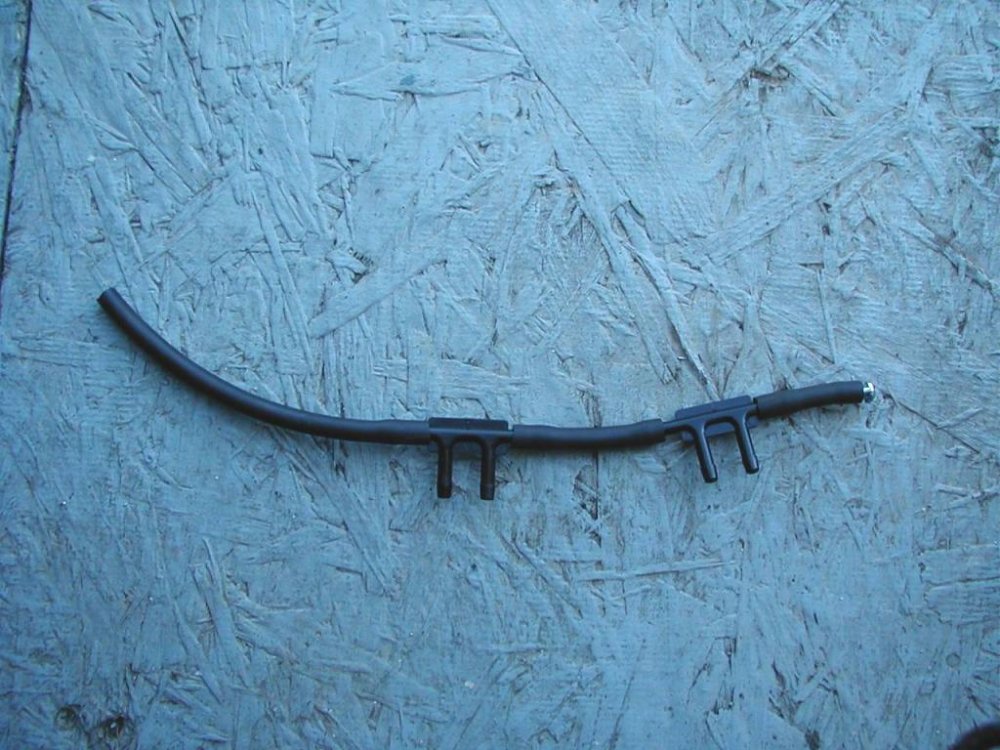
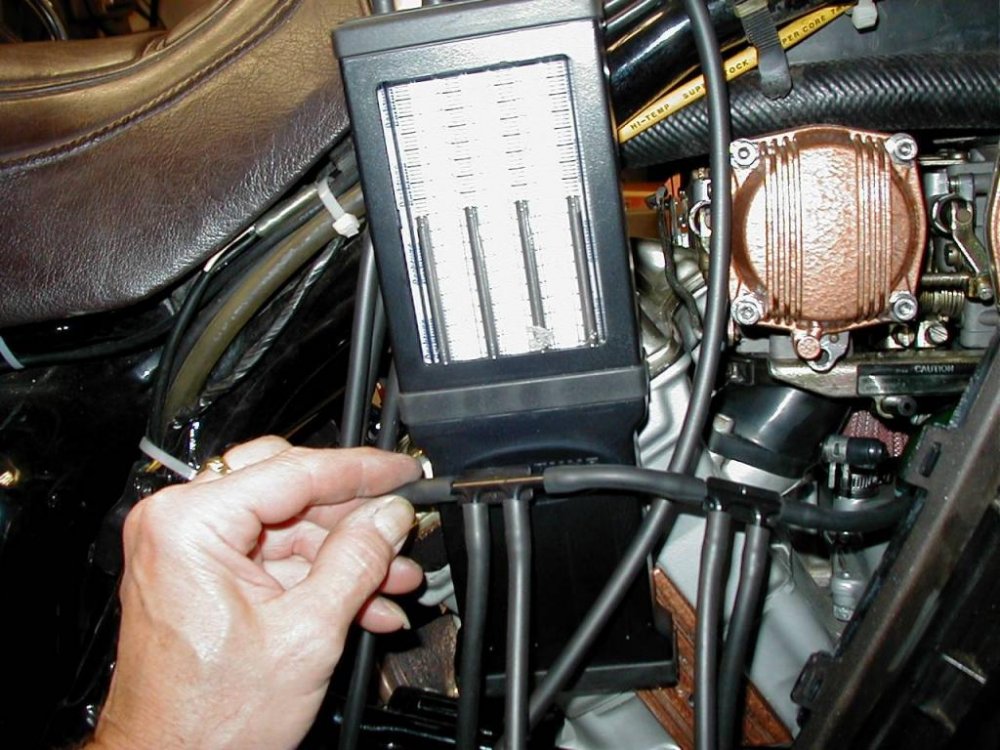
There have been so many people asking about Syncing. the Carbs on their First Gens. that I thought I would take a few pics of the way I do it so that other members would have a general Idea how to go about it. (Disclaimer: My way is not the "do all, be all", just the way I do it. Take what you need and leave the rest.) I start by removing the screw in the false tank cover and unhooking the front of the cover, It does not need to come off. I then remove both side covers. I then remove both of the Radiator side panels to expose the 2 screws that will allow the lower fairing legs to be pulled away from the Carb. Bodies. (NOTE: if your lower fairing legs are in bad shape, you may want to remove the lower cowling which will expose the screws that will allow you to completely remove the lower fairing legs, Mine are still pretty flexible so I don't take them completely off. (Do what you feel "warm and fuzzy" about.) With the plastic off, I start the bike and let it run up to "operating temperature". Pic #1 shows the temp. gage about 1/3 the way up. Depending how "hot blooded" you bike is, this may take a minute or two. While the bike is warming up. Pic #2 shows how I suspend my Carbtune from the ceiling in my shop with a long shoe string and center it right above the gas cap. This allows the Carbtune to remain vertical and also allows me to work both sides of the bike with out moving the Carbtune . At this time, I shut the bike off. Pic #3 shows the location of the Vacuum ports on the right side of the bike, I remove them and plug in the Carbtune on that side. Pic #4 shows the lines installed on the right side. I then move to the left side of the bike, Pic #5 shows the one Vacuum port Cap and the "Boost Sensor" Vacuum line that is connected to Cylinder #2. (NOTE: These pics were taken of an 1987 VR MKII, I don't know if the MKI is the same because I don't own one!) I remove the Vacuum port cap from the #1 cylinder and the Boost Sensor line from the #2 cylinder and Pic #6 shows the two lines from the Carbtune connected. I am now ready to restart the bike. Pic #7 shows how I position a fan at the front of the bike to keep the engine temp. from going too high. I like to take my time when I'm adjusting the Carbs. on a bike and this gives me the extra time. With the bike running and at temp. Pic #8 shows the location of the Idle adjustment screw. (NOTE: I moved the #2 cylinder Carb. Bowl Drain Tube out of the way for the pic. This screw is hard to find unless you are squatting down... and use a flashlight!) Pic #9 shows the Tachometer at 1000 RPMS (By the book 950-1050 RPMS) Pic #10 shows the Carbs. are in fact out of adjustment. I have the left two channels of the Carbtune connected to the left side of the bike, (cylinders #1 and #2.) and the right two channels of the Carbtune connected to the right side of the bike, (Cylinders #3 and #4). Starting on the left side of the bike Pic #11 shows the location of Carb. Sync. screw "A". (NOTE: This is another screw that is hard to see at first, and it is at a downward angle so it will be hard to get a screwdriver on it properly, be patient!) The object here is to rotate "Screw A" until you get the left two channels balanced. Make an adjustment, then "Blip" the throttle and let the bike return to Idle. If needed, adjust again. With the left bank of Carbs. adjusted, I move to the right side of the bike for the rest of the adjustments. Pic #12 shows the location of the "B" and "C" screws. Screw "B" is used to adjust the right two channels of the Carbtune, and Screw "C" is used to adjust the left bank of two Carbs. (Cylinders #1 and #2) to the right bank of Carbs. (Cylinders #3 and #4) Using screw "B" I adjust the right two channels, "blip" the throttle and readjust if necessary. Then I use screw "C" to adjust the left bank to the right, "Blip" the throttle and readjust. Pic #13 shows all four Carbs. on the Carbtune adjusted pretty darn close. Basically, you are done at this point. I wanted to add a few personal suggestions that I use to "enhance" the Carb. Sync. experience to make the bike run even better for me. After I am done with the Carb. Sync. at Idle, I Rev the bike to the 1800 to 2000 RPM range and hold it there, if all four of the Carbs. aren't holding the same vacuum at 2000 RPMS I make slight adjustments (split the difference) between Idle and 2000 RPMS. The reason I do this is because when I am stopped, and start to take off, I increase the RPMS of the bike into the 1800 to 2000 RPMS range as I am slipping the clutch to engagement. I don't want one or more Cylinders "cutting out" or "cutting on" as I am trying to look cool pulling away from a light, especially with Jean on the back! The next issue I would like to address is the "Reliability" of the Carbtune Manometer. Here is a list of Items I purchased to build a simple "Manometer Tester" Manifold. Pic #14 shows the "Manifold". and Pic #15 shows how I test my Carbtune BEFORE I use it. I got these Items from NAPA Auto Supply: Part# 2-616 (2 needed) Vacuum Connector $1.49 each $2.98 Part# H-459 (1 foot needed) 5/32 Vacuum Tubing $.99 1 qty. 1/4-20 screw Free from toolbox 6% Tax (Pa.) $.24 -------- $4.21 Total I hooked all 4 Carbtune lines to the manifold and hooked the Manifold line to one of the carbs. on my 87'VR. My Carbtune checked out OK. If you have any questions, PLEASE feel free to ask. Earl
-

1st gen MK1 replace fuse panel
skydoc_17 replied to timgray's topic in Venture and Venture Royale Tech Talk ('83 - '93)
Hey Tim, Last spring when I first got my 87'VR, I tried to make it to the Pa. meet and eat and while riding on Rt. 30 I hit a bump and most of the old glass fuses rained down on the hiway. Needless to say, I didn't make it to the meet and I had to call my brother to pick me up with the trailer. I got an ATC fuse box from Ebay and a pair of terminal blocks from my "stash" and went to work. I have a pic of the finished project below and if you go to my profile, on the right side of my page you will see a section called "View All Albums". Click that and you will see step by step pics of the install. I have a bunch of the terminal blocks left, if you would like a few, PM me and I will send them to you. I too removed one wire at a time, and that worked for me. Good luck on your project, Earl


