Flyinfool
-
Posts
13,152 -
Joined
-
Last visited
-
Days Won
7
Content Type
Profiles
Forums
Gallery
Events
Store
Everything posted by Flyinfool
-
NEVER say NEVER.... I think it is just beautiful, And I did it without leaving ANY on the ground up here.....

-
 As far as I know there is no circuit that is only on once the engine is running, on either the 1st or 2nd gens. There are a number of ways to accomplish this. I wired a standard relay to act as a latching relay, so that once activated it will remain activated until power is removed (shutting off the bike) I have it wired to the brake light circuit so that as soon as either brake is applied the headlight comes on. I can not get very far without using the rear brake since I have to traverse very loose gravel both at home and at work, and this comprises 90% of my riding. For me this makes it totally automatic, eliminates the on-off-on at startup, still lets me start the bike and work on it without turning on the headlight. You could also wire it to the side stand switch so that the light will come on as soon as you raise the side stand. You could hook it to an oil pressure switch so that if there is oil pressure (this should mean the engine is running) the light is on, you could monitor the stator output so that whenever the stator is putting out voltage the light is on, you could monitor the tach wire (sorry 2nd gens, I have a 1st gen) to see if the engine is running. I looked at a number of these options, some I passed on because if the engine should ever quit, like run out of gas or an electrical or mechanical failure, I do not want to suddenly be rolling along at highway speed in total darkness, I did that once when a headlight bulb burnt out at midnight on a dark country road at 70 mph. LOTS of pucker factor.
 -
First off so glad that you came out OK. Second it does not look like the bike was hurt to bad. Unfortunately the insurance will almost automatically call it totaled just because of its age. And then that designation will live on on the title forever. So even if you put all new parts on and bring it back to like new, it will always have reduced value due to having been totaled once before. Make sure that IF you keep it that the insurance compensates you for that reduced future value. Not to mention that some insurance companies will not cover anything with a salvage title. This is probably the one scenario where having the loudest horns possible can actually save you.
-
WARNING Technical crap ahead..... An LED that is in a housing designed for the LED will work great. That is what all the new cars and bikes that have LED are. The same goes true the other way, If you could put an halogen into one of these new housings that was designed for LED then the halogen would be way out of focus and perform poorly. You can not make a comparison between a new vehicle that was designed for LED and expect the same results with a vehicle that was designed for halogen and has an LED stuffed into it. A halogen bulb has a fairly small length of wire that is giving off the light and that light is a full spherical output. The reflector and lens are expecting that light to be coming from every angle and a fairly small point in space. A HID bulb is also a fairly small area that is producing light and the light is also a full spherical output to keep the reflector and lens happy. Granted the HID light source is slightly bigger than the filament of the halogen, but not by much. ALL LEDs have a directional light output, they concentrate the light in just one direction and it gets dimmer as you move off center. The LED bulb makers compensate for this by putting multiple LEDs in the same bulb pointed in different directions to try to simulate a spherical light output. the problem is that there is a circuit board and heat sink in between the LEDs spacing then farther from where they are supposed to be for the light to be focused properly. Tech part is over. RANT part ahead...... I am a bit of a light snob, I really hate lights that are not done correctly, and/or aimed properly. Because not only are you not able to see as well as you should, but you are blinding me and everyone else on the road at the same time so that no one around you can see well either. It is really important to check the aim of your headlights after changing the bulb. In the last 40 years I have yet to replace a headlight and not have to tweak the aim at least a little bit to have it exactly correct. The last set of HID that I bought was for my P/U truck. I bought the Morimoto brand, they are not cheap, and I have been very happy with them. They were very close to being plug and play. The wires I had to find places for was the battery power and a ground for the relays. In my truck I then added a relay that has a 10 second delay so that the HID do not light when the key turns on, then go off for cranking and then try to relight as soon as the engine starts, this on-off-on operation is very hard on the bulbs. These bulbs have held up to all of my off road activities so they should hold up on a bike to. I put the 50W in my truck, you would want to stick with the 35W for a bike. My bike has the 35W.
-
As I mentioned early, I hate throwing money at a problem. $250 worth of new parts would have fixed the same problem. BUT I am old, stubborn and cheap, a dangerous combination.
-
I am still a fan of HID. I put HID in everything I drive. There is no brighter bulb yet. LED is getting close in brightness for some of the high end bulbs. Anything in LED that is affordable most of the add is lies and misinformation. The biggest issue with LED is that the light emitting elements are way bigger than the filament of the bulbs they are replacing, as many have noticed above this causes poor focus which results in very bright light but not much projection down the road, and due to the non focus there is very little difference between HI and LO beam. Also many of the bright LEDs actually draw more power than the halogens they are replacing. Most LEDs will still need to have a driver installed somewhere. ALL HID will need to have a driver installed. You could hook it up to not have to do all of the CMU jumpering but it is not recommended as the bikes wiring can not handle the startup surge to fire the HID. I have mine hooked up, so that it does not try to light while starting, this prevents the on-off-on at startup that is bad for the HID. If you are after max light down the road you will want a color number of 4500K or 5000K. Lower numbers will give a yellow light like a fog light and higher numbers sacrifice light output for the popular bluer colors.
-
I'm keeping an eye on the both of you..........
-
WHAT???
-
You are correct, the pilot goes off when the burner shuts down. Every time the blower was hung the thermostat was calling for heat, the pilot ligt was lit and the blower was running. So it may have been the pilot coming on, making just enough heat to turn on the fan and then just sitting in that state because the pilot was not hitting the flame sensor. Since my cleaning of the flame sensor and realignment of the pilot flame shield the furnace has not missed a beat.
-
I am now in wait and see mode. If the blower goes back to not working correctly then I will be pretty confident that it is the switch. The switch is directly switching motor power, no relay. There is a relay but that just selects the blower speed. Either speed still goes thru the blower switch. My volt meter says that when the blower is on and should not be the switch is closed. This gives me time to work on diabolical devices in the basement while I monitor the furnace.
-
Furnace is now in watch and see mode.
-
Tank you, but I don't do rain, just
-
You are all correct, this is keeping me away from the WWW, I just do not have time to go out and turn it off........ I got the pilot unit out and I think it was the problem, there is a flame shield that forces the flame over the flame sensor, Way back when the furnace was built, someone did not use a second wrench when they tightened the gas line to the orifice and twisted the flame shield about 30° so only the very edge of the flame was hitting the sensor. The sensor also had a good coat of carbon on it. I straightened out the flame shield and cleaned up the sensor with a folded piece of paper. Now when the pilot comes on the main burner lights instantly, or at least within a half second of the pilot coming on. It NEVER lit that fast in the 30 years I had it. It always took 3-5 seconds of pilot before main burner light. Along the same lines, the pilot is a pretty big flame, it is directly below the blower switch. I am wondering if the big 6 inch high pilot flame was just enough heat to turn the blower on?? Since I cleaned and realigned the pilot the blower has not hung either? So far the beast seems to be cycling normally.
-
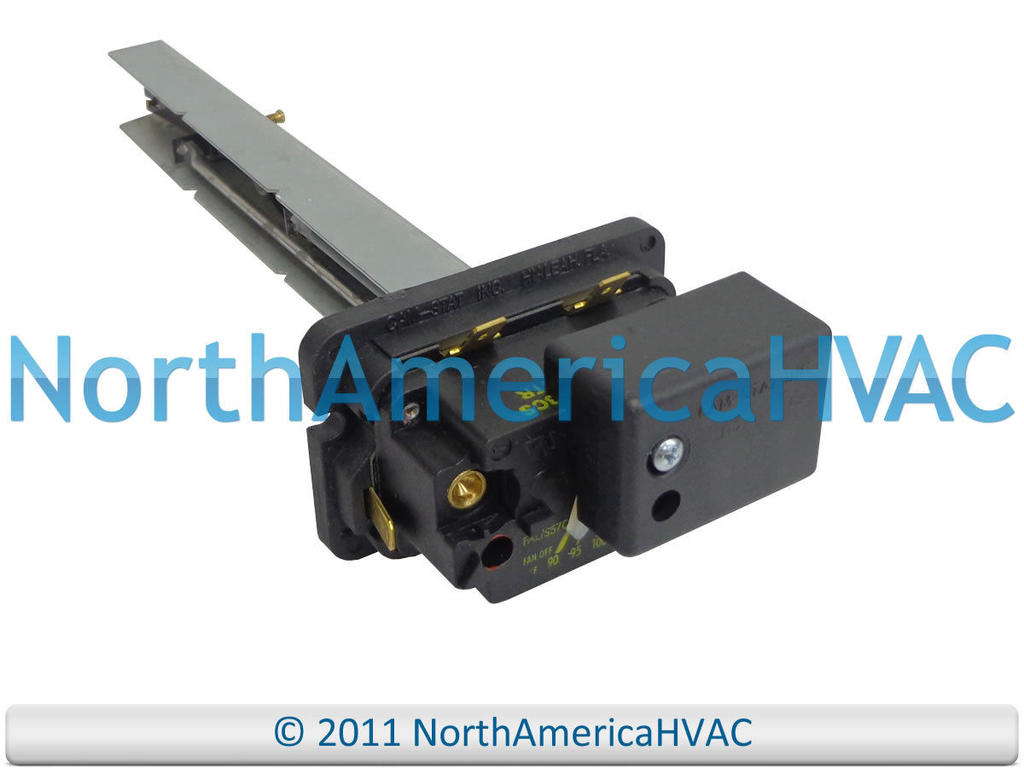
This furnace is one of the early high efficiency ones, I think it was listed as 95%. It has the PVC exhaust but still uses inside air for combustion. Here is a pic of the blower switch. it is p/n 1002743. I did pull out my blower switch and it was nice and clean. I did try bumping up the shut off temp by 5 degrees and that made no difference. the no fan overheat part of the switch is factory set to be 30 degrees above the fan start/stop setting. The plan for today is to pull the burner assy to get at the pilot and see if cleaning it up will help. I will pull some panels to see if I can get to the heat exchanger to check for holes. Because it is an old furnace and It has had the heat exchanger replaced 6 times already I do have CO detectors all over the house including one in the duct work to hopefully avoid the waking up dead part. If it will cost more than $200 to fix this thing I will have to bite the bullet and start furnace shopping now. I did a bit of looking and I can get a 98% efficient one for $1900, I would have to do my own install. I have no problem with the electrical hookups, the PVC intake and exhaust work or the gas line. It is only the modifications to the duct work that I do not have technology for. Maybe I need to add a sheet metal brake to my shop as part of the cost..... Part of the problem with the install is that I want to move the furnace location over about 6 feet so there will be a bunch of duct work involved. And of course I will also have to move a cold water pipe out of the way which could end up having to replumb the entire cold water side of the house......
-
I know we have a few HVAC folk around here. It is getting a bit chilly at times around here. I think I might have 2 unrelated issues happening at the same time which is helping to keep me confused. The patient is a 30 year old Tempstar. Model #867 .769423, on natural gas. The symptoms are. 1. Forced air blower will not shut off. It just keeps blowing cold air. If the thermostat asks for more heat while the blower is on it will light the pilot light but not the main burner, and just keep blowing cold air. I have pulled out the blower switch to see if it might be dirty but it is not and all of the switches move and open and close as they should. while it is blowing the cold air the contacts are staying closed keeping the fan on. A wack with the handle of a screwdriver (technical tap) will open the switch contacts, which shuts off the fan and opens the gas valve to the main burner and normal function is restored for a few hours. 2. The main burner does not want to light. The pilot is lighting (electronic ignition for the pilot) I checked for power to the main burner gas valve and there is no power going to it to tell it to open. BUT all it takes is a tiny puff of air directed at the pilot, or even just a wave of my hand to move some air toward the pilot and the power to the gas valve immediately comes on and the main burner lights and then the rest of the cycle is normal, unless the blower forgets to shut off at the end of the cycle. All this without actually touching the furnace, just the tiniest puff of air will trigger it. My guesses, 1. The air control switch is on its way out, and may need to be replaced. about $110 2 screws and 6 wires, should be a 10 minute job. I just hate to take a $120 shot in the dark. 2. The pilot sensor is bad or dirty. I can not see it without significant disassembly. I am thinking that the small puff of air is just enough to push the pilot over a bit so that it heats the last couple of degrees needed to trigger the sensor. Could be a dirty sensor or dirt around the orifice for the pilot making the flame the wrong shape. or it could be the sensor on its way out. The other thought, I did have to replace the inducer last winter. I sure does not sound like it is turning 3400 rpm. It used to make a lot more noise than it does now. I am not sure how to get in there to actually measure the speed. I hope it is not that, not only was it rather expensive, but I had a hard time finding someone that actually had one in stock. Again it is $110 for a new pilot burner and sensor assembly and $222 for the module that controls the gas valves. I hate throwing money at a problem. I was planning to replace the furnace the summer of 2020.
-
I just sold my HF trailer that already had all the needed mods and a floor and a topper and all LEDs and even a spare tire for that much.
-
DANG, @cowpuc typed faster than me,,,,,,,,,,,,,AGAIN.......
-
The shims are case hardened. Typical case hardening goes .015 to .030 deep. At the factory they are ground to finish size after hardening so there is no way to know how much case is left. I am sure that a range of sizes is made from each batch just by grinding a bit more. So they will all have different thickness of case left. This is why I will only go down 1 or 2 sizes to be sure that there is plenty of case left. One size is 0.05mm or just under .002 inch. I did a test once and took off .010 and did not go thru the case. In use if the case were to thin it could start tot break up and that would be bad. I always grind the side that has the size marked on it, and then mark the new size. Of course it has to be a good shim that I am starting with. You need to measure the shim with a good micrometer, NOT a calipers. You have to check to be sure the center and edges are the same thickness, IF the center is thinner at all, then that shim is worn out. A caliper will only measure the edge thickness and can not get to the center. I have measured shims that had the center warn as much as .005. If you were to install one of these after measuring with a calipers or believing the printed size your clearance would be .005 to big. When you are shooting for .006, that is a LOT to be off. Of course when you install a shim it should always have the marking down so that the cam will not wear off the marking.
-
Come spring I am planning to sell my generator, there has not been a power outage here since they completely rewired the area 10 years ago. We used to have lights out at least once a month. I also no longer have an RV for it to power.
-
Actually I keep the surface grinder in my right jacket pocket, The lathe in my left pocket, the vertical Mill in my right pocket, and the horizontal mill in my left jacket pocket. And the WWW does not even get to go in a pocket, it is a busy machine, always running.
-
It is to early for me to know if I/we can make it, but if I/we do it will be on 4 wheels, and staying at the Pond Monster Inn.
-
Not MC, but still looks like fun. My other passion.
Flyinfool replied to Flyinfool's topic in Watering Hole
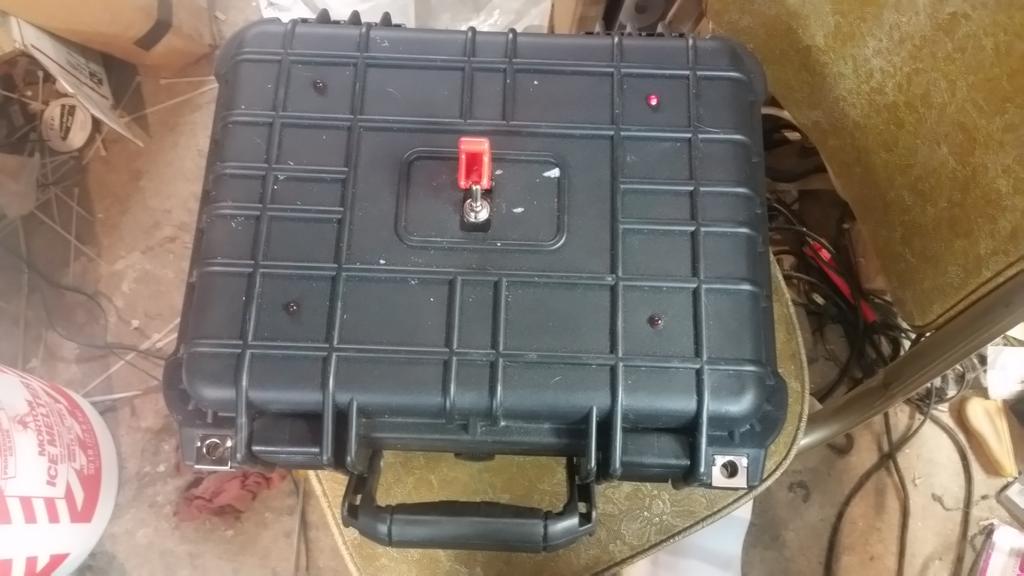
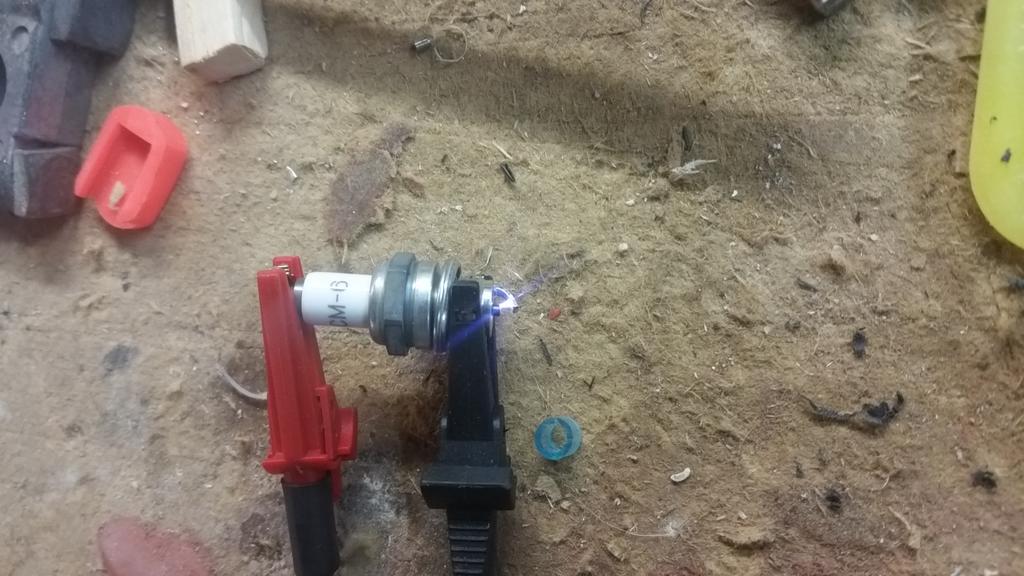
I have now completed the ignition system for the engine. I need a continuous spark to get the fuel to ignite. once the pulse jet is running the flame is self sustaining. this box will stay on the ground and is just for starting. It produces a spark about 3/4 inch long, and has a really hot fire across the electrodes of the spark plug. It is really pretty simple electrically. A 12V battery, A relay wired as a buzzer, which also acts as the points in an old bike, a condenser to try to save the relay contacts a bit, and an automotive ignition coil to step the voltage way up. I also added 4 random flashing LEDs to show that the power is on. I have some "DANGER HIGH VOLTAGE" stickers coming to put by the switch and the output terminals. Next on the list is the Air supply for starting. This will need a source of compressed air and that will need to be mixed with the correct amount of propane to make a nice combustible mixture to blow into the front of the engine. Once this mix ignites inside of the engine I can then turn on the main fuel flow and it should keep running at that point. As soon as I get all of this ground support stuff designed and built I can do the first test fire of the Pulse Jet engine on a test stand. There is still a lot of work to do on the aircraft itself, but that is also coming along little by little.
-
If you get really desperate and have the next thicker size, I have the technology to grind a shim down to size for you. When I did my bike I really cheated and made shims in sizes that have never been available.
-
I never mess up. It is all part of the master plan. @cowpuc don't even know where to find my wonderful little machine.
-
Yamaha did not start making Motorcycles until after the war in 1955. During the war they still made pianos.