-
Posts
1,209 -
Joined
-
Last visited
-
Days Won
5
Content Type
Profiles
Forums
Gallery
Events
Store
Everything posted by Du-Rron
-

Oil Filter Comparisons... Hey I.m no Engineer
Du-Rron replied to Du-Rron's topic in Royal Star Venture Tech Talk ('99 - '13)
Thank you Mike G, for your reply. Just trying to be helpful. Please see my reply to BlueSky a little lower below. Happy Trails! -

Oil Filter Comparisons... Hey I.m no Engineer
Du-Rron replied to Du-Rron's topic in Royal Star Venture Tech Talk ('99 - '13)
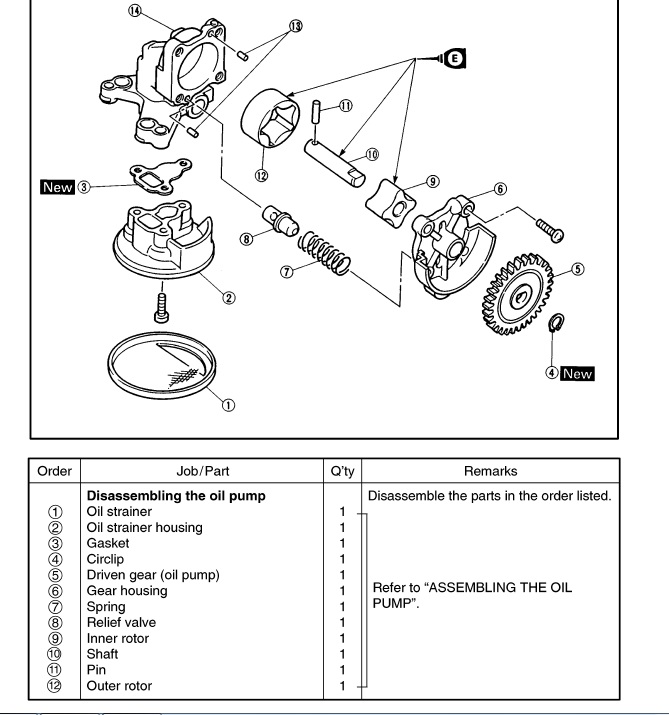
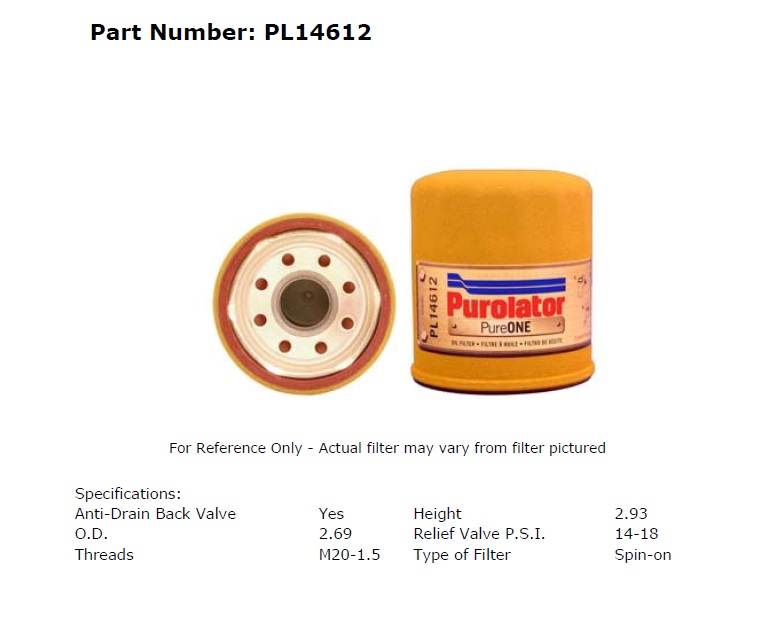
Yes you are correct. According to the manual, Yamaha wants a filter on the bike that has a relief (I call it a pressure differential) of between 11 and 16 psi (see "BYPASS VALVE SETTING PRESSURE" in pic from the Service Manual below). The Purolator L14612 with a relief of 14-18psi fits the Yamaha specs handily in that respect and it surely is able to flow more oil (at any pressure within the 14-18psi dump pressure) than our weeny little oil pump can produce in capacity. Me, I really never want the pressure differential valve opening at all. It would take whatever trash is already in the filter and spew it to your engine all at once. This is the last ditch attempt to save your engine. Keep in mind that the factory 5GH-13440-00 oil filter does not even have a pressure differential valve. As far as pressure, according to the service manual, our bike should produce around 6psi - yes really just 6psi- at idle hot (44kPa). Because we can spin up to about 6500 rpm, the oil pump internal relief valve is set to dump output pressure back to the input side of the oil pump somewhere around 60 to 78psi. (see RELIEF VALVE OPERATING PRESSURE in the pic below and note that it is part #7 & #8 in the parts drawing below that.) This is a function built into the oil pump and is not oil filter related. However, after about ...say... 2500rpm we finally have made enough oil pressure that (-can-) or (-is now able to-) activate the Yamaha, Fram, and Purolator pressure differential valve if the filter is clogged or you have decided to run 90wt oil in your engine that no longer can flow through the filter. Below 70psi is normal automotive pressure that car filters and media are used to seeing, so the Purolator will have no trouble with this either. By published Yamaha specs, the Purolator L14612 fits the requirements of the XVZ13TF series motorcycle -
Kawasaki Concours14 or... an old Goldwing... or an old Ultra Glide... OR Maybe... another RSV!
-
WHAT THE %#$* Sure sorry to see this. Sure glad your still around. Best wishes for a speedy & full recovery!
-
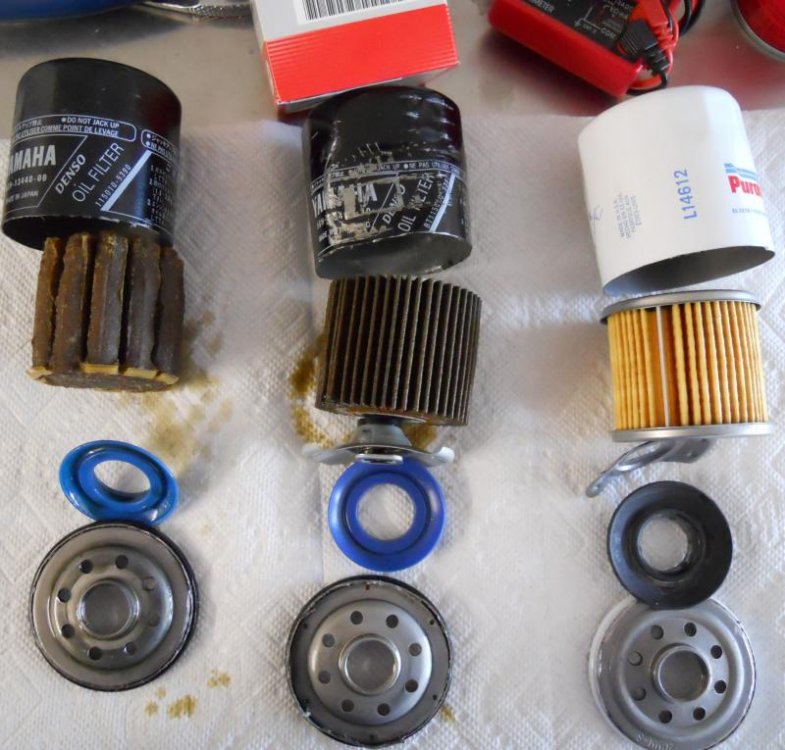
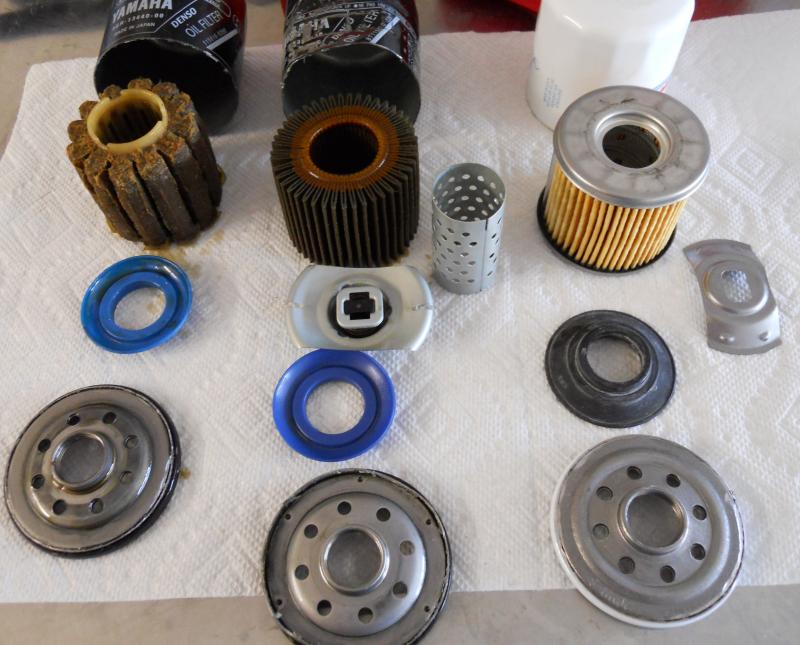
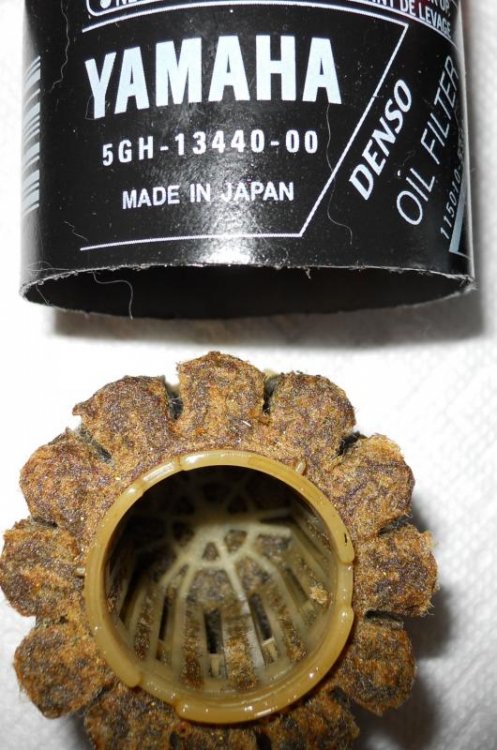
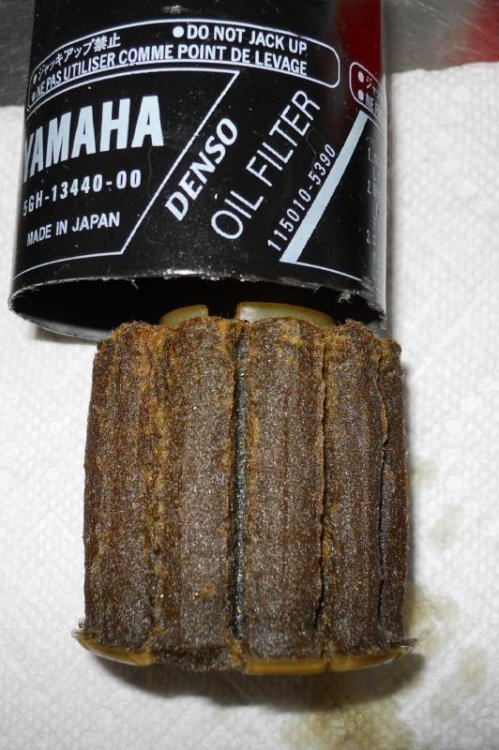
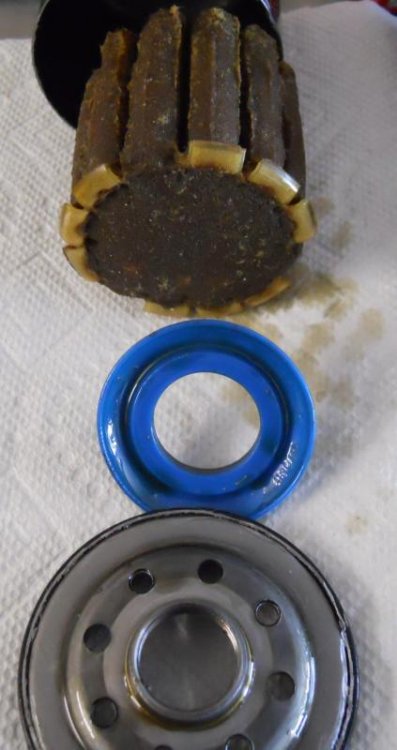
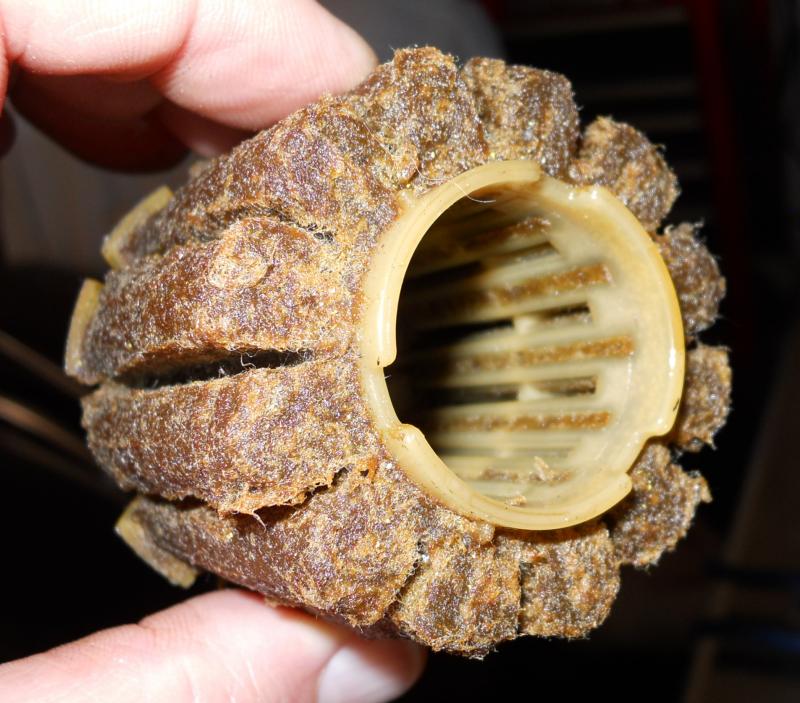
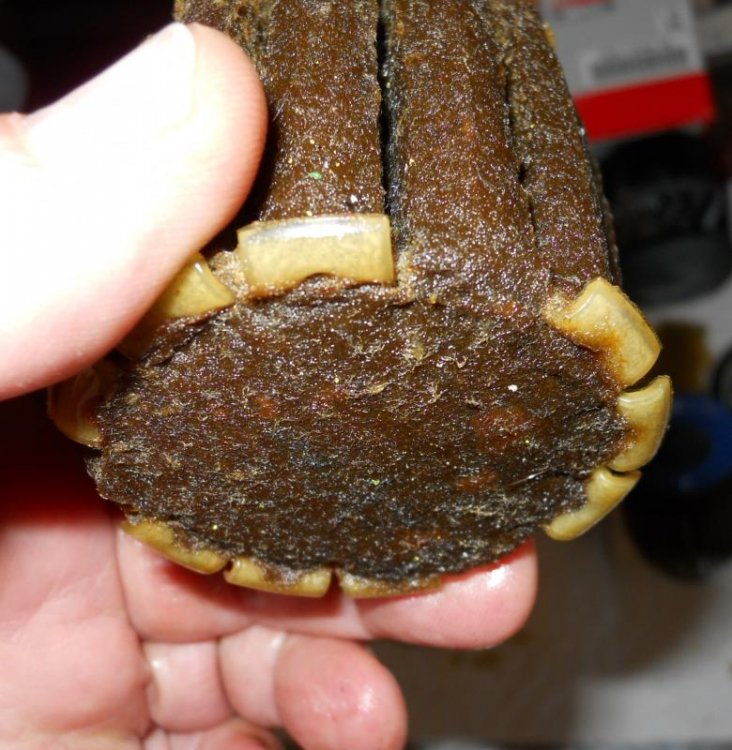
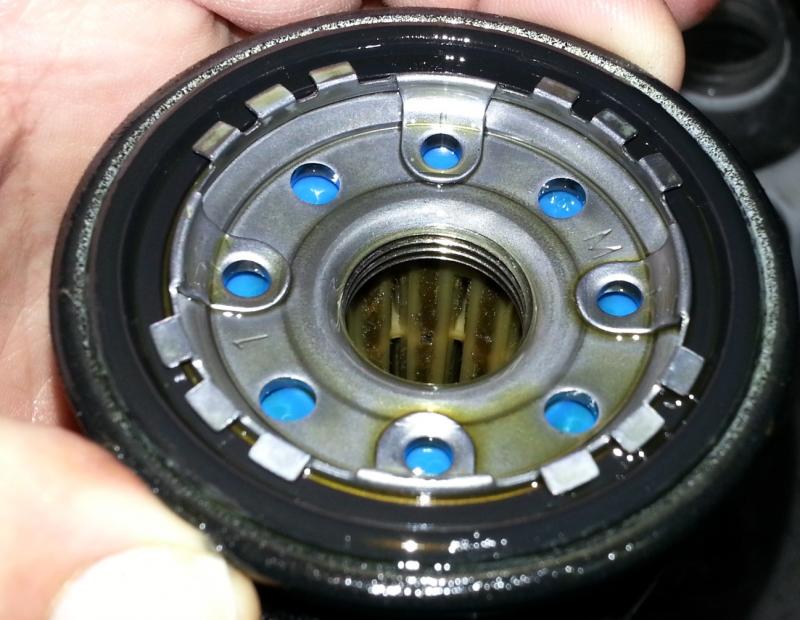
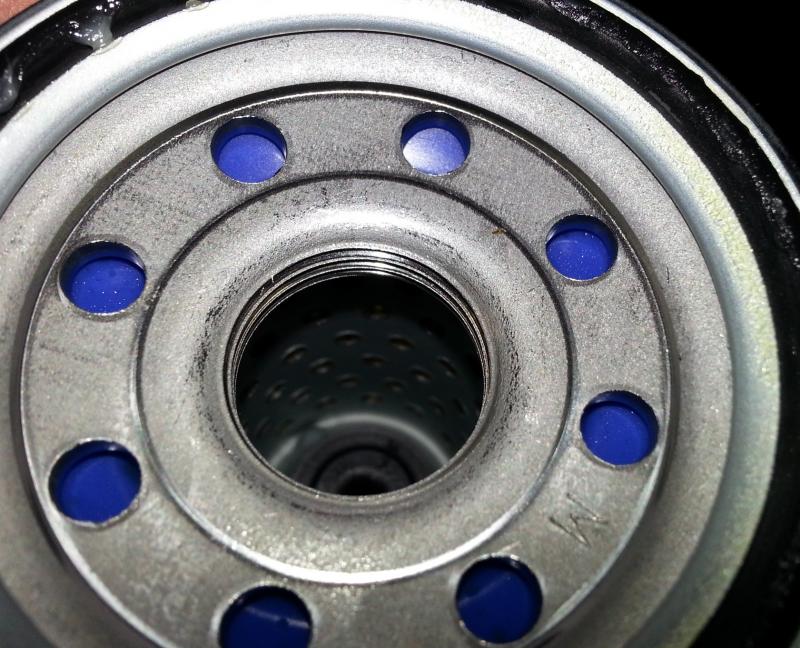
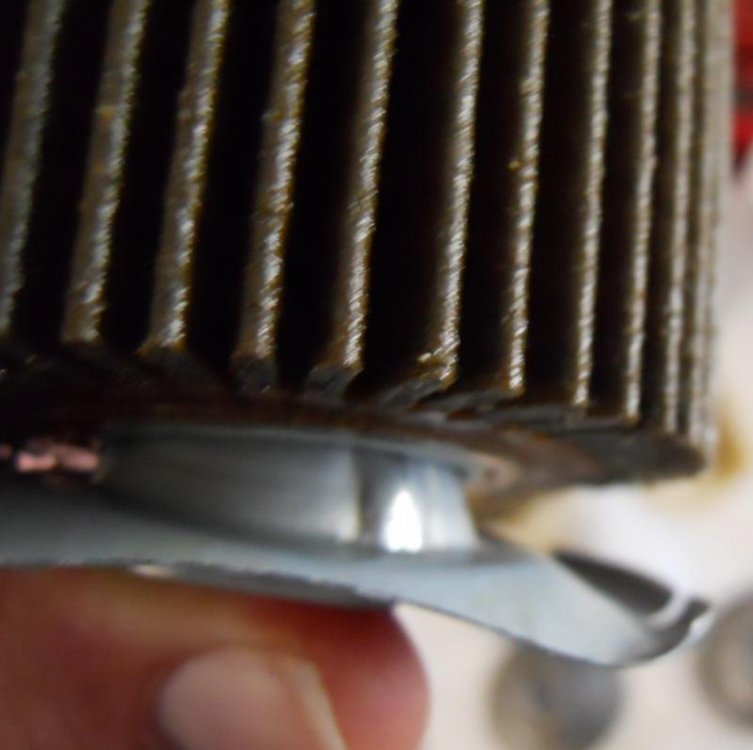
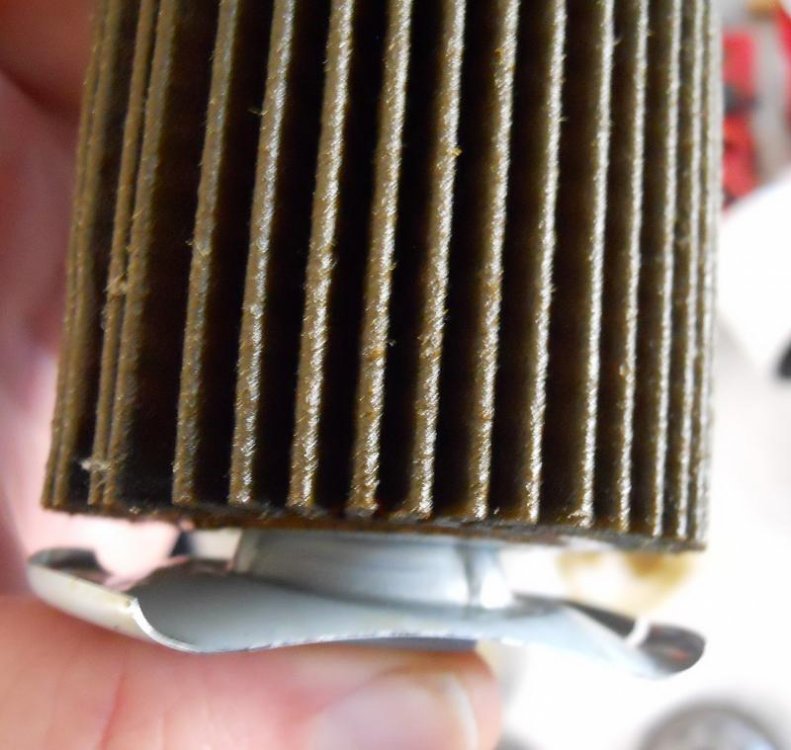
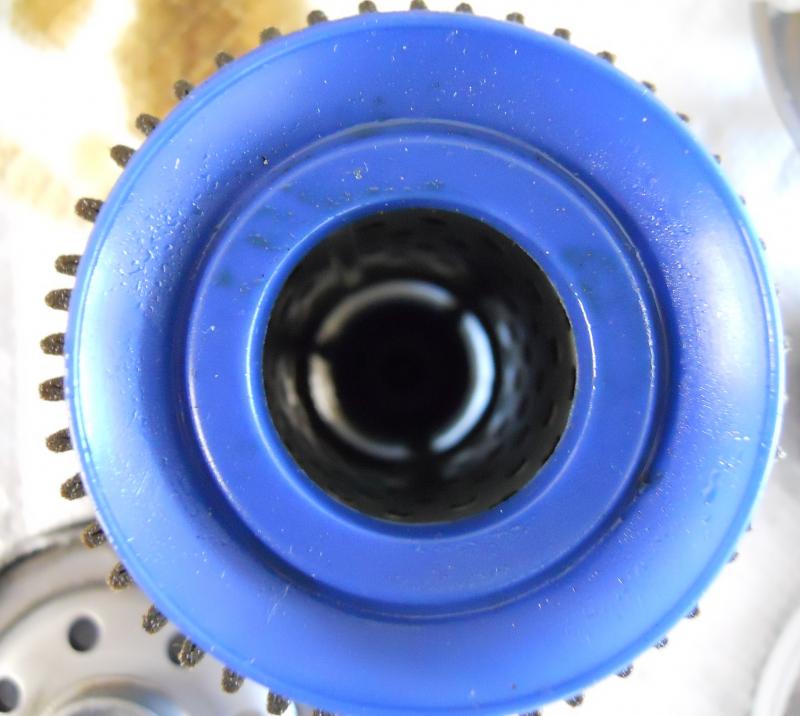
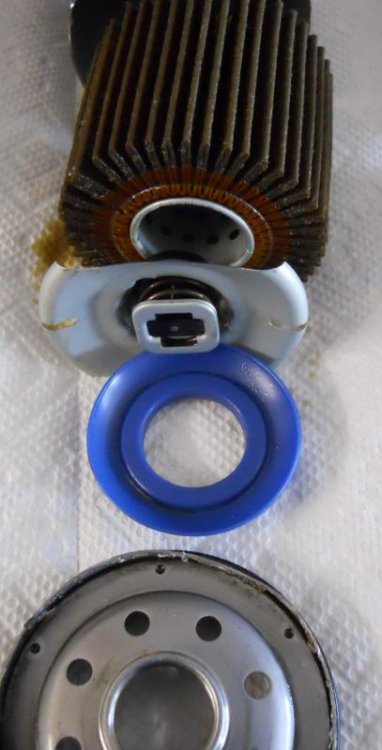
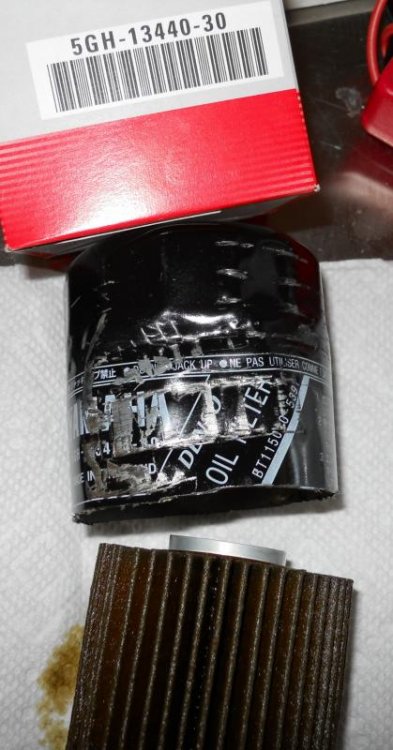
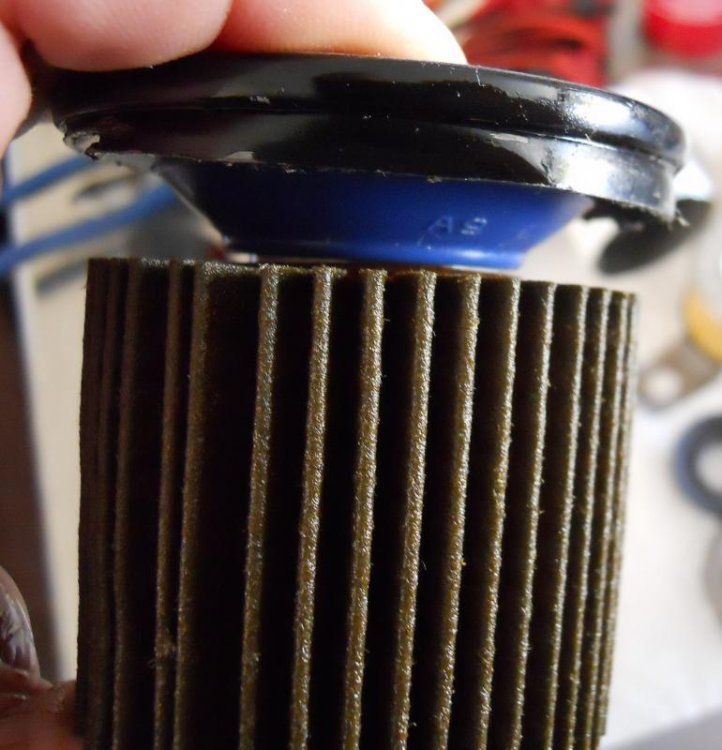
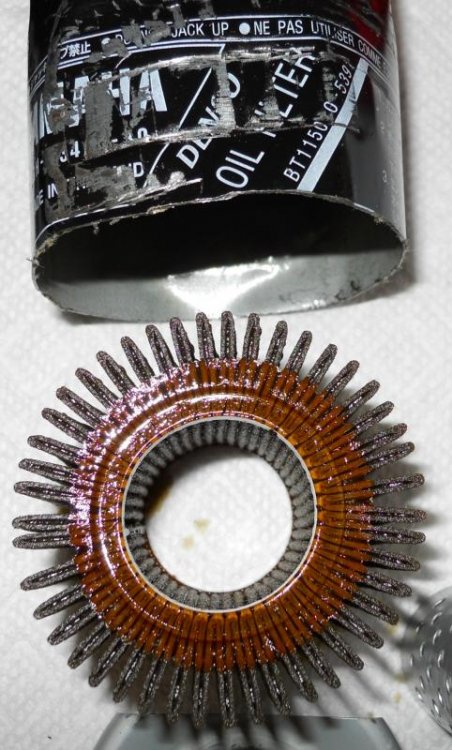
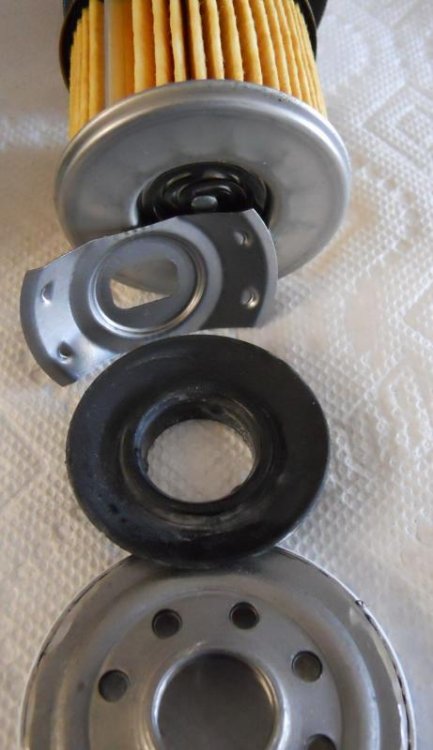
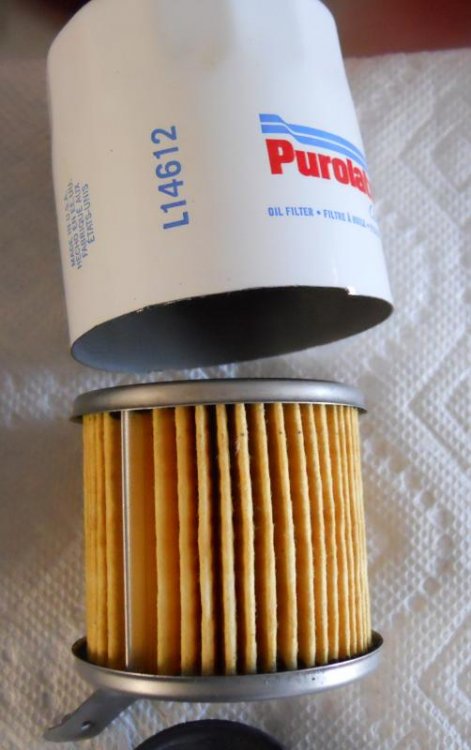
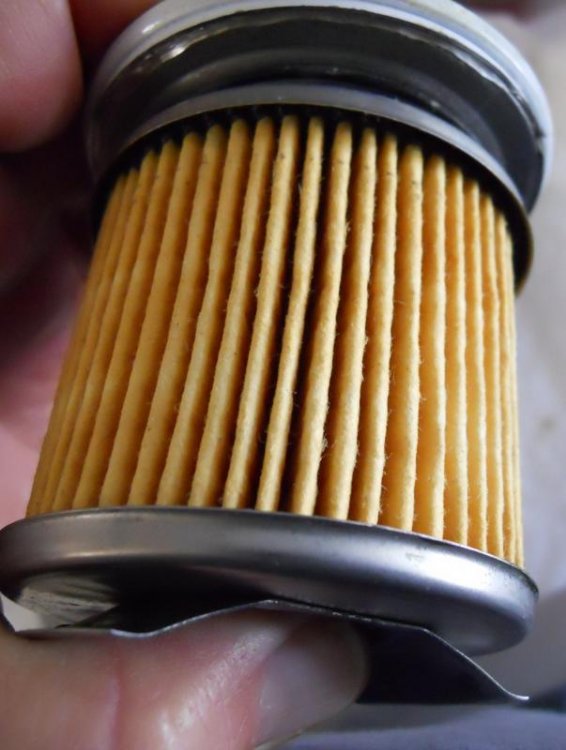
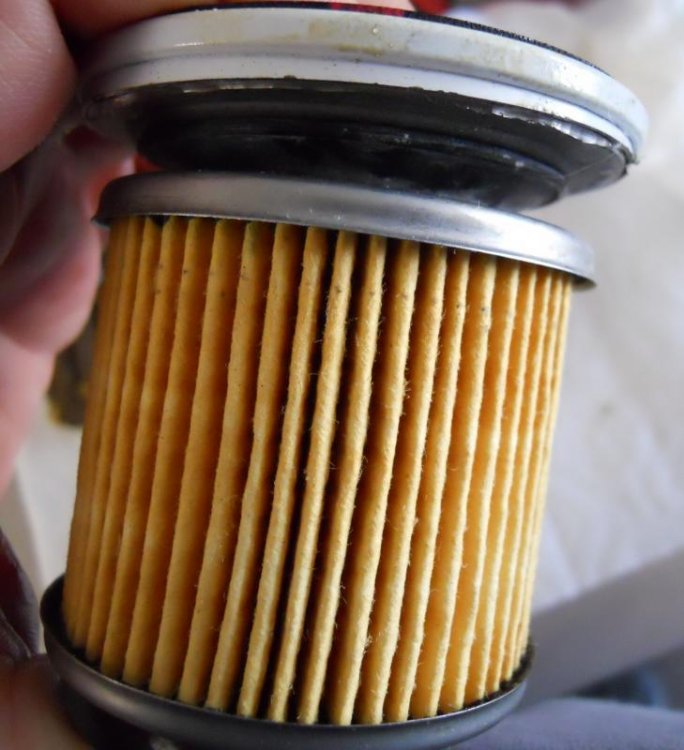
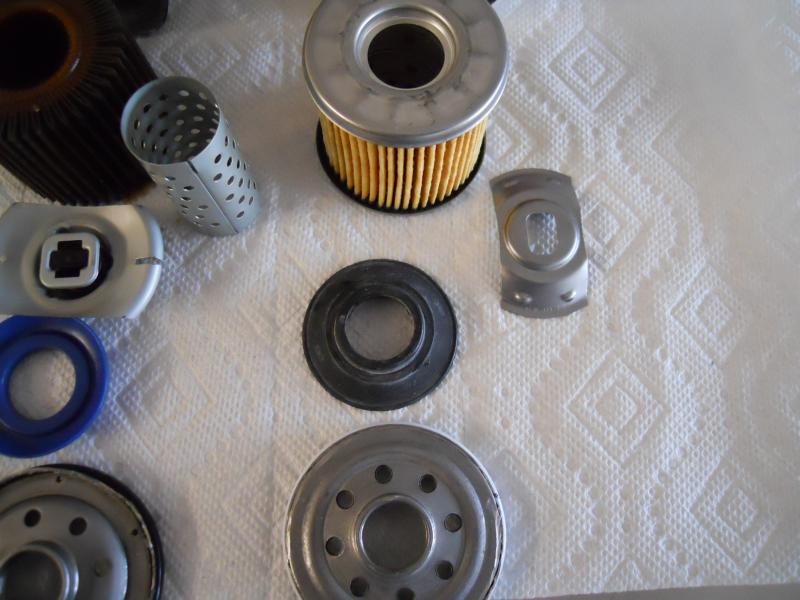
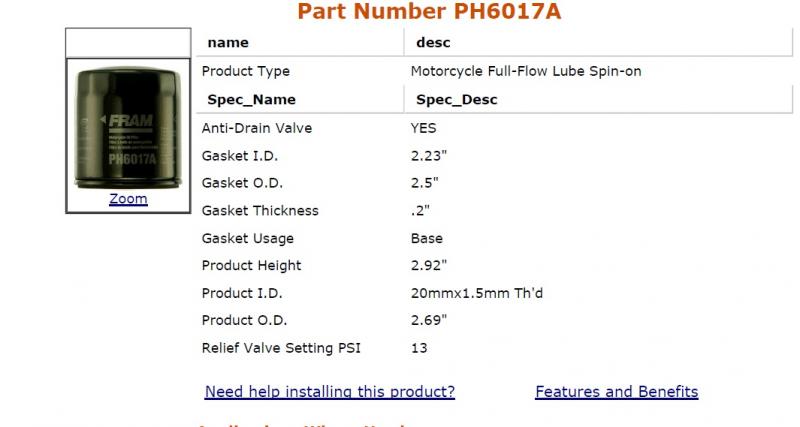
Hey, I'm not an Engineer... But I did stay at a Holiday Inn Express last night. I have seen many oil filter comparisons on here, but never for these three specific filters at the same time. The filters shown here are the Yamaha 5GH-13440-00 factory installed oil filter as it came with my 2012 RSV, the Yamaha 5GH-13440-30 which my dealer tells me is the most current filter and the one that I used for my 600 mile oil change about 2 months ago, and a Purolator L14612 oil filter which seems to “fit” and is something I am considering to use as a filter on my bike instead of the Yamaha Filters. If these filters have been previously compared here, please accept my apologies for not finding them. The Yamaha 5GH-13440-00 oil filter: Is made in Japan, has a “?fiber?” mono-bloc filter element with no pressure differential valve, no Spring of any kind, and a silicone anti-drainback valve. I believe that this filter element is more porous than not, just to flow oil. I also believe that it flows the most oil right at the –V’s- in the filter element which are only 1 mm away from the inner core of the filter. Thereby not filtering the oil very much. But, I believe over time that this filters efficiency will increase as the pores clog up and or the oil turns to sludge. If this filter ever did clog up a little over many many thousands of miles, your engine would have no last ditch attempt to get oil by the opening of the pressure differential valve, since this filter does not have one, and your engine would become oil starved. Best to get this filter off at the 600 mile oil change as recommended. The Yamaha 5GH-13440-30 filter is the most current filter as of 1-15-15 so says my dealer and the one I used at my 600 mile oil change. In the pictures it came off a little rough and dented, but that really is a 5GH-13440-30 you’re looking at. The Yamaha 5GH-13440-30 filter: Is made in Thailand, has a recognizable common cellulose filter element, with a silicone anti-drainback valve, a removable metal inner core, a pressure differential valve, and a torsion spring. There are no end-caps but there are “GLUE STICKERS” at each end that does not go all the way to the edge ends of the element. It would be reasonable to assume that a “little” oil can go in between the pleats and come out the inner side and that the oil has only been a “little” filtered since the oil went past the sides of the paper and not through the paper. The Torsion Spring has the pressure differential valve built into it and it presses against the bottom of the element, where it does not completely seal, due to the three inner ribs on the metal portion of the spring, and you can see daylight around the circumference of the pressure differential valve. The element and inner core are also pushed up by the Spring into the Anti-Drainback valve and oil filter flange. I believe that once the engine is off there will be no significant back pressure against the anti-drainback valve so it should seal well around its outer circumference against the filter flange and its inner circumference setting on top of the inner core which lightly touches the top of the paper element. In MY OPINION, this filter is not worth the $14.00 that Yamaha charges for it and I would consider it no better than the Fram PH6017A which you can purchase at Wal-Mart for $5.00 if you don’t like your engine very much. The Purolator L14612 oil filter substantially matches the Yamaha and Fram filters in the most important physical dimensions and is of particular interest to me because I can get one seven days a week, Wal-Mart sells them for $3.50, and they look to be a much better filter than the Yamaha or Fram. The Purolator L14612 oil filter: Is made in the USA, has a recognizable common cellulose filter element sealed on both ends with metal caps, a non-removable inner tube screen, a nitrile anti-drainback valve, a torsion spring pressure differential valve built into the bottom end cap, and a torsion spring. The end caps are both glued on and the glue reaches the edges of the element and there is no excess glue on the side of the element. The torsion spring presses up against the bottom of the element, and the element fits the anti-drainback valve snuggly at its inner core since it is mating to metal. The anti-drainback valve then pushes against the filter flange and also fits snugly. This is the filter, or its counterpart the Purolator Pure One PL14612, that I’ll be using in the future.
-
just curious.... Did they charge you $0.25 each ... or $12.50 for 50 of them? Want to make sure of the pricing around the country. Thanks!
-
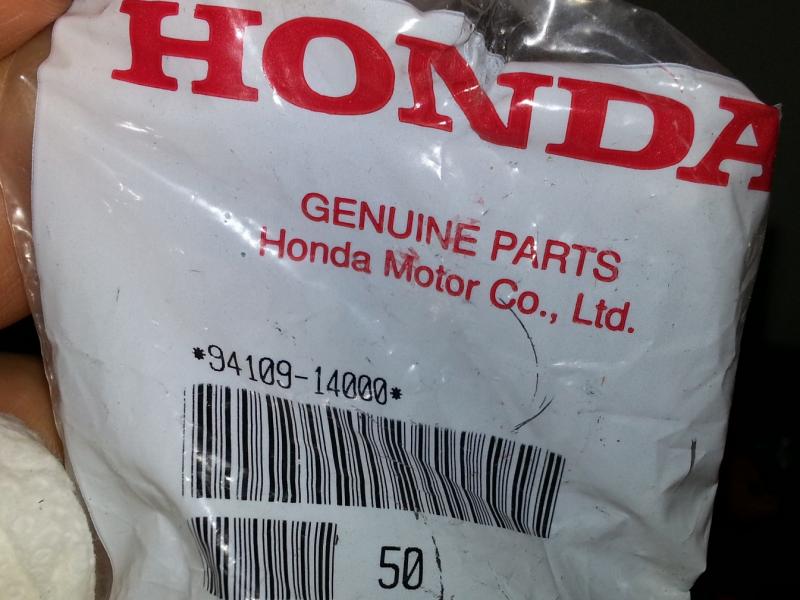
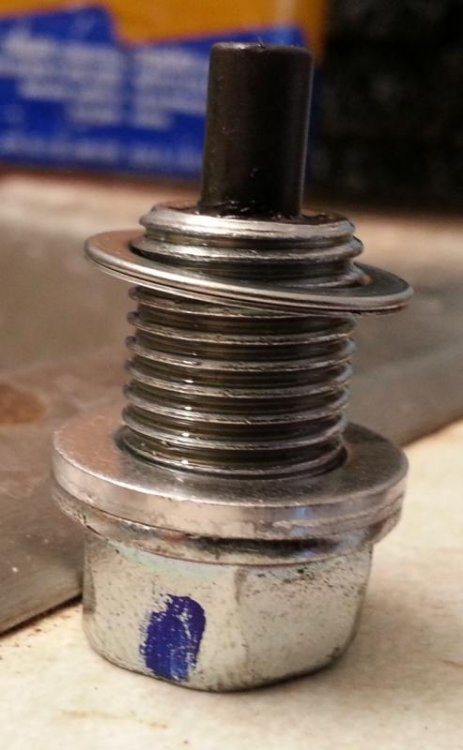
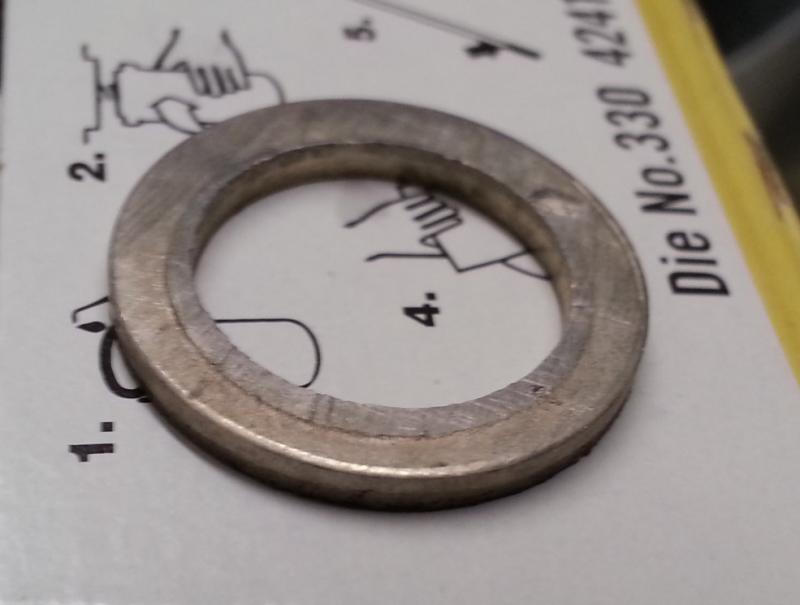
Instead of using the factory crush washers, pick up some HONDA part # 94109-14000 from your local Honda CAR dealer. They charge me $0.25 each for them but I buy a bag of 50 for $12.50 so I always have some around. In the picture below you can see the fat aluminum crush washer compared to the thin factory tin washer hanging off the top of the threads of the diff drain bolt. If you tighten your drain plugs without using a torque wrench (I use one) the Honda washer will put up with more abuse and still seal well while protecting the threads of what you are trying to seal. Shown below is the washer after crush. Note the raised part where it has formed into the hole.
-

Oil leak and smoking???
Du-Rron replied to Wesley G's topic in Royal Star Venture Tech Talk ('99 - '13)
-
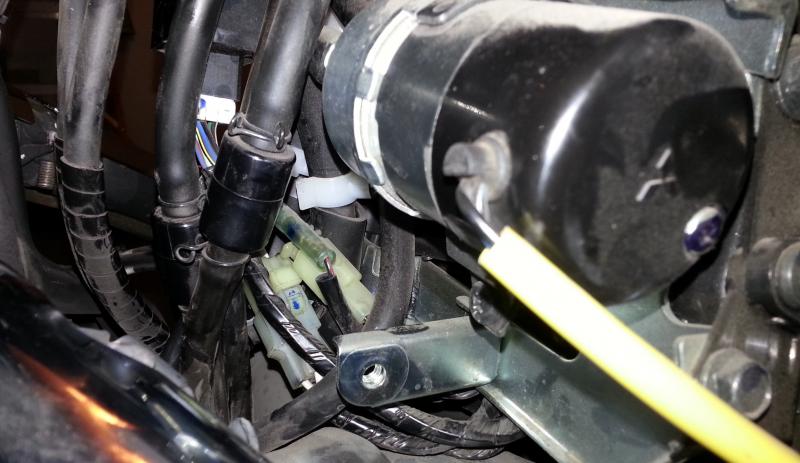
The 3 pin connector is under the seat, behind the center cover, behind the vent lines, lower than the fuel filter, and is marked by a blue marker in this picture and has 3 white wires on it.
-

To Lube or Not to Lube... That is the question
Du-Rron replied to Du-Rron's topic in Royal Star Venture Tech Talk ('99 - '13)
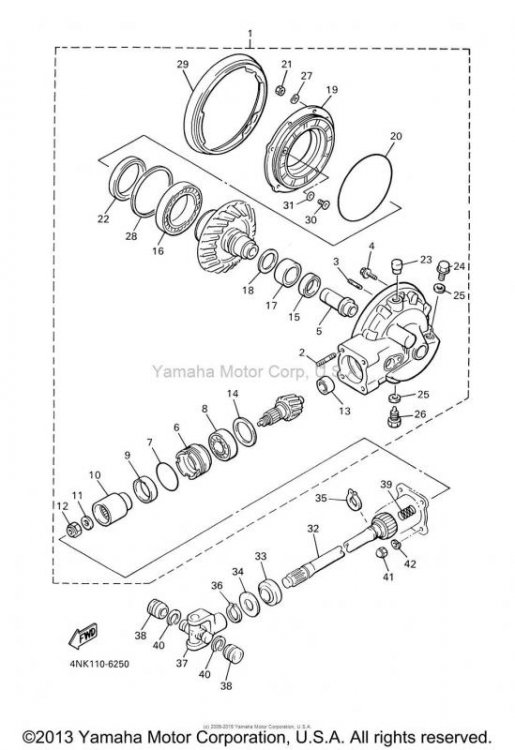
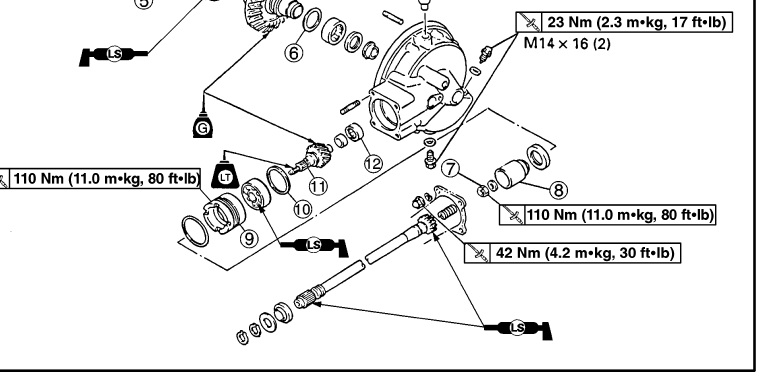
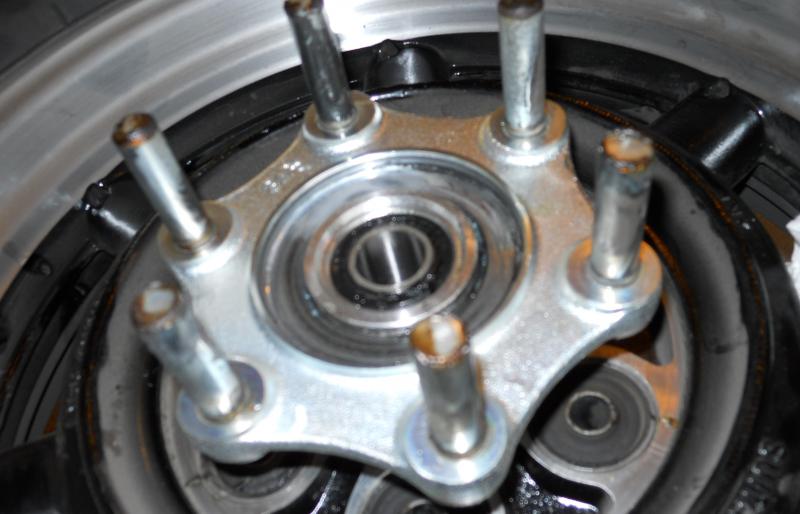
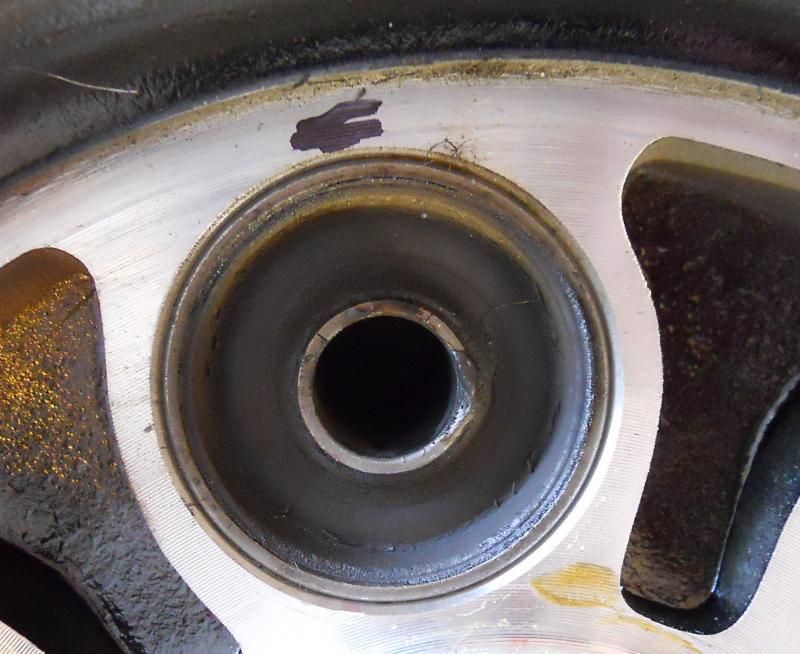
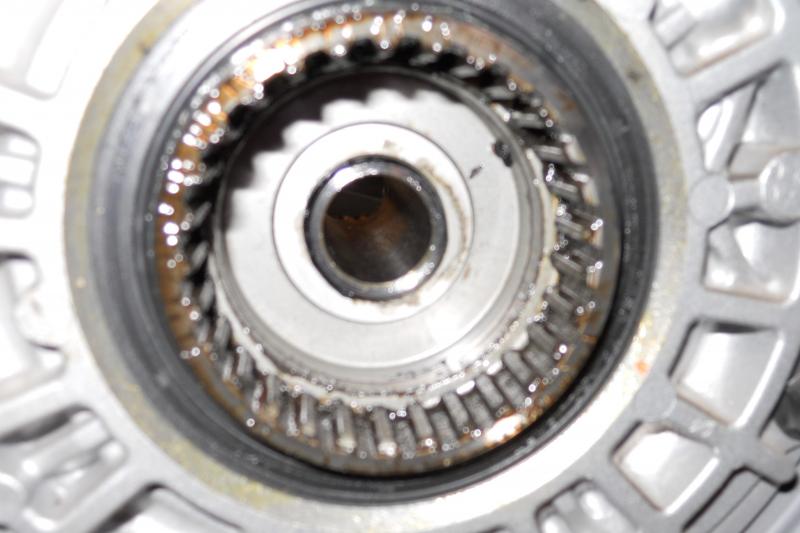
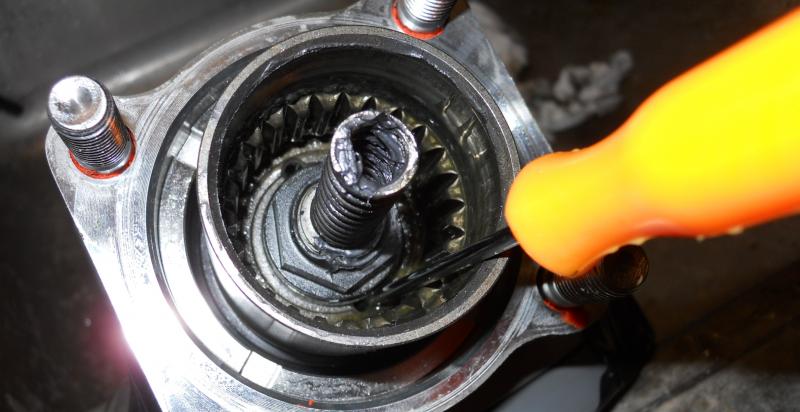
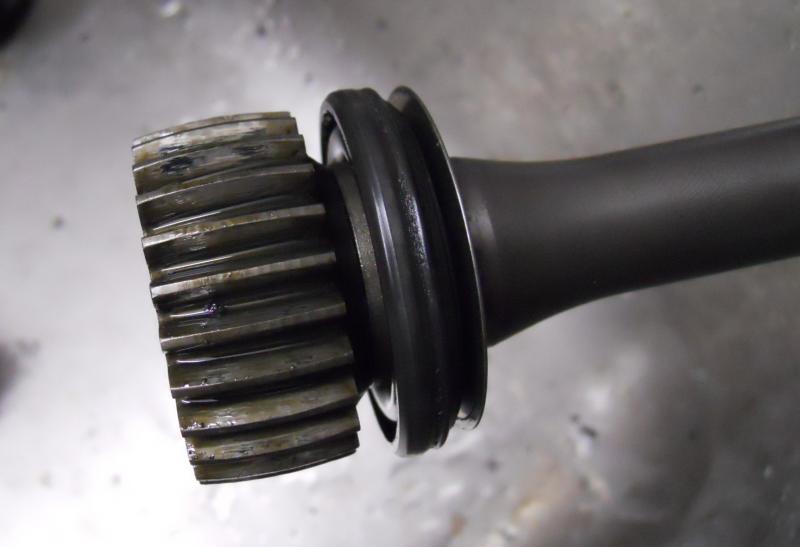
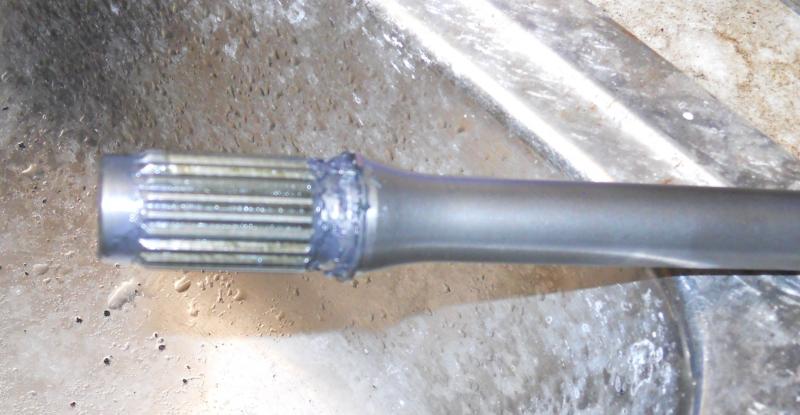
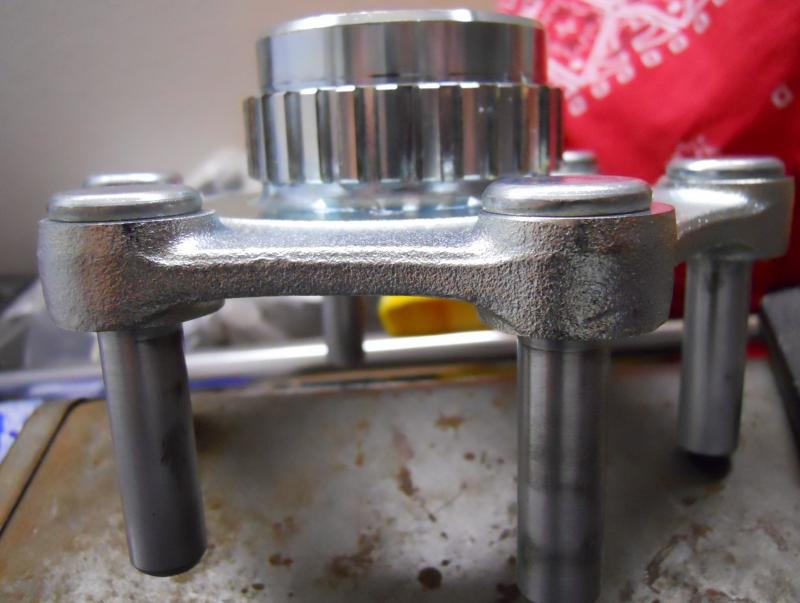
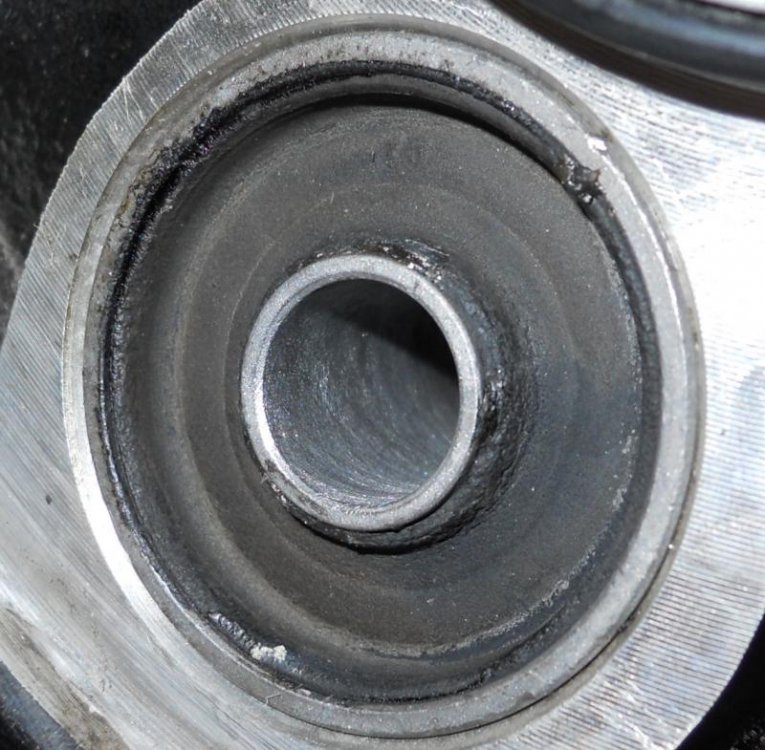
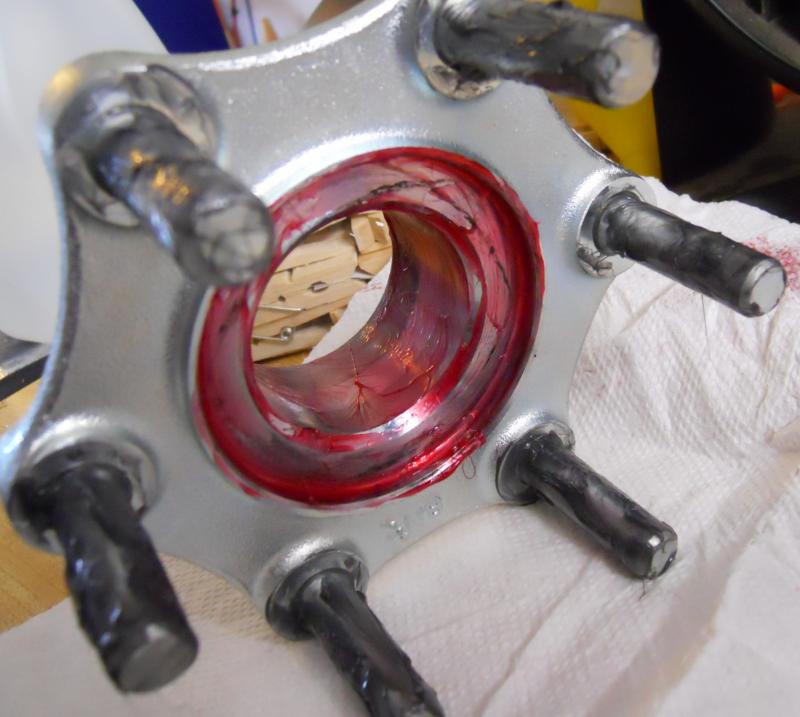
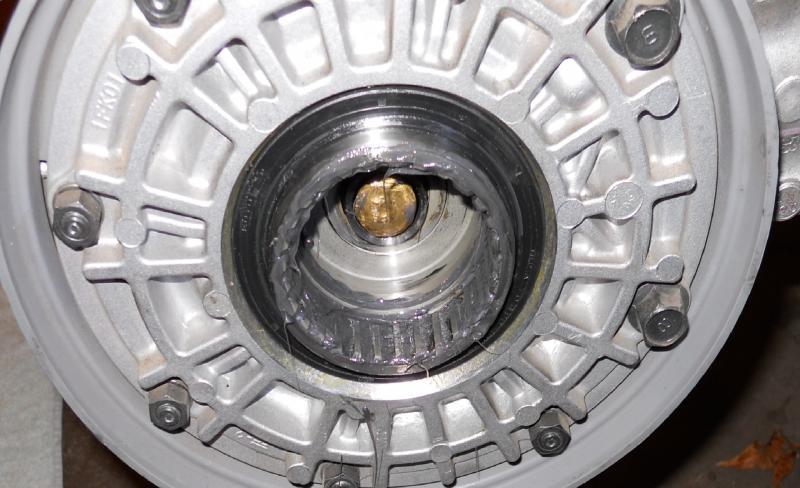
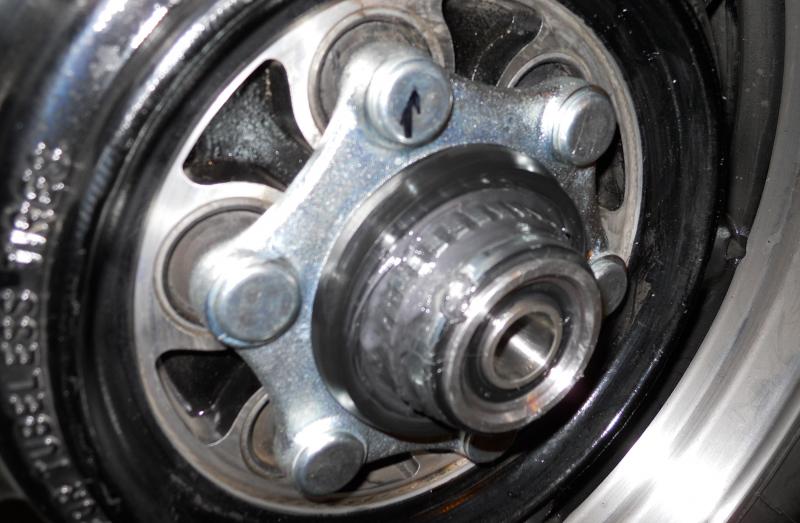
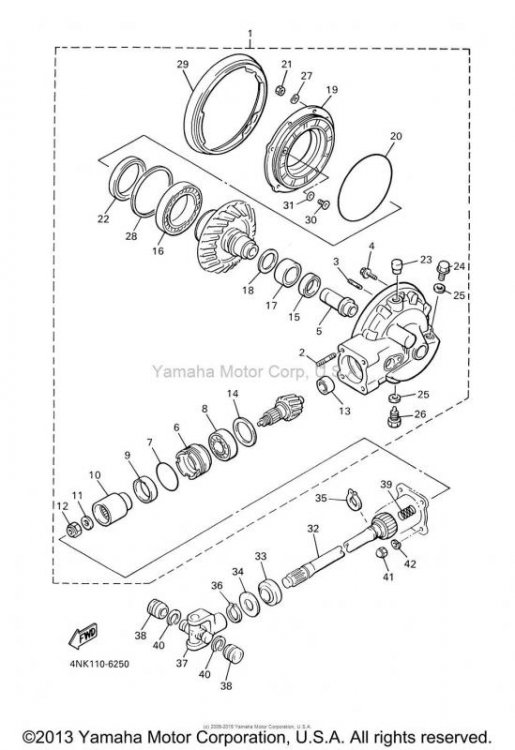
Thank you to all of yall. Just trying to be prepaired for what I was getting into. Here is what I found. The PARTS drawing is wrong and the service manual drawing is correct. If you will look at the parts drawing it shows #33 through #36 in the picture in the wrong picture order but in the right assembly order. In other words, Put #33 (the oil seal) on the diff end of the drive shaft first, then slide on the washer #34 , then slide on #35 the circlip, then install #36 at the yoke end of the driveshaft. is the parts drawing is the service manual drawing. Notice the difference. I had close to 4000 miles on the bike and I wanted to bring it up to a known condition. I found dry rusty drive pins Dry rusty cush drive holes. Hardly any grease on the drive splines Found that the diff end of the driveshaft is lubed by diff sump oil that it gets from the two holes in the coupler and that factory puts a little moly on there as a pre-assembly lube. notice the seal on the diff side.... Hardly any grease on the yoke end. So I cleaned it up, greased it, and put it back together. I used a brass 1/2" pipe cleaner to clean out the cush drive holes and scotchbright to clean everything else. The wheel is hollow so I plugged both ends of the axle shaft bearing holes, then gave each hole a shot of brake cleaner after the pipe brush. I used straight lith grease (red and gc-lb rated) on the diff side oil seal and internal of the drive pin assembly and moly (black smelly stuff also gc-lb rated) on the brake side needle bearing and the cush drive pins. and put it all back together. Installing the drive shaft was tough. I eventually made a tool out of a coathanger bent in such a way that it had a -U- on the end of it that would hold the yoke up so I could stab the driveshaft. The other toughie was getting the wheel back on in that I had a hard time pushing the wheel into the diff splines without scooting my bike off the jack. After about 30 minutes of wrestling with the wheel, I finally called the boss (my wife) for some assistance. I had her stand where the left rear crash bar is and told her to push against me while I was trying to get the wheel towards her and that the goal was to get the wheel inserted without pushing the bike off the stand. On the first try which took only 30 seconds the wheel was engaged and the bike was still on the jack. I don't know how I would have done this by myself. You'll note that in the picture of the cleaned up diff that I also had a brass drift in there trying to hang the wheel off of that to get the splines engaged. Maybe I was under hydraulic lock from so much grease, I dunno. I just know that it was very easy to get the wheel back on with two people. Thank yall.. Maybe this article will help somebody in the future. -
I have a 2012 RSV with 4000 miles on it. Tomorrow I am removing the rear wheel and driveshaft. I have read back and forth on here that GEN2 ventures have their differential splines lubed by differential oil and that you just need to lube the splines in the U-joint end. Some say you need to lube both ends. In the enclosed picture, for the life of me I cannot figure out how -any-, or at least a -significant- amount of 80w-90 can make it past, the gear, the seal, the bearing, the bearing retainer, the oring, and the oil seal, not to mention the nut and washer in the middle of the drive shaft coupler to get to the differential side drive shaft splines. Some folks have said that by lubing the differential side drive shaft splines that it will plug oil holes in the gear coupler. As I said, this is tomorrows project and I have not actually viewed the parts in real life yet. So... which is it? Lube the differential side drive shaft splines with moly, or do nothing and let it get lube from to 80W-90 in the diff sump? Thanks!
-
If you have never done it, now is the time to rebuild the master and slave clutch cylinders and use nothing but DOT4 fluid, -from a brand new container- to refill. Rubber hydraulic hoses swell and contract just a little, during use, and more as they age. May want to consider replacing these with the factory clutch hose or upgrading to teflon steel braided hose.


