-
Posts
1,209 -
Joined
-
Last visited
-
Days Won
5
Content Type
Profiles
Forums
Gallery
Events
Store
Everything posted by Du-Rron
-

Stuck Pilot Screw, Got any Ideas?
Du-Rron replied to Chaharly's topic in Venture and Venture Royale Tech Talk ('83 - '93)
Bluesky... Nothing bad directed your way when I was replying to @videoarizona. I am a goofball and I was just making fun of a mental thought I had while thinking of @Chaharly pounding away on the carbs with a drilling hammer. Kinda like thinking about Watch Repair using a claw hammer. Sometimes... ok well most of the time... my stuff is just funny to me. Please accept my apologies and please ignore me as I don't mean any harm. -

88VR hydraulic clutch repair question
Du-Rron replied to Indian's topic in Venture and Venture Royale Tech Talk ('83 - '93)
At the minimum it would include a master cylinder kit that contains new seals for the master cylinder, a slave cylinder kit (also new seals) and recommend new hydraulic hose and seals. If you have never done this before, may want to consider calling your favorite mechanic and asking what it would cost. Parts for Master Cylinder & Slave Cylinder can be around $70 (guessing. Some folks replace the entire slave -expect to spend more-). Hose can be factory or you may want to go to steel braided hose. Cost is about $50 to $125 (guessing). Labor to do it yourself if you have never done it before (I dunno). Shop time will be about 2 hours with no problems encountered. See here for some clutch parts that just came up. http://www.venturerider.org/forum/showthread.php?100530-Almost-free-1st-gen-clutch-actuator -
I can say this because a long time ago I used to live in a mobile home for awhile. If you put a mobile home in an area that has not had a tornado in the last 100 years... a tornado would destroy that home within months. Why? Because mobile homes attract tornados. Kind of like the way that lightning rods attract lightning.
-

Stuck Pilot Screw, Got any Ideas?
Du-Rron replied to Chaharly's topic in Venture and Venture Royale Tech Talk ('83 - '93)
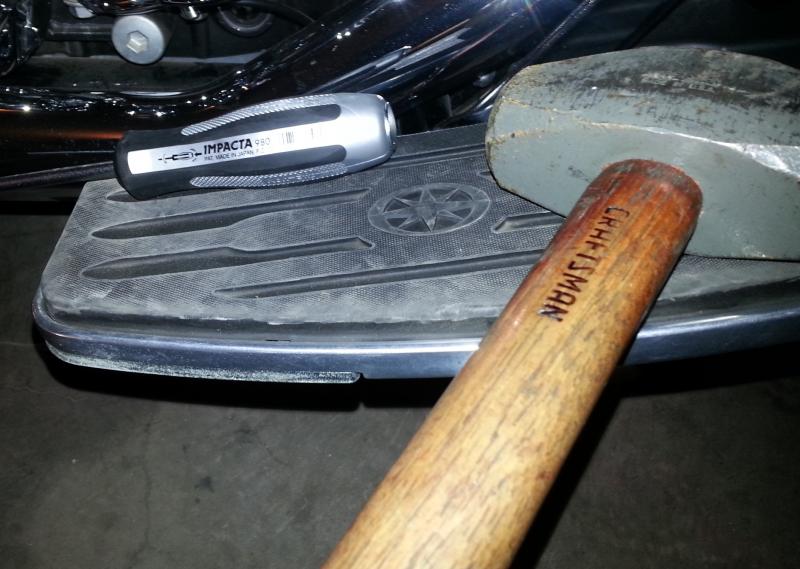
Pilot Jet Removal Tools: These are the factory authorized Pilot Jet Removal Tools. Immediate results Guar-Ron-Teed. (Also resizes pilot from wimpy #15 to a full manly 0.250") -

Stuck Pilot Screw, Got any Ideas?
Du-Rron replied to Chaharly's topic in Venture and Venture Royale Tech Talk ('83 - '93)
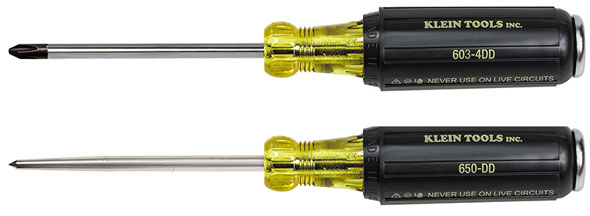
Those are good. But I was thinking of just the full tang screwdriver for light duty work like so... These have no springy guts in them and have a metal striking cap on them. They are for a more "delicate" touch. -
I would say -no- to anything keeping her in the seat. Make sure you have plenty of medical insurance. Start with short trips of a couple of miles or so and see how it progresses from there. Can she ride a bicycle on her own? That will help her understand. I was not a passenger at age 7, but I was riding on a Honda Trail 90 by myself when I was 9.
-

Stuck Pilot Screw, Got any Ideas?
Du-Rron replied to Chaharly's topic in Venture and Venture Royale Tech Talk ('83 - '93)
When you hit it and glance off the top and hit your hand instead it makes an impact after you throw it at the wall. No, the tang is against a ramp. Even a small tap will transfer downward and a little torque force as you twist it by hand. Yes, the harder you hit the more torque is transferred. Right about the point you think you have it loose, the lever mysteriously flips to the other side. After 3 or 4 blows you realize that you are now again tightening the thing. Once again it makes that "impact" sound after you throw it against the wall. On the manual side is impact screwdrivers that have full length tang with a metal head on the top of the handle. The only torque force there is by you twisting it. Downward force is by you hitting it. Call this the "delicate" version of an impact driver. -
Those there are your linear farznel bearing slides. Seriously though, there are drain plugs for coolant behind there. They are rubber plugs. Available from Yamaha, you may want to consider replacing them since they are probably pretty old.
-

Stuck Pilot Screw, Got any Ideas?
Du-Rron replied to Chaharly's topic in Venture and Venture Royale Tech Talk ('83 - '93)
Before you take an impact driver, drill, blowtorch, or gun powder to it, try some penetrating oil in it. Leave the oil in the hole for about 1/2 hour and then work it back and forth for a while. Nothing -Ventured- nothing gained. (I crack myself up sometimes...) -
Start checking for power & ground at the lamp plugin.
-

To Toe Heel or not to toe heel that is the queston
Du-Rron replied to Kc9ojn's topic in Watering Hole
I -kinda- like my heal shifter but I cannot shift as "slickly" or "quietly" with it as when I use my toe shifter. On acceleration runs I never use the heal shifter as I am better at toe shifting. Also, I am thinking of hacking off the heal end of the shifter to give my size 12 left foot (yes the right one is the same size) more room to move around. as Always Thanks -
But ... But... But.... According to the government, I'm only 67% a bad a$$.
-

Lay over kill switch 97 RSTD??
Du-Rron replied to Str8tarrow's topic in Royal Star and Royal Star Tour Deluxe Tech Talk
Check Battery cable connections at battery and at starter. Move gear shift lever up and down while in neutral. Play with clutch lever switch. Then look on page 8-14 of the RSV manual ( I know its not RSTD but it is close enough) available here to start troubleshooting. http://www.venturerider.org/forum/guides-parts-diagrams-etc-/1828-download-owners-service-manuals.html -
I think you did exactly the right thing. Suggest to the seller that he contact the original buyer by, text, email, phone, PM or send smoke signals. I would tell the seller that if he gets no response after that from purchaser #1 , just like you already did, that it is to be all yours after 48 hrs.
-

upgrading bulbs
Du-Rron replied to oconeedan's topic in Royal Star and Royal Star Tour Deluxe Tech Talk
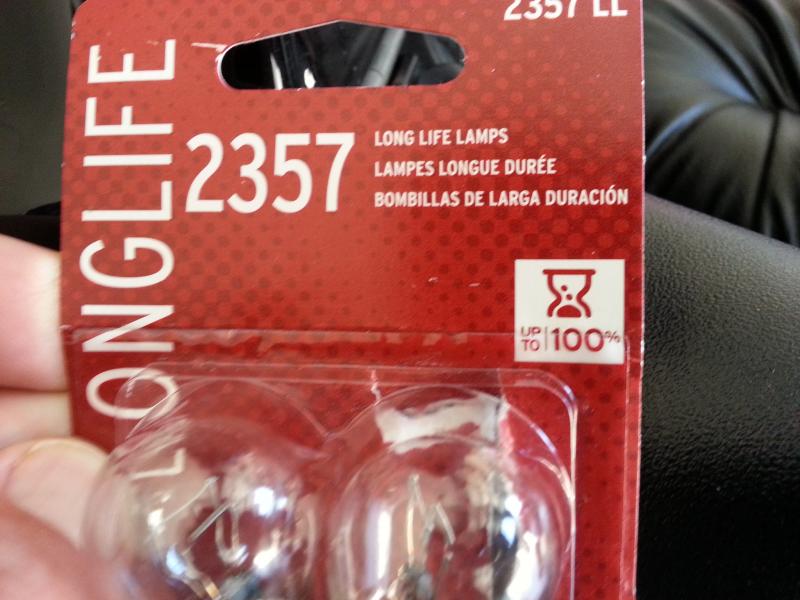
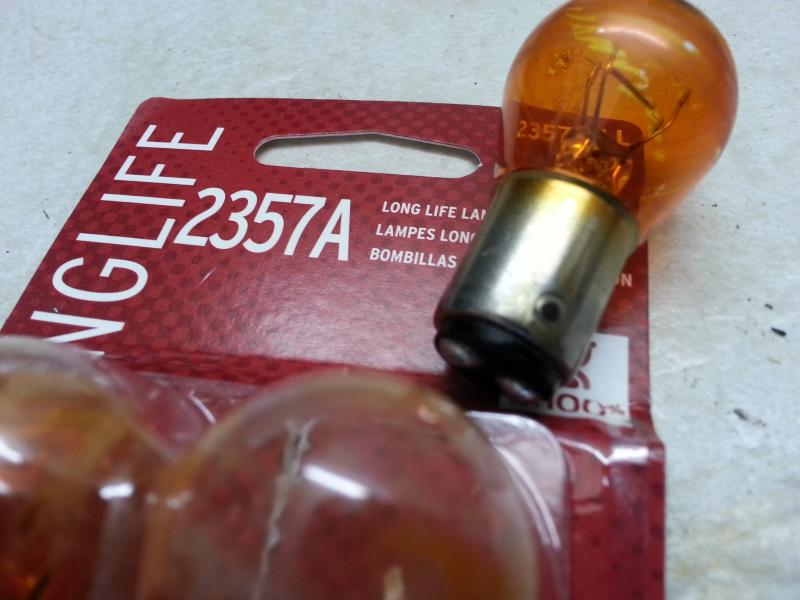
Ok, time out... new rules... I told you wrong before. There is an article in here some where about light bulbs. On mine, the 2357 is a higher output direct fit for the brake light bulb. The 2357NA (yellow one) can be used in the front turn signals with the lower nib filed off. I haven't messed with the single filament rear turn signals yet. -

So what's the big deal?
Du-Rron replied to MasterGuns's topic in Venture and Venture Royale Tech Talk ('83 - '93)
I never saw the -X- rated version of how to install a clutch (grin) -

upgrading bulbs
Du-Rron replied to oconeedan's topic in Royal Star and Royal Star Tour Deluxe Tech Talk
The 2057 will be brighter for brake lite than the 1157. Don't reslot socket, instead file last nib off of 2057NA bulb. There is an article in here somewhere about that. -

So what's the big deal?
Du-Rron replied to MasterGuns's topic in Venture and Venture Royale Tech Talk ('83 - '93)
Just trying to be helpful. -

So what's the big deal?
Du-Rron replied to MasterGuns's topic in Venture and Venture Royale Tech Talk ('83 - '93)
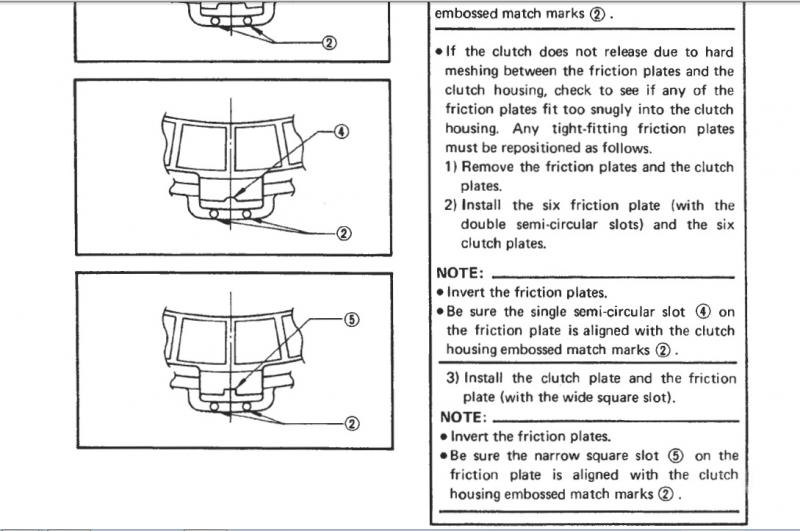
Yamaha states in R1 and older Venture manual (available here) that plates must move freely. Starting position is to be with the twin dots matching twin holes on frictions. If plates don't move freely the optional position is to be with the single hole on the twin dot position on an entire clutch pak or plate by plate basis. If you cannot get freely moving plates, then either moving plates to any other position is the third choice. Failing all that, last choice to gain free movement and least desirable is to file plates or smooth worn basket if it has had wear notches worn in it. My bike is newer with only 6K miles on it. Mine came out and went back in with twin dots lined up. On older higher mileage bikes someone may have had to finesse the plates to get movement. The only thing that did not seem to be optional on mine was pressure plate line up. Would not fit flush on any other position than with dots lined up. [ATTACH=CONFIG]98250[/ATTACH] -

So what's the big deal?
Du-Rron replied to MasterGuns's topic in Venture and Venture Royale Tech Talk ('83 - '93)
Yamaha states in R1 and older Venture manual (available here) that plates must move freely. Starting position is to be with the twin dots matching twin holes on frictions. If plates don't move freely the optional position is to be with the single hole on the twin dot position on an entire clutch pak or plate by plate basis. If you cannot get freely moving plates, then either moving plates to any other position is the third choice. Failing all that, last choice to gain free movement and least desirable is to file plates or smooth worn basket if it has had wear notches worn in it. My bike is newer with only 6K miles on it. Mine came out and went back in with twin dots lined up. On older higher mileage bikes someone may have had to finesse the plates to get movement. The only thing that did not seem to be optional on mine was pressure plate line up. Would not fit flush on any other position than with dots lined up. -

So what's the big deal?
Du-Rron replied to MasterGuns's topic in Venture and Venture Royale Tech Talk ('83 - '93)
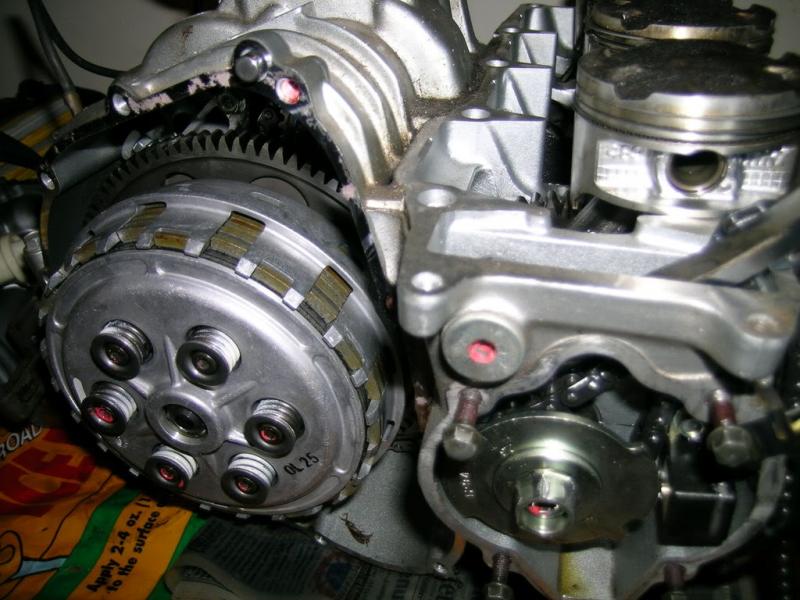
All clutches are not the same. The one in this picture must be assembled in correct order using the correct plates installed the correct way. When using factory parts and alignment marks, it just makes sense to put it together that way since the factory spent the extra penny making all those reference marks. On my RSV, I am only guessing that alignment of the frictions plates puts them (friction block -steel- friction block) contact instead of (friction block - steel - half friction block contact). On my RSV the pressure plate would only go on one way, and that was with the "dots" aligned. Barnet plates may have friction block material equi-distance spaced around the circumference so that alignment may not matter.


