-
Posts
4,225 -
Joined
-
Last visited
-
Days Won
13
Content Type
Profiles
Forums
Gallery
Events
Store
Everything posted by videoarizona
-
Sounds like my 89. On the highway, my gauge gives me about 40 miles then 1st bar goes away. From that point on, every 20 miles I lose a bar. This is at normal great cruise, little wind, solo. Around town, unless I remember to let the motor rev... My mileage is worse. The gauge can drop fast, but I only put in 3 gallons or less! Weird. That said, I've decided to use the gauge only as a simple reference. Between that and the odometer I have a pretty good idea of how much time I have left. Since I live in the West, and gas can be scarce, I usually fill up after two hours cause I need a break. I never top off the tank as it's too hot around here and the fuel will expand and overflow if I take a meal break. I fill to bottom of neck and stop. I don't need for the tank to be perfectly full, just close enough to give me reasonably consistent mpgs. You can take the sending unit out, clean the wiper contacts and bend the float to get your gauge to read better, but that would be a pain to do until you get it right for you. Best thoughts I can give is ride ... and simply get a feel for what your bike does for mpgs in different situations and go by that.
-

Cruise slow to engage:
videoarizona replied to Rob Swallows's topic in Royal Star Venture Tech Talk ('99 - '13)
Rob, sorry to hear you are not pleased with this site. In all fairness, the responses you have received so far are the result of experience. My cruise control does not engage immediately and the cure is as I stated... for me. That said, I don't see where you tested the hoses for vacuum leaks, tested the cruise diaphram for vacuum leaks or tested the bikes vacuum for weak or poor vacuum... all of which will cause any cruise operated by vacuum to be very slow to engage and weak to respond at best in hilly situations. If I misunderstood the tests you did run, then my apologies. If you haven't done these tests, please do and get back to us with results. Stick around, we'll figure this out... -

Front Fork Oil Leak
videoarizona replied to videoarizona's topic in Royal Star Venture Tech Talk ('99 - '13)
Rode this morning for about an hour. Slow speed handling is better. That 1/4 inch did make a difference. I'm now lowered a full 1 inch from stock on the front end. Started out slowly....checking brakes, front tire, front end and shocks. Took the access road at 40mph. Kicked it up to 50 after testing everything and some more stops and such. Good. Hit the freeway. (Note:I also added the SpeedoDRD device while the bike was down for shocks...stole it from my VStar 950T. Programmed a -7.1 correction into it for the RSV.) So speedo numbers should be very close now to actual. Got her up to 80mph, gradually, checking steering stability and front end stability. No issues. Even at 80, she was solid hands off on cruise. (No, I don't ride normally with my arms folded over my chest...napping....) Bottom line: Shocks seem to be fine. A tad harder on rough roads at slow speed with the 10wt oil, but not objectionable. Still smooth on semi-smooth roads and at high speed. No pulling or pushing at speed from shocks so they must be fairly equal. All in all...think the RSV is going to be good to go for our Fall riding season which starts in another month! Time now to work on the 89 VR. She just needs a little bit of TLC and she will be good as well.... -
Agreed...the video is very stable for Mt Mitchell . Can you elaborate on the mount? Or a picture or three? I'm still looking for a place on both my scoots that is that stable... david PS And thank you for sharing!
-

Front Fork Oil Leak
videoarizona replied to videoarizona's topic in Royal Star Venture Tech Talk ('99 - '13)
Got up early this AM to put the scoot back together. But first, I sat, sipped the 1st cuppa and watched the sun rise from the garage. It was 63 degrees and clear as a bell. Just as the sun peeked up over the mountain...."Riders on the Storm" came on the mp3. Great song....coffee tasted better too! Good memories of those days....beer, women...women...women... But I did get the scoot together. Nothing broke! Front axle went in slick.. camos had me worried as the book didn't say anything about using the axle to align the forks. But I did write that tip into my manual for next time. Thanks Camos! No pics taken as we all know what a 05 RSV looks like in one piece...well maybe. And I was to into the music to think of sunrise pic.... Tomorrow, I'll go for test ride and report back on shocks. Did put 10 wt in instead of 5 wt. Based on majority recommendations on increasing viscosity for better handling...and raised the shocks up 1/4 inch more for a total of 1 inch now. Be curious to see.... -
Log cabin kit ... someday? That would be a good goal for me. I hope you guys can do that...be so cool! I bet we can all chip in to help. Good excuse for a M&G&E. I'll bring the beer. Puc can bring the hot dogs....and we won't invite Jeff....he'll bring snow.
-
Sorry to hear about the health issues. Sending prayers this too shall pass. Good find for the 4 wheels. Pretty!
-
I've seen this before...it is well built...and a beautiful area to live. But after 6 years of Colorado, I decided as beautiful as the state is, I didn't want to put up with the weather. Extreme temp changes within 24 hrs, snow in summer, dead cold in January...and 10 feet of snow. I noticed the snow cat as the camera arrived at the location. That would be your transportation 7 months of the year. Nice but tiring for sure... Thanks for sharing....it is nice to dream....
-

Cruise slow to engage:
videoarizona replied to Rob Swallows's topic in Royal Star Venture Tech Talk ('99 - '13)
+3 I found pressing "resume/acc" right after setting the speed works immediately for me as well... -

AUX input for satellite radio
videoarizona replied to orlean1's topic in Royal Star Venture Tech Talk ('99 - '13)
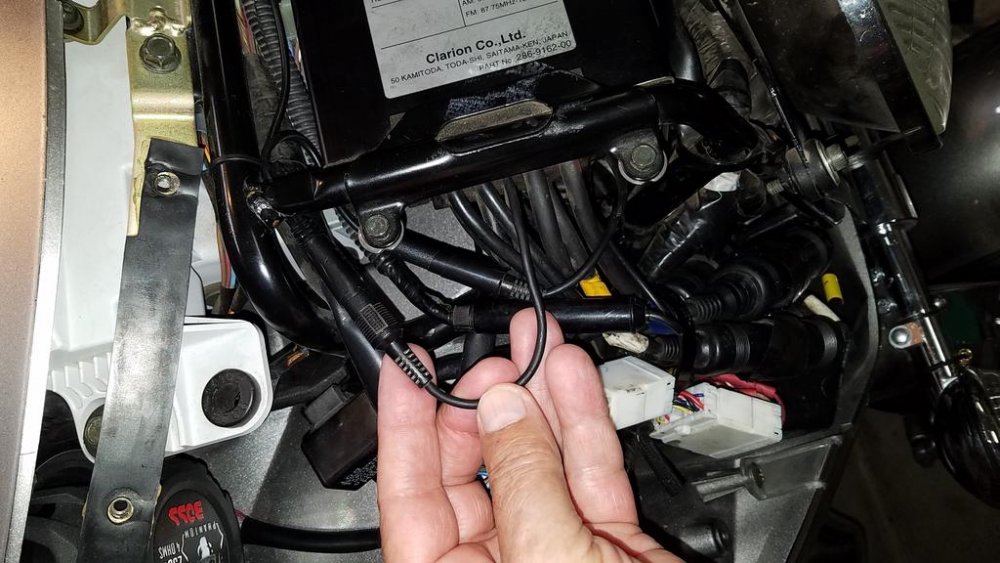
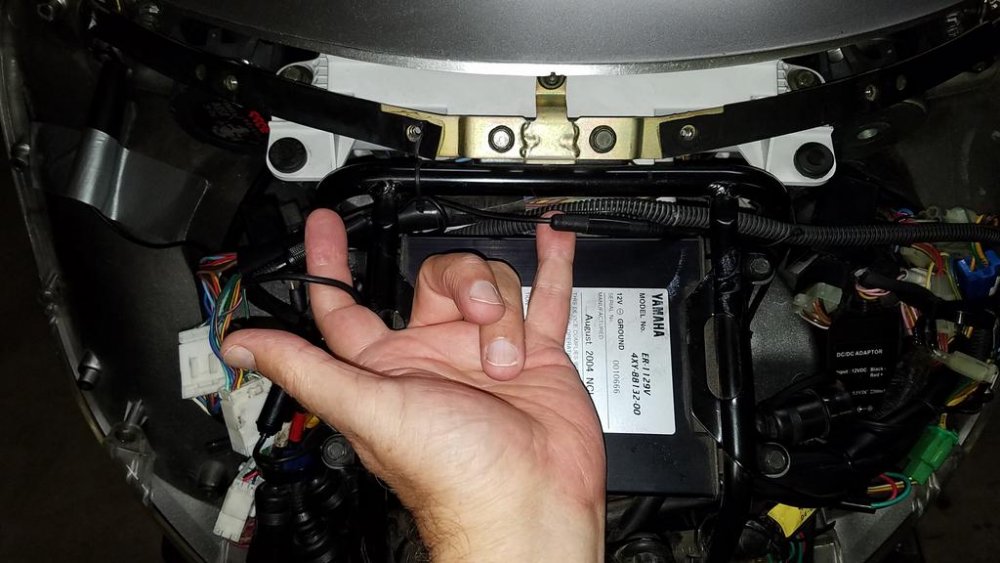
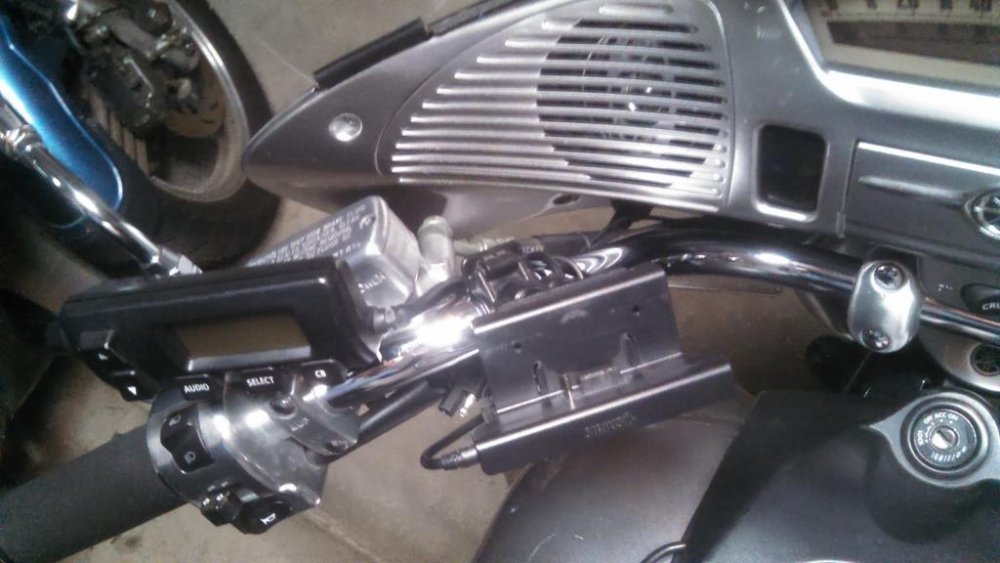
The aux in from the front cassette panel runs into the fairing and connects to the main amp on the left side... As viewed from front of bike. A tiny cable compared to others same side. I bought a y adapter cable...stereo mini male to two stereo mini females about three inches long. Plugged male of adapter cable into female coming out of amp.... Plugged original cable from cassette aux into one of the females. Plugged audio out mini jack cable from xm adapter into 2nd adapter female. That's the basics. I ran xm adapter cable from mount on left handlebar... Down bar and under the inner fairing on left side as sitting on bike. Ran xm cable end under amp area to other side and plugged it in. As stated above. Extra xm cable is coiled and stuffed next to amp. Btw, I'm assuming you have taken off the outer fairing. I'm posting this now.. Will get a pic to you in a few minutes. Update: https://www.bhphotovideo.com/bnh/controller/home?O=&sku=304018&gclid=CLPCm9j74c4CFYGAfgodNScIYg&is=REG&ap=y&m=Y&c3api=1876%2C92051677562%2C&A=details&Q= Above is example of cable Y adapter. I went with cable over solid little box as it will bend and take more vibrations.... 1st picture is my finger showing the 3.5mm mini cable coming out of the amp. You can see the Y adapter cable male end is now plugged into it and taped with electrical tape. I'm standing on the right side of bike looking toward the center of the inner fairing...amp is black box with label in top center of photo. This next picture shows one of the other (female) ends of the Y adapter cable plugged into the original aux input from the cassette. The other female with the xm connected to it is buried under this mess. My pinkie and index fingers show the cables. The last picture is of my xm mount...on left handlebar.. Last...my antenna is run similar fashion to the left side (as standing in front) of the inner fairing and taped there. It works most of the time there....but does get masked out in certain direction...as I guess the signal gets blocked from the radio/amp cage in center of inner fairing. You can barely see the antenna in middle picture on upper left. Look for gray duct tape over a vertical cylinder antenna....same picture as taken from front showing my two fingers holding the cables... Note: I will never be running both the aux input by cassette and xm radio at same time so this way works for me.... Hope this helps, Vince. david -

Front Fork Oil Leak
videoarizona replied to videoarizona's topic in Royal Star Venture Tech Talk ('99 - '13)
Now you tell me. I put the forks back together early this morning. Sigh. Well, let's hope the axle goes in nice and easy! Thanks for tip, though!! Jamsie.....yep.....done that.. Thanks. -

Front Fork Oil Leak
videoarizona replied to videoarizona's topic in Royal Star Venture Tech Talk ('99 - '13)
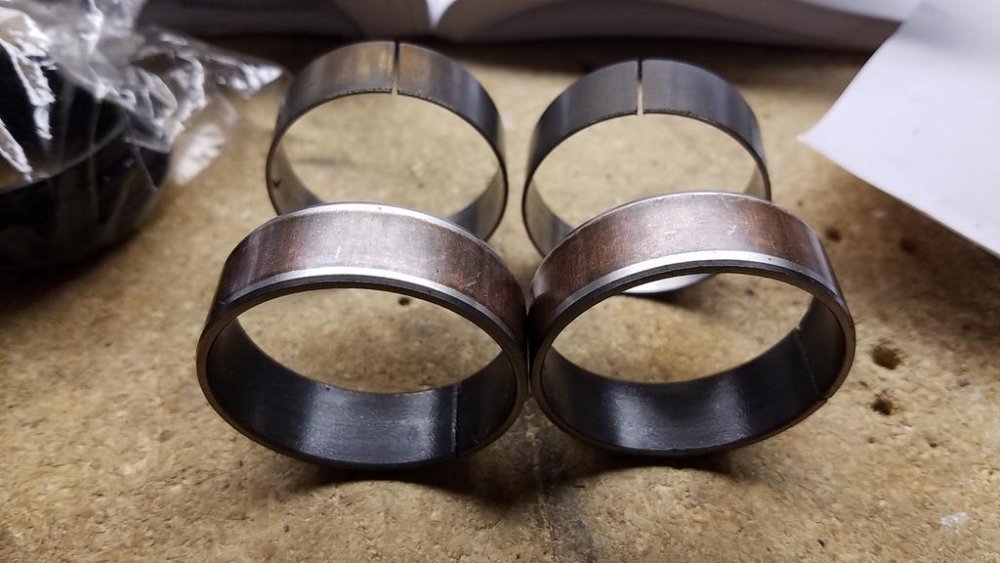
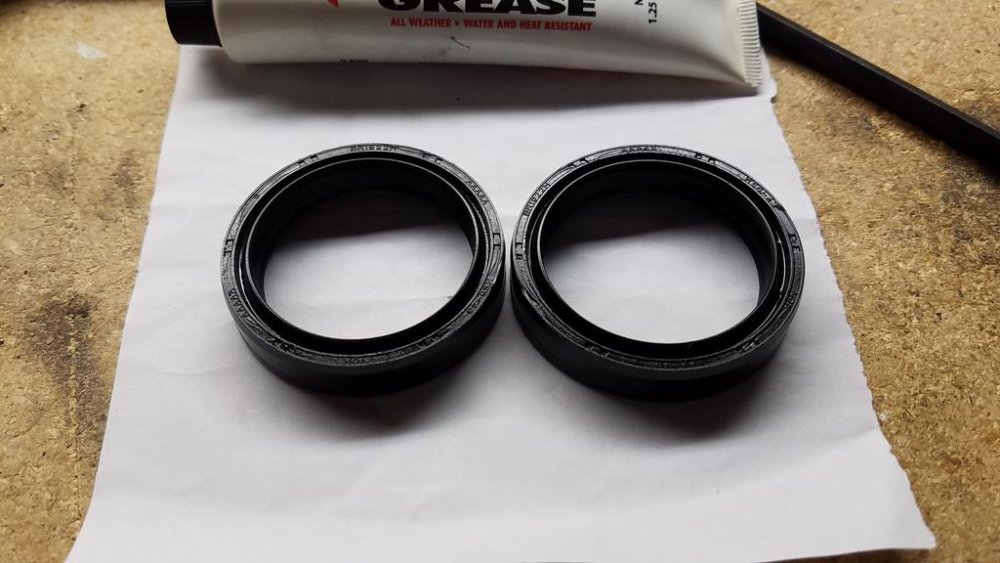
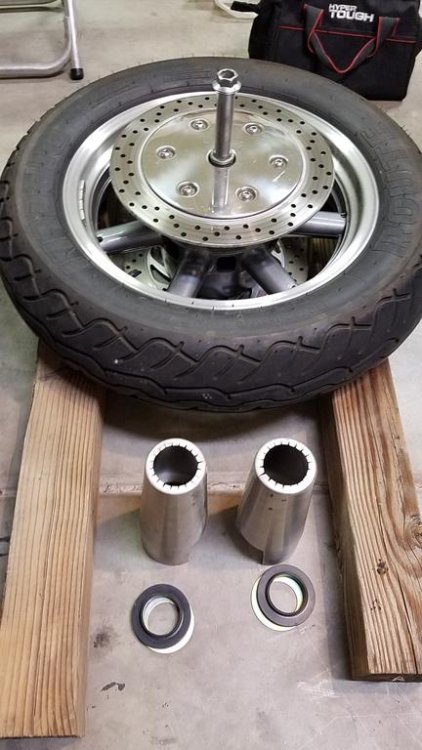
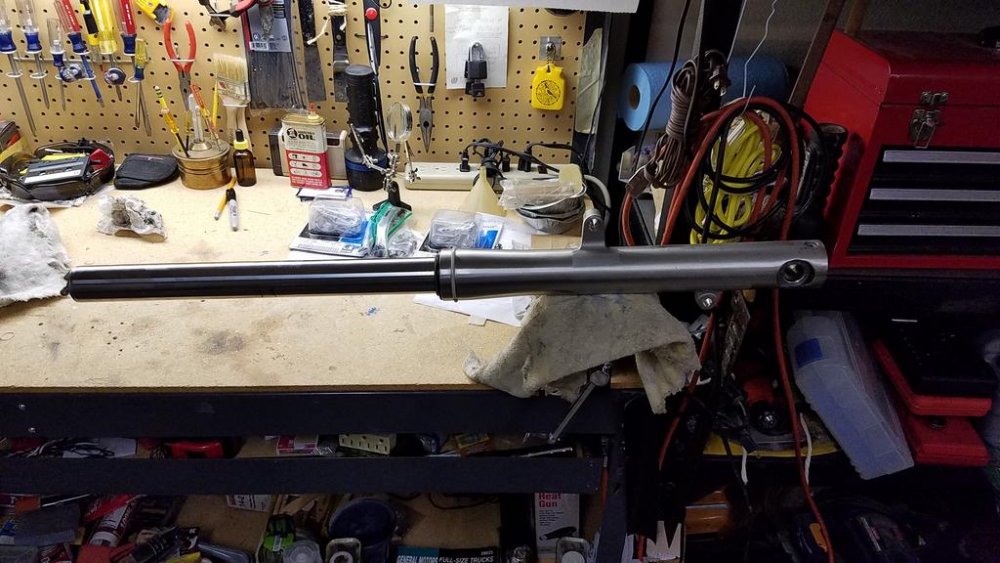
Update: Got the forks back in two hours. Barely had time for breakfast. To make me feel better, I ordered all the new bushings as well as the seals and dust covers. A bit more $$, but since I was there anyway.... As it turns out, I asked for and got the old parts back...negligible wear on the bushings and what wear there was was even all around...so bushings were wearing perfectly and had lots of life left. Not bad for over 50K miles and 12 years. As can be seen...the bushing surface is worn evenly. If it wasn't, you would see the "copper looking coating?" worn off in places. There is a slight bit of that on upper left bushing near the joint...which is normal. The oil seals looked great on both sides. No tears or nicks...just some dirt. So a good cleaning would have been sufficient. But I feel better they were all replaced. Steering bearings were right on the money and greased. In going back together, I was stumped for a few minutes trying to figure out how to apply 90 + pounds of torque to the stem head nut without help. Finally, the light bulb went off and I stuck a screwdriver in the two holes provided for us to padlock our forks. Worked. So did that, moved both forks up to the 1 inch mark for lowering the front end, tightened the lower tree and then removed the top triple tree (grunt & still had screwdriver in hole) to put the upper fork covers, washer and bumper on. Did that, tightened the uppers and then put the upper triple tree on for good. Removed the screwdriver from lock hole and put on the front fender. Stopped there for the day. Tired and need to think about how the front tire came out as it doesn't want to go back in. Nothing changed in lift height so I guess I'm simply to tired to "finess it" properly. BTW, the dealer...Ride Now Power Sports at Ina road in Tucson has only seen one RSV in the past few years...mine. First time for an oil change and complete go over after I bought the scoot and now today. But they went by the book... and seem to have done a good job. Won't really know until I get on the road again. Guy said it came apart and went back together the way they all should.... More later....I need a libation....in celebration of getting this far, of course. What were you thinking? Grins! -

Any painting tips and tricks for the ABS?
videoarizona replied to NewbeeMC9's topic in Watering Hole
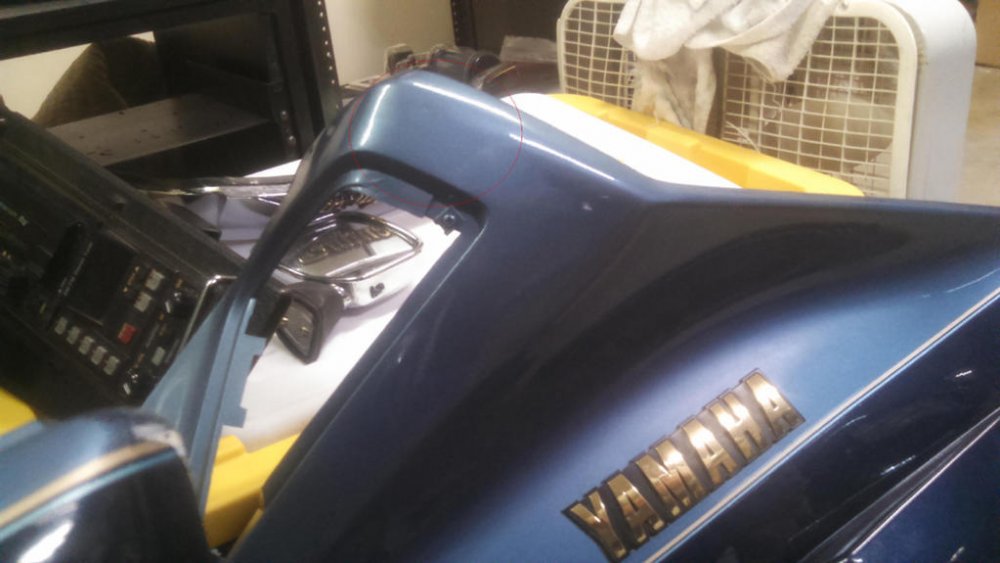
I painted my 89 VR. Take the cover to a local auto paint shop. They should be able to mix up a small jar of matching paint. Mine was $50 for a pint. I sanded down the bad areas on my plastic, after doing my repairs, and lightly sanded off the sheen on the surrounding areas. I bought an empty can/lid at a hardware store...looked like it was made for holding paint...and put my color paint in there for storage. About $3 for can. Then painted using a cheap spray gun from Harbor Freight. I already had a compressor with a supply valve to regulate the pressure. Put 4 coats of color...light coats...about 20 minutes apart. Did not worry about the overspray...let that blend. Then I used a spray can I bought from WalMart of gloss Acrylic Lacquer made for auto painting. About 40 minutes after last color coat. Think 2 coats..maybe 3....again let the overspray cover the color overspray. Only other hint is if you use a little gun, clean it after each use! Job turned out pretty good. I have the two tone blue 89....I painted the lighter, upper color. Took two tries though...1st try didn't look good so I sanded that out and tried again. Thanks to Jeff and others, I learned and I'm pleased. Saved me big bux as I painted three areas on the plastic. http://www.harborfreight.com/adjustable-detail-spray-gun-92126.html Thin red circle surrounds one of the areas I painted. The whole area around that circle got painted..including the turn signal area... Here is the write-up I did with pics: http://www.venturerider.org/forum/showthread.php?119659-Doing-some-repairs-to-89&highlight=painting Passes the 3 foot test..... Hope this helps david -
Similar situation with my youngest 6 years ago. I went right to principle.... They took care of the problem at school. My daughter... well... That took longer for her to get back her self esteem. But she is now great!!
-
Walked out to garage and looked at the RSV. Looks so lonely hanging there waiting for parts. Sigh...
-

Gas Issue Guage misleading reading
videoarizona replied to Statussymbol's topic in Royal Star Venture Tech Talk ('99 - '13)
Stat, Speedos are off as others have posted. There is a simple cure.... http://shop.12oclocklabs.com/index.php?route=product/product&product_id=59 Very easy to install. Unplug factory 3 prong plug on lower left panel (behind your foot), plug in unit, turn bike key on and calibrate. Instructions on web site...with video. $80 Hint: get an accurate figure of how far off your speedo is in mph (use gps)...then use the guide on their web site to set your correction factor. Mine was -7.1 BTW, on your fuel....run a few tanks through and you will get the feel of how your fuel system/mpgs is working. I ALWAYS use the odometer as a simple way to tell where I am in relation to fuel used. Spend $12...become a member...you will love the info available here! And enjoy your scoot! david -
Don, 4K is "nice", but that's it. It's really kinda useless unless you have a serious computer to edit it with...and lots of ram/HD space to store. GP Silver is the best all-around GP there is. It has the best feature set and the built-in monitor is a huge plus. Makes life so easy to see what the heck you are doing while on the road. Plus, I still prefer to shoot 720P for motion video on my JVC and my original GP on the road. Smaller size files than 1080P and virtually no difference in picture quality...unless you are Jeff running a 4K TV. Most of us, even me, are hard pressed to see the difference. My professional thinking is to get the silver and experiment with the settings you like the best. Good luck!
-
Amen. +1
-

Front Fork Oil Leak
videoarizona replied to videoarizona's topic in Royal Star Venture Tech Talk ('99 - '13)
Did that last year when I lowered the front end. Like them the way they are. For now....Grins -

Grommets
videoarizona replied to Big Auggie's topic in Venture and Venture Royale Tech Talk ('83 - '93)
Ace hardware had them as I bought some last year. Wonder if they still do? -

Front Fork Oil Leak
videoarizona replied to videoarizona's topic in Royal Star Venture Tech Talk ('99 - '13)
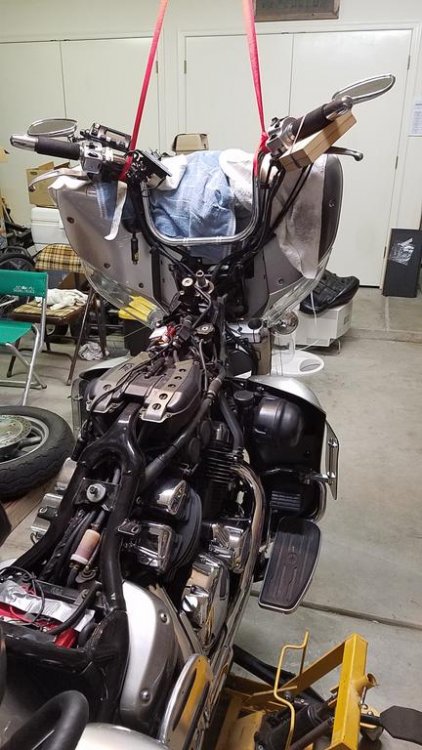
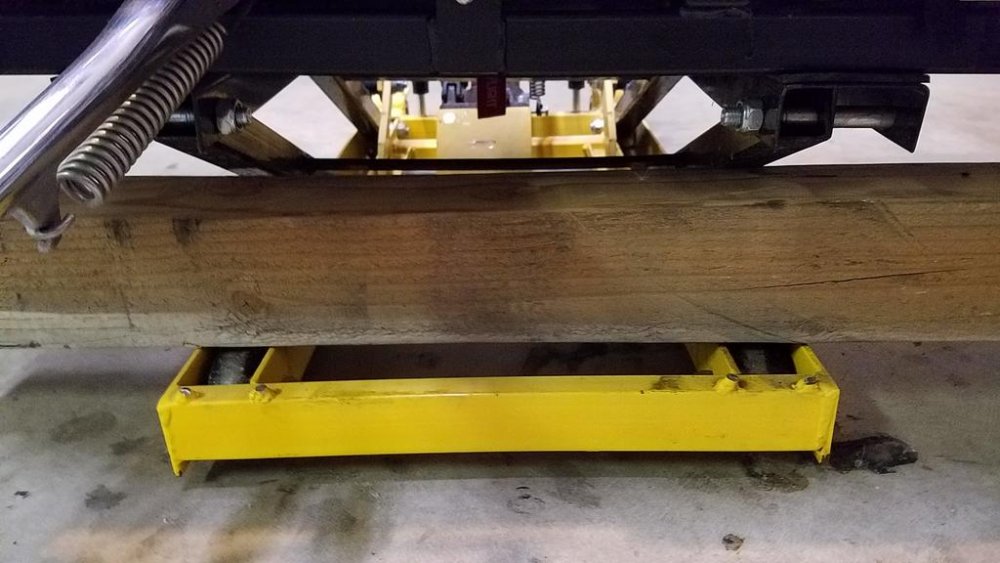
Hi @bongobobny, Thanks for your eyes! Just checked again to make sure....no dings or pits...just dust and dirt. The right side shock picture does show that I have dirt in under the dust seal, when I pump the shock, dust and dirt comes up. So new parts ordered for both. Dealer wants $165 for labor to re-do both shocks. Parts are under $100 for both...so the shocks are going in next week for a do-over. I feel this is a worthwhile investment as they guarantee their work. And after 50K miles, it's a good thing to do for the scoot! So now I'm writing things down, putting bolts and nuts back in their holes or marking them...since it will be over a week before I get back to work on bike. And taking pictures! Lift is braced in case of failure. Done about all I can to give myself a decent chance to put her all together again ! Now for lunch and a beer! To be continued: -

Front Fork Oil Leak
videoarizona replied to videoarizona's topic in Royal Star Venture Tech Talk ('99 - '13)
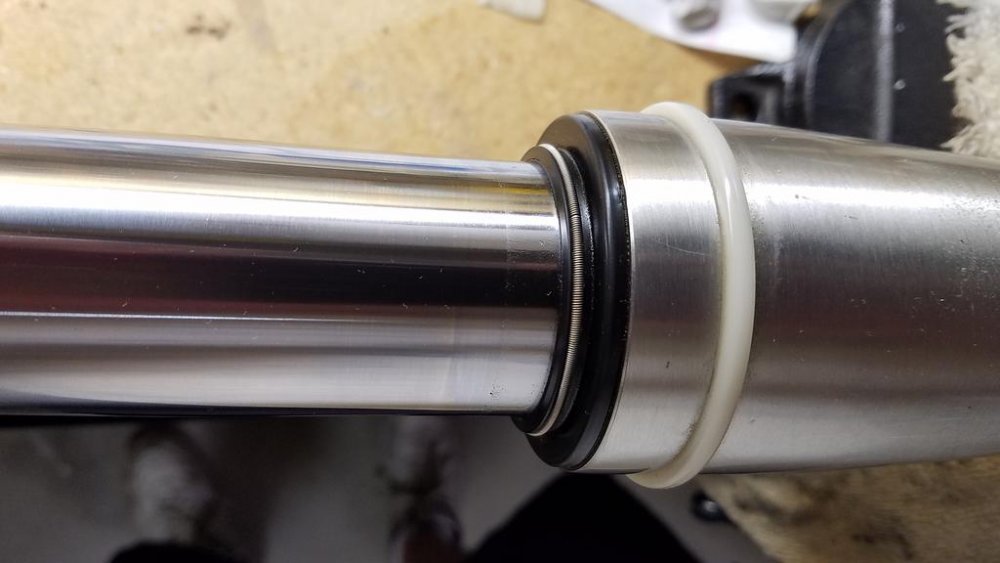
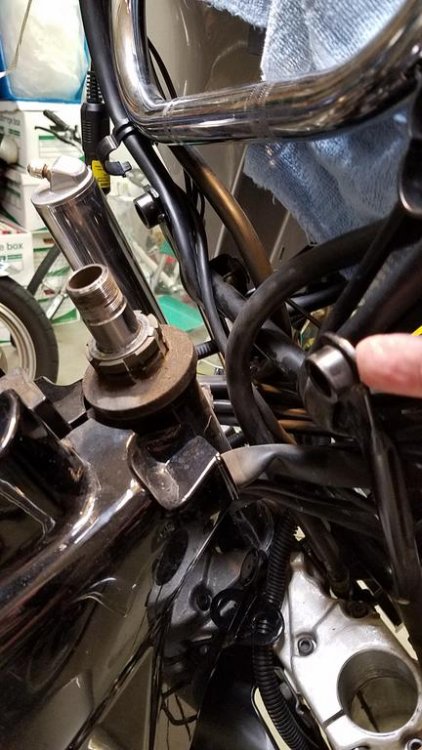
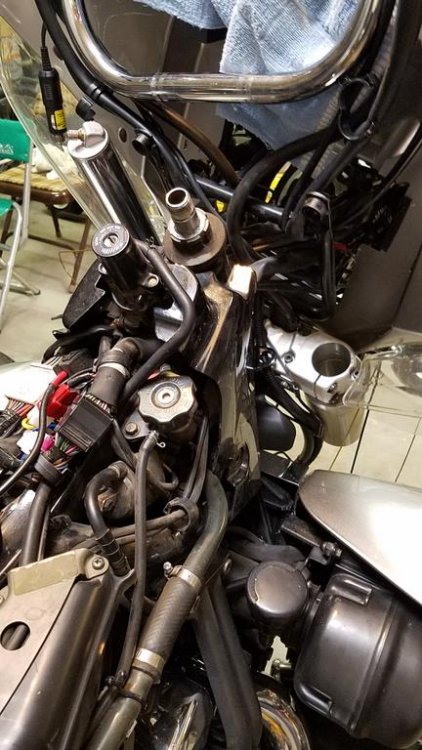
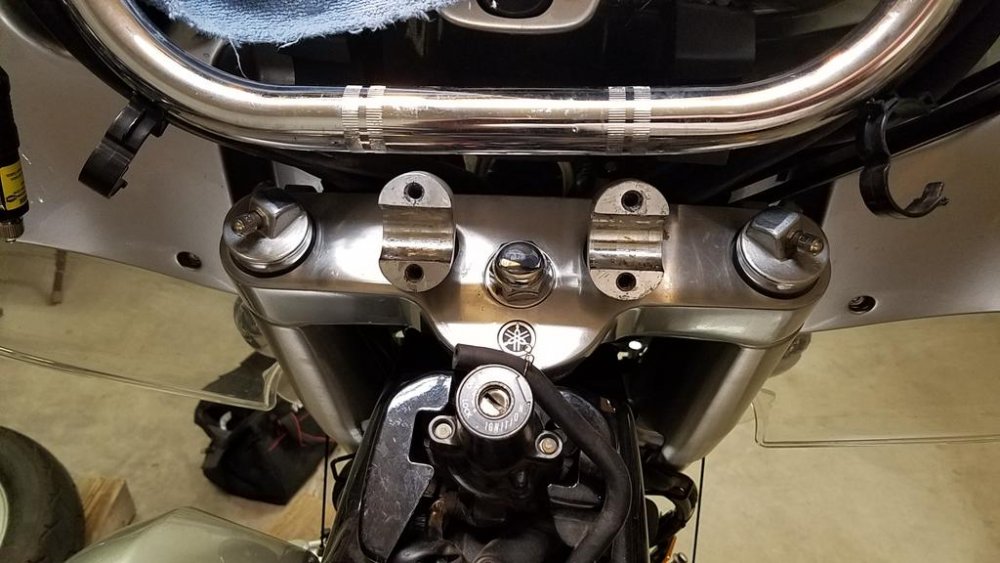
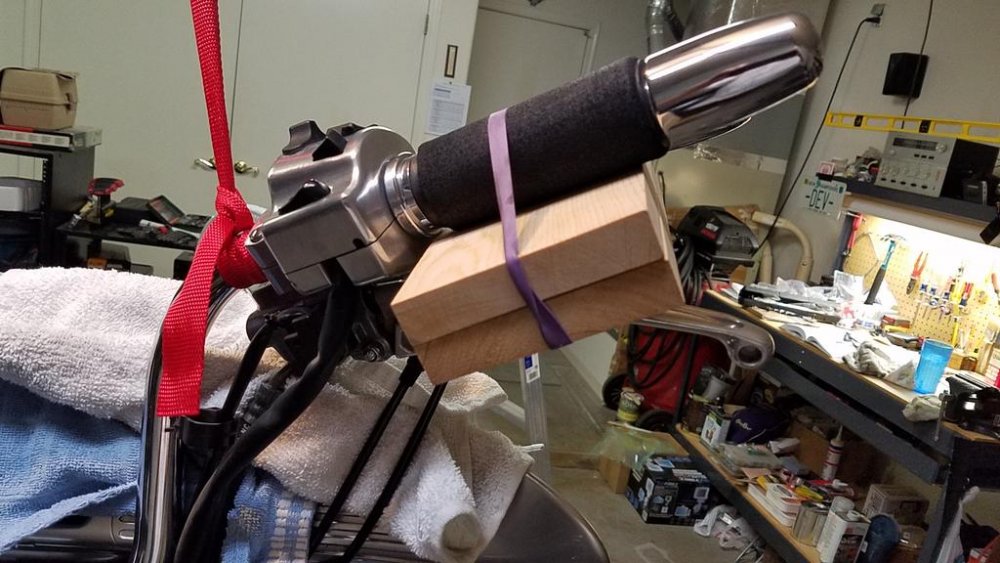
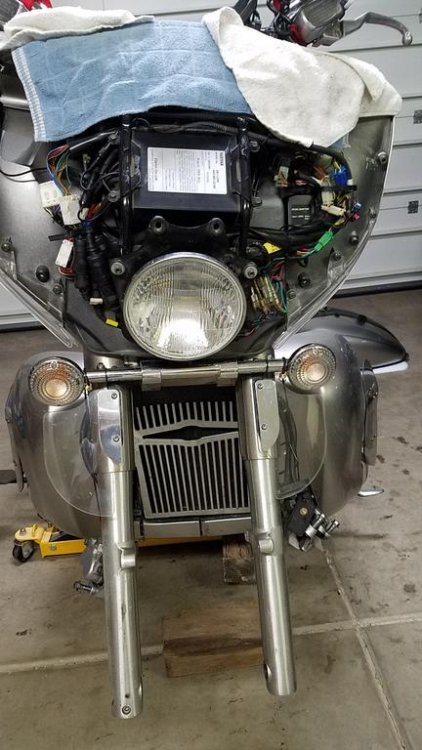
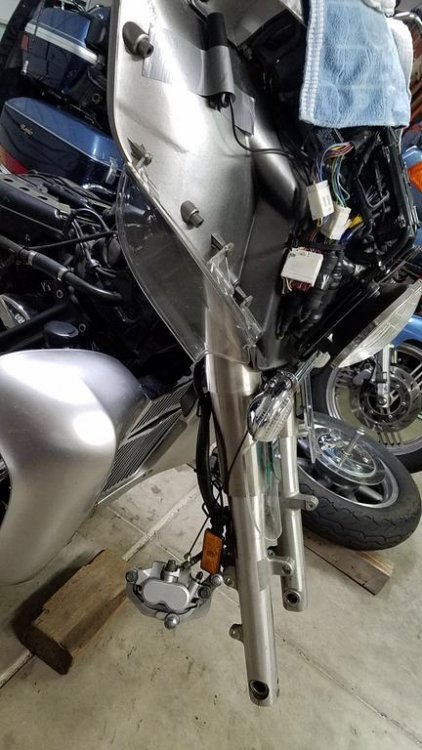
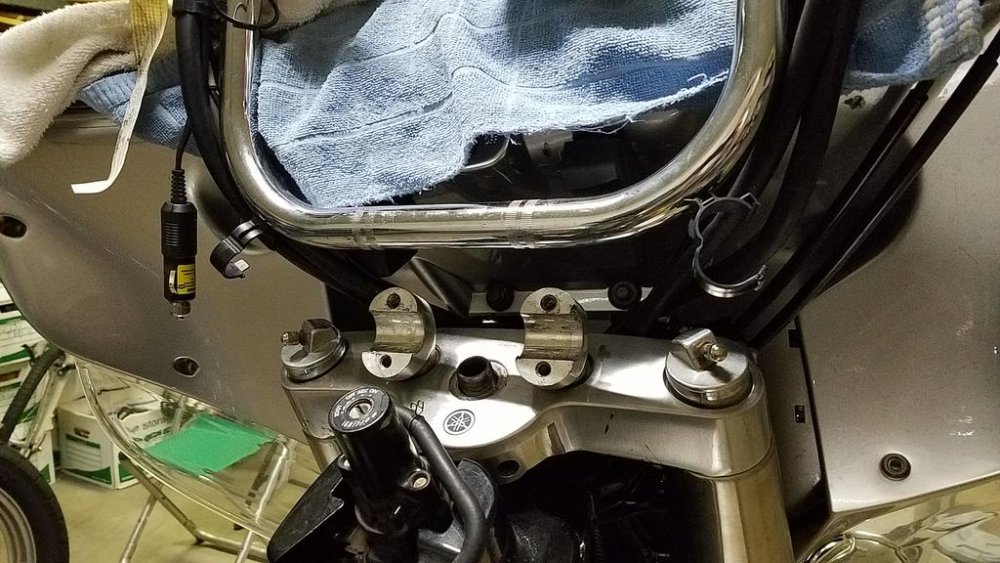
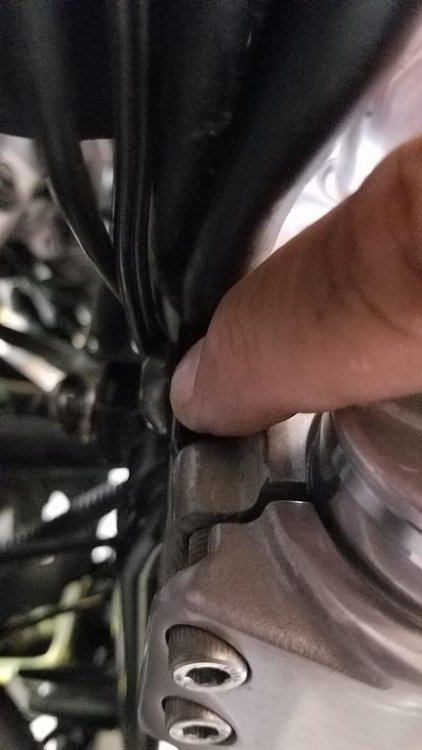
OK got that figured out. It was those two bolts. Sure don't remember taking them off...and they were on there. I'm surprised I had that much strength last year ! Now I can't get the dust seal out....or whatever is first on the tube with the spring...shop manual is getting grease prints all over....that's good right? Picture of seal, then right fork tube, offending frame member with finger pointing at it...two bolts one on each side to release the upper triple tree....last, overall view of the front end at this point in time. I think I'll call the dealer and see if anyone wants to put new seals in my forks. Not sure I can finish this without damaging something. -

Front Fork Oil Leak
videoarizona replied to videoarizona's topic in Royal Star Venture Tech Talk ('99 - '13)
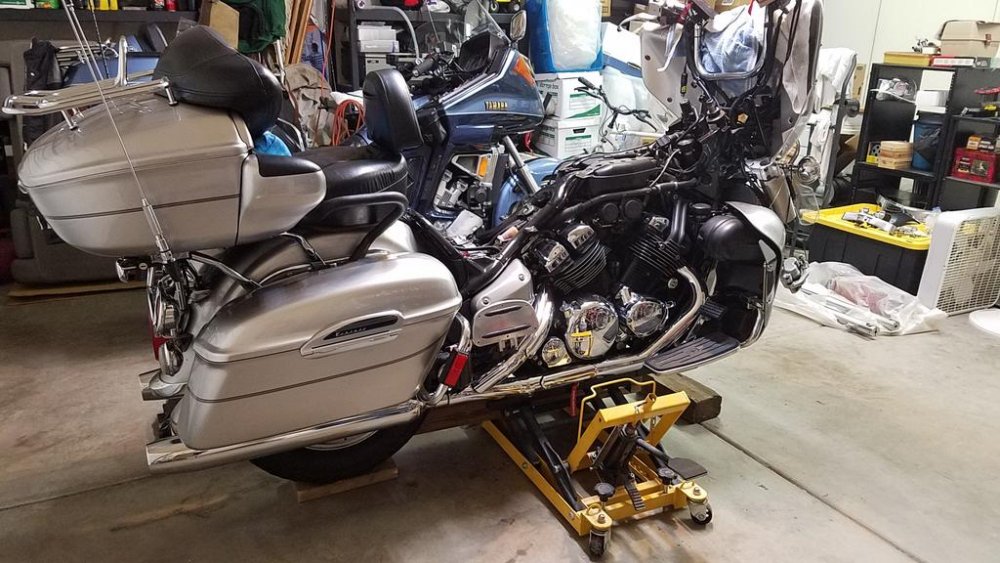
BTW....here is what a 2nd Gen looks like at this point....The steering stem washer and nut are off...so disregard that in 1st pic. Really easy peasy to get this far...just a few screws/bolts/nuts to account for is the only concern... -

Front Fork Oil Leak
videoarizona replied to videoarizona's topic in Royal Star Venture Tech Talk ('99 - '13)
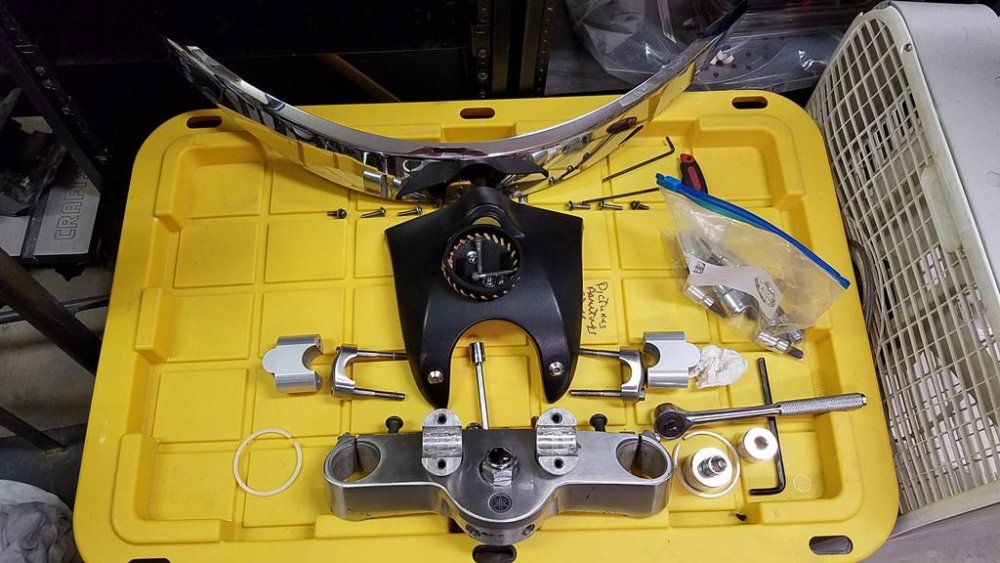
Latest: Got tire and fender off ok...brakes off ok. So far...I've been down this road when I lowered the front forks... Now I've been trying to get the upper triple tree off....or as Yamaha calls it, the upper fork bridge. I took off the steering stem nut and washer, and loosened the two upper fork bridge clamp bolts on both sides. At this point, when I lowered the front end last year, all I needed to do is lift off the upper fork bridge...exposing the steering stem bearings and the top shock tube covering...which lifted right up as there is nothing holding them down but the upper triple tree(upper fork bridge). From there, I could loosen the lower fork bridge bolts on both sides and move the shocks up/down or out! Guess what, that upper fork bridge is not moving.... There are two hex head bolts near the front of the upper fork bridge that hold the inner fairing/headlight frame to the front end, but I sure as heck don't remember taking those off as they are buried! Besides, it appears they are bolted to a frame member underneath and inside of the triple tree....and the front edge of the triple tree goes over the mounting. I don't think they are a factor for the above reasons... I tried lifting the assembly (inner fairing and the upper triple tree together...but that didn't accomplish anything useful. Maybe tomorrow I can have my buddy over and we can try together....but when I lowered the front end...I did it by myself in only a few hours...did not have this issue....So... Ideas needed again! Thanks! -

Front Fork Oil Leak
videoarizona replied to videoarizona's topic in Royal Star Venture Tech Talk ('99 - '13)
1: I think I just may leave well enough alone on the 89. It handles nicely... 2: Yeppers, ya gots to take the RSV apart to work on the forks. No way around it...I'm thinking about new seals and bushings...but that may be a problem. If I have to wait for the dealer or anyone else to get the seals for me....I'll probably forget what goes where!! Thankfully, I do have some 35mm film floating around somewhere if I do decide to just clean, change oil and put back together. BTW, it really isn't hard to take the bike down this far. The hardest part was unbolting the bars with the risers on and trying to keep them up and in line with one hand so I could take out the 4 bolts with the other. Other than that...it's a piece of cake to take the fairing apart... 3: Stock bars on the RSV. They do reach out and back a bit...but not enough for me to lean back and rest. Just a touch to short. And I have the Baron 1 1/2 inch risers that help a lot.


