-
Posts
4,225 -
Joined
-
Last visited
-
Days Won
13
Content Type
Profiles
Forums
Gallery
Events
Store
Everything posted by videoarizona
-
I think you will like them. I've got them on all 3 scoots.
-
You might spray some cleaner on the choke linkage parts then look at the little plungers to see if they are pulling out on all 4 carbs. They should pull out and push in about the same throw. If that doesn't help, then popping off the cover of the enrichment assembly on the side of the carb, cleaning and checking for oepration is next. Seafoam never hurts!
-
OK thanks for bike info. The RSV's rear shocks are a known trouble spot after around 50K miles.... and the original units are not rebuildable. It's not that they are bad, its what it is. However, there are two companies (or 3?) that make direct after market replacements, and the original Yamaha shock is also available. In addition, you might be able to find one at pinwall cycles on ebay...a used one that may or may not last long enough to make you happy. It's a crap shoot as it is with almost any used part. The good thing about putting another shock in is, you get to grease up the rear end and check the drive splines and such for wear. Peace of mind kind of stuff. Brake pads and tire check on rear as well. Here is a link for an old discussion on rear RSV shocks. Doing a search in the forum should produce hundreds of hits for you to read through. http://www.venturerider.org/forum/showthread.php?75298-What-is-the-best-rear-shock-replacement-Jan-2013 The problem with low speed handling is one of how the bike is set up. Its made for high speed cruising down the road at speed.... I did NOT do the lowering/raising kits for the rear as I felt that is not what I needed. I did do the lowering of the front end to help with handling. There are a number of pics and discussions about how to do it, but it is really simple...just involved. Handlebars off of the triple tree, Take the outer fairing off, release the 2 nuts holding the inner fairing to frame and the two holding the triple tree, then pull the fairing and bars toward the front and up to gain a few inches access to the triple tree. Remove the main stem nut, remove the front fork covers, lower covers, and loosen the nuts and adjust, etc..... I raised mine up one inch. Make sure you angle the air valves on top of each shock to the outside so you can get to them later if needed. I also moved my whole fairing forward a tad to give more clearance between the bars and the inner fairing. I did that by putting a washer on top of the bolts that hold the inner fairing to the frame. Yes, it works. I don't know how the lowering/raising kits will help or hinder the lowering of the forks. Someone else more familiar with the kit can help here. The idea behind the lowering of the front end is to change the way the bike sits (front end geometry) so she still tracks well but is easier to steer at slow speed. Not quite as much "pushing" or "plowing" into the corners. Here is a link or two for you to get some idea of what has been done....even a link on when I took off my forks due to a leak. http://www.venturerider.org/forum/showthread.php?122351-Front-Fork-Oil-Leak&highlight=lowering+front http://www.venturerider.org/forum/showthread.php?939-Lowering-the-Front-End http://www.venturerider.org/forum/showthread.php?107623-Damper-replacement&highlight=lowering+front And last...the clutch issue you had is familiar to me as well. Except mine was on my 89 VR. Air in line and old fluid (3 years) stopped my clutch from disengaging. Bleeding it got it working again enough to get me home. I just finished putting in a rebuild kit for the master cylinder this morning. Took a few hours to bleed again...but think I got it done. Will know in a few hundred miles. If the bike starts to creep with clutch in, I'll know I didn't get all the air out! hope this helps.
-
What bike?
-

Shinko 777 Tires
videoarizona replied to Du-Rron's topic in Royal Star Venture Tech Talk ('99 - '13)
The Shinko 777 is on the rear of the VStar. Rode around yesterday to start the breakin period. Very smooth riding. No issues with cracks or ridges...it tracks true. So far, so good! Dam good looking tread! -
Dion, that is similar to what I looked at, at the RV show last week. The new ones are just like that but cost serious bux. The issue I had was twofold: 1: I couldn't tow it with my Yukon XL with tow package. 2: I couldn't get either Venture into the garage due to the angle of the loading door. To sharp, they would bottom out. Couldn't find a new rear door unit even close to my price range that looked like the above. I could buy a used 28 - 30 foot class A motorhome and a trailer for what they wanted for the new toyhaulers.
-
Hmmm...the Royale came with radios and stuff on both sides. I still think it's an 83 Standard. Unless someone really took her apart. You might send your VIN to @Prairiehammer here. He collects the vins in our database...and he can tell you more about your bike. Understand about the harness.....Yikes! Is there any more room with the coolant bottle or are you saying there already is a glovebox there? Either way...enjoy making the scoot your own! Our Ventures have a heck of a wiring harness, so don't be surprised if you find more "fun" under the hood. Keep the pics coming.
-

I know I can get input on anything on this site.
videoarizona replied to uncledj's topic in Watering Hole
Boy, I just bought a new mattress and after reading the above posts, hope I didn't make a mistake. I bought an Ikea firm mattress for around $200. One of those rolled up ones. Coil spring, etc. It's not flippable but they recommend rotation every couple of months. Has a 25 year warrantee and a 1 year "if you don't like it, bring it back and exchange it for a different one". I unrolled it and let it sit for a day, then put it on the bed supported by an old box frame. Put a 1 inch memory foam mattress protection pad on it and it's quite comfortable. Noticed we can bounce around and not bother the other person as well. There is decent support for my aching back. And it doesn't feel "warm" or "cold" compared to others I've slept on. The only downside so far is when I sit on the edge, I feel I'm sinking down quite a bit. Not like the old extra firm I threw out. You could sit on the edge and not sink an inch! Not enough time to know if it will create impressions or sinkholes, but so far I'm impressed.I'm sleeping very well. And for the money, if it doesn't last...I'm ok with finding something else. http://www.ikea.com/us/en/catalog/products/60307417/#/00307415 Ah...I see there is a pic in the link above that shows construction. There is a layer of foam around the edge...that's why I senk in. Big butt...guess I'd better try harder to lose weight.... -
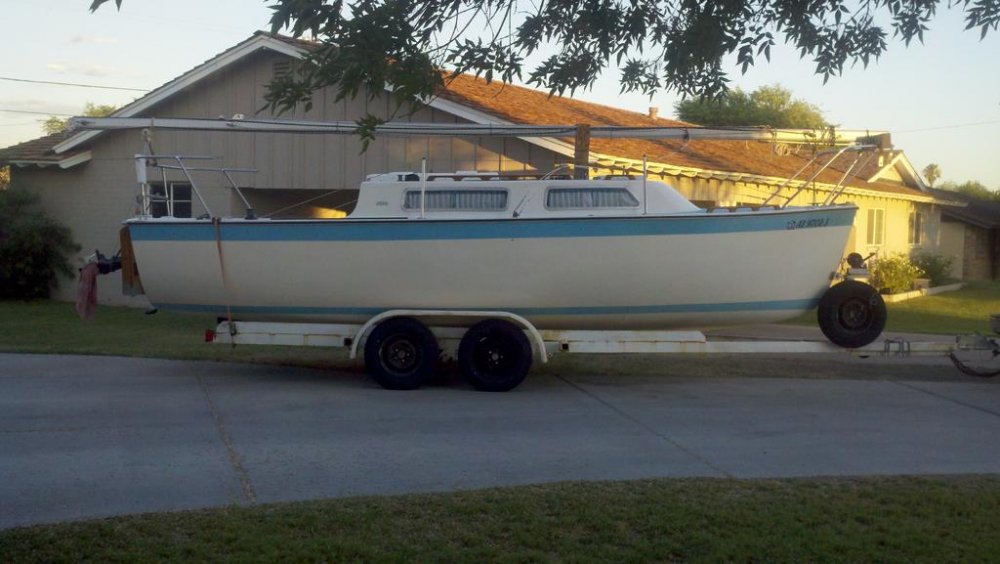
I'm still thinking about this...I do like the idea of what you are doing. Just trying to get my head around the space needed for an RSV and the frame/loading issues. I tow a 23 foot sailboat on it's original trailer. Typical strong boat trailer. Had to be, as my boat was made for trailer sailing. Problem arose...got some vibrations that got worse. I noticed the entire trailer had bent down from the middle of the dual axles to the rear! This is a 7,000 pound rated trailer with a 2400 pound boat displacement...3200 pounds fully loaded! Seriously? Yea....so went to trailer frame guys and their recommendation was to add a second frame welded on top of the first. WHAT? That would almost double the weight of the trailer. They explained to me the bouncing of the boat on the roads over the years had slowly bent the frame and it would do it again in time. I asked if they were only going to weld on the rear end....they said NO. The entire frame on either side of the axles had to be stressed otherwise there would be flexing in front the strengthened area, creating problems all around. I know about flexing as I had one tongue crack on me with the bad roads back East. So they straightened my old frame and added the two new rails. Bottom line: I don't know anything about trailer frames and how they are strengthened, but you might want to discuss your idea someone who knows these things. I'm interested in what you are doing... as toyhaulers are a bit to much for this kid, my wife does not living with diesel or gas fumes, and I don't like the idea of moving the bike out to sleep. By the way, I did see a large class A motor home with a hydraulic lift on the rear that was holding a Honda Goldwing. He was also towing a car. So if they could do that, I'm figuring I can find a way to tow a used trailer with a bike as well. You are thinking outside the box...which I like.
-
I'm with Dion on this. In addition...the height of the unit will make side loading a real bear. I looked at a new toyhauler last week. Side load. 24 feet. Not only could I not get any of my 3 scoots over the hump between the ramp and the trailer body without bottoming out on the oil pan but there wasn't enough room for either of the Ventures. 96 inches doesn't cut it. If I could get over the hump without destroying the engine/trannie...I would have to go in at an angle and then the 89 VR would fit, barely, the 05 RSV would not. So no go for me. Measure twice cut once. Like the idea though....
-
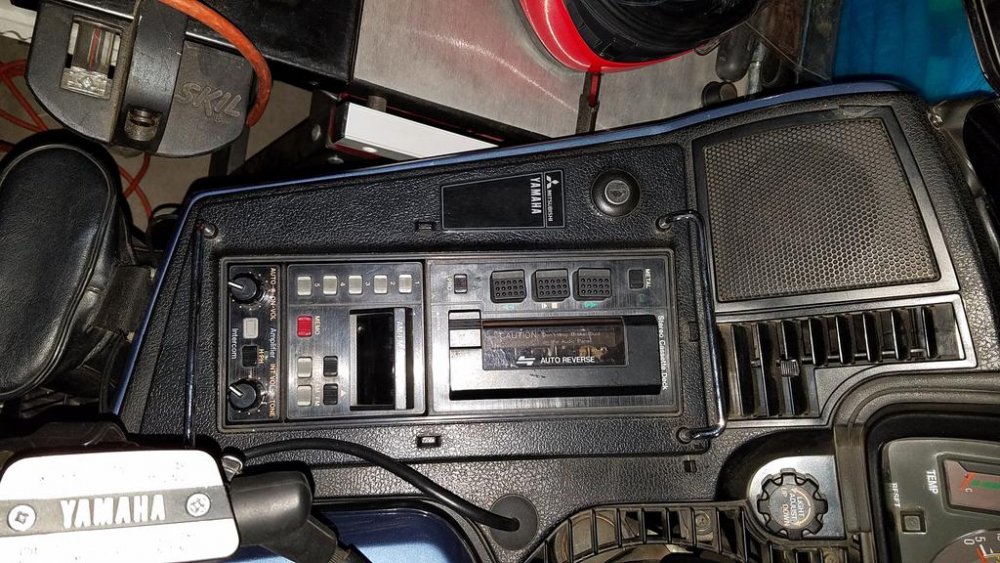
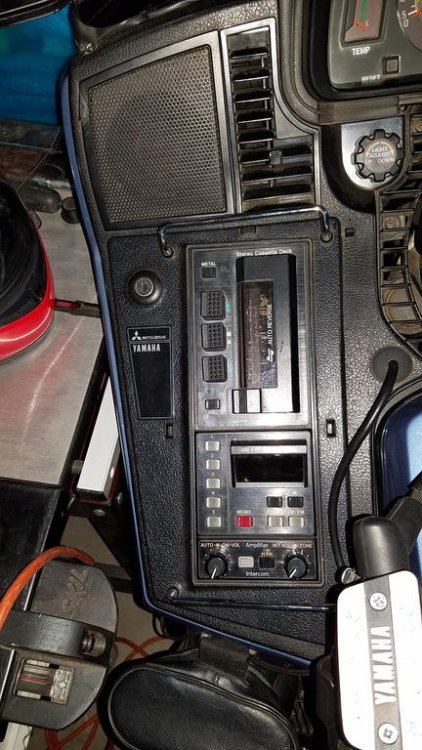
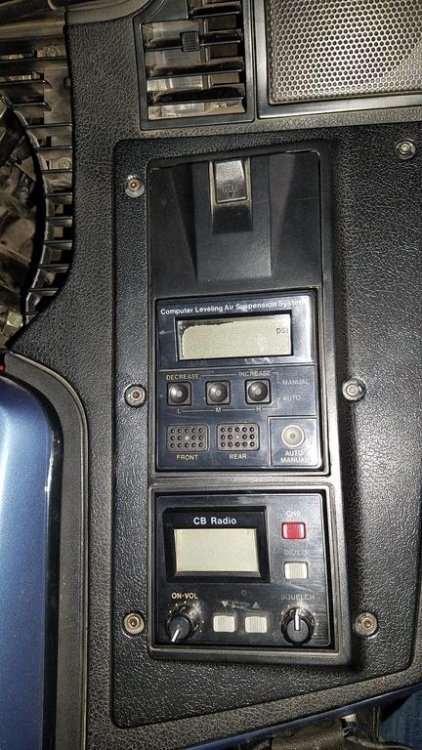
The above is the left side of my 89 Venture Royale. Tape deck on top, radio in middle and lower tiny panel is volume, auto volume, intercom volume and tone. Above is the right side. Lid covering the coolant overflow bottle, CLASS system for the air suspension and the bottom is the CB radio. Here is where you can add a really nice glove box! Lots of room. Sorry it took a while for me to get the pics to you...but this is what the Royale looks like...I won't add the XM radio to this bike. Just don't need it.....But if I did, it would be on handlebar left side...with cables running down toward the fuse box...and antenna on rear trunk rack. david
-
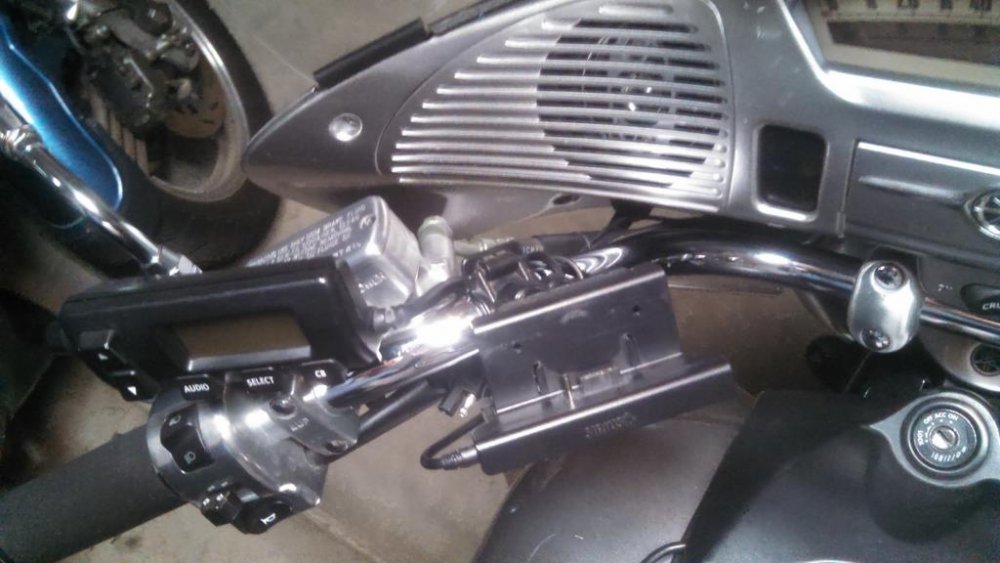
This is my mount of my RSV. Doesn't really help you at all, but you can see what I had to do to get XM mounted. I take off the radio and place in trunk while I'm eating or taking a break. You are in a great position as you can do this on the panel!
-
Well, you don't have your year and model of your scoot under your name but the pic tells me it's a Venture Standard...not a Royale so you can do whatever you want with the space as there was no radio there to begin with. I would trace the wiring....or tear it out and start over. That would be my way. I don't even know if this is your work or what the PO did. So.... Add 4inch speakers in the areas provided, add a marine type radio with built in XM or a regular radio with an additional XM receiver that you can plug into the radio's aux input. Build a nice cutout for your radio(s) and plug them in. Usually mounted vertically (as you sit on seat) as your P.O. did... there is plenty of room down below for wiring. Easy to run the speakers wires inside the fairing, behind the headlight to the right side. Power and ground wires can run directly through the left side panel into the center by the fuse box...and add an aux fuse panel to take up any other accessories you may want to add. Also, since you are in there, if the radio you add doesn't have a headphone out, you can make your own and place it on the panel as well in case you want to run down the road listening to earplugs. Blue tooth the same. With some marine radios now capable of XM and Bluetooth, it's pretty easy now to add wireless listening to a bike. As far as a mount. The plastic on the bike is ABS. You can order a sheet of it (12inch square), black, maybe 1/8th inch thick for a few bux... or two or three...for later repairs. Interstates Plastics I've used as a source. ABS is very easy to cut and glue using ABS type glue that chemically bonds (kind of like chemical welding) the pieces together. Even a soldering pencil works at welding the stuff together. So you can make a panel that fits right in the hole, if that hole doesn't work for your radio. While you are at it, make a glove box for the right side panel! https://www.interstateplastics.com/Abs-Black-Extruded-Sheet-ABSBE~~ST.php?vid=20170310153632-4p I bought 3 sheets and have used it to make repairs around the scoot. You can buy it cheaper elsewhere, but this stuff is premium quality. Lots of info on it on the page as well. The XM radio antenna usually has a pretty long wire, so the antenna can be mounted anywhere. I have a unit on my 2nd gen RSV. The mount for the radio is on the left handlebar and power and antenna runs to the front fairing. My antenna is mounted inside the fairing and works pretty well. It will cut out and lose signal if the bike is pointed in the wrong direction, masking the antenna from the satellite. Since you are starting from scratch, you could build the radio mount into the panel area or use a small, short aftermarket mount bolted to the panel so you can remove radio while you snack or take a break. Easier than the handlebar stuff for sure. I would go with a marine unit though that has everything built in. Should be really easy if you start over...do it your own way. Lots of info on here for searching....lots of guys have added their own stuff...tons of ideas. Search away and hopefully you will find pics as well. Keep us posted as we like to see where others go with their scoots! Hope this helps... david
-
Welcome to the Best Place On Earth! The missing pieces are easy to fix yourself. You can make your own tabs, almost all of the screws and bolts can be found at an Ace or True Value store, just bring in a similar one and match up. The parts book that can be downloaded in the 1st gen tech section has the parts numbers for the screws and bolts. The number lists the size and length as part of the number! I forget the sequence but I'm sure that someone else will chip in and make that clear! Suggest you make a repair list then start searching the archives and old posts. If you find an oldie post where the links don't work or pics are missing, contact @Freebird. Don is our resident Boss and he can find and repair the links. By searching, you will find just about everything you need to rebuild and repair your scoot to where she will blow the doors off of any Goldwind you find, and do so comfortably! Again, welcome and join up. Best $12/year you will ever spend!
-
Yes...will fit. I moved my 89 that way too. I used the larger trailer. I used two straps up front, one to each handle bar pulled forward to top corner of trailer rail. Rear was to the crash bars next to the bags, pulled rearward to the rear corner of trailer. 4 straps worked great. I placed front wheel in my chock. Just to hold the wheel from turning. Chock wasn't bolted down to trailer...just pressed up forward against frame.
-

Let's play "Pay it forward". Free windshield to start
videoarizona replied to deepforkriver's topic in Paying it Forward
I have an original windshield for a VStar 950 Tourer. Just the plastic. In good shape...boxed and ready to go out. I got a larger one with a vent. So if you know of anyone who has the 950 Tourer...I've got the original shield for it. All I want is shipping.... I was going to sell it on the Vstar forum, but thought I'd give our members a crack at it.... -
I sure don't...hope someone else has some experience with this. I would image, guessing here, take it off and plug the vacuum lines. You should probably gets some rubber caps to plug off the carb ports first, disconnect the lines from the carbs, maybe cap them too and leave everything else alone. Do a test. If bike runs fine and nothing else happens, then you can probable cap off everything semi-permanently for a while and ride. If everything still works fine....then you can take the stuff off. Just make sure your vacuum advance and such are still connected (if that even have anything to do with the Cal stuff??) so the computer knows what's going on.
-
Yea....gotta find the right place though. It seems the bottom of the frame near the rear is at different levels from left and right. Guess to make room for something. So blocking up both sides evenly won't work. Gotta find a way to change that around.....I'm going to be cranking 110 foot pounds of torque on the axle nut off and on. Don't want scoot to tip over while I'm struggling with that. Thanks guys....
-

Shinko 777 Tires
videoarizona replied to Du-Rron's topic in Royal Star Venture Tech Talk ('99 - '13)
Just ordered a 777HD for the VStar. Rear. If I can figure out a way to block the scoot so I can pick it up on the lift...I'll be able to get the tire changed. Then I can let you'all know if I like it. -
Yea it does.....check this part out...there is an outer vent control....has an electrical connector. Has something to do with the california crap.... http://www.countlessbargains.com/venture/1986_1987_XVZ13D_S_SC_T_TC.PDF #14 on the parts list. Wonder if it has something to do with controlling the venting/vacuum or however the system works. Last...I'm wondering if you can take that whole darn thing off! At least that way you can eliminate it from your list of suspects... Sure looks like a fuel pump though....! Wonder if that's the outer vent control??? Page B10... pg 22
-
Image 0690, right side pic......the brass thing looks like a fuel pump to me. One side is connected to something and the other spicket is wide open. Nothing connected to it. I say it "looks" like a fuel pump because our pumps are brass on the middle with a black end where the two hoses connect...one in from filter/tank the other out to the main fuel line that goes to all four carbs. There may even be a vent line to the side...don't remember. The top has a black plastic case with wires coming out of it. That is where the fuel pump points are located. So why is one side of the fuel pump (if it is that) not connected? And...why is the fuel pump there? isn't a first gen pump located down on the lower left part of the frame by the passenger foot rest??? An extra pump? Relocated? Am I nuts? (that is debateable but another story!!) @cowpuc you see what I see?


