-
Posts
4,225 -
Joined
-
Last visited
-
Days Won
13
Content Type
Profiles
Forums
Gallery
Events
Store
Everything posted by videoarizona
-

Looking for opinion
videoarizona replied to snyper316's topic in Venture and Venture Royale Tech Talk ('83 - '93)
Yikes! -

2018 Venture for short people
videoarizona replied to wylbur78's topic in Star Venture and Eluder Tech Talk ( '18 - Present)
I finally got off my butt and went down to see the 3rd Gen in person. Was looking for this huge monster scoot. In fact it's about the same size as the 2nd gen....except lower. The salesman let me crawl all over and under the bike, answering my questions and making comments. He was good and knew the bike. First impression, it has a big butt! It is very easy to get off the side stand. It is easy to hold up. I have no problem flat footing that beast....felt very comfortable sitting on her. The controls look/felt perfect for my reach and inseam. 210 pounds, 30 inch inseam, 5'10". My wife commented on all the plastic. She's thinking breakage. But at least the plastic feels stronger than the 2nd Gen...though not as strong as the 1st gen. The flexing is in between the 2....but did feel better to my hands. The trunk is huge. Seriously. Saddlebags are larger on outside but the opening is smaller due to the hinge mechanicals. Still...lots of room. No 12 volt for passenger...that's in the trunk. There is 12 volts for rider and USB as well. Cleaning the buggies off of the all the stuff that is stuffed under the triple tree looked like a daunting task. The hole between the forks is huge. Be a nice place for a radiator but there is a ton of other stuff up in there. Eric, our salesperson, said not to worry...pressure car wash as all electronics are marine grade and can take the water pressure just fine. Hmmm. Well...that wouldn't surprise me knowing Yamaha engineering. Seat felt good to me. Firm. Can't be as comfortable as the pillow seats on the 2nd Gen. Feels more like an advanced 1st Gen seat. The rider seat" back" piece does move forward to allow more room between the rider and passenger...but at the expense of room between rider crotch and gas tank. When forward, It feels like the 2nd gen...when back...it feels roomy! Wife thought maybe that little back piece lifted up rather than slide forward. That would have been a good idea Yamaha...as my back needs more support. To lift up 3 inches would help my lower back a lot. It would truly make you feel like you are sitting in the bike and not on it. Snug. But...maybe on the Mark 2 version! Glad to hear a rider back rest is coming soon. There isn't much room around the engine guards for mounting highway pegs. In fact none at all in the front. Plastic would need to be trimmed out to allow a bracket there. Will be curious to see how the aftermarket solves that problem. The guards will not help the plastic in case of a fall at all. Just like the 1st Gen in that regard. Maybe Yamaha or some 3rd party will design some good looking side pieces that will act like some of the aftermarket stuff I've seen for dirt bikes. But that probably wouldn't look to cool... Minor thoughts. The lower vents are not adjustable while riding. Gotta get off and reach in get them. But look and feel much stronger than the HD Ultra lower vents. The upper vents have lots of adjustment to them...so passenger/rider cooling shouldn't be a problem. The dash was an easy reach for me, the hand controls felt good and easy to find...but all that a moot point if you use voice control. Windshield had impressive amount of movement. For my riding height, looked like I could vary the airflow nicely. I like the rake angle of the windshield as well. Should throw the air up and over without being a huge wind block in higher winds. Overall, I'm impressed with the quality of the bike. It truly looks like a well designed and built piece of precision machinery. I will ponder what I saw and felt, then go back for another walk around. I told Eric that my buying style is one where I visit 3 to 4 times before I even ride....and then expect at least a 50 mile test ride. His eyebrows raised up at that...but the manager was standing there...and he smiled and said that could be arranged. So we shall see... Would I buy it? Yep. Hands down from just walking and sitting on it...it is a very nice scoot. But...wifemate wants a travel trailer or RV so....who knows what toys I'll have this time next year. OH...did like the red color, but I do prefer Yamaha's liquid silver! Hope this helps... -
Interesting in that my 89 has a similar red hose on the fuel line. Guess I'd better look into something better. I would have never known! Thanks!
-
1: take a picture and post about the rotating studs in the air housing. I can't picture this in my feeble brain today... 2: Yes and no. It will idle with air box out but will run like it has a cam in it. The problem is either in the idle circuit, the fuel line/filter/pump area(doubt this) or vacuum. I'm going to guess the idle circuit is still plugged up. It should run fine without choke once slightly warm. Plus the idle circuit does control more rpm range than just the idle (if memory serves). So the teeny passages and jet must be clean. And it's the teeny air/fuel passages that will keep it from idling well. This is where taking the carb stack out makes the job easier. Getting carb cleaner into everything, checking the orings and seats, etc.. But sometimes they can clean up without going that far. Back to the basics. I had similar problem with my 89 after I first got her. I took off the plug wires, clipped the ends and re-inserted. Put new plugs in. Sprayed carb cleaner into the carb throats while using throttle to keep her running. Took out the diaphrams and checked for holes and cleaned the slides. Did the reverse flush cowpuc recommended with cleaner up into the overflow tube. That goes right into the bowl. Then put her back together with Seafoam in tank and ran her like heck on the back roads. When she came alive, I was nearly thrown off the seat. It took some patience as cleaning carbs without taking them out can be a long process...and I didn't want to take them out yet...bike was still new to me. OH..make sure the diaphrams are not pinched and seated properly when you put the covers back on!! Since then, I changed out the plug wires and caps with a new set found on EBay. Changed plugs again. Added a K&N air filter.....and so forth. Bottom line. If you get frustrated...walk away. Then come back and do one thing at a time. You will get her running well and the results will be worth it! They really are easy bikes to maintain. For me...only the carbs are a bit of a trial. But now I keep the fuel clean with Seafoam and run her hard once in a while. Preventive maintenance is so much fun on this scoot! Twist the throttle and go! Awaiting pic of the Class control ....
-
Interesting conversation. I bought 3 HF torque wrenches for the workbench last year. Had to order a Tekton 3/8ths as the HF was all over the place in it's calibration and it was hard to hear/feel the "click". The Tekton is far better. I can hear/feel the click everytime. For the few extra bux, I think I'll stay with Tekton for 3/8ths. The 1/2 inch HF works perfectly. The 1/4inch HF hasn't been used enough for me to know. Accuracy? Yep...read the instructions. Tekton has a line at the bottom of the scale to set your wrench torque to where the spring tension is at rest. Also.... Read V7Goose's calibration procedure on this site.
-

Hello Darksiders.. Dark Side for a Stratoliner ?
videoarizona replied to KIC's topic in The Darksiders
Tame your right wrist and some of the rear tire wear will go away! Grins! Seriously, it's the torque that wears out the rears on those type of motors... -
Good to hear your progress. The best thing for the rear brake besides new fluid is to take the rear caliper out and clean it thoroughly. Before you put new pads in, make sure the front calipers are clean and working as well. When finished working on the rear system, know you have to bleed them in proper sequence. The first is the bleeder at the steering head. Look in between the handlebars there is a bleeder there. The highest part of the rear brakes. Bleed here first, then the left front then the rear. Now when this done, you are back to where the stock brakes should feel like. I put an R1/R6 caliper in the rear of my 89 and the brakes woke right up!. I still have my brakes linked and really like how well they now work. Enjoy working on the 89 and keep us posted! Oh...take pictures!
-

Help with making brakes better?
videoarizona replied to VentureFar's topic in Royal Star Venture Tech Talk ('99 - '13)
Yep..on the 1st gen the calipers and HH pads made all the difference on my 89 as well. But I'm talking about my 2nd gen. The front calipers are wimpy 2 pot units, the R1/R6 are 4 pot. That and stainless lines should make the RSV stop with nice controlled finger pressure. I was thinking GG rear pads for the RSV as they are not quite as effective and I need to tone down that 4 pot caliper since my right foot still doesn't get the message! HH on the front of the RSV...definitely. 30 years...that really is good service. I have 14 years and almost 200K miles on my Yukon and still have original brakes, water pump, AC compressor, Alternator..etc.. I'm wondering how they could build such good quality parts these days. Or maybe they don't anymore. Not complaining...just astounded I don't have to routinely change these things out like I did on the Dodge vans.... Yep...mom Yamaha builds good quality into their scoots! -

Help with making brakes better?
videoarizona replied to VentureFar's topic in Royal Star Venture Tech Talk ('99 - '13)
I'm not that enamored by the RSV brakes. The front require more pressure than I like and the rear is way to strong. After I get the 89 back on the road, I'll bring the RSV home and replace the front calipers with the R6 units I've already acquired and cleaned up. I'm hoping the stainless lines that came with them will fit. Then I'll go searching for gg pads for the rear. That should eliminate the issues I have with the RSV brakes. I'll let you all know my thoughts when I'm back on the road. -
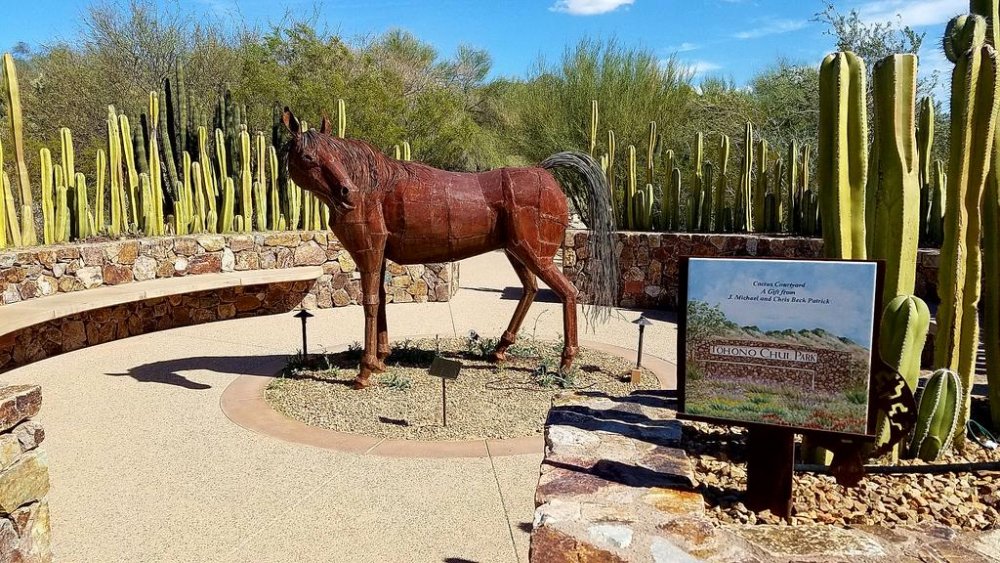
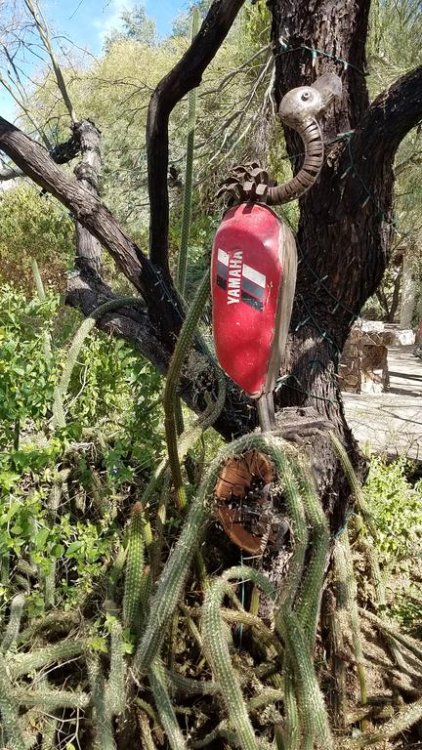
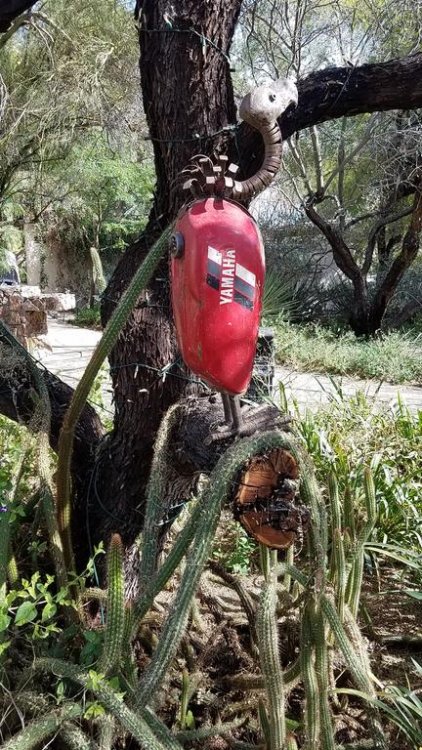
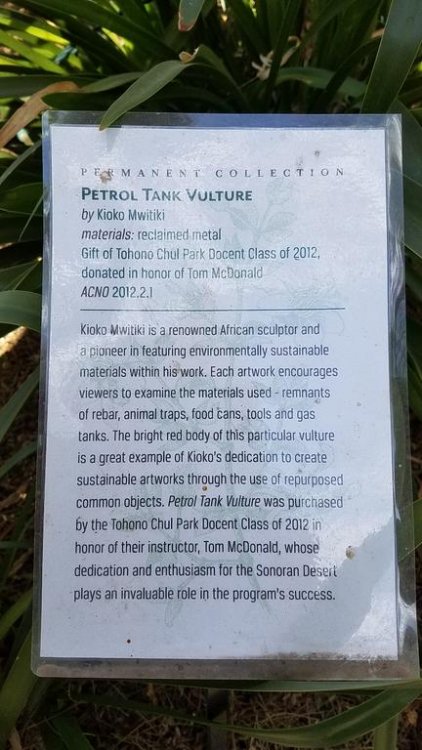
So there we were....in this little park in north Tucson area...celebrating the youngest 25th BDay. Eating brunch at their Bistro....really good food! Kidlet decided she wanted to walk the trails and enjoy all the hundreds of varieties of Sonoran Desert plants they have there....so off we go. See this artwork horse....in a cactus garden. Kinda cool. Looks like they have artists who make things out of recycled stuff and donate to this place. Tohono Chul Park. About 1/2 way through I see something sitting on a rock...???What the ??? The Petrol Tank Vulture Made my sore feet smile.... Nice place to visit....
-
Rats! I was afraid someone would ask that question. No Jeff, you read it right. I did leave the security screws in...for a really good reason. A dumb reason. You see, when I went to the store and bought the new hex screws, I counted how many I would need....and got that amount. Came back home and put the screws in a little jar and labelled them for whenever I got around to using them on the carbs. Well...I bought 12. DUH. And that's why the security screws are back on. Sigh....
-

Good audio setup on a 1st gen?
videoarizona replied to Cory4366's topic in Venture and Venture Royale Tech Talk ('83 - '93)
Gotcha. I thought you were talking about an aux input to the stereo. I'm running the Venture adapter that plugs in between the tape deck and the amp. It allows me to plug in an mp3 player or bluetooth. But for now I'm happy/content with the tape deck and the Etymotic earbuds. Keeps the noise down and allows excellent fidelity. I don't ride with a group and the helmet speakers still work so my Admiral and I can still talk between us. All we need. -

Good audio setup on a 1st gen?
videoarizona replied to Cory4366's topic in Venture and Venture Royale Tech Talk ('83 - '93)
What aux circuit does your 1st Gen have? Or are you talking about when you replace the tape deck and tie in there? -
Me too! Love that!
-
I just went through my 1st Gen carbs this afternoon and all screws were same length. Of course, they were not original... Not on an 89. But the security screws were there, one per carb. I kept them in. But did replace the rest. 4 screws gave me grief turning a 30 minute job into an all afternoon affair! Everything looked good.
-
Yep, picked up 16 screws from ACE that were black in color....
-
Call the dealers in Phoenix and ask to speak to the mechanic that's been there the longest. The 2 dealers in Tucson, Only one had a mechanic who has worked on the 2nd Gen RSV's and not one knew anything about the 1st Gen Venture Royales! So needless to say, I try and do my own stuff. I did break down when I first got the RSV and knew nothing about them and take the 2nd Gen RSV to a PowerSports dealer on Ina Road in Tucson and the older mechanic did an oil change for me as well as re-build the front forks. Other than that, I do my own stuff...


