videoarizona
-
Posts
4,225 -
Joined
-
Last visited
-
Days Won
13
Content Type
Profiles
Forums
Gallery
Events
Store
Everything posted by videoarizona
-
 Usually if it revs up then comes slowly down, doesn't that mean it's running to rich. Rev it again and hand turn the throttle down. If idle stays up like before it's usually to rich. You got a carb vent plugged? Air cleaner plugged or not sitting in there properly? Collapsed intake boot? (hard to believe this since they are lined with metal...?) Got me...
 -
Could be the problem. Wondering out loud if a 97 RSTD has the same ignition problems as a 2nd Gen? Too much juice flowing through the switch, eventually burning out the contacts... Well, you will find out when you get home and tear into it. And no, I don't know RSTD's and how to jumper around the switch. Someone here should though....
-
Venture Mortality
videoarizona replied to B.E. Coyote's topic in Royal Star Venture Tech Talk ('99 - '13)
I wouldn't worry about it. Turn off the petcock when you park and ride on for many miles! It's a good habit to get into, if for only this reason! The only thing you "should" do, besides normal maintenance, is check the valve clearances once in a while. Some have gone 200K plus without even looking...others do this every 16K miles. Your choice. But if you've never checked or if the PO didn't do it...it would be a good thing to do. There are a number of Venture riders on this forum in Texas area. Look them up and see if you can arrange some help if you think you need it. Not a hard job....just time consuming. Search this forum for pics and write-ups. -
Gentlemen, You will need to take the side cover #2 off. And yes, Yamaha calls it the push comp thingie... You will need that gasket. Plus, get the little washer that goes in the bottom bolt. I would also get the neutral switch gasket, an orange thing, as it tends to leak with age. Be very careful taking it off as the screws should not be tight. Just snug. Same with the hex screws on the cover...snug. I think around 8 ft lbs. 100 inch pounds? It's in the same area as the slave...just below it. The slave comes out with two bolts after taking off the clutch fluid line. My slave came out after I moved the stator wires from their location below the area to above and tied them there. Be gentle as to much horsing around can cause the wires to leak where they come out of case #1 . My slave dropped down into the area where the wires were, I tilted the top forward a bit and out it popped. Just gotta hold your tongue just right?!! I put a new slave in, new switch gasket, and cleaned everything very well. Put new gaskets in...don't go with old. Save old for an emergency. They aren't expensive. Why risk a leak. Oh...torque everything properly... Hope this helps. Pictures available on this site....even a full blown tutorial with pics... I have some too if you want/need.
-
I got right on that site you linked to. I'm on Chrome. Haven't done anything to mine. It's stock, per se. Suggest if it is taking to long to load... click on the stop ..."X" in upper left, then click on the reload button...same place as the stop X. Sometimes, by stopping and then quickly reloading a page, it gets through the ad crap loading faster. You can see the progress in the lower left of screen...and can see what is holding up the process. If it continues to be a security process holding you up, email Chrome or read their FAQ's. (3 horizontal bars in upper right is drop down menu...click on it.) Go to Settings. Scroll to bottom and click on advanced settings. Check all settings on content management and security. If not sure, there is help there as well. Good luck...
-
I've been on Cpap for 3 years now. Don't care for it, but it does help! I'm using the ResMed S9 AutoSet CPAP machine. It's a portable 2 piece machine that runs on 24 volts. You can buy an adapter for it to run off of 12 volts. They do have a battery but it costs as much as the machine so no go for me. I like the machine a lot. It's quiet and small. I'm using the Quattro medium full face mask. It's a 2 piece unit. One piece is the machine, the 2nd piece is the distilled water/heater/humidifier. I got both the heater hose and the lighter regular hose. In the winter, the heater hose warms the air to whatever temp I want...(usually 84 degrees is best for me). When it's really dry in the house (below 10% humidity), I add water and my throat doesn't get sore. I run the unit in auto mode. Changed the pressure ramp-up time from 45 minutes to 5 minutes, as I fall asleep quickly. I need far more pressure on my back than on my side and the S9 adjusts for that as I sleep. Less pressure on my side, more pressure on my back. It starts automatically when I breathe in the 1st breath. It almost has stopped my snoring! The S9 was the best unit I could find that fit my needs. I had my doc specify that model in the script for me. The local supplier tried to set me up with one from the sleep doc. I let them set it up before I asked what they were doing. When I told them my prescription was for the ResMed S9. They put the older bulky crap unit away and brought out the S9. Guess the sleep doc gets a bigger kickback from some suppliers than others!! Understand the S9 is outdated and now has a newer version. The difference between CPAP and BIPAP is the BIPAP can be set for 2 pressures. The older units and newer cheap CPAP machines do not regulate the pressure for breathing ease. IE, sometimes it's hard to exhale against the positive pressure of a cheap CPAP machine. The ResMed S9 takes care of this automagically. The Quattro mask also helps in this regard. That was the selling point for me was the ability of the machine to work with me rather than against me. BIPAP is the latest technology. You might ask the VA if they work with ResMed BIPAP machines. If they say yes, then research which looks best for you and ask your sleep doc to prescribe that unit for the VA to handle. Sometimes they will approve you to go outside the system and get the right unit for you on the civilian market. The language used in your test results "severe", etc.., will work for you in getting the best machine you can. Good luck... Oh...BTW, my ResMed S9 has not skipped a beat in 3 years of usage each and every day...except when I'm on the boat! It also fits in the left saddlebag of both of my Ventures....
-
-
New Venture Pricing
videoarizona replied to Rhys's topic in Star Venture and Eluder Tech Talk ( '18 - Present)
We Ride in Mesa really wants to sell me the red Venture I spent a few hours with a couple of weeks ago. They were telling me they would give me a really good deal on the bike. I kept smiling and saying I don't buy on first date! Since then, I've had 2 calls from them asking when I'm coming back. They are not on commission so I know the sales pressure is not $$ driven by the sales guys. I'll get back to them today and give them a time frame for me to come and ride...in about 2 to 3 weeks. Waiting for warmer weather to check out the "heat issue". That would be a deal breaker for me as I've now reached the age where heat and cold does bother me enough to stop me from riding. Geesh, just 5 years ago I was riding in the Phoenix summer heat with full gear on, but still smiling. Interesting how this has changed! -
Added Power steering to the bike!
videoarizona replied to baylensman's topic in Royal Star Venture Tech Talk ('99 - '13)
Good to hear ! Let me add that, I think part of that power steering feel is coming from the 777 tire itself. I put the 777HD's on my 05 RSV 3 weeks ago (stock sizes) and have about 400 miles on them. The tires really do help with the handling. My RSV feels like a completely different scoot. Steering into turns and holding the line is no longer a struggle. We shall see if this continues to hold true as the tires age. For now, they are the best tires I've ridden on. Tar strips and irregular road ridges are a thing of the past. I no longer cringe when I see them coming. I'm re-learning my steering/ handling techniques and smiling a lot more. Gotta keep reminding myself that the Shinko motorcycle tire technology came from Yokohama racing experiences. Shinko has done a great job continuing the tradition, IMHO. P.S. The 230 Tourmasters I put on the 89 VR are still holding true to great handling and a sticky soft ride. Note to self: Those Pirelli Routes were not the right tires for the RSV! Nope. Nada. -
Life is not fair.
videoarizona replied to CaseyJ955's topic in Inspirational, Motivational, Prayer Requests, Etc.
I'm so sorry to hear. Life can be cruel for sure..... And know that the time you had with him, you will never forget. That's what makes life worthwhile besides knowing people, is remembering them! Prayers Up for the family! -
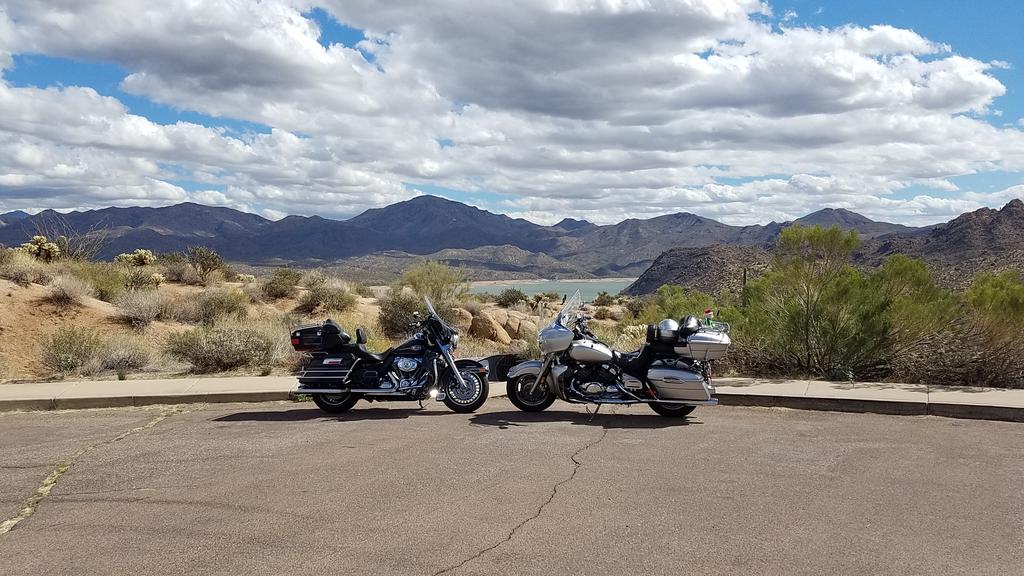
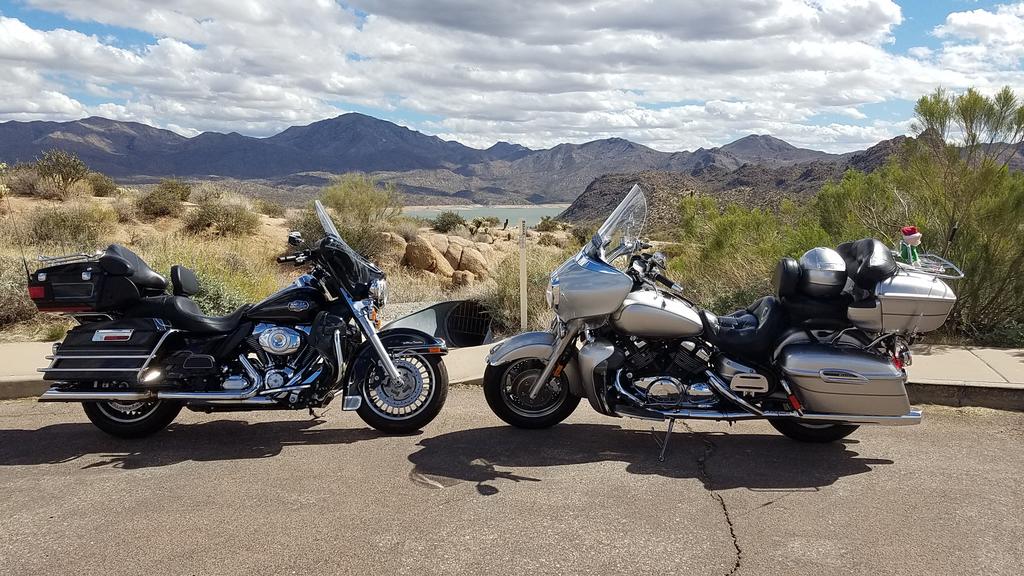
> Brian, in my opinion, the above is the issue. Finding something you can ride, feet flat, and handle at our age. I'm getting there fast as well. The only touring bike that I think fits you is the HD Ultra. Even the VStar 1300 might be a stretch in that the bars are wide and the tank is big. It still felt heavy for me but does handle. BUT, it's a cruiser not a touring bike. Will be buzzy at highway speeds as it really needs a 6th gear....like its smaller sibling the 950T. I loved my VStar but not for day long riding. Even after my seat was Butlerized, it was not a long distance bike for me. [/color] BTW, he made a huge improvement over the stock seat! My wife didn't like the rear seat on the VStar either...even with the touring backrest and pad I made for it. I even tried aftermarket seats! The Honda GW's are good, well balanced... but heavy. The BMW is very tall in the saddle, so that would be out for me and I'm a bit longer leg than you (30inch). I'd stick with the HD. Do the upgrades. Or buy a newer one...like the 2012 ultra classic. Nice bike, handles well, comfy seat for better half, good mpgs as it's fuel injected. Around 40mpg average. My only complaint is the cockpit is tighter than either of my Ventures... Picture from our ride yesterday of my 05 RSV and my buddies 2012 HD Ultra. his has been dependable for over 30K miles so far. I've ridden many of those miles with him on my Yamaha's. Good luck with your choice.....

-
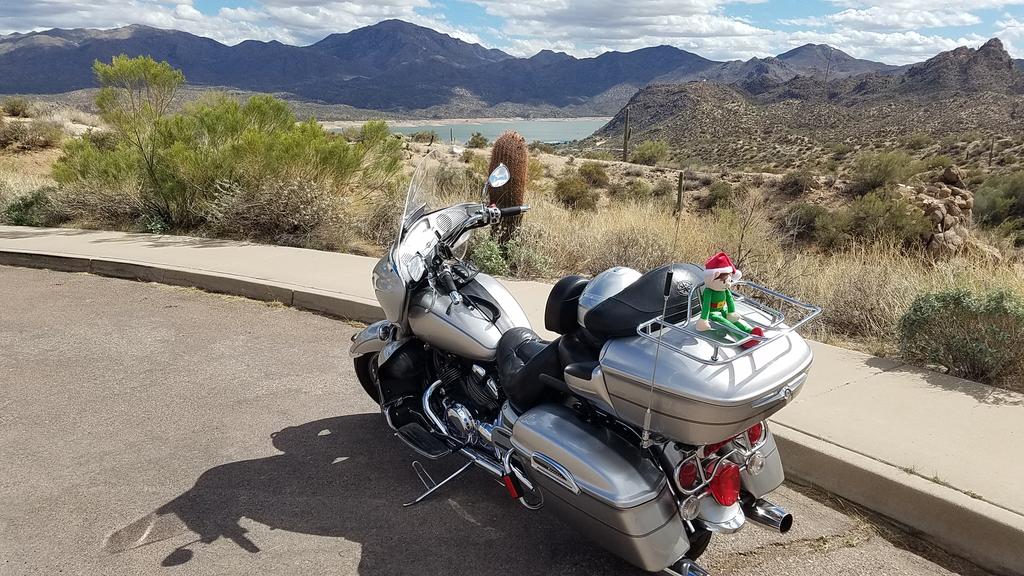
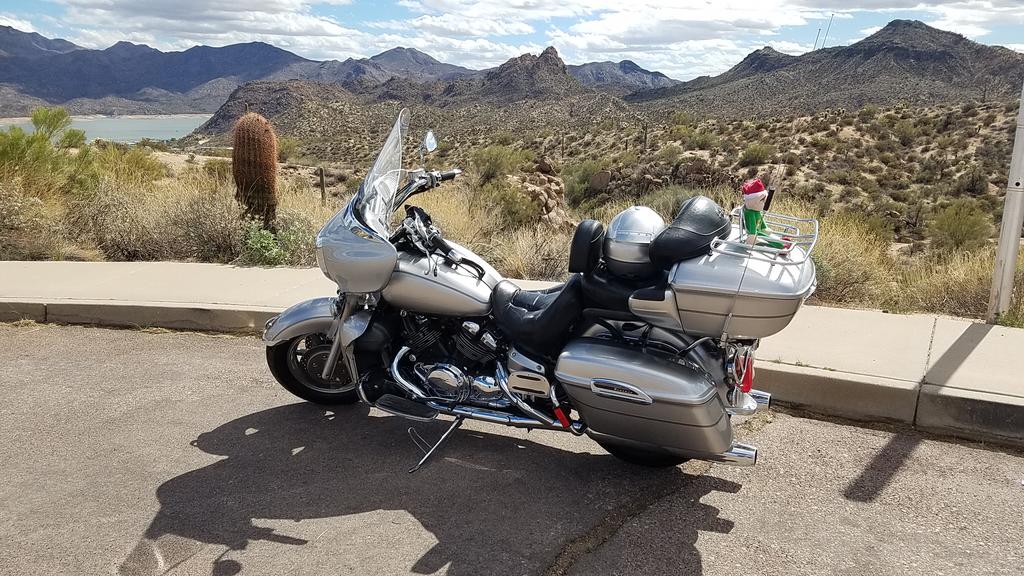
Jumped on the scoots today for a breakfast burrito in Fountain Hills. Then took the back roads to Rio Verde and over to Lake Bartlett. both scoots...We stopped at this overlook just above the lake. Liked the view better... The road from Carefree to the lake is truly fun to ride. Lots of curves and beautiful scenery to boot. Wish i had the Gopro with me...the ride to the lake was nice. We had a warm day with cool wind. 70's. Enjoy! OH...think The Hideaway in Cave Creek was having a party. The bar/restaurant had a gazillion bikes parked all around it and the music was loud enough to be heard out on the street. Wish we could have stopped.... www.hideaway-usa.com Cheers to my ice-bound friends!
-
Happiest Birthday, Don. Sorry I'm late, but I was out CTFW don't cha know....
-
Is my Gen 2 clutch slipping or do I have a Slipper clutch?
videoarizona replied to VentureFar's topic in Watering Hole
I'm with Condor...before you change out the clutch springs, flush out the clutch master. I use a high E guitar string to clean the tiny relief hole in the master. Be careful, as it should squirt out a bit of brake fluid and go everywhere if you don't have the lid on. Use on Dot 4 brake fluid in the 2nd Gen. Make sure you flush her well. Should take a bit of fluid to get everything out. -
Prayers UP! Crossing fingers too that she will be OK...
-
In 2004, I bought my Yukon XL for cash. got a great deal on a brand new truck with all the bells and whistles. It had a 60K milke bumper to bumper warrantee. The dealer asked if I wanted a extended one. I replied...if you can find one that is bumper to bumper like the GMC factory warrantee, sure. They did. it was $2400 as well. Only exclusions were normal wear things...tires, battery, etc.. They covered the speedo replacement, 2 little door motors for the heater and the emergency brake going bad way to early. Did I get my money's worth? Don't know. But I was spending $60K for a brand new truck and I wanted it covered for 100K miles. So from that stand point, I think I did. She now has 200,640 miles and still going strong...(knock on wood). So yea, do your homework on that year truck. Look for reliability issues on line. Then decide.
-
Worst luck...
videoarizona replied to s.tyler58's topic in Venture and Venture Royale Tech Talk ('83 - '93)
Yes....on my 89 it called for around 100 inch pounds...I simply put my hand over the wrench and turned each bolt evenly until I couldn't turn anymore. With my hands, I bet I was around 8 ft lbs. Not much torque using the palm of your hand. IE, just snug them up in a alternaing pattern so they are even. There isn't any high pressure oil there...just oil. -
Yea and the rest of the world uses other standards as well... OH...in case you are wondering...the FCC (Silly lawyers who think they are radio and TV engineers) has made he final decision on the new TV standard for the USA. It will still be NTSC but a newer digital standard. ATSC 3.0. Remember the fun we all had when we went digital? Our TV's no longer worked and we had to either buy a new Digital tuner TV or get an adapter box for a few bux. That's where we are heading again. The new digital standard is NOT compatible with the current digital standard, so our wonderful 4K TV's we got for Christmas won't work without a converter box unless they already have the new tuners in them. The new digital standard will now allow many more channels in less space..freeing up more airwaves for the cable and phone companies. Of course this also means my $2,000 wireless microphones will no longer be allowed as the space they use is now being "given" to others. It will also allow cable and TV to offer a better streaming experience with 2 way communication from your house to your supplier. It's a bit of a political play as well from cable companies. But they are always on the short end of the stick as they only have so much bandwidth going through those pipes. I don't care about them since I'm over the air. it just bothers me that my little TV's that are only a few years old will need a converter box in the near future. I really don't like the politics in this...but so be it. So before you buy a new TV in the upcoming year, know that unless it has the new ATSC 3.0 tuner built, (and it may have in a few months or sooner) you will need to buy a box for it to work. Time frame isn't nailed down for the conversion to start....but that should be your #1 question to the salesperson...is it capable of receiving the new tV standard?
-
Thanks for the pictures and sorry for the delay... I suspect those broken tabs are sitting there inside the fairing. If you take off the panel that the CLASS system controller resides in, you should be able to find the parts then do the plastic repair thing. There is an inner fairing under all that stuff that catches wayward runaway bolts, nuts and plastic. In fact, you can probably McGiver something with plastic, or weld/epoxy a washer or two and a bolt or something similar. It really isn't rocket science on these bikes. Whatever you can come up with will probably last longer than the original. BTW, if the screw mounts that hold that whole right side panel on are broken, you can cut small square pieces of black ABS plastic and melt them/epoxy them underneath the holes (found that fix on the forum) or even use small washers pressed in the holes in addition to the bottom repair above (did that too). Stronger and looks fine. There are all sorts of tricks I learned from searching this forum. I have the attitude that I'm not the 1st to have this problem, and then see if I can find out who solved it. Fun Stuff, really! Regardless...I'm watching to see what you come up with...maybe I can find some of the posts I was talking about and save you some time...I'll look but heading out of town in morning.... Found one of the posts....here's the link...I found the 1st response to be excellent info on working with plastic. I found the 2nd response easier for me to deal with on my repairs for the panel. This is what I was talking about above.... http://www.venturerider.org/forum/showthread.php?106178-Repairing-RT-side-dash-panel-with-ABS-MEK&highlight=Class+panel+repair
-
The oil filter O ring around the bolt leaks. So much for Fram putting in the correct O ring. I'll deal with this when I get back in town... Clutch and area around slave is dry after a 5 minute run. So far so good... Now back to your regularly scheduled life! Bartender, set em up for the gang...on me.......
-
Well events in life have changed again...so much for plan A... The lady says she needs to get back to Phoenix tomorrow (Friday), so I'm putting her (scoot, not Old Lady!) together this afternoon. Took a long time to get the air out of the clutch lines before any fluid made it down to the slave. She pumped up quick after that. No leaks in clutch. But think I may be replacing the master soon as the relief hole keeps getting plugged and I've drained, flushed and replaced to many times. I rebuilt the master sent to me by cowpuc...so it should be ready to go. I know...I should be doing this now, but need to take the tools with me to Phoenix and don't want to leave the old girl naked and apart while I'm gone. Besides, I like working on these scoots...so doing the master again is good experience. That's my story anyway!! Now I'll go put some oil in and see if she fires up and leaks....
-
I wish! Seriously, but no....sigh.
-
Thanks Carl....once the garage warms up a bit I'll go back out and get back to work....32 degrees this morning. Nice!
-
Yes, Rick...there was the small brass washer under the bottom bolt. I bought a new one and will replace it when she goes back together. What bothers me was the leak was small...but after trips back and forth to Phoenix at 75 mph (2.5 hours), the bottom of the bike on the left side as well as the left muffler would get oil on it. So the high speed was pushing oil out. I would clean area and go for a ride but when home...the whole area would be wet. On the ground after an hour there would be one drop about the size of a quarter. Weird cause I was expecting more on the ground. Regardless, I'm thinking the neutral switch was the leak. It may leak again as it's getting old and that plastic is probably ready to crack. I'll be looking for another switch here just in case... Thanks for the thoughts...
-
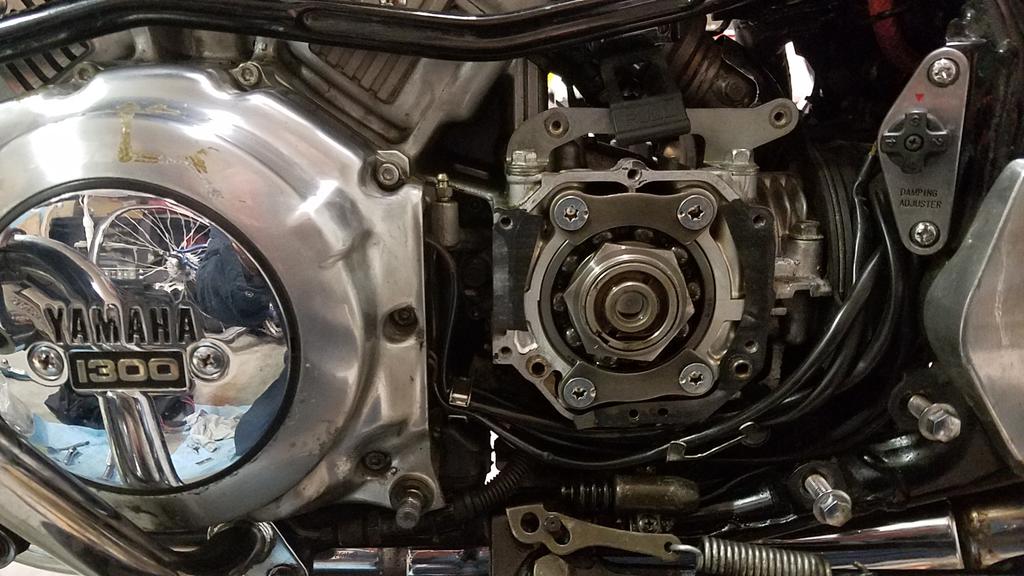
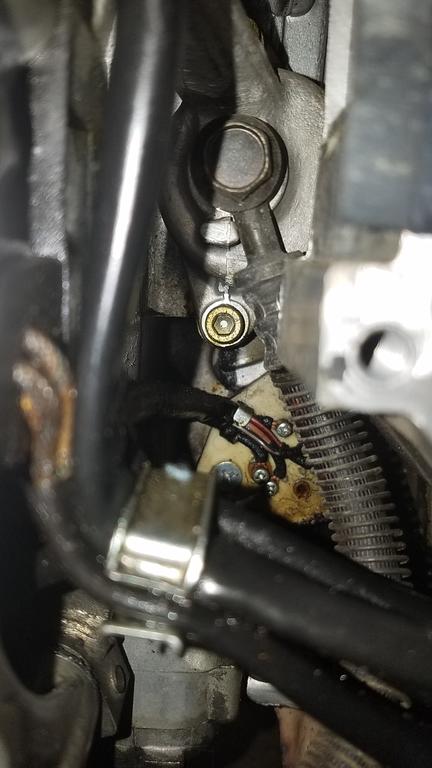
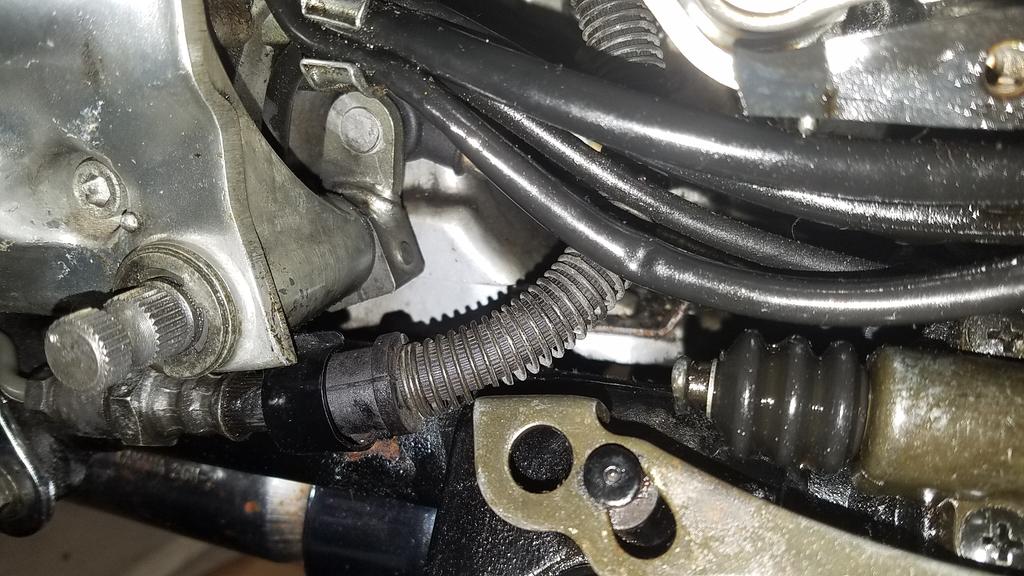
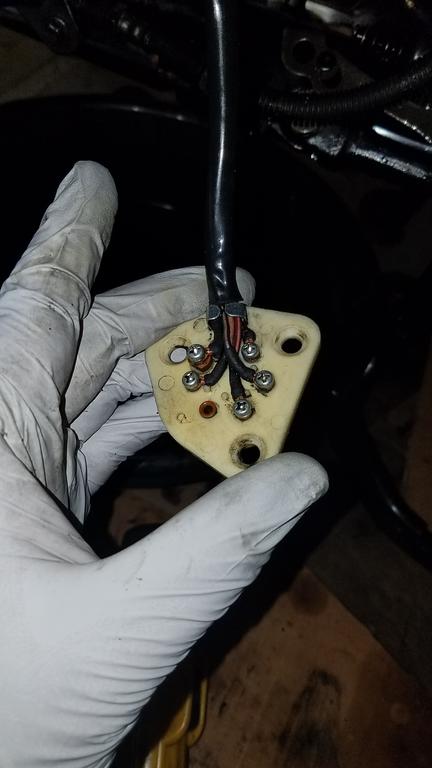
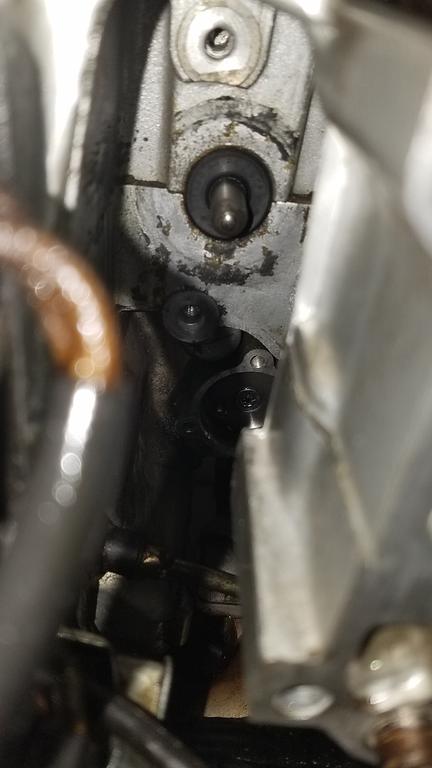
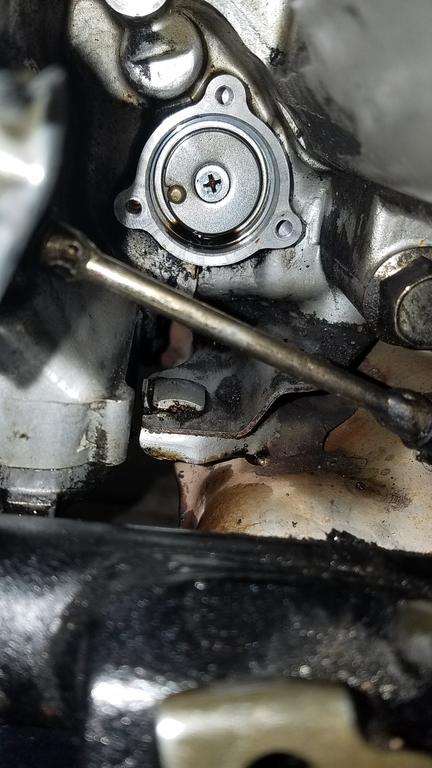
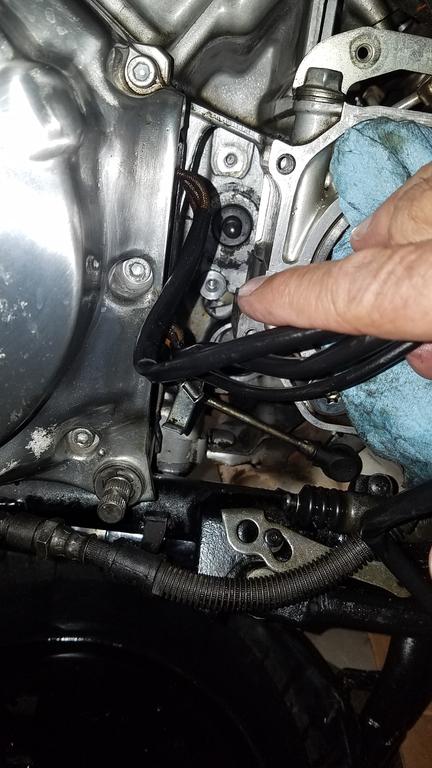
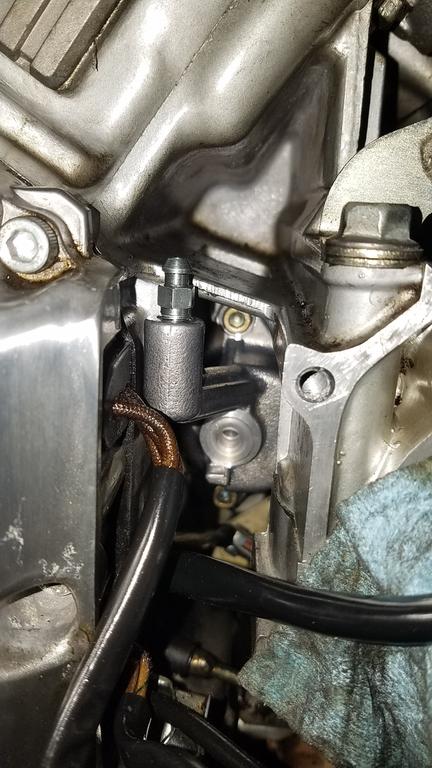
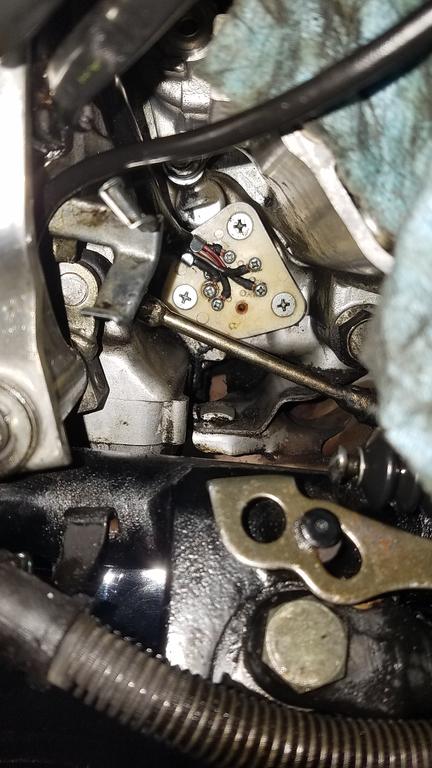
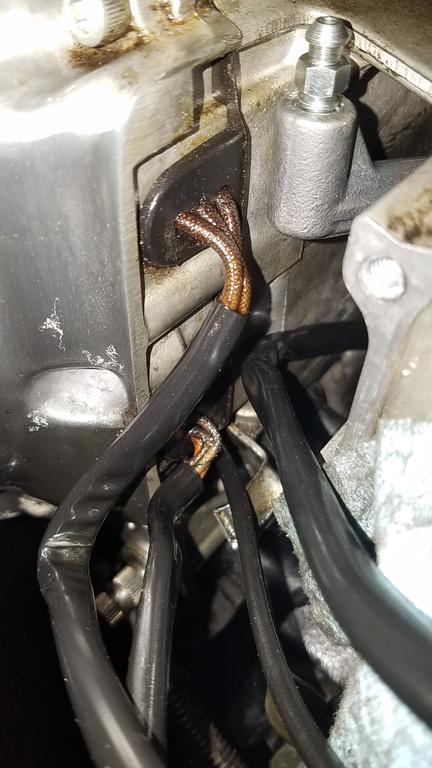
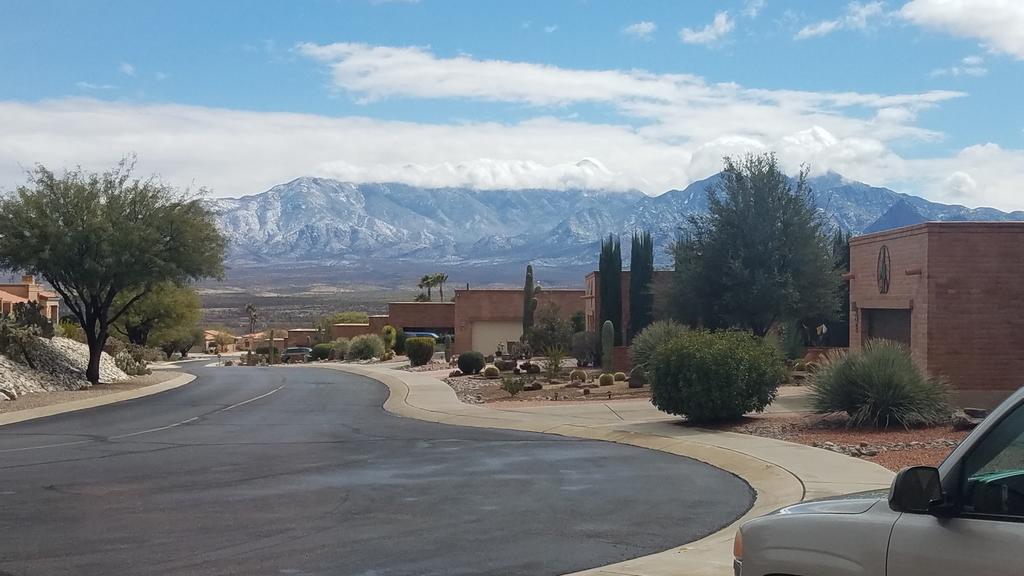
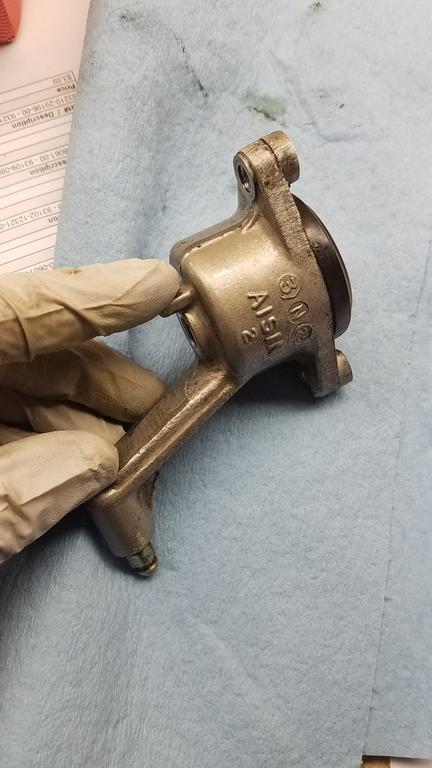
UPDATE: Finally got back into town and started work on the 89. Drained the oil, replaced the oil filter and O rings. (thanks Puc for guidance on the cover.) So now time to take the left side apart. The idea here is to look for a leak(s)...minor but annoying. Took all the stuff off to get to everything like plastic, etc.. So here we go....OH...I went through all my notes of the past 4 years here on the forum, collating all the stuff relating to this job so I could have it all handy when needed. Like torque values. Nothing much to taking cover 2 off. Looked relatively clean around the clutch slave. Shift shaft looked decent as well... But as you can see...there is oil around the wires and the area under the neutral switch. The clutch slave was fun to get out. But no where near as hard as I thought. It simply drops down and rotates out the hole where the wires are. You really have to move the wires up and out of the way. I also bent the wire holder near the stator wires and moved the clutch line completely out of the area after draining the clutch system. That was hard to do emotionally after all the work bleeding to get a good clutch! So once those things are moved you can drop the slave down, rotate the bleeder neck towards you and the thing fell out! Going back in was also easy....slip the slave in sideways, rotate up... then lift into position. I did have some fun trying to get the slave over the clutch shaft and then holding it down so I could get the bolts in. Put some paper towel into the hex driver then pushed that into the screw. Wanted to hold that screw on the driver as I pushed it in and got it started. Worked! Here are pics of the old slave. Not bad for 29 years! Next, took off the neutral switch/gear indicator switch from trannie case. It came out fine as well. But highly recommend you use a magnetic screw driver for the 3 screws. I managed to get one finger in to hold the screws on the driver as I backed them out. Replaced O ring, cleaned the contacts and snugged the wires on the front side to make sure they were making good contact as well.... After cleaning contacts.... Pretty clean area before I managed to get a rag in there. So don't think the clutch pushrod seal is leaking. and the neutral switch area as well...though underneath does look wet so this could have been my leak. BTW, I'm really glad I took this next picture as I forgot the orientation of the neutral connector with respect to the switch....I was able to look at the camera picture and see the pin is at the 8 O'Clock position....and on the front side, the raised connection is neutral. Turn the switch until it matches the pin...align holes and put the screws in! Took one more picture to get a feel for the empty space, then cleaned it....pic is before cleaning with finger pointing to area of slave and neutral switch. Here is the new slave back in it's hole... BTW, only mistakes I made here were I put the neutral switch in before the slave. The cables from the switch got in the way of moving the slave up into position. And then I made the mistake of reading the 2nd gen manual and it said to put some sealant on the top bolt for the slave. So off came the top bolt, RTV to the rescue then torqued the 2 bolts and that was that...I didn't confirm if the 1st gen manual said that as it's on computer and my hands were not clean enough! Can't hurt though. Here is the neutral switch in place....the raised wire terminal for neutral is in the 8 O'Clock position. Here is a close up of the wires coming off the stator. They don't look like they were leaking...but I'll leave that up to the brain trust here.....do they look normal or really wet? Don't feel wet to me.... And that's where I stopped for the night. New clutch slave in. New O ring on neutral switch and area cleaned up. I could stop here and put her back together tomorrow, bleed the clutch and go for a ride to make sure everything works. I already have the gasket for the stator cover but would need to order another gasket for cover 2. I think I'll wait to see what you all say about the wires. It won't be much of a problem to drop the engine guard and take off the stator cover. I'm leaning that way now.... Of course...that just means it's more of a chance for me to break something else!! BTW, it snowed today in the mountains across the valley. We got a few flakes here but it didn't stick. Too warm at 52 degrees. Another cold front came through Arizona. Picture from my driveway.... So far working on the left side has been easier than I expected. I just hope that I can get her back together when I'm done! d