-
Posts
4,225 -
Joined
-
Last visited
-
Days Won
13
Content Type
Profiles
Forums
Gallery
Events
Store
Everything posted by videoarizona
-

How to r & r the tires on 2nd gen?
videoarizona replied to VentureFar's topic in Royal Star Venture Tech Talk ('99 - '13)
The only way I know with a motor cycle floor jack is Carbon One's lift adapter. It gets you above the motor and frame members that get in the way... RD's idea sounds cool.... I ran Pirelli Routes on my 2nd gen...and couldn't wait to get rid of them. They were great at first...but after 4K miles, they nibbled on every imperfection on the road. I kept the tires at 40-42 rear and 38-40 front. -
That's OK mama. I've only met a couple of people from the forum...so everyone is going to be new to me. New faces and new names. Only problem is I have the wonderful "I can't remember anything five minutes after I hear it" old age syndrome! So unless everyone is wearing name tags, including me, I won't remember who I am....to say nothing about anyone else!
-

Lost all of my audio
videoarizona replied to Chaharly's topic in Venture and Venture Royale Tech Talk ('83 - '93)
Geesh. Kevin. Wish my fuse block looked as good as yours!! -
Me too! Love fried chicken!!
-
http://www.techniche-intl.com/products/techniche-evaporative-cooling-vests-6529 Found it on Amazon for $30, $5 shipping
-
Finished checking over the RSV. I think she's ready for some miles. I got the stator in...undecided whether to take with or leave boxed and ready for a fed ex overnight if needed. Got in the cooling vest @VanRiver recommended. Inexpensive and looks really simple but well built. Waterproofed the boots. Tent gets it's treatment tomorrow. This is my backpacking tent. it hasn't seen daylight in 12 years...neither has the backpacking sleeping bag. Tomorrow I need to throw some Seafoam into the 89 and run her for a while. She'll be sitting/resting while I'm gone...Then clean the front end of the RSV...darn bugs really like those lowers!
-
@leroy,you give me some info about how you mounted those little lights down by the fork tubes? P.S. like the aux fuel!! TIA david
-
Why get a kit when the new ones are almost as cheap....? [TABLE=width: 100%] [TR] [TD=width: 60%][TABLE=width: 100%] [TR] [TD]1FK-16381-11-00 PUSH LEVER COMP. (Yamaha Motor) $84.25[/TD] [/TR] [TR] [TD][TABLE=width: 100%] [TR] [TD=width: 60%]Shipped Thursday, February 15, 2018[/TD] [TD=width: 40%]1Z1YF720YW18377956[/TD] [/TR] [/TABLE] [/TD] [/TR] [/TABLE] [/TD] [TD=width: 10%]1[/TD] [TD=width: 10%]1[/TD] [TD=width: 20%]$84.25 [/TD] [/TR] [/TABLE] From Boats.net So now you have more than one choice...
-
Very good reason...besides "Murphy". With electronics, my over 40 years experience has shown that if they are going to fail...the most likely failure point is within the first few weeks of operation. If they make it that long, they will probably go a long time. The reason for this is the parts do "break in" just like anything else. A weak electrical part will usually fail near the beginning of it's life. I know a stator isn't really electrical per se.....but my gut says put it in the bag along with the gasket and hope I never need to try it out. So...since my current stator is working well and has been since the beginning of time...there is a decent chance it will last a while longer. The new part...there's no guarantee at all. At least that's my belief system. LOL!
-
Not going to carry everything...just some basics. Going to borrow the tool kit from my 1st gen as it's pretty complete....then a few more things. The rest, I can "borrow" from Autozone. I already have the gasket...so a little wrenching should get me going again. If not, I'm going to try and carry some phone numbers of members on the way. I might get lucky and break down right next door to a member! (crossing fingers here). I'm going to rely on the reliability of these Yamahas for the trip. The rest will be keeping my fingers crossed as I zoom down the road!
-
Great idea, Puc. I'll shut down here as well. Same time. A moment of silence for Yammer... Prayers Up!
-
After seeing the picture of the Pocono ride, I'm jealous! All I did today was check tire pressures, replaced clutch fluid and front brake fluid. Boring.....
-

Difficulty finding neutral
videoarizona replied to jsb777's topic in Royal Star Venture Tech Talk ('99 - '13)
If I may take a stab at it. The "internals" I think he means the master/slave cylinder O rings/gaskets that do wear. These are the parts that attempt to compress the fluid pushing the clutch in/out. Remember, the hand operated hydraulic clutch pushes rods that do the work on the other (right) side of the motor. So all the wear is going to be on the left side...at least as far as clutch fluid is concerned. Now the coloration of the fluid comes mostly from heat and air/moisture. As the fluid cycles through the master/lines and slave, it passes through the slave and gets repeatedly heated. And even though it's a closed system, it does manage to get moisture in the fluid. Heat, wear particles and moisture all contribute to contaminating the fluid, causing hard shifting and not finding neutral. The other culprit in hard shifting and neutral issues is the motor oil. Once it's old the trannie doesn't like to shift well any more. Seems ridiculous, but everytime I've changed oil, my trannie feels like new again. I can only contribute that to the sheer forces in the gears is breaking down the additives in the oil causing wear and hard shifting. So instead of calendar or mileage to change motor oil and clutch/brake fluids, I simply go by performance. When I start to have brake issues I 1st look at the fluid. Same with clutch, same with motor oil. And that should happen at least once a year unless you put gazillion miles on each year! The only exception are the brake/clutch lines. They should be replaced every 2 to 3 years. The rubber does get old and they swell...so you end up losing clutch action since part of the pressure is going to pushing the lines out...swelling them. I just changed both the clutch and front brake fluids this past Fall. Did it again today....because the shifting was getting hard and the front brakes just didn't "feel" right. Much better. As far as where to put the bars to change the fluids? I turn them until the master cylinder is as level as it can be. Just makes life easier on you... Just thinking outside the box again.... -
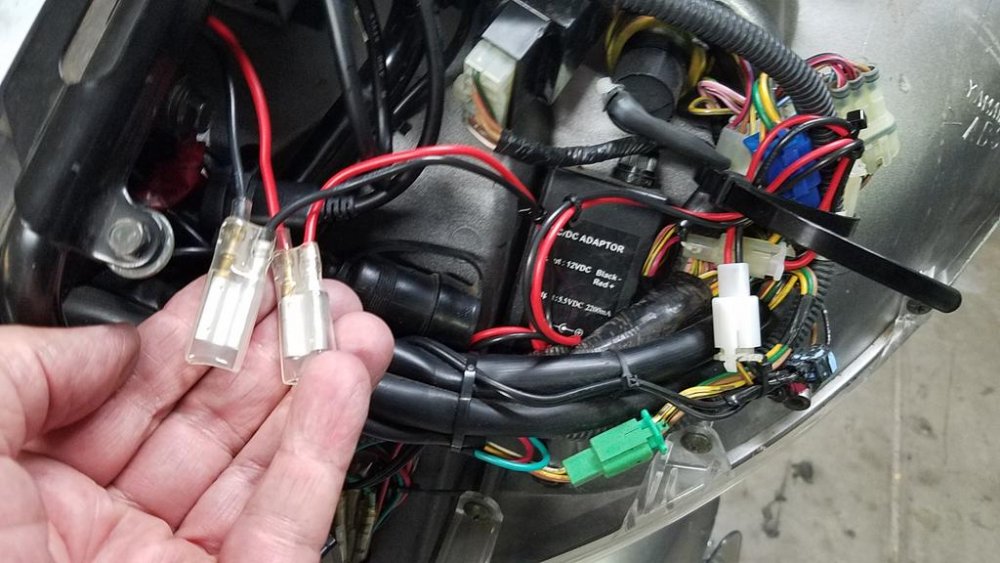
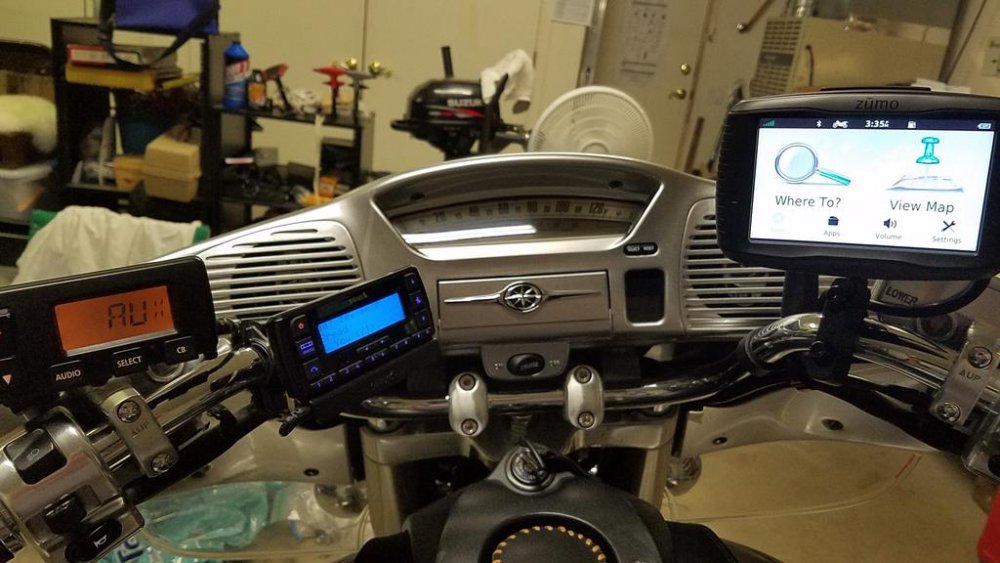
Installed. Works great!! Installation: I contacted Steve @M61A1MECH and he built a harness for me to plug directly into the cig lighter inside the fairing. From there, he pigtailed wires and connectors so I could do 2 things- run power to the GPS on the right side of the fairing as well be able to connect some LED spot light if and when I can figure out where to mount them. The harness came and it was perfect! This is the 3rd time I've ordered from Steve and the experiences have been fantastic! Thanks Steve! Plugged in the harness, soldered and crimped the GPS wires, mounted the bracket on the bars and did a system check before buttoning things up. The GPS now talks through the RSV audio system in the "aux" circuit using the GPS audio line out. I simply unplugged my "Y" connector that previously married the XM to the "aux" circuit and plugged in the GPS. The XM is now plugged into the GPS through it's line in. So with GPS on... the xm plays fine. Still need to do some audio level adjustments to both units, but that will come once I get time to take her for a run down the road. The GPS also has a micro SD slot. I can load additional maps and tons of MP3's with a 32 gig card. I can put my library of oldies on the card and tuck the GPS in the trunk in bad weather and listen to tunes while navigating. I don't have a problem with the GPS needing to be on to hear the XM. I can always add an electrical isolation switch in the future. For now, the system works well. Here is a shot of the harness pigtails. On the lower right corner is the white connector that plugs into the RSV wiring. The colored wires running off to the left is GPS power. I haven't dressed everything yet. GPS mounted on bars playing XM music.... ...weird angle...GPS isn't THAT big! I left the USB power out from the GPS wrapped and tied down inside the right side of the fairing for future use if needed. Maybe to power my phone if I decide to mount it. Right now my phone can get charged in the backrest pocket as I installed a direct to battery cig lighter on lower left side behind the rear seat. BTW, the GPS comes with both motorcycle mount and a car mount and power cables for both. Really a nice unit. Now working on front brakes....
-

Where did you GO on your venture today?
videoarizona replied to s.tyler58's topic in Fun and Frivolous
I patted my 89 on the tank and then put the RSV up on the lift. I didn't get to go anywhere but the RSV went up about a foot in elevation. Does this count? -
I'll be glad to help with the flower fund as well..... I can't make the funeral as I'll be coming East to the MD in a few weeks...at least going to give it the old college try!
-

Radiator gaurd
videoarizona replied to Raven1294's topic in Royal Star and Royal Star Tour Deluxe Tech Talk
That's the one I have on my 05 RSV. I like it and it's strong. It's been banged a few times but hasn't pushed in or dented the radiator at all. Hope you have as good luck as I have! -

Gear indicator switch O ring
videoarizona replied to frankd's topic in Venture and Venture Royale Tech Talk ('83 - '93)
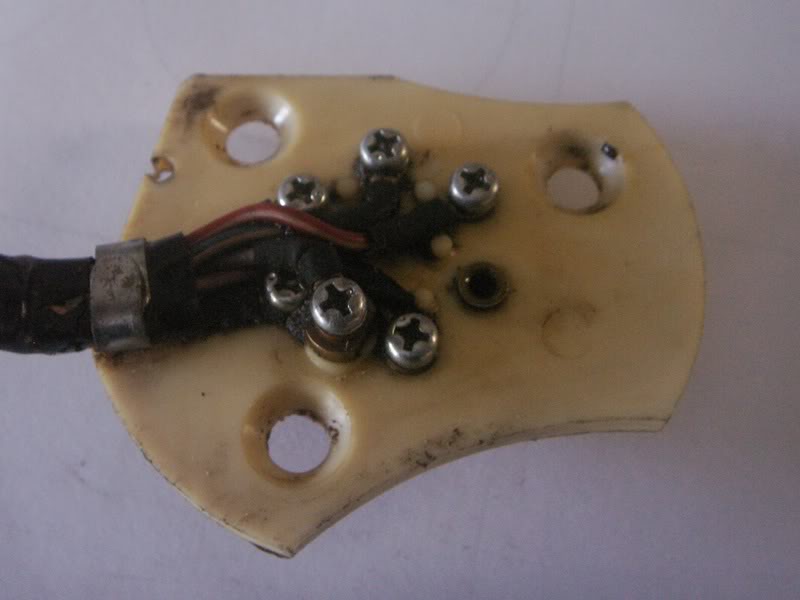
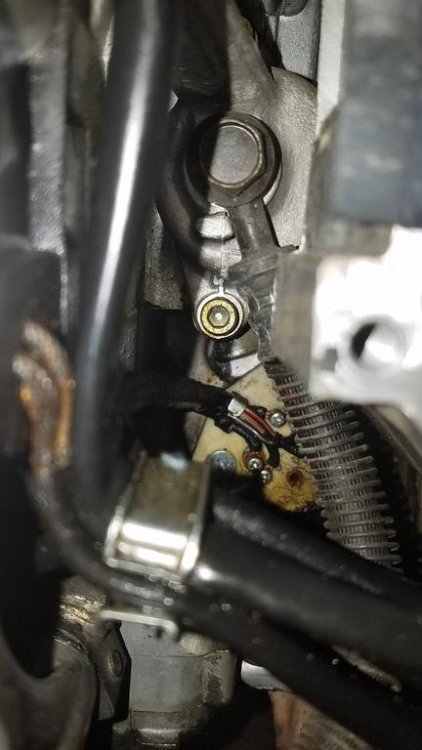
This is what it looks like And here is where it is....below the slave cylinder. Move the stator wires out of the way (lift them up) and you will see the switch. Be careful...don't tighten down those screws. It is a special O ring...orange(?) in color Part # 8 41R-82540-01-00 NEUTRAL SWITCH ASS’’Y . . . 1 9 93210-29196-00 O-RING . . . . . . . . . . . . . . . . . . 1 Can be found on the parts diagram for the 89.... Electrical 2 section page 11 parts 8 & 9. Please let us know what you find....I still haven't found my leak yet...if you want to read my journey here is the link of what I've done so far...with pictures... http://www.venturerider.org/forum/showthread.php?134041-1St-Gen-That-pesky-tiny-oil-leak -

Skids Ordeal
videoarizona replied to Yammer Dan's topic in Inspirational, Motivational, Prayer Requests, Etc.
Prayers Up! For Skid and Yammer! (and for you too!) -
Oh lord.... Prayers Up....


