-
Posts
4,224 -
Joined
-
Last visited
-
Days Won
12
Content Type
Profiles
Forums
Gallery
Events
Store
Everything posted by videoarizona
-
Yea... Mine didn't want to come out either. Took a hard yank to get the bolt out of the cover. But that was the O ring doing its job. The bolt is one piece and does come out. I wouldn't worry about it. As long as it doesn't leak. My O ring that came with the new filter was the wrong size anyway... So I put my original Oring back on.
-
Well... Since the manual says to have no weight on the bike when adjusting air pressure, I would say your pump probably won't last much longer as it is obviously not made to pump up under that much pressure of your weight while riding..... Just saying...
-
I don't drive aggressively much anymore either. After the cross country trip, I realized I do need the VMax rear end and would like to be able to extend the rev limit a touch so I can cruise easier in 4th and 5th. Especially in heavy wind situations. In retrospect, I could/should have done about half my trip last month in 4th gear all day. And yes, Curve #1 is stock. Curve #2 simply extends the advance curve out to the redline. IE, if I understand correctly...it's nothing more than an extension of curve#1 . Don't know why that would cause an MPG hit...but I'm not a racing mechanic....that stuff is beyond me nowadays. Thank you!
-
I never knew there was a factory place for putting fog lights on a 1st gen. Can you take a close up pic or two of the mount? I'm curious!
-
The small O ring goes around the filter cover bolt. The one that came with my filter was way to big...so I just used the flattened one that came off....
-
Don, I looked over the Dyna site and found that the RSV would use a Dyna 3000 module. At least it looks that way as they don't list any of the newer RSV's. But under their heading about buying, there are quite a few choices? Do you remember which unit your purchased for your RSV? Also, it looks like advance curve #2 would be perfect as well as setting limiter to 7250rpm. Agree? TIA
-
On my 2nd Gen, I was running Shinko 777HD's front and rear. 38 front 42 rear. Loved that tire. Had around 3K miles on it when I got a nail in East CHicago on my road trip. Sad to see it gone....because I think the mileage would have been there. It looked brand new and I was carrying quite the load for the last 2K miles. Have a Shinko 230 on the rear of the RSV now...I'll leave it on till it's gone. Really like the "feel" of the Shinkos. Very comfortable ride...At least for me...
-
Will keep you in my thoughts, Prayers Up!
-
Puc and I have been running Shinko 230's on our 1st gens. Great tire but won't last long at 80 plus mph across the 100 plus degree temp roads fully loaded. The heat gets all tires. I have about 5K on mine, but most of my trips to Phoenix and back to Tucson are not heavily loaded and I stick around 75mph. I also don't ride much in the heat anymore...old bod can't handle it like it used to! My rear still looks about 1/2 gone. Figure I might get another 4K out of it. Front looks new. @cowpuc will chime in and tell you his riding style and wear on various tires over the years.
-

Brake Light
videoarizona replied to JimboSlice's topic in Venture and Venture Royale Tech Talk ('83 - '93)
I did it to my 89 and have pictures but can't find the link right now. I do remember, I took off the headlight trim, both mirrors the windshield and unscrewed the top fairings to loosen the top...then pull the fairings apart. From the front, simply reached in with a long screwdriver, undid two screws, 2 electrical connectors and the speedo cable and pulled the speedo/dash assembly out with it's frame. On the bench, I took the CMS module apart and jumpered according to the directions I found on the site. I also jumpered the Headlight module (Reserve Lighting Unit) found directly under where the dash sits in the front, disconnected the module and put it aside, then jumpered the connector....which in essence bypasses the RLU and it's warnings on the dash so I could put in an LED headlight bulb. Easy to do. There are pictures and text of both operations on the site... Think I found the ones I used and mine as well... http://www.venturerider.org/forum/showthread.php?129385-1st-Gen-LED-Headlight&highlight=reserve+lighting+unit Read all the way through. The jumper pictures for the tail light and turn signals, etc., are about half way down. The rest involves moving over to an LED bulb headlight. -

Clutch slave cylinder
videoarizona replied to dna9656's topic in Venture and Venture Royale Tech Talk ('83 - '93)
Here is a thread that talks about the parts of the clutch slave. About half way down the thread. There are pics but they aren't connected...hopefully Freebird can find them and reconnect them. @Freebird...can you follow the link and reconnect the pictures that go with? http://www.venturerider.org/forum/showthread.php?21978-1st-Gen-Clutch-Slave-Cylinder -

Adventures on the road: Cherry and I are gone fishing.
videoarizona replied to SilveradoCA's topic in Watering Hole
Fantastic! Can't wait for the next chapter! Thanks for sharing... P.S. Probably nothing wrong with your scoot...just the quartering headwinds that knock down the mpg's, especially when loaded. Those are the worst! -
I copied this from her FB page. Hope you don't mind, Annie... "To my family and friends in FB land...I’m okay but “Dottie” isn’t looking too good, I had to take evasive action yesterday to prevent any harm coming to Riders in front of me after traffic suddenly stopped. Have broken bone on side of hand, skinned knuckles, and badly bruised arm to the shoulder. Lower arm in half splint.....and today I am very sore in upper body BUT I’m here and no one else was hurt !!"
-

Where to put those lights?
videoarizona replied to videoarizona's topic in Royal Star Venture Tech Talk ('99 - '13)
I've been thinking about that...and thinking of ways to reinforce the top of the lowers. I can't remember seeing any vibration type flex on them on this cross country trip when I ran into heavy winds for a good part of it. I may have solved part of that problem when I reinforced the lower parts of the fairings with fiberglass last year, after seeing how prone they are to cracking due to flex stress. Maybe a simple layer of epoxy and glass matt near the top of the inside of the fairing will solve that problem. Plus, by adding a small square of ABS where the bolt would go through, I may be able to stiffen up the mounting so it doesn't crack with vibration. Thanks for confirming that I need to take that into account. LOL...maybe a little flexing would be good...like a modulating headlight! And as Neil said...I think I am making to much of the this whole problem. Just mount the darn lights where I want them and live with it!! -

Delinked Rear Brakes are weak
videoarizona replied to rrod1393's topic in Venture and Venture Royale Tech Talk ('83 - '93)
Hmmm interesting for sure. Two thoughts to add to the fire: 1: The linked brakes on the 1st gens are designed to apply brake pressure to the rear first under light brake pressure...then as pressure is increased...more power goes to the front brake. I've had no troubles trail braking my linked 1st gen. Even in dirt/sand it works well.... 2: If linked brakes are so dangerous, why are so many manufacturers going with them now...on many different types of scoots? -
Happy 4th, guys and gals! Stay safe, hope the BBQ comes out great.. and health and happiness follows you all throughout the years!
-

Where to put those lights?
videoarizona replied to videoarizona's topic in Royal Star Venture Tech Talk ('99 - '13)
Don't want to go lower as the light is low enough as is to just barely be useful. I would want to move it forward about 1.5 inches. But Neil has me thinking about just mounting them and see what happens. I can always take them off.... -

Where to put those lights?
videoarizona replied to videoarizona's topic in Royal Star Venture Tech Talk ('99 - '13)
But the bottom line, Neil, is put them up and get better use of the light or mount them down. You run one set low and one set high. -

Where to put those lights?
videoarizona replied to videoarizona's topic in Royal Star Venture Tech Talk ('99 - '13)
Yikes! Do you have stock springs or Progressives? I'm still on stock and I can bounce the bike hard enough to get the travel to hit the light. I run no air in front at all...maybe that's my problem... The forks were rebuilt last year and springs measured. Put 15 wt oil in instead of the stock weight. I could be paranoid! Would hate to break those wind deflectors... -

Where to put those lights?
videoarizona replied to videoarizona's topic in Royal Star Venture Tech Talk ('99 - '13)
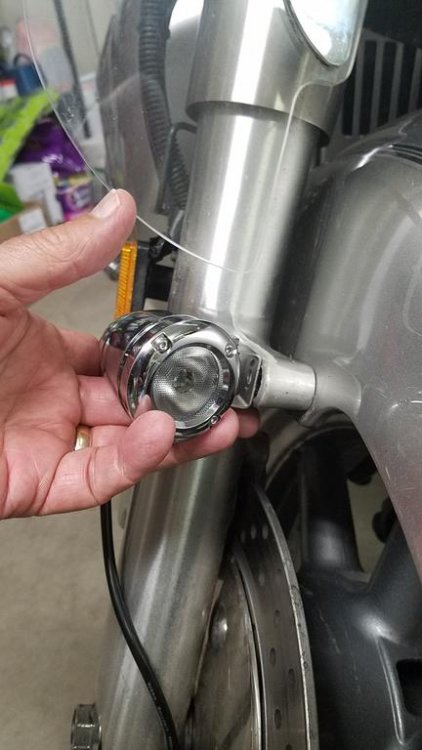
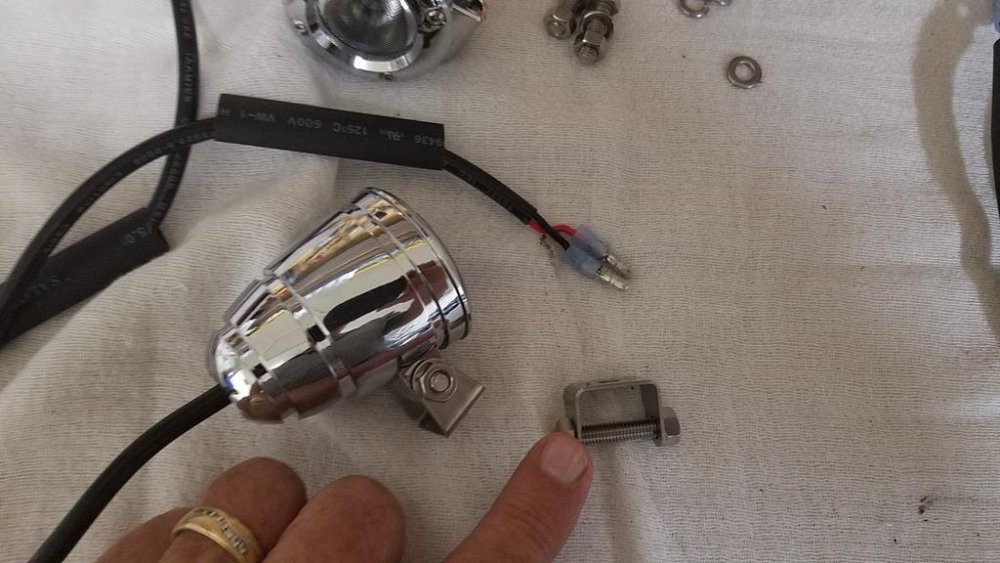
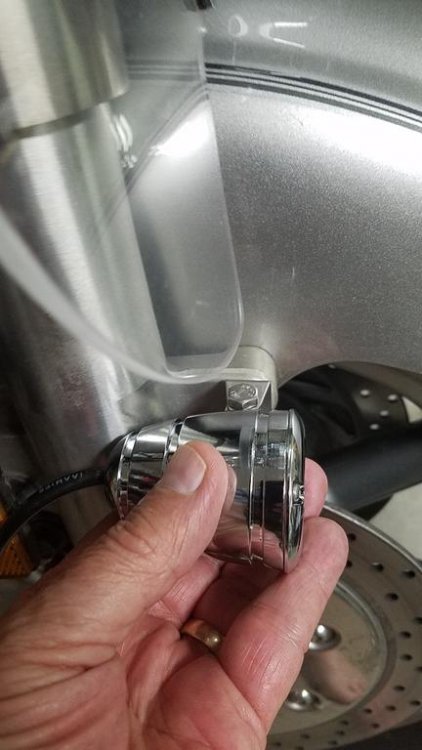
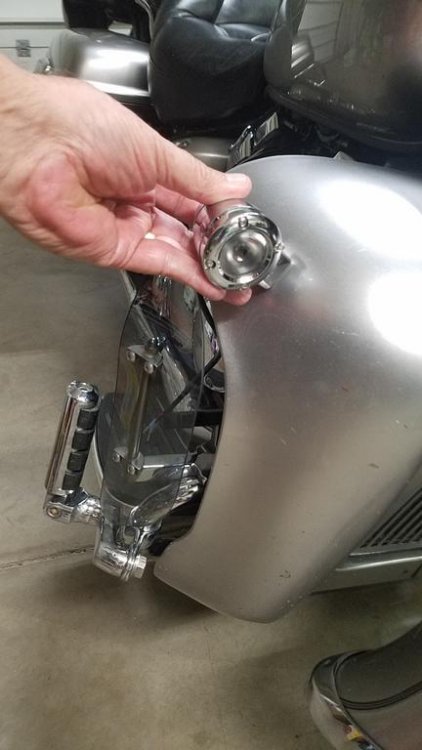
I've been looking for something like an angle bracket from places like Kuryakin. Would like to keep it looking decent. Here are the lights and the little bracket that comes with them.... As you can see, there is only about 1.5 inches between the bottom of the plastic and the top of the light if I mount directly to the fender bolt. Front fork travel is around 5.3 inches. More and more I'm re-thinking mounting them on the top of the lowers. I already have quick disconnects on the end of the wires so taking the lowers off will not be a problem and I like the idea of the light being higher anyway. Let's face it, they are for use during the day to help me be seen and at night for the critters, both 2 legged and 4, that cruise on the highway when they shouldn't.... If you have any other suggestions, I'm all ears! TIA -
You will like the 777HD on your scoot. I loved mine and it handled the very heavy load I had on my trip. It's a shame that East Chicago threw a nail at me and my rear tire caught it. Hated to let that baby go as she only had about 3k miles on her and 3 months old. It was a comfortable tire and handled the wind and rain fine.
-

Where to put those lights?
videoarizona replied to videoarizona's topic in Royal Star Venture Tech Talk ('99 - '13)
It looks like your mounts keep the light away from the wind deflector...and that is my problem. IE, farther forward. If I mount to the fender bolt, a good bump or pot hole will find the deflector hitting the light. -
Agreed. The longer hose works for me as well. Routing it up in a big loop allows me to keep the bleeder open and watch the air bubbles. Slow and easy... and if the system is in good shape, it should only take 15 minutes or so.
-
Hmmm I can do that.... "Pretty please with a cherry on top" (just in case no one else like cherries!) No..I'm not trying to jump in here....carry on.
-
I thought I read somewhere that Dunlop is re-releasing the old 402's (?). Didn't they have the retro looking raised white letters?


