videoarizona
-
Posts
4,225 -
Joined
-
Last visited
-
Days Won
13
Content Type
Profiles
Forums
Gallery
Events
Store
Everything posted by videoarizona
-

Reflective lens on trunk
videoarizona replied to MrOflam's topic in Venture and Venture Royale Tech Talk ('83 - '93)
I read that some units did have screws. I was going to mention that, but went out to check on mine and no screws. Interesting. -
I was completely hooked by my 2nd scoot: Yamaha YDS-6C. Saw it at Boston Yamaha. 1969. Head mechanic told me this bike would go across country without breathing hard since the engine was a detuned version of the racing engine Yamaha used at Daytona and elsewhere so successfully. I bought the darn thing and went from New Hampshire to Arizona on it! That was it for me... david
-
Reflective lens on trunk
videoarizona replied to MrOflam's topic in Venture and Venture Royale Tech Talk ('83 - '93)
Clive, The reflectors around the trunk were mounted by double sided tape. The double sided tape comes off easier with a little heat (think heat gun - not direct heat via soldering tool) and then gently prying off. I replaced my cracked reflector on my 1st Gen last year after reading about "how to"...here. It was a bear to get off...but did come off cleanly. I used a hair dryer and a stiff putty knife. Not daunting at all...just take your time. -
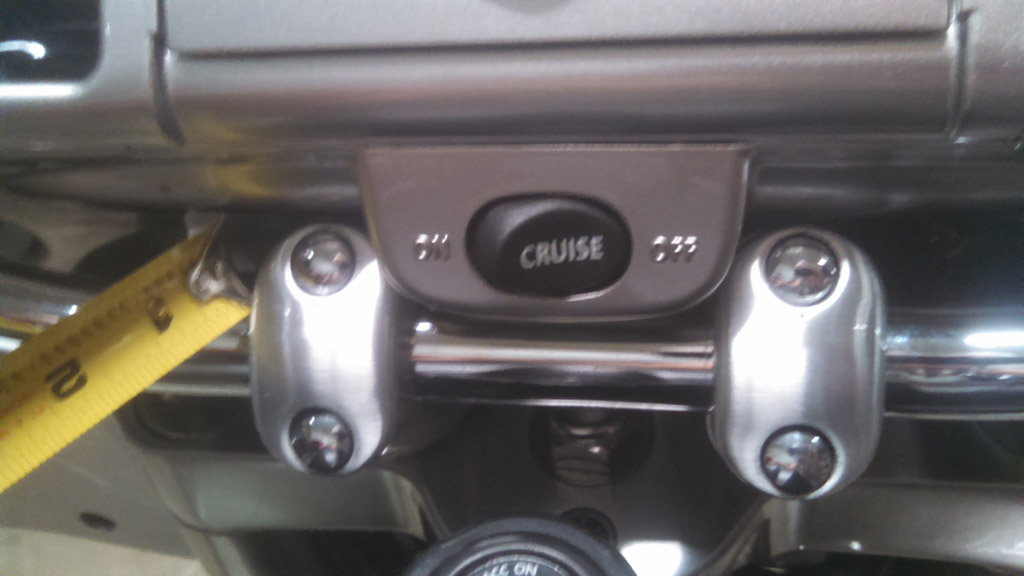
No I don't have the kit. But for some reason, it's a very tight fit for my 05 RSV between the cruise and the bars. That's with the extensions. There are a lot of posts regarding lowering the front end...here's a start. At the bottom of this post you will see references for others... http://www.venturerider.org/forum/showthread.php?939-Lowering-the-Front-End

-
:big-grin-emoticon: Ok....Grins!
-
I voted for gulf coast...only because it's during a time of the year when I can actually ride across the south.
-
Take the outer fairing off. Unplug the electrical connectors...they should all be either color coded or similar plugs. Then from a forum post about lowering the front end..."Remove two 12mm nuts that hold the inner fairing, behind the top of the headlight, a 3/8 extension works great, and two 5mm allen bolts, one at each side just behind the bottom of the headlight." Then you can add spacers to the 12mm nuts....maybe a few washers. Don't know if you will get your half inch. My Baron's extensions make for a tight fit without your kit...
-
Honda 160, 1965
-
I'll keep it simple: Happy Birthday, Dan! Grins...
-
Reflective lens on trunk
videoarizona replied to MrOflam's topic in Venture and Venture Royale Tech Talk ('83 - '93)
If you take the original off carefully, you will have the base... -
Reflective lens on trunk
videoarizona replied to MrOflam's topic in Venture and Venture Royale Tech Talk ('83 - '93)
Heat and a wide spatula type tool. Take your time... -
Reflective lens on trunk
videoarizona replied to MrOflam's topic in Venture and Venture Royale Tech Talk ('83 - '93)
http://www.bigbikeparts.com/templates/product.aspx?ProductGuid=900100L&GroupGuid=674 -
Front tire.
videoarizona replied to cwhite123174's topic in Royal Star Venture Tech Talk ('99 - '13)
No problem. Understand! -
Have you ever wandered what the poles on Cherohala are for?
videoarizona replied to etcswjoe's topic in Watering Hole
Dam...looks like another great area to ride. -
Front tire.
videoarizona replied to cwhite123174's topic in Royal Star Venture Tech Talk ('99 - '13)
Relatively easy on my 05. I sweated doing it...then said..."just do it"! Take outer fairing and windshield off. Take off the 4 nuts/bolts that holds inner fairing to frame. Pull inner fairing forward and stuff towel in there to keep it away from steering area. Cover tank. Remove handlebars and lay down on tank. Remove large silver nut. Remove two more bolts in front of triple tree. Etc.. Heck...go here and read all about it... http://www.venturerider.org/forum/showthread.php?939-Lowering-the-Front-End http://www.venturerider.org/forum/showthread.php?22482-lowering-front-end -
handling upgrades.
videoarizona replied to douglasp.burdick's topic in Royal Star Venture Tech Talk ('99 - '13)
I have Baron's 1/1/2 inch "extensions". Also lowered the front end 3/4 inch using free method. Stock cables are fine. Only thought is if you are going to lower the front end, do so when you have everything apart before you put the risers on. Might as well....you are halfway there anyway. -
Front tire.
videoarizona replied to cwhite123174's topic in Royal Star Venture Tech Talk ('99 - '13)
I'm running the standard 150 front width. Pirelli's. When they wear out, I'll keep the 150 on the front and go with white walls. Really like that fat look. As far as handling, the 150 doesn't give me any problems now that I lowered the front end 3/4 inch. With tire pressures at 38 front and 42 rear, the scoot feels like it has power steering now that the front has been lowered, the front tire replaced and air pressures up. -
Puc, Looks decent to me. rotors look good. Nice and thick. Front axle area looks clean. Some corrosion on the engine casings but it's a bike from the north country...that's normal for you guys, right? Agree about clutch...probably does need fluid changing...just from old age! All the pieces are there....all plastic looks good from what can be seen. Radio panel looks weathered...but that is probably all cosmetic. For the price, it the engine doesn't burn oil...and the oil looks good...then price is very good! @stanG...did you get a chance to start it up? Check charging? Pull dipstick? Check electronics? david
-
1st job employment experiences,, oh those wonderful first jobs..
videoarizona replied to cowpuc's topic in Watering Hole
Besides delivering papers in the snow (HD twine around bike tires for traction), my first real job was pumping gas in the snow...oil changes and all. 2nd real job was a REAL job. Laying undersea cable in ships during high school summer breaks. Man, that paid huge bux for working midnight to 8am...with overtime in the mornings when the day shift guys didn't show. After work, slept on the beach...then home for dinner, family time with mom and dad...a nappie then back to work. Then came college, radio jobs, Assistant Manager of a Bliss Marine store in Boston and the rest isn't history! It has been interesting, for sure. -
Ok Puc, You asked for it Here is the picture video
videoarizona replied to Zzyzx's topic in Watering Hole
Well done! I do like slide shows videos....give me a chance to really look at the pic. Thanks! -
Sadde bag question.
videoarizona replied to Saddle tramp's topic in Royal Star Venture Tech Talk ('99 - '13)
I read the owner's manual a dozen times before the light bulb went off. Page 4-14 is the start of the tuning the radio...how to. I wrote it down on a 3X5 card and carry that with me. I can sit on scoot and play with radio using the card. Works for me. Manual can be downloaded from here: http://api.viglink.com/api/click?format=go&jsonp=vglnk_144048036611012&key=e24a6de127caafe43f772df085fb6605&libId=idqwstwv0100a62s000DAo9ptyi4t&loc=http%3A%2F%2Fwww.venturerider.org%2Fforum%2Fshowthread.php%3F1828-Download-the-Owners-and-Service-Manuals&v=1&out=http%3A%2F%2Flabs.trunkful.com%2Fvrmanuals%2Findex.cfm&ref=http%3A%2F%2Fwww.venturerider.org%2Fforum%2Fforumdisplay.php%3F91-Guides-Parts-Diagrams-Etc&title=Download%20the%20Owners%20and%20Service%20Manuals&txt=http%3A%2F%2Flabs.trunkful.com%2Fvrmanuals%2Findex.cfm -
Yep that's the one I'm thinking of adding. I was looking here... http://www.customdynamics.com/Yamaha_tail_retro.htm However you have a better price! david
-
@KIC has a good idea. Check the A Frame to make sure it's clean. Reduced air flow is a blockage or the air handler fan is loose and it isn't turning fast enough to send air throughout the house. I would do this even if it is 20 years old. My Carrier in last house in Phoenix was installed in 1959. It had a cast iron compressor. Was still working when we took it out ten years ago. Sometimes those things go forever...
-
Gentlemen...You've listed all of mine. I've got a dent in my truck bumper from an idiot who threw his grocery cart "toward" the cart rack. He missed and hit my car while I watched. I retaliated. His girlfriend was not happy with him. I had one lady with a full cart try to cut in line at the store. She did ask if I minded. I said I did. She "hrumphed" me and stood there. The clerk refused to check her out. She left cart and walked out. We applauded. And so on..... I was brought up with manners being a part of my life....but as I get older..I seem to have less patience with those who lack manners. I think I should consider adopting Art's response.....just smile! david
-
John, is this what you are looking for? http://www.thepropad.com/pink-ribbon-motorcycle-flag/ david