-
Posts
4,225 -
Joined
-
Last visited
-
Days Won
13
Content Type
Profiles
Forums
Gallery
Events
Store
Everything posted by videoarizona
-
Clearview with vent on all three scoots. F4 is more scratch resistant but I like CLearview...
-

How do you 2nd Gen riders swap out rear tires on the road?
videoarizona replied to cowpuc's topic in Watering Hole
Puc, I would think you could pull the right side saddlebag and muffler, then lay her down on the left side. As long as fuel is shut off and you have a blankie under the left saddlebag, you probably could change the tire on the road. You may choose to remove left saddlebag and muffler for easier access to axle nut as well...but those quick to do if you use neverseize stuff on mufflers. Getting her back up might be an issue as we get older....sigh...but I think it could be done with standard tools you carry. You would still need clearance on left side to get the axle nut off or back on (I would loosen everything before leaning her over.) Just thinking out loud here... david -
One of our members turned me on to this guy... http://www.leatherup.com/p/Motorcycle-Luggage-Racks/Kuryakyn-Luggage-Rack-with-Mount-Kit-for-Honda-GL1500/351769.html I bought it.
-
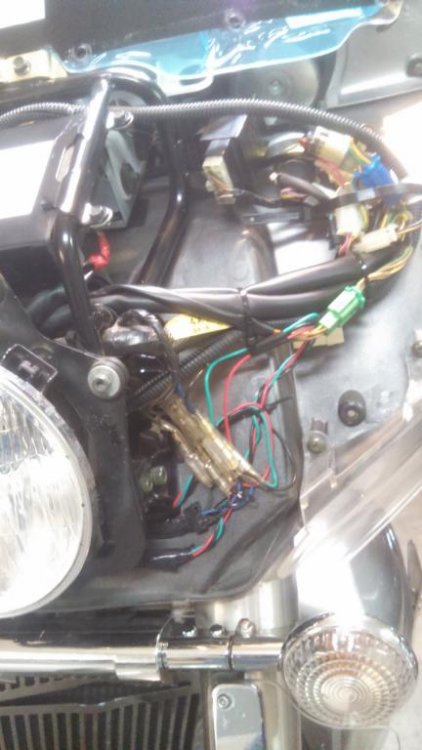
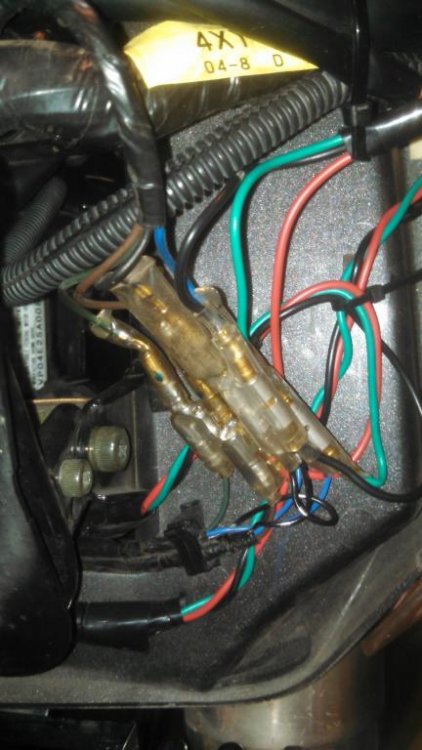
Yea...guess I hijacked thread as well. Sorry Greg. Steve can help you with wiring colors if you do decide to go through the front fairing for front power. Rear seat power is easy as well. Both wire colors can also be found in the schematics found in the tech section (manuals). I also may be going into the fairing area for another project in the middle of next week. So if you aren't in a hurry, I can take some pics and post them to show you how easy the front wiring solution is... Let me know if I can help.. david
-
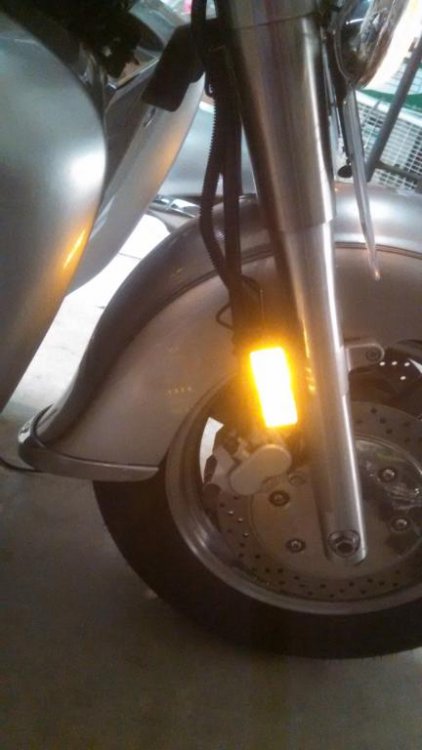
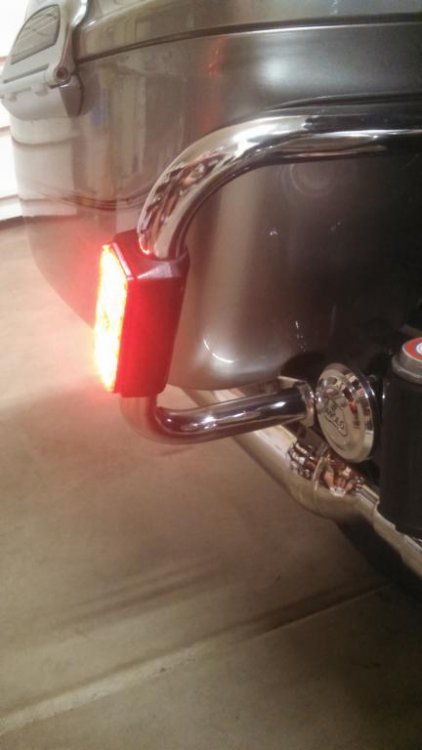
Found them on ebay. Similar to these... http://www.ebay.com/itm/2-LED-Reflector-Tail-Brake-Stop-Marker-Light-Truck-Trailer-RV-ATV-Motorcycle-RED-/161984641532 Two parameters: 1: Size match - get close enough and you can trim them to fit the reflector mounts. 2: Make sure they are three wire. Ground, running and brake (I use the brake wire for blinkers) This way my two reflector LED lights, red rear and yellow front, are on all the time and blink with turn signals. I used Steve's bullet connectors to tap into the factory wiring in the front fairing and it was an easy installation. Took longer to fit the units into the reflector mounting bracket then anything else. If memory serves, I had to enlarge a hole so the LED light would fit flush and trim a bit off of one end. Once wired in and fit, I put waterproof goop in back to protect unit and connected wiring. david
-
Greg, I ran my front LEDs (replacing the reflector) straight up the shock into the front fairing area. You can see the wire wrap looking like factory going up the fork leg in first picture. Steve @M61A1MECH sent me some 1 to 2 taps to plug into the factory wiring harness, located on the port or left side of the fairing near the headlight (right side looking from front). So installation was easy. Rear LED's (replacing the reflectors) were routed into the saddlebag guard (its hollow) then went up under the passenger seat to the taillight running light wires. Really not hard to do. david
-
Puc, Here is a pic of my RSV rear end with the HD mod. So you can get jealous! I put LED bulbs in mine...
-
Whoa! Happy Birthday, Boss!
-
My take on the problem: I was on jury duty. It was a fatal DUI case. I asked if we were going to be able to get his prior driving record. Answer was "NO". I then told the judge "that if we cannot take into consideration previous DUI convictions (if any), I would not serve on the jury. Alcoholism is a disease and needs to be treated as such....but in the meantime, no driving allowed. I've seen to many broken bodies in my lifetime due to DUI driving, and frankly blame the legal system for making it worse". Judge thought about what I said and then let me go. One DUI is all it should take to lose the license. 2 DUI's should make that permanent. Period. Sorry...but I've lost friends and watched the guy walk away with no jail time and still driving. I don't take kindly to that.
-
Your records should be safe. I went in in 1969 as well and my records are good. Only a limited years were effected by the fire. http://www.archives.gov/st-louis/military-personnel/fire-1973.html I applied and got copies of all my records years back. But still have copies of my DD214 floating around! Thankfully, most places accept copies!!
-

Replacing stock cassette stereo and soeakers
videoarizona replied to Lug Nut's topic in GPS, Audio, Electronics
With 15 watts RMS power handling, looks like a perfect match for our amps, too. Good choice! -
I like the full web browser....that is fun. Be a while before you get to use the UHD...but you will have it ...when the time comes. Good choice, Jeff...
-
I've got way to much! Alright already....way over normal for past month. Anyone want some....come on down and get it...free!
-
Hello guys and Gals... Just spent an hour speaking with @cowpuc. He is doing well. For those who have been buried under snow or out riding and haven't heard...his right hand was operated on the other day. He's doing fine, but will not be able to post to much in the coming month as, in his words, "I'm down to one finger in my left hand, and I'm right handed!" He was laughing and in great spirits....and Tippy is taking "most excellent" care of him! So "Prayers Up" for Scott... ...and beware....know that he is lurking here....so be careful what you say! Grins! david PS. Thanks, Scott for taking the time to discuss carbs with me!
-

Any demand for these stock electronics?
videoarizona replied to Lug Nut's topic in GPS, Audio, Electronics
-
Can't see how those would work?
-
Interesting problem: You could try to augment the shielding by making like a Faraday cage around the radio...nothing more than a metal type shield that covers the non-seen outside of the radio chassis and ground that cage to radio chassis and truck ground. You can try and add a metal shield plate behind the phone between the phone and mount...and find a way to ground that...or maybe not...just the shield plate might work. The idea here is to capture the spurious signals before the front end of the radio does. Other than that....I've put all sorts of radios into vehicles and only ran into this type problem once: In a 1972 Open GT. Had to build a cage around the instrument panel to isolate all the ignition crap and such that was giving us fits and ground it. We used a fine mesh chicken wire looking stuff made out of copper. Worked.
-

Getting at the coil power connector
videoarizona replied to camos's topic in Venture and Venture Royale Tech Talk ('83 - '93)
Clive, I was able to get to the coils to replace the spark plug wires. I did it without pulling all that plastic off...just the two side covers, the battery and battery box. It was a very hard job in that if my hands had been thinner I wouldn't have scraped off skin. As it was, I got the job done with all four plug wires. Took some doing but you can do it. I got to the one set of coils from underneath. Suggest you take some time and get a good flashlight....and look into the frame area until you see if you have a pathway to the coils. That's what I did and it worked for me. Taking the coils out? Nope...think that would require some surgery! As far as the connector is concerned. Try and check out the coil power from the computer to the coil. If it checks ok, then the connector is good as well. If it doesn't, then yea....going to be difficult to get to the connector AND be able to get it apart. -

I look for information on a bag
videoarizona replied to KISA's topic in Venture and Venture Royale Tech Talk ('83 - '93)
Agree. I like it too! -

Need adapter for antenna 3/8 x 24 to 8mm
videoarizona replied to Lug Nut's topic in General Tech Talk
That's what I did too, found at a truck stop where they had a CB place. -
Wondering if he was reading your sticker and got distracted. Well...glad he was OK.


