dna9656
-
Posts
1,124 -
Joined
-
Last visited
Content Type
Profiles
Forums
Gallery
Events
Store
Everything posted by dna9656
-

Cruise control
dna9656 replied to azxvz1284's topic in Venture and Venture Royale Tech Talk ('83 - '93)
There is a trouble shooting guide for the Cruise Control in the shop manual in the appedices, if you don't have a ha manual there are links to a free download of it here on the site. there is a very nice version on E-bay for very reasonable $ that is complete, searchable, and has general M/C service tips and how to. It's tech something or other. -
You stole my thunder! That's what I was gonna say!
-
No job that entails a major engine tear down ever got done with replacing JUST parts A & B. You're going to need rings, the connecting rod and bearing will probably need work, I mean you have the classic "why you have it torn down why don't you do...a,b,c,d,e,f,g,h,i,j to it ? I don't think you want to use the old wrist pin in a new piston, the pin might be too worn, and since the crank is out maybe you should think about replacing all the bearings inside, what about the 2nd gear issue? See what I mean?
-
Cruise Control component access.
dna9656 replied to dna9656's topic in Venture and Venture Royale Tech Talk ('83 - '93)
Thanks! That tells me WHERE they are but not how to get to them. I figured leaning how to get to them would infer WHERE they were...I knew they were in the fairings but I don't know the best way to take the fairings off. My CC light goes bright/dim like it should but that's it. It doesn't hold speed at all on the highway. I think maybe the vacuum servo has a hole in it or the hose disconnected, if those check out that leaves the controller... yes? -
How does one get to the individual components of the CC system?
-
Seat heater swicth
dna9656 replied to dna9656's topic in Venture and Venture Royale Tech Talk ('83 - '93)
Mea culpa... That's German isn't it?? Is that like FUBAR, SNAFU, TARFU? Well now that you mention it I guess you wouldn't know about those switches if you don't have them on your bike...this is the first time I have had here that an esblished "Old Head" :backinmyday:didn't know about some aspect of the bike! OMG!!! -
Seat heater swicth
dna9656 replied to dna9656's topic in Venture and Venture Royale Tech Talk ('83 - '93)
I have TWO sets of TWO switches in each set, each SET has a Normally OFF switch that controls search or seek function in the radios , THAT switch is momentary, the other TWO are ON/OFFF to mute the audio. It's the audio mute switches I would use, holding a switch in the on position to power most accessories doesn't make sense to me.... -
When I got my seat recovered I had a heater installed (wifie doesn't ride in the cold) in the front end of the seat. The heater uses a 3 amp fuse, that would explain why it's slow to heat; the ones I installed in my car heat up pretty fast but they take a 10 amp fuse and have a relay for 2 heat settings. I got them through Amazon for about $30.00 a seat. They come with seat AND back heaters, so you could use ONE on a 2 up seat.... Anyway I digress. I removed the INOP audio system from the bike; the amp, radios, and cassette player. I'm going to put in a blue tooth setup. I have the remote control twin pair(s) of switches on the L/H handlebar that control the audio system's mute/tune and search/volume still in place and thier wire harnesses are still in place as well. I was wondering if I could use one of the off/on switches to control my seat heater. Where would I find the other end of the wires connected to these switches? Would I need a relay to carry the current (uses a 3 amp fuse) of the heater of would the switch handle the load?
-
battery indicator
dna9656 replied to dna9656's topic in Venture and Venture Royale Tech Talk ('83 - '93)
Well it helps then the circuit that the resostor is connect to has a good fuse. -
battery indicator
dna9656 replied to dna9656's topic in Venture and Venture Royale Tech Talk ('83 - '93)
Well I connected the wire to BAT+ months ago (without the resistor) and the icon went off, NOW I do that and that doesn't work, to me that indicates that wire somehow broke or got cut when I removed the harness? Would any other circuit make the battery icon come on? -
I installed a unbroken right hand inner panel (the radiator overflow bottle hangs on this panel) and removed the wiring that supports the Jensen amplifier located inside the fairing there by the overflow bottle, I (gently) removed the wiring harness that is located in the flex-tube that (on my bike) crosses from left to right from the radio (below the radio controller) located inside the L/H fairing. There was a ground to the battery in this harness that I disconnected too. I unplugged the harness(es) in the L/H fairing, unplugged one antennae and had to CUT some things that were not connected using plugs. Understand that my harness has more butt connectors (solder-less) than NAPA. I couldn't get any of these components to work, who uses cassettes? I don't do the CB and we have blue tooth helmets anyway. My plan is to install a marine grade AM/FM media player so I don't need the wire harness here and it looks like a fire hazard anyway. A couple of weeks ago I completed the resistor from the battery to the CPU mod to turn off the battery warning indicator. No problems. ISSUE: The battery warning light is back on. I reconnected the resistor (it came off during the wiring harness removal/inner panel install) and found it had broken out of the connector I used. When I re-connected it the battery warning stays(ed) on. CRAP! So I think the resistor is broken (it's wrapped in shrink tubing right now) Question: Is the lack of the resistor the ONLY reason that warning icon is on? In other words is there any OTHER reason that battery warning would come on besides the resistor or the proper battery sensor isn't in play? I don't want to re-connect that junky wire harness and carry it around. I don't believe anything else would turn on the warning but I don't KNOW. Ideas?
-
http://www.amazon.com/gp/product/B00CIGK3W4/ref=oh_aui_detailpage_o01_s00?ie=UTF8&psc=1 Sold by motosport
-
Well I'm no specialist but the pores (holes) in the Uni look like a lot could pass through, and besides, professional racers re-build their engine every season (or get a new one) so all they really need to do is keep the rocks and pebbles out right? But still it goes against the grain to see that paper filters out perform the oil bath air filter....who'd a thought?
-
These filters can be easily cleaned. Problem is there are no hard test data on the site and the people in sales don't have a clue...
-
Well I knew it because YOU told ME about it!
-
I just bought some through Amazon.com. I counted the little squares you see cast into the plastic, on mine there were 9 across the width, then I counted them in the pictures shown on Amazon AND compared the measurements. The ones that Drag Specialties package DO NOT come with new screws btw.
-
Help identifying and finding a part
dna9656 replied to CMCOFFEY's topic in Venture and Venture Royale Tech Talk ('83 - '93)
The light on the left side of the pic looks a lot like ones you can get from Grote, Wal-Mart, or any auto parts store... -
cabreco I think they look best in Gold or some sort of white.... I like the touch of LEDs around the front blinkers! How did you attach them? Wired to the running light circuit? The air scoops on the front lowers... after market or OEM? I can't find one in the parts catalog though I have seen a few different style...
-
That's correct; my VIN is JYA59J001FA001416. My '83.5 ('84 DKC2) has 65K miles and there's in no indication of a 2nd gear issue but I have no idea if it were fixed or not. When I ask Yamaha about it they say they have to check for files NOT in their current data base and they promise to call me back yet they are to do so. After warranty repair (and I assume after an OUT of warranty repair) the dealers were supposed to leave 3 stake marks on the transmission housing next to a "pad" cast on the left side of the transmission housing; they are missing on my bike .
-
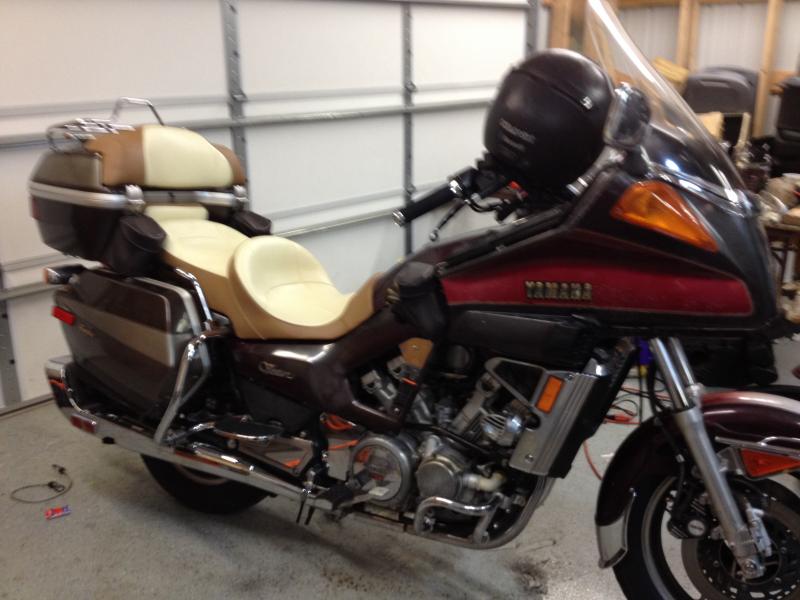
Well it's been a little over a year since I bought my '83.5 XVZ12DKC2 but it's really a '84. The bike came with a new clutch and springs in the trunk, still boxed and a PAPER Yamaha Service Manual that had been in the trunk (for 2 years) right under the new clutch. The bike had been sitting out side all this time so you know what the manual looked like....It went in the trash as I had one from my first Venture Royale ownership back in 1996, THAT manual is pristine. Now I use a digital one on my computer. When I got the bike I got a lot of extra parts, another set of saddle bags and trunk, some other stuff...I bought a group of parts found on craigslist, a seat, wire harness, nuts bolts, foot pegs, mirrors, radiator, etc. The sides and lowers were cracked and had broken tabs, the bike had been dropped so the fairing on both sides where the mirrors are were cracked and had small pieces missing. I found the '84's travel bag would hold 1 helmet only so I took the bigger one (with it's mounting rack) off the '85 and the saddle bags, cover locks and ignition (so I would have ONE key) and put them all on the '84. I installed the clutch even before I got the bike running, installed new plugs and checked out the plug wires. Cleaned the OUTSIDE of the carbs, THAT took a while...I had found this forum and with the help of members here got through the clutch install and learned about Sea Foam, it has NOT solved my plugged pilot jet issue yet so my plan is to get the (3?) gaskets and I don't know how many O rings and replace ALL the jets, re-set the floats, and get a synchronizer. I have a bucket of carb cleaner, a compressor, the service manual (I can view it of a 40" flat screen in my shop, makes the pictures MUCH better!) and the good people here on the forum to help me. I found the fuse panel almost not used with many of the fuses modified into in-line locations. I bought a 10(?) circuit fuse block and moved ALL the fuses to it, including the ones Yamaha has in "In-Line" configurations. It simplifies checking and changing the fuses, trust me. The fuse block fits right on the battery like the original one. I mounted it on to the original fuse panel though I did modify the panel to make it work. I traded a cheaper guitar I didn't play for a '85 Venture hoping it being newer would become the one I would pay most attention to but when I removed the oil filter cover I found a welded crack between the O ring seating surface; one side to the other but INSIDE the inner ring. Also I didn't notice the 3/16" aluminum crash plate under the floor boards, WHO rides a 750 odd lbs. dirt bike with a 1200 CC engine and what; 97 horse power? NOT ME! This bike is No. 4 (or so) off the assembly line with the factory 2nd gear issue resolved. That's why I'm keeping it. Not sure it's worth it. But it's got lots of parts too! So far the '84 has no 2nd gear issue with 65 to 66k miles showing on the odometer. Anyway I got the plastic repair all roughed in during the last 2 weeks using black PVC plumbers glue and a sheet of PVC obtained through E-Bay. When cutting, filing or sanding the PVC wear a dust mask, breathing plastic dust is not a good idea, there is NOTHING in that plastic you want to have in your body. Anyhow I will be finessing the repairs (filling in low spots, sanding and getting it ready for painting next summer. While I repaired the "fingers" that the hold 4 screws and the rubber strip along each side of the battery (I actually made one and I had the thin the 1/8" PVC stock using the Dremel so the screw plates would fit) cover (false gas tank) I found better panel, inner (on E-Bay) that holds the screw plates (they slide on to the aforementioned "Fingers") and a few other pieces that I will replace. Three of the screw plates on the outer right fairing were gone, the outer fairing on the '85 had them (so that fairing being in worse shape that the '84's) I sawed them off and transplanted them to the '84. Using the liquid ABS I set them in place buy screwing them in place on the top cover and in turn screwing the cover in place using the in-board mounting screws. As there is some shrinkage when the ABS dries I have been sanding and filling the low spots. I found you can't hurry the ABS with heat, cold temps seem to slow it down but this stuff doesn't react to heat like epoxy does; it just gets THIN FAST! Anyway I got my Dremel tool out and widened the cracks into a V shape and applied the liquid ABS and clamp(s) and/or duct tape as appropriate. After the glue dried I used my Dremel with the sanding barrel on it to shape the ABS stock and glued pieces that was applied into proper tabs. I miss-drilled almost all the screw holes at least once but with more liquid ABS and some duct tape on the back side of the tab you can fill the drilled hole and try again. The larger travel bag had an issue though, the latch hooks had broken off; they were there, but laying in the bottom of the travel bag. The liquid ABS seems to be doing a good job holding them in place but I plan on re-enforcing the repair with more ABS flat stock and glue. I want to upgrade the ignition to the one Dinky has, I have added a few LEDs, the tail/brake and side markers that replace the reflectors, also I put LEDs in the front fender maker. I did the LED in the dash thing but couldn't dim them so I removed them. I'd LOVE to find a YAMAHA (or equivalent) flasher designed for LEDs that would integrate with the cancelling blinker and not require some sort of dummy electrical load. I got a new seat for my Birthday, Anniversary, Sweetest Day, Christmas, New Year's and any other day I might want some thing. Any ideas on the LED Flasher?

-
double post sorry
-
On further research I found the following: OK I went and read the Uni filter site. Issues with this filter: No specs are given on the web site !!! I guess that chart is PROOF but something seems fishy here. Most all MFRs CLAIM they filter better, proven through race usage blah, blah, blah. Same stuff K & N says. Look in the street bike catalog, not in the Vintage catalog (strange) and you'll find the filter for $33.95 or you can go on E-bay or Amazon for a better deal. A vendor on E-bay says the following: Product Features: •Fits exactly like the original equipment air filter •High flow Uni-filter will improve performance and provide the best filtration and engine protection available •Uni-filters can be easily cleaned and reused •"Flow Matched" filters need no rejetting Uni Filter's description: Air Filter designed for Yamaha XVZ Venture/ Royale 1983-93 STREET BIKE FILTERS Uni Filter street bike air filters are a direct factory replacement air filter and are designed to fit perfectly into your stock airbox. They provide unsurpassed airflow, dirt stopping and overall performance. Now you all have all the info I could find.
-
http://www.nicoclub.com/archives/kn-vs-oem-filter.html Clue: K and N doesn't make a good showing in this comparison test.
-
I bought a 24" X 24" X 1/8" sheet of black ABS with one side textured through E-Bay for about $22.?? w/free shipping. I have started to copy the broken off tabs that are all over the bike, attaching them with black ABS pipe cement from the hardware store. It also fills cracks (recommend opening the crack a little with a dremel tool to get the cement IN there. The cement makes for a very solid bond! I'm told that you can even MAKE parts using the cement! I suppose that entails making a form or building the shape 1 piece at a time; sanding/filing to shape. Heat does not speed the drying of the cement, just time; I'm working in my un-heated garage and the cement is drying over night but sure to be fully cured after 24 hours. It looks like the ABS cement is polish-able too. I think some ultra fine sand paper would work, some plastic polish similar to that used on the new headlight lenses on cars....and the really secret polishing ingredient,,, ELBOW GREASE!
-
Whoopie! LOOK AT ME!!! I just installed a K&N air filter!!! Ain't I speshal!? The one in there was an original style, I blew it out IAW the instructions in the manuals and I still couldn't see any light through the filter! Amazon had the best price I could find at $55.?? with a few bucks shipping; with the shipping it turned out $10.?? less than buying locally.