Stealthblade
-
Posts
158 -
Joined
-
Last visited
Content Type
Profiles
Forums
Gallery
Events
Store
Everything posted by Stealthblade
-

Saddlebag Lid Organizers
Stealthblade replied to Stache's topic in Royal Star Venture Tech Talk ('99 - '13)
I copied what he said into google and got this http://www.saddlemen.com/saddlebag-organizer-set-touring-harley-davidson Looks nice -
Weddings,, just in case you ever wondered.....
Stealthblade replied to cowpuc's topic in Watering Hole
Only one loaf of bread? Gonna be some people missed out on a ham sammich me thinks. Bob -
One more thing, @cruiserlover I have found that there aren't too many jobs that I can't handle myself on this bike. Mounted and balanced the tires with the help of my friends, along with the LED reflectors, valve shims, numerous iterations of splitting the fairing ( to the point that I do it for fun now ), brake pads, rear brake rotor, speed bleeders, coolant flush, headlamp replacement without splitting the fairing ( and I have rather large hands ), rewiring the passing lamps/front turn signals/LED reflectors ( to clean up the look ), oil changes, and I can't remember how many other things. The only thing I went to the dealer for was to have them replace the fork seals, but I took it apart and brought the forks to them. There is such a wealth of knowledge on this site that I will admit I would not have bought this bike without the help of everyone here, and especially @Freebird for putting it all together. Best purchase I have made is the @Carbon_One lift adapter. I then went and bought the expensive but awesome J&S jack. After that, I bought Carbon One's Stebel horn mount and wiring harness and crash bar braces. Three items you must purchase IMHO. It may seem like I am gushing about the members here, but they are deserving of the praise. I would do it all over in a heartbeat. Bob
-
Oh, and another thing... zip tie the large wrenches together in the correct order. If you use a re-usable zip tie it's better in the long run, but if not, the bag of 50 zip ties you stuff in there will be enough for a few seasons of use. Keeps them together and you can pull them as a unit and set them aside so you have room to look for the darn LED flashlight that keeps hiding in the corner.
-
@cowpuc ... I am the grasshopper at your feet. I will rename and re-label the departments as you have advised. Thank you for commenting on my maintenance department, but it was in fact YOU that lead me to build it in that manner. You helping that old kick-start harley on the side of the road was the main factor that led to the building of the bag. And, bonus that it's a WWII surplus bag.
-
Couple of responses... After way too much reading, I went with Dunlop Elite 3. So far, very impressed with the handling, but I don't have "that many" miles on them. Take that for what it's worth. Regarding the tool kit. I did not get one with my "used" bike. I have made one that will help me and any other metric bike I encounter on the road with a problem. I went to my local Army surplus and bought a bag that fits nicely in what I think @cowpuc would call the "Maintenance Section"... or my right saddle bag. I have full allen set, socket allen set, socket wrench with up to 19mm sockets, small pack of box wrenches, large set of box wrenches, fork air pressure tool, knife, wire/strippers/connectors/tape, crescent wrench, pliers, needle nose, zip ties, you name it, it's in that bag. The more you work on your bike, the more you know what you 'might' need to put in the bag. I also keep my Hagon shock preload adjuster tool in there. Can't use it on the side of the road, but at least I know where the darn thing is. MPG: I am usually between 38 - 42 when I ride solo. When I am with my 'Wing buddy, it drops to about 32. They love their first 3 gears. Air filter: I would be in the camp of blow it out and go. I have not seen any difference in my filter from 2 years ago to now, so I look at it, tap it a couple times and put it back it. YMMV, or Your Mileage May Vary, due to weather and conditions where you ride. Can't help with dealers in Denton, TX, but I was very surprised to find that my local Yamaha/Honda/Kawasaki/Ural ( sheesh ) dealer wanted to charge me $2.95 to "swap" valve shims with them. Yes, you heard that right... I give you one shim, you give me one shim.. then charge me 2.95 for the convenience. They went down a mark or 4 in my book, but I really needed 4 shims and they stayed late for me to get there. @skydoc_17 your shim kit is coming home soon. Side note... I have an 01 also. Any more questions, don't hesitate to ask. Real friendly bunch here. Bob
-
In an effort to stir the pot a little, sorry Boss - cant resist..
Stealthblade replied to cowpuc's topic in Watering Hole
Now I need to see a pic of Pucster wearing his tux on Tweeks. -
Puc, I'm only at video 5 so far, but wow, incredible footage. Thank you so much for this Bob
-
What's wrong with this picture?
Stealthblade replied to Brake Pad's topic in Royal Star Venture Tech Talk ('99 - '13)
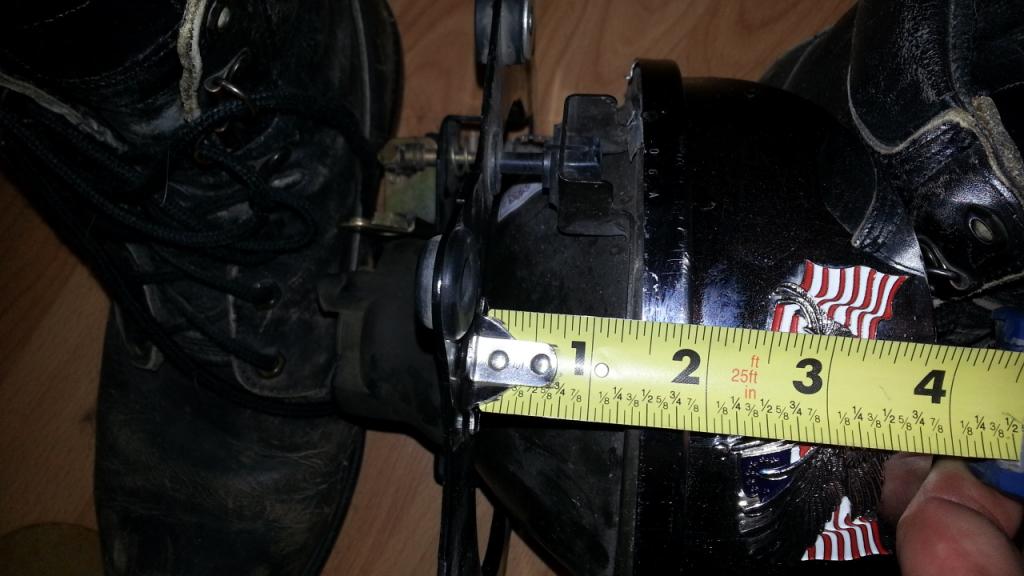
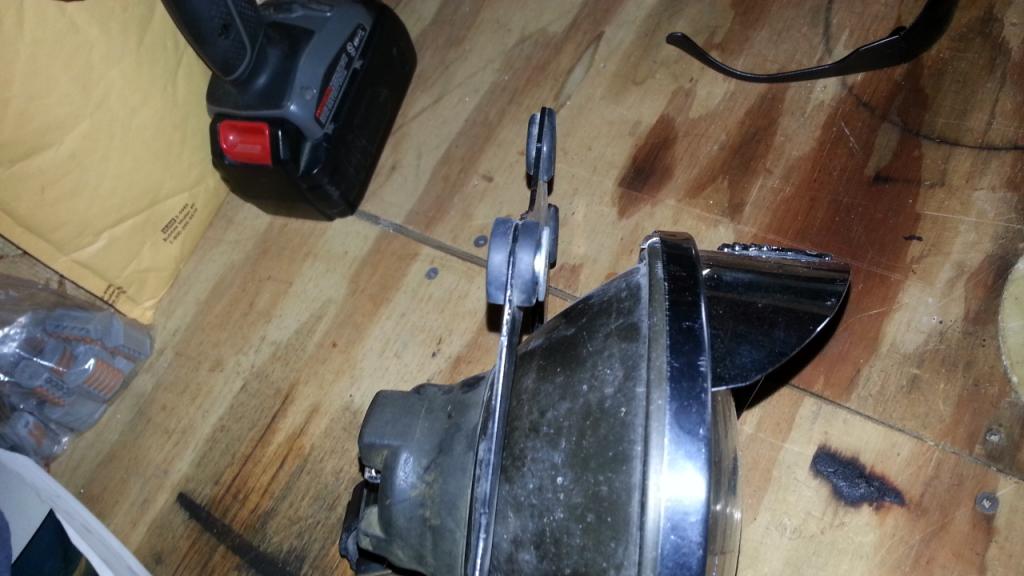
I have a couple more pics of my lamp Looks like yours sets farther into the bracket than mine does If you need any more pics, or measurements, let me know.
-
What's wrong with this picture?
Stealthblade replied to Brake Pad's topic in Royal Star Venture Tech Talk ('99 - '13)
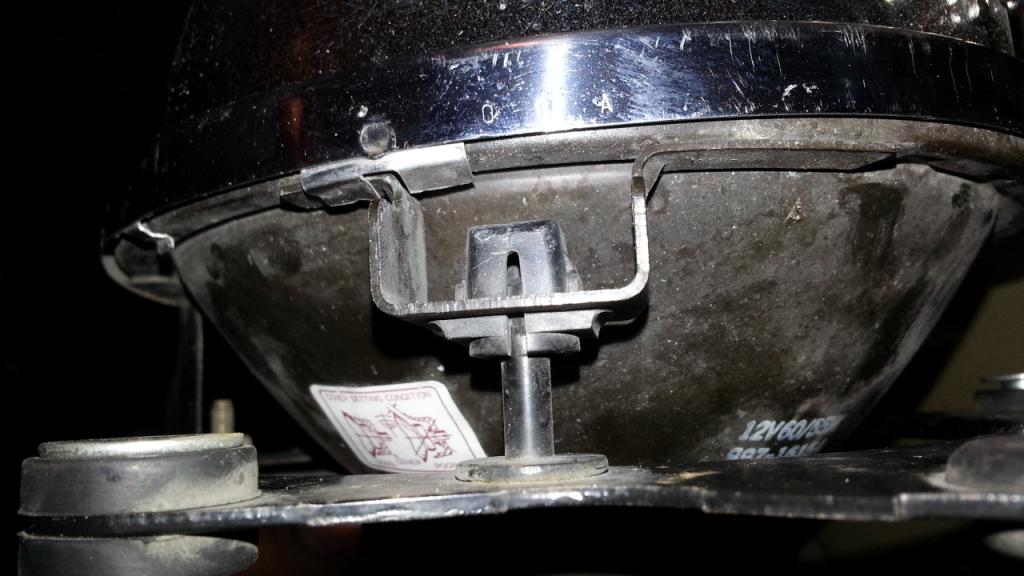
You can maybe hit a hardware store for something close to the grommet, and possibly the shoulder washer. 2 rubber washers and a flat washer could work, just not as stable. Let me know if you need measurements or more pics of them. Bob -
What's wrong with this picture?
Stealthblade replied to Brake Pad's topic in Royal Star Venture Tech Talk ('99 - '13)
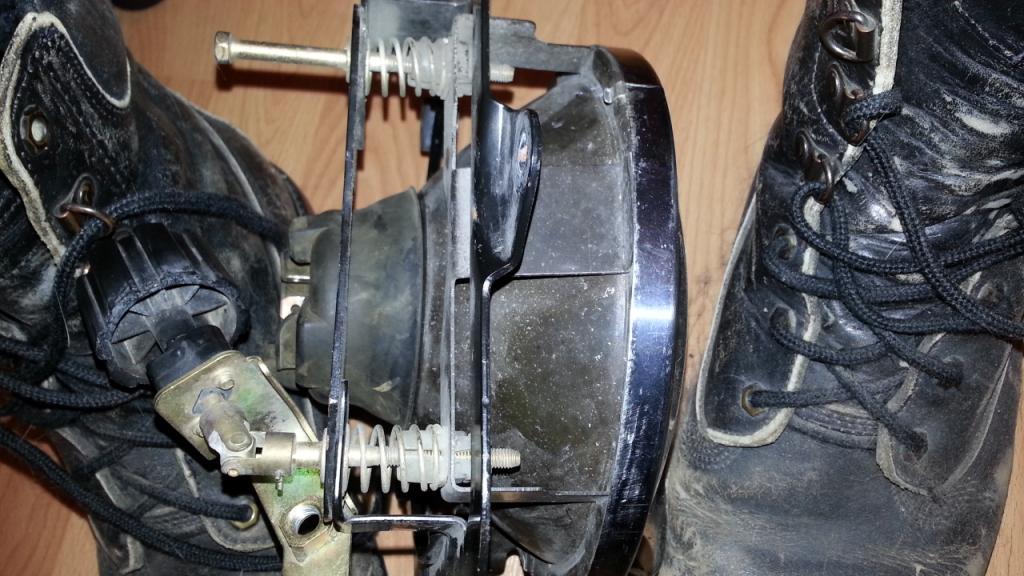
I have my fairing split and the headlight out, so I just took a pic of the grommets in question.
-
I use the SENA also, and while splitting the fairing to clean up some wiring and install LED reflector at the front, I thought about chucking the audio system as well. My buddy thinks I'm crazy, but I want to get rid of the audio controller and the aerials at the back. Please post pics of the completed job, that might sway me to do it. Bob
-
Nice trip, thanks for the view. Loved the sound of the bike in the first half.
-
Fool, be vigilant going through Chicago. You're should hit there right about shift change time. Thankfully, only 2/3 of them will be drunk.
-
Then I'm glad I helped, boss :}
-
I do mine with 2 jacks. The bike up on Larry's lift adapter, then a standard floor jack under the tire to raise it into position. After the axle is in, then do the calipers and pads. Bob
-
Windshil;ed chrome trim repair
Stealthblade replied to ReinyRooster's topic in Royal Star Venture Tech Talk ('99 - '13)
I would like to know this as well. When I did mine this spring, I bought what I thought was "close enough". Turns out it was still too big, so I cut it down from using 2 legs to only using 1 leg. It has worked so far, but I'm a completionist, and I want it done right, without buying a new trim piece to have it break and leave me in the same situation. Bob -
Luckily for me, when I got them in January, they were 2614 and 4314.
-
I got mine at Dennis Kirk. Front is 150/80H-16 Rear is MV85HB-15 Bob
-
I have been following this company for a long time, and I really like idea behind their product, as I too am an engine braker. http://vololights.com/ Bob
-
SnowMaker, I love the shots of the truck before and after. I can smell the fire and taste the hot chocolate. Good on ya for taking a nice relaxing weekend. Bob
-
And, I can come look at it if you want. Madison is only a couple hours from me. Phone number is in my profile. Text me if this is an option. Bob
-
Bonus for a backrest. Choke should have a metal plate above / around it. All that oil, as mentioned is probably blow by, but needs to be cleaned up. Take care to not over fill the engine. Lose those tires and get new set. Dunlop E3's are an excellent tire, I just mounted a set and have noticed a difference in the handling. Make sure you check the rear shock boot for " any oil at all ". My Hagon cost $395, and even though I'm happy with it, I would have preferred to not replace it. Check the rear disc rotor. If there's a big lip on it, I just bought one for $138, so add that and $40 for the pads to the list. Some people use pads that are too hard ( not organic ) and they eat the rotor up. I went EBC rotor and EBC organic pads. Cosmetic note, pull and polish the underside of those mufflers, like my grandma always said :} Check back and tell us how it's running. Bob
-
@JerryK Have you met @cowpuc ? Let me save you the trouble by posting what he would post. Oh yeah, and he's gonna want more ride reports, so just tell me...erm...him...erm...us....
-
@Squidley just sent payment for 2 black, 2 silver. Thanks a ton for getting these made. I have wanted one since I found out about these bikes and bought one. Bob