Leaderboard
Popular Content
Showing content with the highest reputation on 04/21/2023 in all areas
-
2 points
-
Hi Everyone Picking away on getting things done on the Bike Installed the Handlebars last nite with the new Krator Risers Not sure if they are set at their final position but they are on and Ready to have the controls mounted. Now have the new forward control Rear Brake master permanently installed after retapping the Outlet for the M10x1.25 banjo the hole was originally M9x1 and near impossible to find a Banjo to fit it one of the joys of Amazon. Started to rebuild the Rear caliper and found out the AllBallsRacing Rebuild kit only has the Piston and Dust seal for 1 side so now I need to order a second also missing was the rubber washers that are in between the 2 halves so i have contacted the manufacturer we will see if they respond. that is it for today Herman2 points
-
My wife and I have been "planning" a trip to the southwest since last year and are finally getting ready to leave. We had hoped to leave in late March, but the death of a family member delayed us. It looks like we will be able to head out tomorrow if I can get one more project finished on the RV. I am so looking forward to doing some serious sightseeing from the Trike in New Mexico and Arizona. I will try to provide some pictures when I can. Steve1 point
-
1 point
-
Hi Everyone I did not get to work on the bike much since last week, the head cold turned into some sort of upper respiratory Infection lots of Coughing up of stuff , fever and Headache. Spent Friday , weekend and today feeling like crap. Did manage a couple hours in the garage yesterday and part of the afternoon today, I managed to get the Rad Hoses installed and Rad mounted so I am ready at anytime for Anti-freeze/Coolant, Re-installed the Coil Bracket and coils and installed the new Plug wires and Iridium Plugs. Installed all the remaining misc Hoses Vacuum Pulse Hose Breather Hose(also installed the Baja Air filter) all new Fuel lines from the Tank outlet to filter -new filter- from Filter to Pump then new line from the Pump to the Carb all visible hoses are sleeved with SS Braid Put all new Spring and Screw clamps. I found these 2 kits on Amazon both kits were under $20 ea Nice to have in the shop Installed the Fuel tank and rear subframe started to finalize the Forward controls on the Right side then ran into a snag the new master cylinder Banjo Bolt threads are different M9x1 versus Yamaha M9x1.25 Hopefully i can source one locally and then ran out of steam. I have also included a Picture of the Russell Brake lines I am using these are Factory made and DOT certified for US/Canada . as always here are some pictures to update you all on the progress. Have a good Night Herman1 point
-
Hi Everyone I wrote an update on Sunday Nite but for some reason it did not post, I spent the first hour or so going over the Bolts installed the previous day to confirm I did not miss any and checked for correct Torque, refilled the Final Drive with new 80w90 gear oil. I spent some time test fitting the Vmax Silicon Hose set I purchased off amazon and made a list of Hoses and clamps I need in order to replace all the hoses on the Bike. Only one hose was too short for the Top Rad to the Fan Sensor tee, but I was able to source a piece of hose at a local Industrial hose supplier, the other issue I ran into was the Hose Diameter was about 3mm larger and the Spring Clamps would not go On the Hose so I found a kit on amazon with the larger Clamps I need. Also finished putting the Head bearing races in the Frame and Mounted the Triple Tree and then went to work on assembling the Front forks. Finished up Sunday Evening by Polishing the SS Exhaust Pipe I built and cleaned up and polished the Front Cylinder Pipes. Monday Morning I was off to the Hose Supplier to pick what I needed, then back in the garage. First order of Business was to install the Exhaust on the Bike, then I went to work on making the Block off plates for the Front forks and gave them a coat of Paint to match the new Black Lowers. Replaced the Clutch Slave Hose and re-installed the Steel Clutch Line on the frame and installed the new Speed bleeder. Filled the forks with new Synthetic Fork oil by Amsoil (10wt) as suggested by Progressive, installed the Springs then closed them up. Changed out the front Axle Seals and checked the bearings they were clean and turned smooth with no play so I opted to leave them and repacked them with bearing grease then installed the Front wheel. The bike is now back on both Wheels with new tires. Went to work on dismantling the rear subframe to get it prepared for a fresh coat of paint, and the day was done. Toke the Nite off from the Garage tonight as I feel like I am coming down with a cold so I will get some rest over the next couple nights and go back at the bike on the weekend. I am hoping to get the remainder of the Mechanical work complete over the weekend with the front and rear subframes re-attached, rebuild the 3 brake calipers, and finalize all the different plumbing, hopefully test fire the Engine again to fill the engine with Antifreeze. That is it for now have a great week all Herman1 point
-
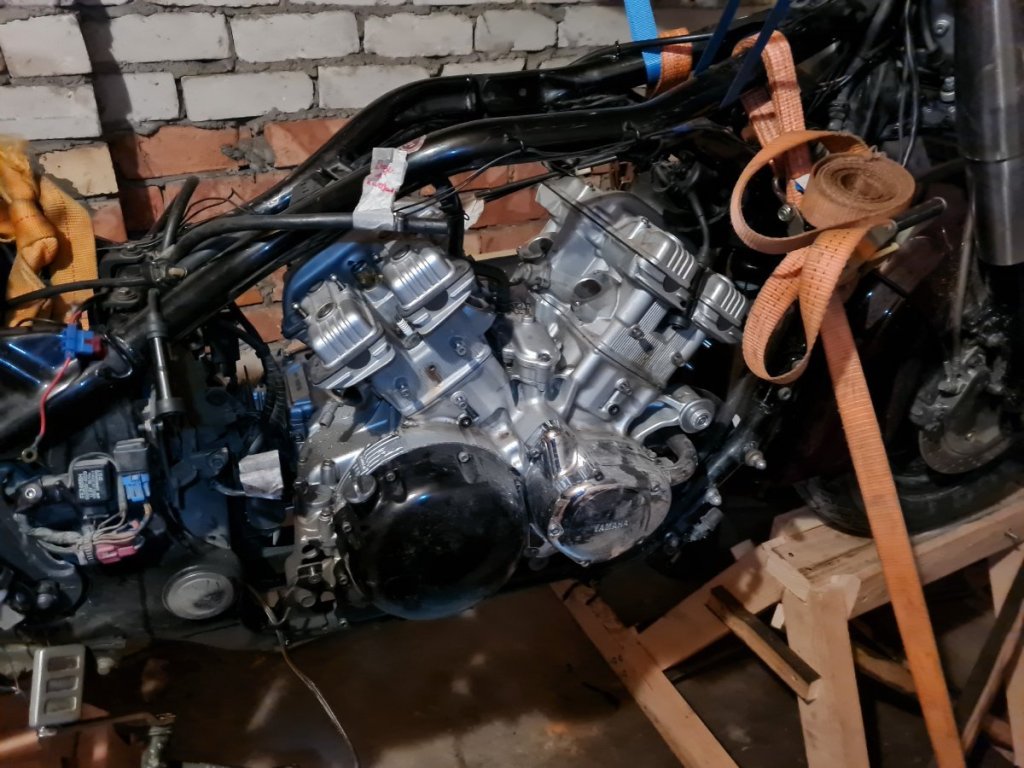
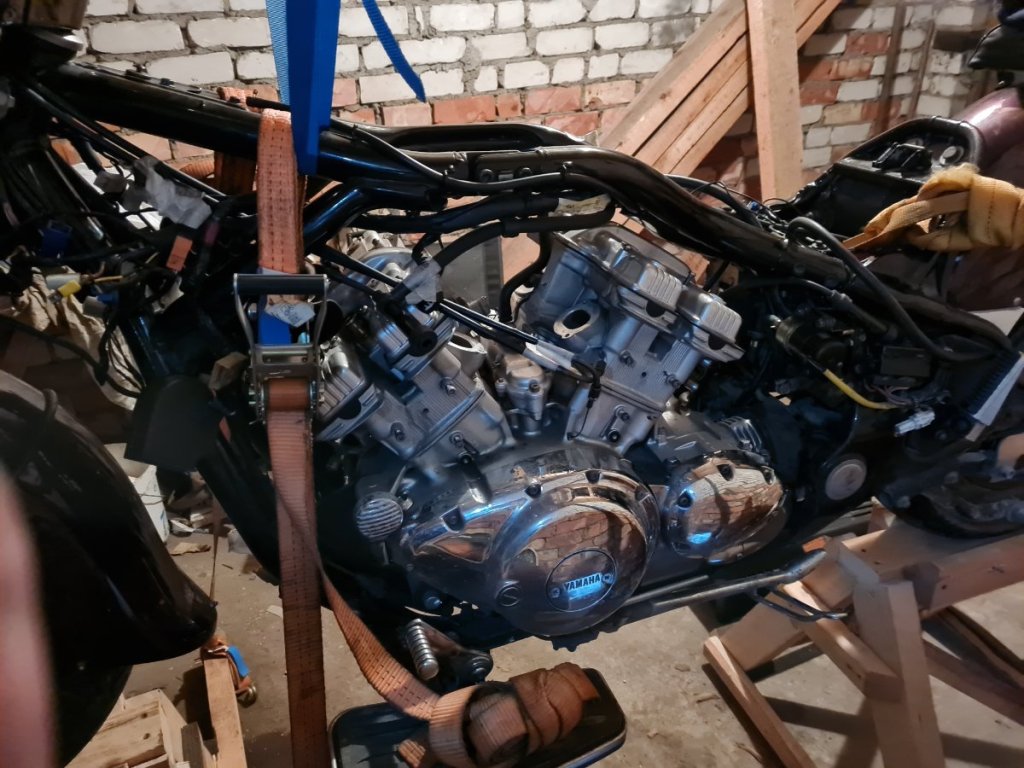
Hi Everyone Here is an update on the Bronze Bushing replacements and Installation in the Lower control arm. The Challenge is finding the Metric Sizes we need for these Swingarms the worst bushings were the 2 that are in the small swingarm link that connects at the Shock lower mount and and the Larger swingarm link. The remainder of my bushings were fine. the 2 on the Larger swingarm link to the swingarm rear mounting points had some wear but was not critical. I have added grease nipples to all 5 points and they are now well packed with grease and the 2 bushings are now Bronze bushings. To accomplish this I purchased from Princess auto a pack of 4 Bronze bushings OD7/8x5/8ID, $14.00, placed this on a 3/8 bolt with washers and put it in my drill press, with the drill press spinning this assembly I used a large flat file to gently mill down the bushing to the required 22MM OD, only need to remove roughly .225mm off the 7/8 OD, once that was done I was able to press in the bushing into the swingarm using my bench vise. Next Step clamp the swingarm into your drill press vise, square it up to the Drill bit then drill the bushing with an 18mm drill bit (amazon purchase $17) go slow using lots of oil. Last thing is to drill and tap for a grease nipple this can be done before or after you drill the bushing to the 18mm. Now an update to the Build my buddy came over to help get the engine mounted in the Frame and I must say it is much easier to install the frame over the engine then muscling the engine into the frame I built a wooden Engine holder out of 2x6 so we could get the engine off my Engine stand and sitting on the Bike lift we then picked up the bare frame and easy peasy engine was bolted in with the new delrin mounts within an hour. We then started reassembling the rear swingarm components and Final drive and Rear wheel with the new Tire. I then started to work at replacing the head bearings and seals, it blows me away how so many MC owners neglect this critical component the Bearings were seized the bearing races were beat to death and not a bit of grease left on the bearings. The bearing Race removal was a bit of a chore as there is now discernable lip on the back side of the race to tap out the old race, so next best thing was to weld the old bearing to the race then pop it out worked like a charm. Front end will be put back together tomorrow as we are heading to family for the day Happy Easter all Herman1 point
-
Hi Everyone I have been out in the garage every nite this week as my Wife is Baby sitting for Friends at their house for the week. I now have all the Major frame components sprayed with a fresh coat of Gloss Black Caliper paint, I have been using VHT brand paints for most of my projects as it has very good coverage and is High Heat and Chemical resistant. I have 2 good coats over all the parts; tomorrow after work I will flip over the frame and just need to apply a top coat on the 2 top pipes Friday Morning My buddy is coming over to help me put the engine in the frame then I will continue to re-assemble. I had my new tires installed today and many parts orders arrived including my new Plug wires and Iridium plugs from Fortnine. So the question posed by MarCarl on what to do about the swingarm bushings. I measured the Swing arm sockets and the internal Diameter of the bolts or Sleeves depending on what Pivot point. The worst Bushings were the 2 that are on either side of bottom shock mount of the smaller Steel swing arm link these measure 22 mm on the swingarm socket and the internal Diameter is 18 MM, I have found a source in Canada for metric Bushings but have yet to get a response as to availability of the sizes needed. However My solution at this point is to take some SAE Bronze bushings that are readily available 7/8 OD x 5/8 ID, I will need to turn down the 7/8 (metric value is 22.225 mm) to the 22 mm to fit the swing arm socket then drill the ID from 5/8(16mm ) to the 18mm finish diameter (drill bit should be here tomorrow) drill a hole in the side of the Bushing slightly larger than the Grease nipple to allow grease to be pumped in, press this into the Socket and we should be good for a long time. The Flanged bushings of the larger Aluminum swingarm link that attaches to the bottom side of the swing arm is 23-24 mm sleeve with internal diameter of 18 MM these bushings have very little play in them so I am not going to change them at this time just because of my time constraints to complete the build, however i will be adding grease nipples to these points as well. All remaining Bushings appear to be in decent shape with little to no play, the Swing arm Pivot bearings just require a good cleaning and repack of good bearing grease and should be good for a long time yet. as always see pictures of the progress all thoughts and comments are welcomed. Have a good nite Herman1 point


